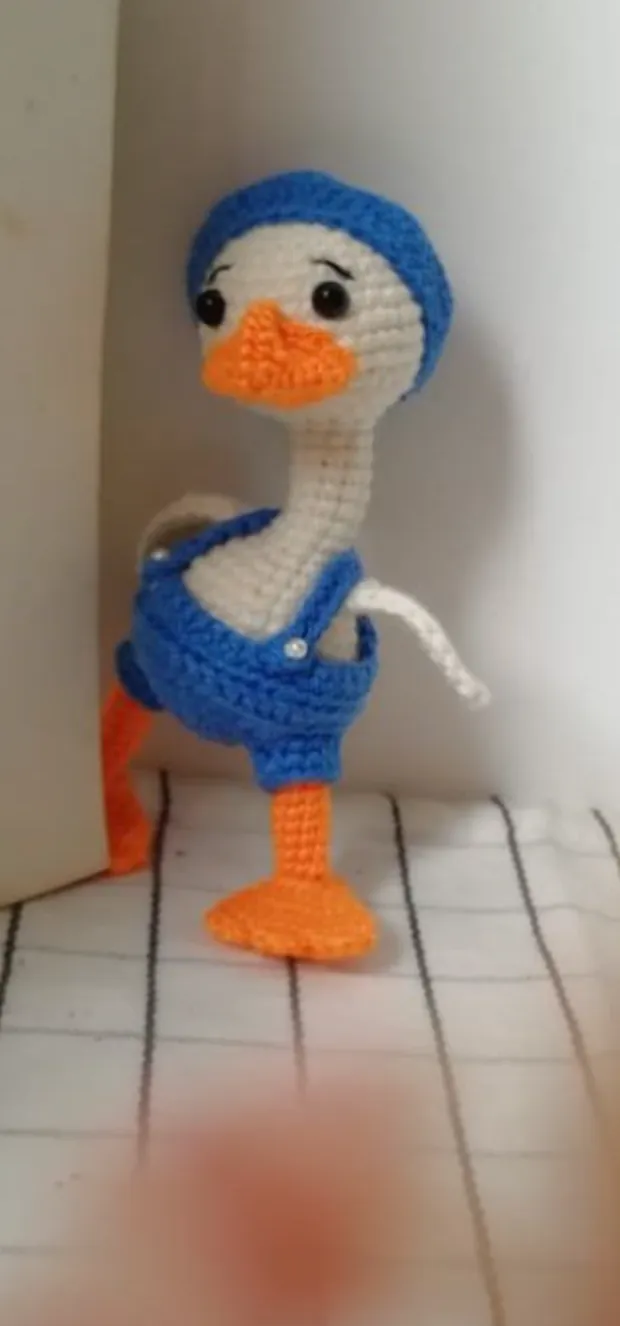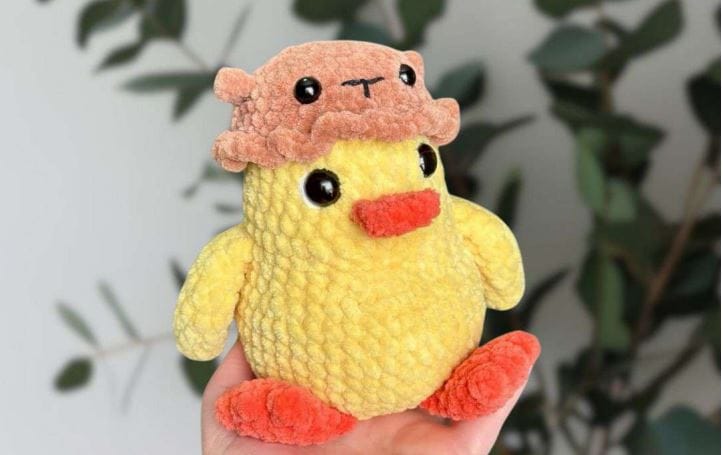
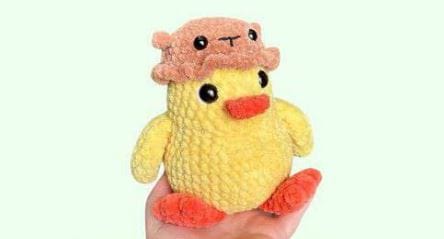
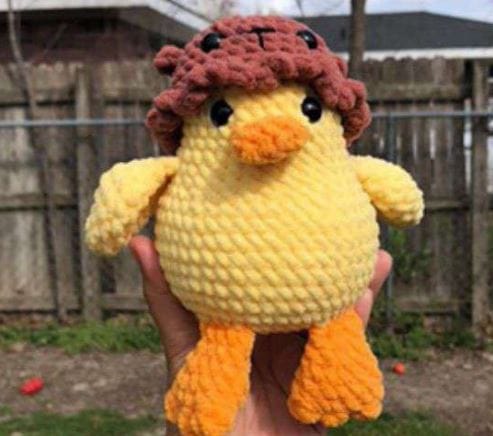
Adorable Chubby Duck with Bear Hat: Free Crochet Pattern for Beginners
Meet Your New Favorite Crochet Project
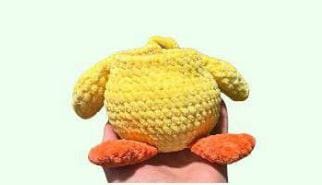
Quack quack! 🦆 Get ready to fall in love with this adorable chubby duck wearing the cutest little bear hat. This beginner-friendly amigurumi pattern is perfect for those just starting with 3D crochet projects. With simple stitches and step-by-step photos (in the PDF), you’ll create a cuddly friend that’s sure to bring smiles.
What makes this pattern special:
✅ Easy continuous rounds (no joining!)
✅ Minimal sewing – most parts attach as you crochet
✅ Perfect for practicing increases, decreases, and color changes
✅ Customizable with optional safety eyes or embroidery

Let’s dive into this delightful project!
Materials You’ll Need
Yarn:
- Main Color: Yellow (duck body)
- Secondary Colors: Brown (hat), Orange (beak & feet)
- Small Amounts: Black & white embroidery floss
Other Supplies:
- 4mm crochet hook
- Safety eyes (14mm for duck, 10mm for bear hat)
- Fiberfill stuffing
- Tapestry needle
- Stitch markers
- Scissors
Note: I used Parfait Chunky yarn, but any similar weight yarn will work!
Stitch Abbreviations & Notes
Basic Stitches:
- sc = single crochet
- inc = increase (2 sc in same stitch)
- dec = decrease (invisible preferred)
- ch = chain
- slst = slip stitch
- dc = double crochet
- MR = magic ring
Special Stitches:
- MBO (Mini Bobble): 3 unfinished dc (4 loops on hook), yarn over and pull through all
- FLO = front loops only
Pattern Notes:
- Work in continuous spiral rounds (don’t join unless specified)
- Use stitch markers to track rounds
- Stuff firmly as you go
- Magic ring alternative: Chain 2, work stitches into 2nd chain
Step-by-Step Crochet Instructions
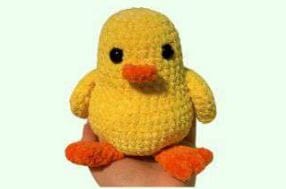
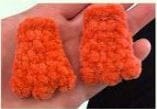
1. Duck Feet (Make 2 – Orange)
- Chain 7
- Round 1: In 2nd ch from hook: (MBO, sc) x3, then 6sc on opposite side (12)
- Rounds 2-3: sc around (12)
- Round 4: (4sc, dec) x2 (10)
- Round 5: (3sc, dec) x2 + 2 extra sc to reach side (8)
- Pinch ends, sew closed with 4sc across
- Leave unstuffed – will attach directly to body
Tip: The MBO stitches create cute little toe bumps!
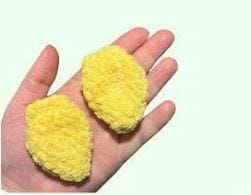
2. Duck Wings (Make 2 – Yellow)
- Round 1: 6sc in MR (6)
- Round 2: (sc, inc) x3 (9)
- Continue increasing to Round 4 (18)
- Rounds 5-6: sc around (18)
- Decrease to Round 8 (8)
- Pinch ends, sew closed with 4sc across
- Leave unstuffed – will attach directly to body
3. Duck Beak (Orange)
- Chain 5
- Round 1: 4sc on each side of chain (8)
- Round 2: sc around (8)
- Pinch ends, sew closed with 4sc across
- Leave unstuffed – will attach directly to body
4. Duck Body (Yellow)
- Rounds 1-4: Start with MR, increase to 32 stitches
- Round 5: Attach feet while crocheting – follow bracket instructions
- Rounds 6-12: Continue body (45 stitches)
- Round 16: Attach wings while crocheting
- Round 19: Attach beak while crocheting
- Rounds 20-21: Add safety eyes (5 stitches apart)
- Decrease to close (Rounds 24-26)
- Stuff firmly before closing
Assembly Tip: Use photos in PDF to position eyes symmetrically around beak.
5. Bear Hat (Brown)
- Rounds 1-4: Start with MR, increase to 32 stitches
- Round 5: Create ears in FLO (special stitch instructions)
- Rounds 6-9: Continue hat body
- Round 10: Create fuzzy edge with (sc, ch2) around
- Add 10mm safety eyes and embroider nose
Helpful Tips for Beginners
🐤 First amigurumi? Don’t worry about perfection – handmade charm is best!
🐤 Magic ring troubles? Chain 2 and work into 2nd chain instead
🐤 Counting help: Use different colored stitch markers every 10 stitches
🐤 Safety eyes: Place before final stuffing so you can adjust position
🐤 No safety eyes? Embroider eyes with black yarn instead
Finishing Touches
- Use black embroidery floss to:
- Add duck’s smile under beak
- Detail bear’s nose (make a “T” shape)
- Use white embroidery floss to:
- Add eye highlights
- Optional: Cheek blush with pink yarn
You Did It! Your Duck is Complete!
Give yourself a big quack of applause! 🎉 Whether you keep this sweet duck for yourself or gift it to someone special, it’s sure to be loved. The adorable bear hat makes it extra huggable!