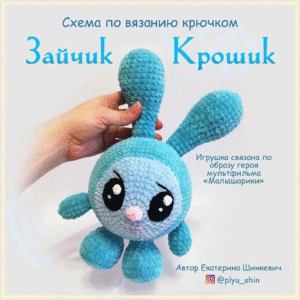
Adorable Sleeping Stitch Amigurumi
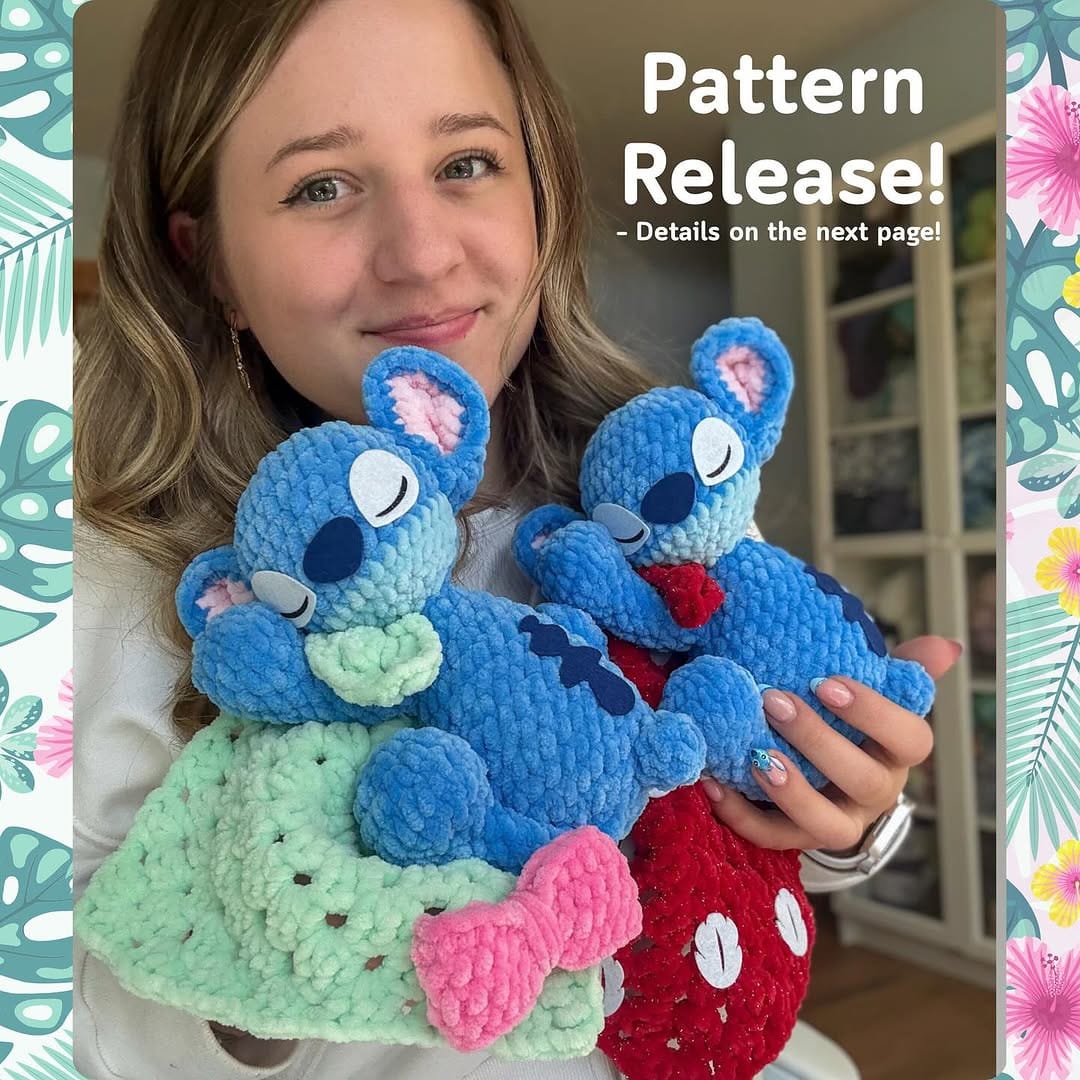
New Crochet Pattern: Adorable Sleeping Stitch Amigurumi Release!
Welcome to a new world of cuddly creations! We’re thrilled to introduce our latest pattern: the Adorable Sleeping Stitch Amigurumi. Perfect for fans of the beloved blue alien, this pattern guides you through creating a charming, sleepy companion that’s sure to bring a smile to anyone’s face. Get ready to crochet a cozy friend that’s just waiting to be snuggled!
Important Information Before Starting
Before you begin your crochet adventure, please note the following:
Getting the Pattern: The complete, typed-up pattern is available to Tier 1 and 2 members on our Patreon. Alternatively, if you purchase our Pillow Pals Pattern on Etsy, you can use the modification instructions in this post to make the Blue Alien, using the bear pattern as the base for the modification.
Getting the SVGs: The SVG files will be available for free to Patreon members, or you can purchase them on our Etsy shop.
What is an SVG? An SVG is a digital file that can be used with Cricut or other cutting machines to create the felt pieces. Don’t have a machine? No problem! You can easily cut the pieces by hand, embroider the details, or use safety eyes instead.
Abbreviations
Here are the abbreviations used in this pattern:
MR: Magic Ring
SC: Single Crochet
DEC: Decrease
FO: Fasten Off
CH: Chain
INC: Increase
SLST: Slip Stitch
DC: Double Crochet
If you’re unfamiliar with any of these techniques, there are plenty of helpful YouTube tutorials available!
Color Change Instructions
To seamlessly change colors in your work:
Stop crocheting right before you pull through the last two loops on the crochet hook. Drop the old color of yarn. Put the new yarn color on the hook, and use the new color to pull through the last two loops on the hook.
Felt Pieces
These sizes are for Sweet Snuggles Lite. We use stiffened white felt with HeatnBond on the back for the eyes, and stiffened felt with HeatnBond on the back for all other pieces listed below. You can adjust the sizes as needed.
The white part of the eye is cut to 1.1 in x 1.22 in.
The black part of the eye is 0.74 in x 0.48 in, and we use black glitter iron-on vinyl for this piece.
The nose is cut from navy felt to 1.1 in x 0.79 in.
The back piece is also navy felt, cut to 1.1 in x 0.79 in.
The SVG files are available on our Etsy and are free for Tier 1 and 2 members on Patreon.
Head & Body
Starting with dark blue, complete Rounds 1-9 of the bear body. From this point on, all instructions in bold indicate where to use light blue.
R10 11sc, 14sc, 5sc (30)
R11 (3sc,dec)x2, 2sc, sc, dec, (3sc.dec)x2, 3sc, dec (24)
In Round 12, the underlined “dec” indicates a regular decrease using both colors. Start with light blue: insert your hook into the next stitch and pull up a loop. Then, switch to dark blue: insert your hook into the following stitch and pull up a loop. You should have three loops on your hook. Yarn over and pull through all three loops using dark blue, and continue with dark blue.
R12 (sc,dec)x3, sc, dec, (sc,dec)x2. sc, dec. sc, dec (16)
Stuff the head fully now. Make sure it’s completely packed.
R13 (dec)x4, (dec)x3, dec (8)
Cut off light blue now. Finish the rest of the pattern using the body instructions from the bear pattern. Using dark blue, make the arms, legs, and tail from the bear pattern.
Ears
Inner Ear x2
In Light pink.
R1 ch11, turn your work and place 10sc down the chain. Then working in the back side of the chains place 10sc for a total of 20sc in Round 1. (20)
R2 sc around (20)
FO. Leave a short tail. Repeat for a total of 2 inner ears.
Outer Ear x2
In Dark blue.
R1 ch11, turn your work and place 10sc down the chain. Then working in the back side of the chains place 10sc for a total of 20sc in Round 1. (20)
R2-3 sc around (20) (2 rounds)
Place the inner ear inside the outer ear with wrong sides facing. Work around the edge, making a single crochet through both layers to join them together for a total of 20sc. Stuff the ends inside the ear and leave a tail for sewing. Pinch the bottom of the ear and sew the last 2 stitches together. Repeat for the second ear.
Blanket (Granny Square)
Round 1: Start with a slip knot, then ch 4 with a sl st to the first chain to form a ring. Ch 5 (counts as 1 dc, ch 2 corner), 3 dc into the ring, ch 2 – repeat from 2 more times (3 total sets of 3 dc, ch 2), 2 dc into the ring, sl st into 3rd chain of the beginning ch 5 to join.
Round 2: Sl st into the first ch-2 corner space, ch 5. 3 dc into the same ch-2 corner space. Ch 1, 3 dc, ch 2, 3 dc into the next ch-2 space – repeat from 2 more times. Ch 1, 2 dc into the same space as the beginning ch 5, sl st into the 3rd chain of the ch 5 to join.
Round 3: Sl st into the first ch-2 space, ch 5. 3 dc into the same ch-2 corner space. Ch 1, 3 dc in next ch-1 space, ch 1, 3 dc, ch 2, 3 dc in next ch-2 corner space – repeat from 2 more times. Ch 1, 3 dc in next ch-1 space, ch 1, 2 dc in same space as beginning ch 5. Sl st into the 3rd chain of the ch 5 to join.
Continue repeating the pattern until your granny square reaches your desired size. We stopped at Round 7. FO and weave in the ends.
For the leaf on the blanket, we used white felt and cut it to 1 in x 0.99 in. You can adjust the sizes.
Bow
Leave a long tail in the beginning. Ch 24, we will be making a loop. Starting in your first chain, slst, ch1, 24sc around.
R2-4 sc around (3 rounds) (24)
Use the tails to wrap around the center of the bow, then secure the bow onto the blanket. Weave in the ends.
Assembly
Ears: Sew the ears along the edge of the light blue section, between Rounds 9 and 10.
Arms: Sew the arms onto R13-16 of the body with the increase/decrease side facing the face. After securing the base, weave the end to the top of the arm and sew it onto the head. Repeat with the other arm, leaving about 1 stitch between them.
Legs: Sew the end of the leg to the 3rd-to-last round of the body, positioning it on the side. Weave the end through the side of the body where the foot rests, then sew the foot to the body. Repeat for the other leg.
Tail: Stuff and sew onto the 4th-6th rounds from the end, on the top of the body.
Happy crocheting!