Adorable Sunny Ram: Free Crochet Pattern!
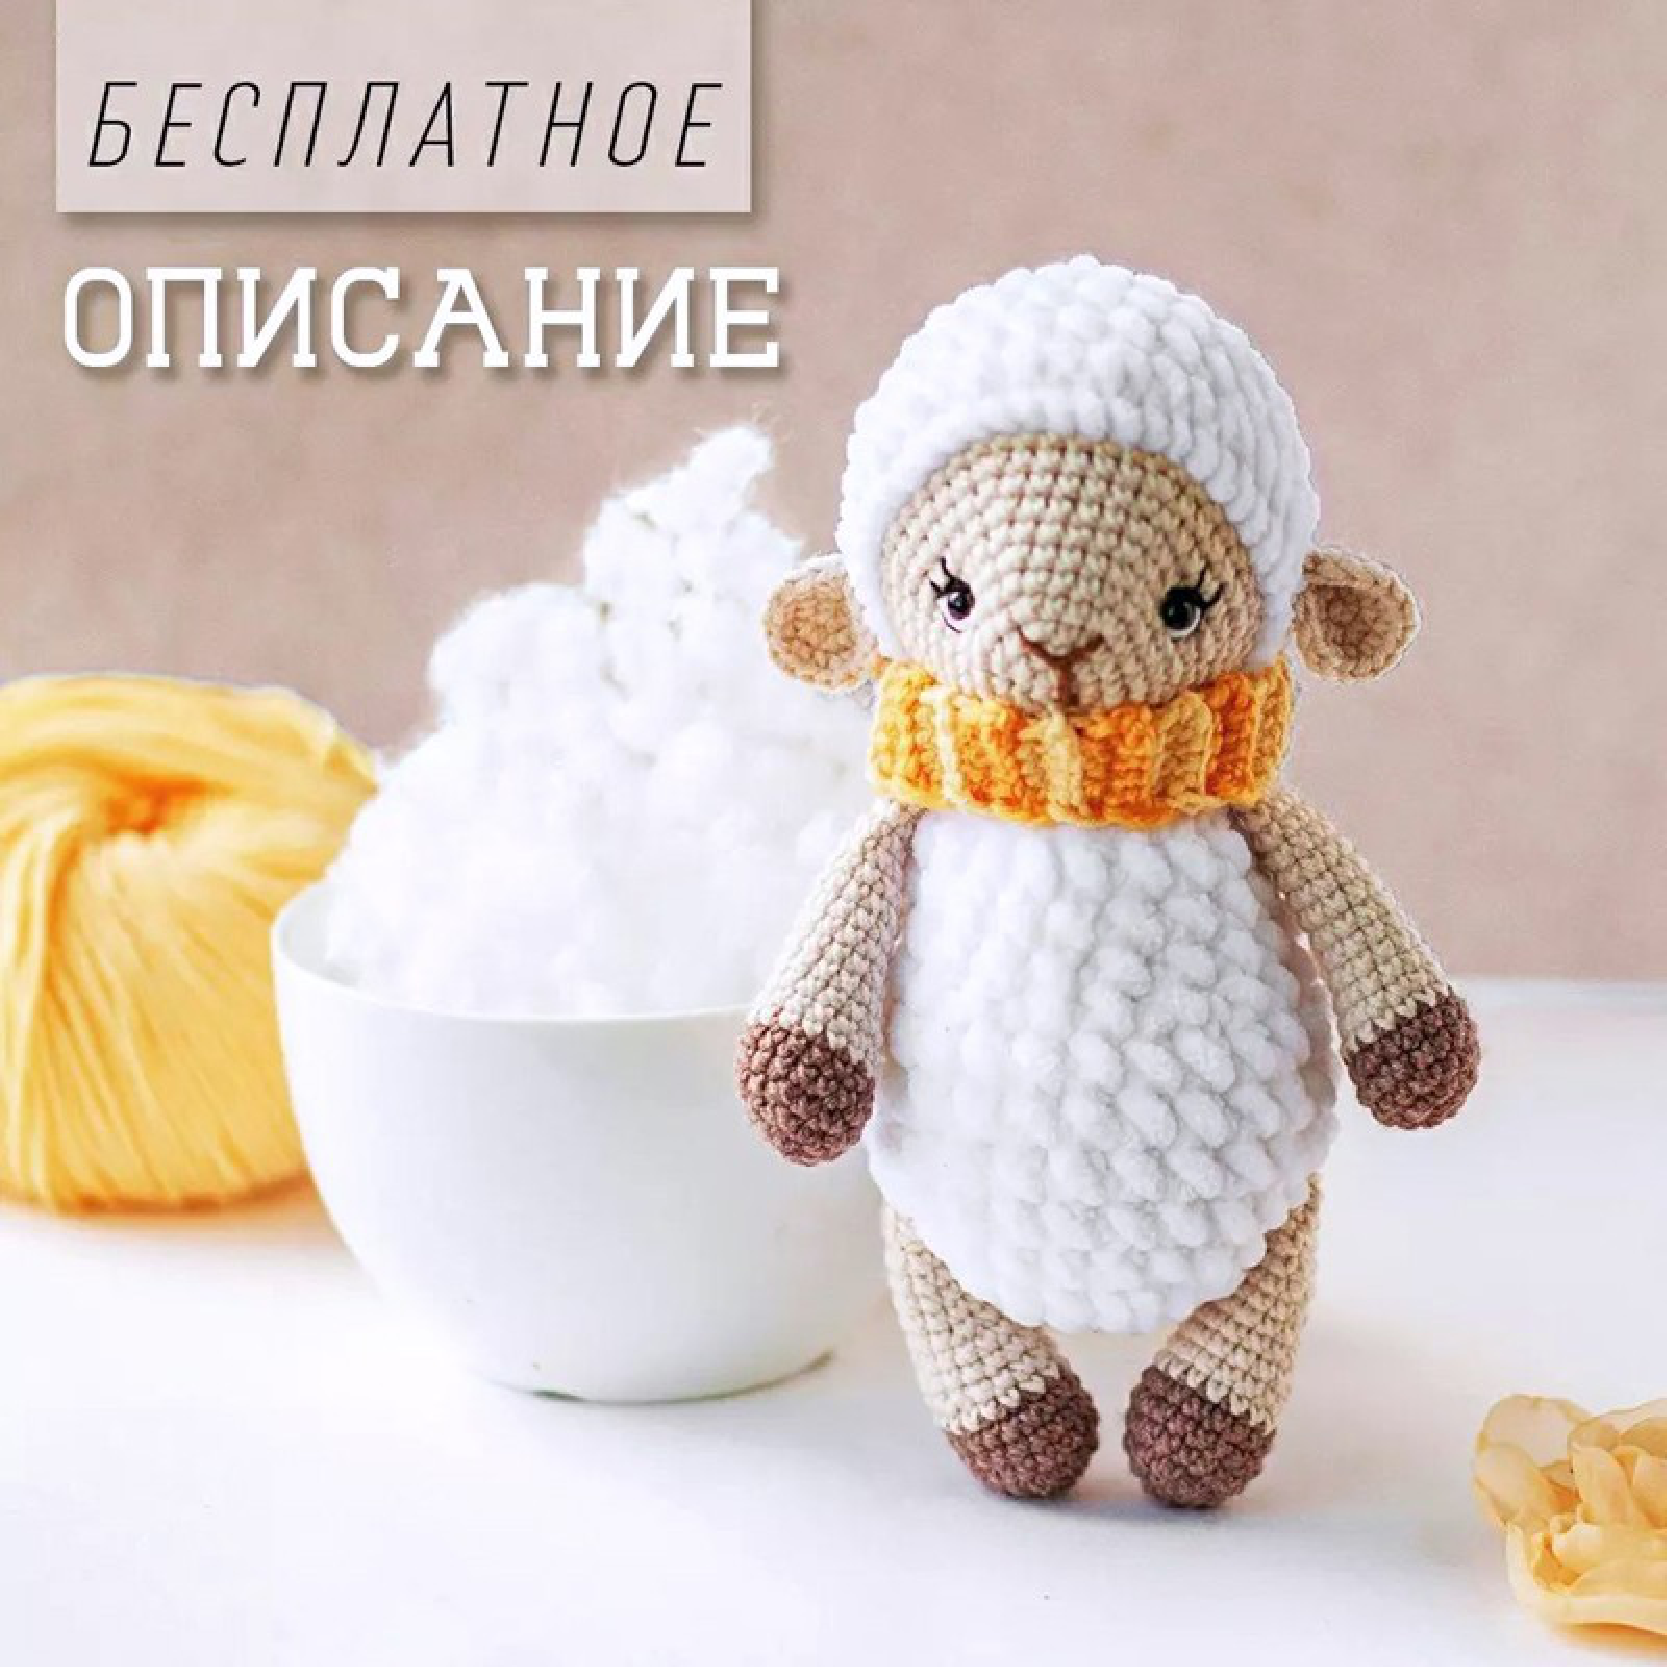
Get ready to create an adorable and cuddly friend with this free crochet pattern for Sunny the Ram! Designed by the talented Alina Luchik (@lu4ik_toys), this charming amigurumi toy is perfect for crafters of all levels. Standing at approximately 16-18 cm tall, Sunny is the perfect size for hugs and adventures. Let’s gather our materials and get started!
Materials & Tools
Here’s what you’ll need to bring Sunny the Ram to life:
- Plush Yarn: Himalaya Dolphin Baby (color 80301) or YarnArt Dolce (color 741) in white for the body and head ‘wool’.
- Cotton/Semi-Cotton Yarn: YarnArt Jeans or a similar yarn (like Alize COTTON GOLD or Gazzal BABY COTTON) in:
- Beige (e.g., YarnArt Jeans color 03 – milk) for the head, arms, and legs.
- Brown (e.g., YarnArt Jeans color 71 – coffee with milk) for the hooves.
- Embroidery Thread: Small amount of black and white thread (YarnArt Jeans or floss works well) for face details.
- Crochet Hooks: Size 2mm (for cotton yarn) and 3mm (for plush yarn).
- Safety Eyes: 4mm or 5mm diameter.
- Other Supplies: A tapestry needle for sewing, fiberfill for stuffing, and a stitch marker.
Abbreviations (US Terms)
This pattern is worked in a continuous spiral. Use a stitch marker to mark the beginning of each round.
- MR: Magic Ring
- sc: Single Crochet
- inc: Increase (work 2 sc in the same stitch)
- dec: Decrease (work 2 sc together)
- (…)*N: Repeat the instructions in the parentheses N times
- (…): The number in the parentheses at the end of a round is the total stitch count.
Crochet Pattern Instructions
Body
Use white plush yarn and a 3mm hook.
- R1: Start with 6 sc in a MR (6)
- R2: 6 inc (12)
- R3: (1 sc, inc) * 6 (18)
- R4: (2 sc, inc) * 6 (24)
- R5-R8 (4 rounds): 24 sc (24)
- R9: (2 sc, dec) * 6 (18)
- R10-R12 (3 rounds): 18 sc (18)
- R13: (1 sc, dec) * 6 (12)
- R14: 12 sc (12)
- R15: 6 dec (6)
Fasten off, leaving a long tail for sewing. Stuff the body firmly.
Arms (Make 2)
Use a 2mm hook. Start with brown yarn.
- R1: Start with 6 sc in a MR (6)
- R2: 6 inc (12)
- R3: (1 sc, inc) * 6 (18)
- R4: 18 sc (18)
- R5: 1 dec, 16 sc (17)
- In the last stitch, change to beige yarn.
- R6: 17 sc (17)
- R7: 7 sc, 1 dec, 8 sc (16)
- R8: 1 dec, 14 sc (15)
- R9: 6 sc, 1 dec, 7 sc (14)
- R10: 1 dec, 12 sc (13)
- R11: 5 sc, 1 dec, 6 sc (12)
- R12: 12 sc (12)
- R13: 5 sc, 1 dec, 5 sc (11)
- R14: 11 sc (11)
- R15: 4 sc, 1 dec, 5 sc (10)
- R16-R18 (3 rounds): 10 sc (10)
Stuff the hand part lightly. Fold the top opening flat and crochet 5 sc through both layers to close. Chain 1, then fasten off, leaving a 15-20 cm tail for sewing.
Head
Use a 2mm hook. Start with beige yarn.
- R1: Start with 6 sc in a MR (6)
- R2: 6 inc (12)
- R3: (1 sc, inc) * 6 (18)
- R4: (2 sc, inc) * 6 (24)
- R5: 24 sc (24)
- R6: (3 sc, inc) * 6 (30)
- R7: 30 sc (30)
- R8: (4 sc, inc) * 6 (36)
- R9: 36 sc (36)
- R10: (5 sc, inc) * 6 (42)
- R11: 42 sc (42)
Insert safety eyes between R6 and R7, with about 12-13 stitches between them. Ensure the color change “seam” will be at the bottom of the head, where it won’t be visible after assembly.
Change to white plush yarn. Continue with the 2mm hook.
- R12: 42 sc (42)
- R13: (2 sc, dec) * 10, 2 sc (32) — Note: The original pattern has a slight math error, this is a corrected version.
- R14: (14 sc, dec) * 2 (30)
- R15-R16 (2 rounds): 30 sc (30)
- R17: (3 sc, dec) * 6 (24)
- R18: (2 sc, dec) * 6 (18)
- R19: (1 sc, dec) * 6 (12)
Stuff the head firmly.
- R20: 6 dec (6)
Fasten off, leaving a tail. Use your needle to weave the tail through the front loops of the final 6 stitches and pull tight to close the hole. Hide the yarn end.
Ears (Make 2)
Use a 2mm hook and beige yarn.
- R1: Start with 6 sc in a MR (6)
- R2: 6 inc (12)
- R3: (1 sc, inc) * 6 (18)
Fasten off, leaving a 15 cm tail for sewing.
Legs (Make 2)
Use a 2mm hook. Start with brown yarn.
- R1: Start with 6 sc in a MR (6)
- R2: 6 inc (12)
- R3: (1 sc, inc) * 6 (18)
- R4: (2 sc, inc) * 6 (24)
- R5: 24 sc (24)
- R6: 1 dec, 10 sc, 1 dec, 10 sc (22)
- In the last stitch, change to beige yarn.
- R7: 1 dec, 9 sc, 1 dec, 9 sc (20)
- R8: 1 dec, 8 sc, 1 dec, 8 sc (18)
- R9: 1 dec, 16 sc (17)
- R10: 1 dec, 15 sc (16)
- R11: 1 dec, 14 sc (15)
- R12: 1 dec, 13 sc (14)
- R13: 1 dec, 12 sc (13)
- R14: 1 dec, 11 sc (12)
- R15-R16 (2 rounds): 12 sc (12)
- R17: 1 dec, 4 sc, 1 dec, 4 sc (10)
Stuff the foot part firmly. Fold the top opening flat and crochet 5 sc through both layers to close. Chain 1, then fasten off, leaving a 15-20 cm tail for sewing.
Assembly & Finishing Touches
- Attach the Head: Sew the head to the body. For the cutest look, tilt the head slightly upwards at about a 45° angle.
- Attach the Ears: Fold each ear into a “teardrop” shape and sew them to the head, positioning them level with the eyes. They should start about 2 rows back from the edge of the white plush “wool”.
- Embroider the Face:
- Eyes: Use white yarn to embroider small highlights (the whites of the eyes) on the outer edges of the safety eyes.
- Eyelids/Lashes: Use a single strand of thin black thread to embroider a small upper eyelid line and a tiny lash on each eye.
- Muzzle: Use brown yarn to embroider a Y-shaped nose and mouth centered below the eyes.
- Attach the Arms: Sew the arms to the sides of the body, just one row below the head seam.
- Attach the Legs: Sew the legs to the bottom of the body, about 4 rows up from the center bottom.
- Finishing Tip: When sewing on the arms and legs, make sure the “step” from the color change is facing the back of the toy so it’s not visible. To prevent the limbs from sticking out, add a small stitch on the front and back of each limb, tacking it close to the body.
And there you have it! Your very own Sunny the Ram is complete!
Share Your Creation!
If you have any questions while making your ram, feel free to contact the designer, Alina Luchik, via Instagram Direct at @lu4ik_toys.
Alina would be thrilled to see your finished rams! Please tag her in your photos on Instagram or include a link to her profile. Happy crocheting!