Crochet a Cozy Wool Hat: A Step-by-Step Guide
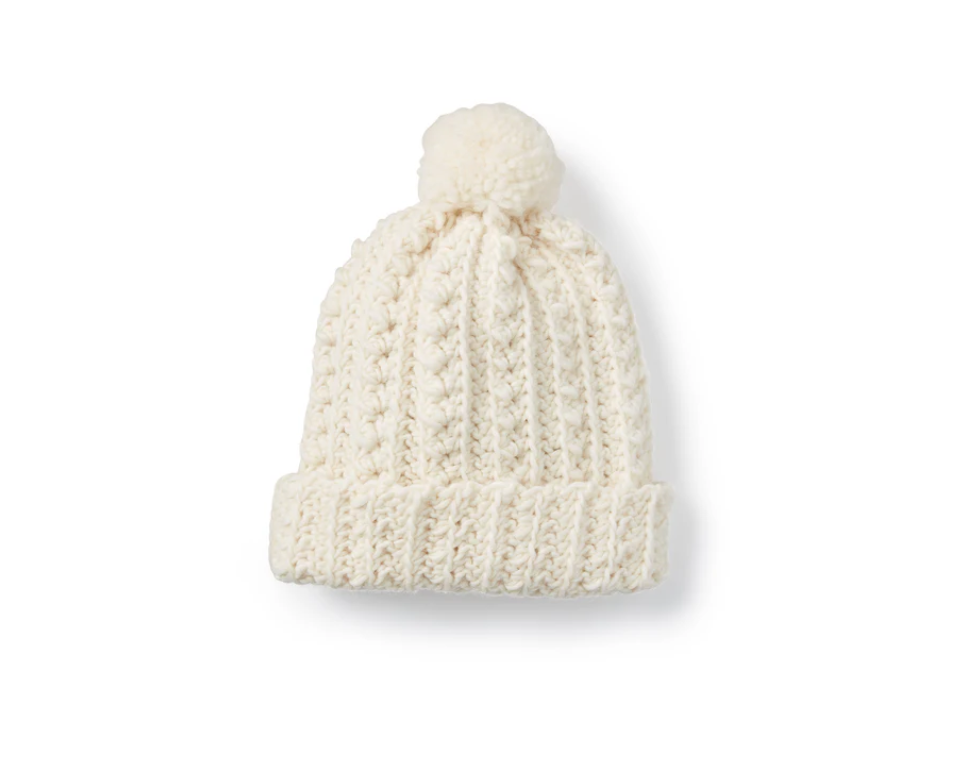
There’s nothing like a handmade hat to keep you warm and stylish in the colder months. This easy-to-follow crochet project is perfect for anyone looking to create a cozy wool hat with a touch of charm. It’s sized to fit the average woman’s head, and the adorable pompom adds a fun finishing touch!

This post contains affiliate links. If you decide to purchase materials through these links, it helps support my blog at no extra cost to you. Thank you for your support!
Materials You’ll Need
To get started, you’ll need the following supplies:
- Patons® Classic Wool Roving™ Yarn: 1 ball (Aran weight, 3.5 oz/100 g; 120 yds/109 m)
- Crochet Hook, Size U.S. J/10 (5.75-6 mm) or size needed to achieve gauge
- Scissors
- Yarn needle (for sewing and weaving in ends)
- Pompom Maker (optional, but handy!)
Key Abbreviations
Here are some crochet abbreviations you’ll encounter in this pattern:
- Ch = Chain(s)
- Hdc = Half double crochet
- Hdcfl = Half double crochet in front loop only
- Hdcf2lCluster = A special cluster stitch (instructions below)
- RS = Right side
Gauge
To ensure your hat fits perfectly, your gauge should be:
10 single crochet stitches and 11 rows = 4″ (10 cm).
Let’s Get Started: Crochet Instructions
- Foundation Chain
- Start with Ch 38.
- Row 1:
- Work 1 hdc in the 3rd chain from the hook and each chain to the end. (36 hdc total).
- Turn your work.
- Row 2:
- Ch 2. Work 1 hdcfl in each stitch across the row.
- Turn.
- Row 3:
- Ch 2. Alternate stitches as follows:
- Work 1 hdcf2lCluster in the next stitch.
- Then 1 scf2l in the next stitch.
- Repeat this pattern across the row. Turn.
- Ch 2. Alternate stitches as follows:
- Row 4:
- Ch 2. Alternate:
- 1 hdcfl in the next stitch.
- 1 hdcf2l in the next stitch.
- Repeat across the row. Turn.
- Ch 2. Alternate:
- Row 5 and 6:
- Ch 2. Work 1 hdcf2l in each stitch across the row. Turn.
- Repeat Rows 3-6:
- Continue working these rows until your piece measures approximately 21″ (53.5 cm) in length, ending on a Row 5.
- Finishing:
- Fasten off.
- Sew the foundation chain and last row together, leaving about 4″ (10 cm) of the seam open to allow for folding the edge back as a brim.
- Gather the top of the hat by weaving yarn around one edge and pulling it tight. Secure it well.
Make the Pompom
- Wrap the yarn around four fingers approximately 140 times.
- Carefully remove the yarn bundle and tie it tightly in the center.
- Cut through both sides of the loops.
- Trim the edges to form a smooth, round pompom.
- Sew the pompom to the top of the hat.
Why I Love This Project
I made this hat as a weekend project and was blown away by how quickly it came together. The roving yarn gives it a soft and luxurious texture, and the pompom makes it playful and fun. Plus, it’s the perfect gift for friends and family—or just for yourself!
If you’re new to some of the stitches (like the hdcf2lCluster), don’t worry. Take your time, and you’ll find your rhythm. The repetitive rows are relaxing to crochet, and before you know it, you’ll have a beautiful hat ready to wear or gift.
Shop Supplies
Here’s everything you need to make this hat:
When you purchase through these links, you’re not only getting great supplies—you’re also helping me keep this blog running. Thank you!
Happy crocheting! If you try this pattern, I’d love to see your work. Share your photos and tag me—let’s inspire each other! 😊


