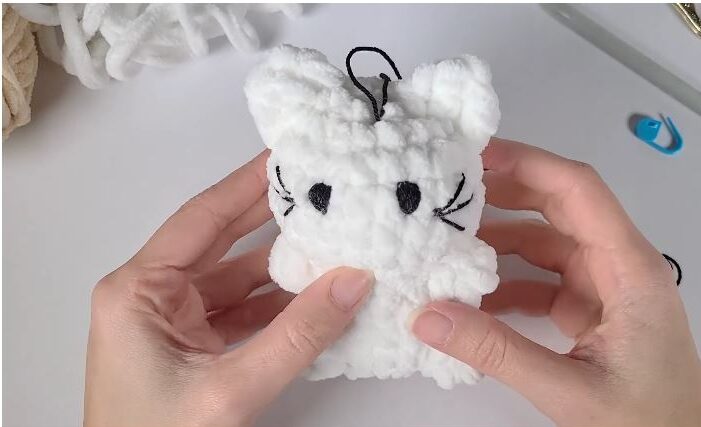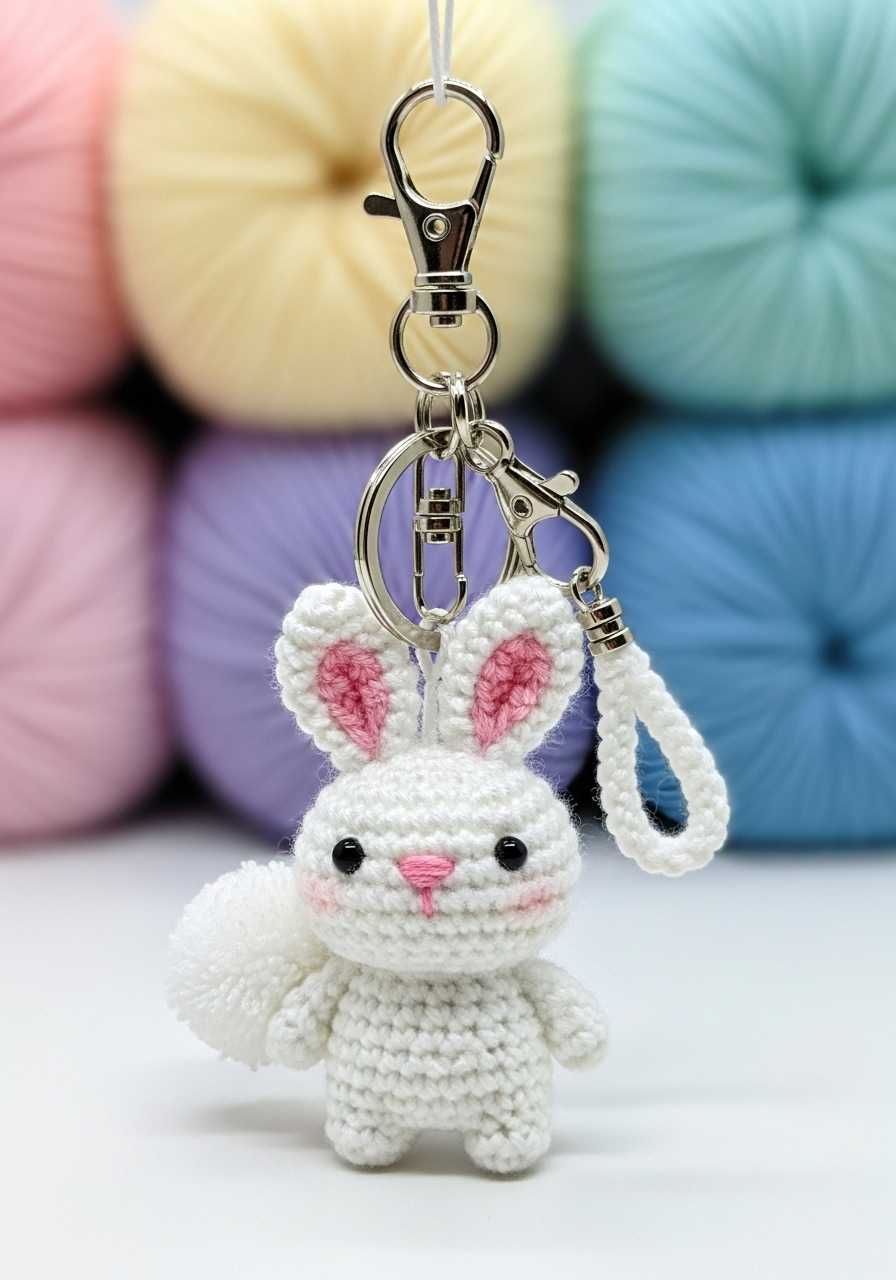
Crochet Baby Bunny Keychain Amigurumi Pattern
Finished Size: Approximately 7 cm (2.75 inches) tall, excluding keychain hardware.
Skill Level: Easy / Intermediate
Materials:
- Yarn: Worsted weight (8-ply) yarn in White and a small amount of Pink.
- Hook: 3.0mm crochet hook.
- Eyes: 6mm black safety eyes (x2).
- Detailing: Pink embroidery floss or thin yarn for the nose; pink blush or chalk pastel for the cheeks (optional).
- Other: Polyester fiberfill stuffing, yarn needle, scissors, stitch marker, keychain clasp/hardware.
Abbreviations (US Terms):
- MR: Magic Ring
- SC: Single Crochet
- INC: Increase (work 2 SC in the same stitch)
- DEC: Decrease (single crochet 2 stitches together)
- st(s): stitch(es)
- Ch: Chain
- Sl St: Slip Stitch
- FO: Fasten off
Pattern Instructions
Head and Body (Worked as one piece in White yarn)
Start from the top of the head and work down in a continuous spiral.

Row 1: Start with 6 SC in a MR (6)
Row 2: INC in each st around (12)
Row 3: (SC 1, INC) × 6 (18)
Row 4: (SC 2, INC) × 6 (24)
Row 5: (SC 3, INC) × 6 (30)
Row 6: (SC 4, INC) × 6 (36)
Rows 7-11: SC in each st around (36) – 5 rows total
Insert safety eyes between Rows 9 and 10, about 8 stitches apart. Embroider the nose centered between the eyes on Row 11. Make a small horizontal stitch, then a vertical stitch over it to form a ‘+’ shape.
Row 12: (SC 4, DEC) × 6 (30)
Row 13: (SC 3, DEC) × 6 (24)
Row 14: (SC 2, DEC) × 6 (18)
Begin stuffing the head firmly. Continue to stuff the body as you go.
Row 15: (SC 2, INC) × 6 (24) – This forms the top of the body.
Rows 16-19: SC in each st around (24) – 4 rows total
Row 20: (SC 2, DEC) × 6 (18)
Row 21: (SC 1, DEC) × 6 (12)
Row 22: DEC × 6 (6)
Finish stuffing the body firmly. FO, leaving a long tail. Use the yarn needle to weave the tail through the front loops of the final 6 stitches and pull tight to close. Weave in the end.
Ears (Make 2)
Outer Ear (White Yarn):
Row 1: Ch 6. Starting in the 2nd ch from the hook: SC 4, work 3 SC in the last ch. Rotate to work along the opposite side of the chain: SC 3, INC in the last st (12)
Row 2: INC, SC 3, INC × 3, SC 3, INC × 2 (18)
Row 3: SC in each st around (18)
FO, leaving a long tail for sewing.
Inner Ear (Pink Yarn):
Row 1: Ch 4. Starting in the 2nd ch from the hook: SC 2, work 3 SC in the last ch. Rotate to work along the opposite side of the chain: SC 1, INC in the last st (8)
FO, leaving a tail for sewing.
Place the pink Inner Ear piece on top of the white Outer Ear piece and use the pink tail to sew it in place. Then, use the white tail to attach the completed ear to the head.
Arms and Legs (Make 4 identical pieces in White yarn)
Row 1: Start with 6 SC in a MR (6)
Rows 2-3: SC in each st around (6)
FO, leaving a tail for sewing. Do not stuff the arms and legs.
Tail (White Yarn)
The tail is a small pom-pom.
- Wrap white yarn around two fingers about 20-25 times.
- Carefully slide the bundle off your fingers.
- Use a separate piece of yarn to tie tightly around the middle of the bundle. Leave the ends of this tie-yarn long for attaching to the body.
- Cut through all the loops on both sides of the bundle.
- Trim the pom-pom into a small, neat sphere.
Keychain Strap (White Yarn)
Option 1 (Flat Strap):
Ch 3.
Row 1: Starting in 2nd ch from hook, SC in next 2 sts (2). Ch 1, turn.
Rows 2-12: SC 2. Ch 1, turn.
FO, leaving a long tail. Thread the strap through your keychain hardware, fold in half, and use the tail to sew the ends securely to the top of the bunny’s head.
Option 2 (Simple Loop):
Ch 18. Sl St to the first chain to form a loop. FO, leaving a long tail. Secure the base of the loop to the keychain hardware and sew firmly to the top of the bunny’s head.
Assembly
- Ears: Pinch the base of each ear slightly to give it shape. Sew them to the top of the head, positioned over Rows 2-4 from the starting MR. They should be about 6 stitches apart.
- Arms: Sew one arm to each side of the body, positioning them around Row 15, right where the head transitions to the body.
- Legs: Sew the two legs to the bottom front of the body, over Rows 19-21, about 4 stitches apart.
- Tail: Use the long tie-strings from the pom-pom to sew the tail securely to the center back of the body, around Row 18.
- Finishing Touches: If desired, lightly dust pink blush or chalk pastel onto the cheeks just below the outer corners of the eyes.
- Keychain: Attach the finished strap and hardware to the very top of the head, ensuring it is centered and secure.