Crochet Flower Bouquet Keychain
Picture this: you’re digging through your bag for your keys, and instead of the usual jangle of metal, your fingers find the softest little crocheted flower bouquet dangling from your keyring. It’s pink. It’s precious. And you made it yourself in an afternoon. That’s exactly the kind of magic this crochet flower bouquet keychain delivers — and honestly, once you make one, you’re going to want to make seven.
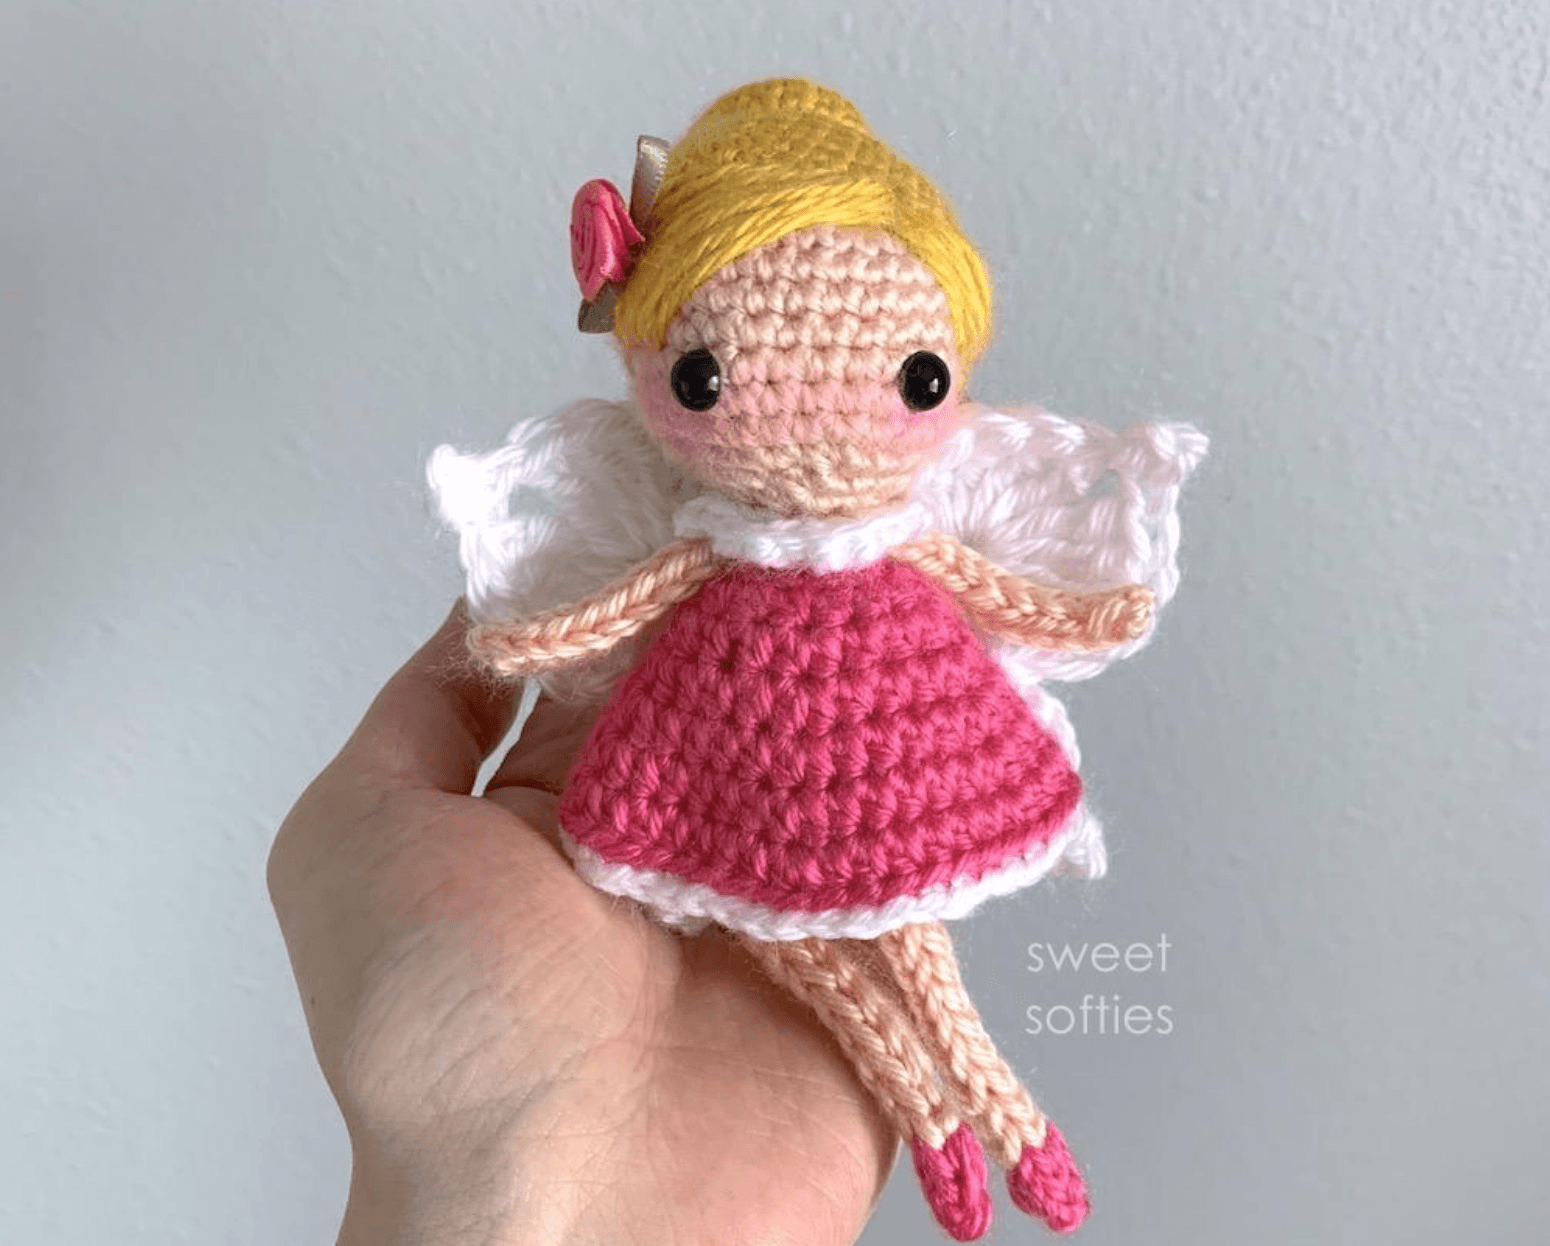
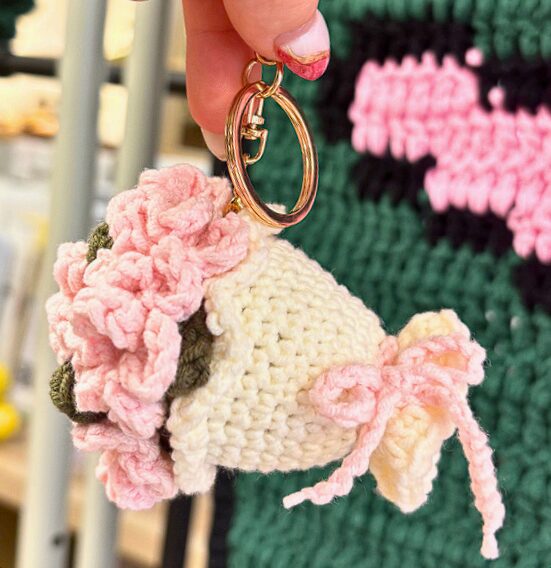
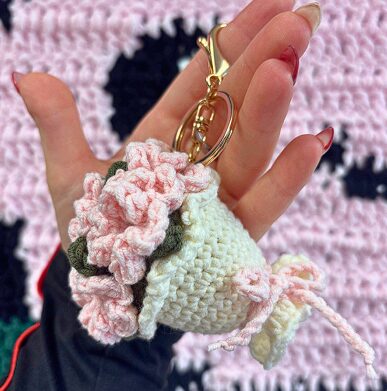
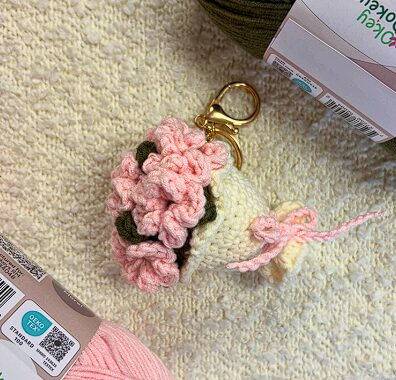
This tiny project punches way above its weight in the cuteness department. We’re talking a buttercream-colored wrapped bouquet base, a cluster of delicate pink five-petal flowers, olive green leaves that stick up just right, ruffled frills at the bottom, and a sweet little pink bow to tie it all together. It measures just 3.5 x 3 inches, but the detail? Absolutely stunning.
Whether you’re searching for a free crochet keychain pattern to use up your yarn scraps, or you want a beginner-friendly crochet flower tutorial that steps things up just a notch, you’ve landed in the right place. By the end of this post, you’ll have everything you need to make this yourself — even if BLO stitches still make you squint a little.
Why You’ll Love This Crochet Flower Bouquet Keychain Pattern
This little pattern is genuinely special, and here’s why it deserves a spot at the top of your project queue:
It’s a seriously satisfying small project. You can finish the whole thing in one or two cozy evenings — no week-long commitment required.
It uses only about 20 grams of yarn total. This is the perfect stash-buster for those little leftover balls of cotton yarn you can’t bring yourself to throw away.
It makes an incredible handmade gift. Birthdays, teacher appreciation, Valentine’s Day, Mother’s Day, bridesmaids — this little bouquet works for all of it.
It builds real skills. You’ll practice working in the front and back loops only, making a magic ring, and crocheting dimensional flower petals. Great for leveling up!
The finished size is just right. At 3.5 x 3 inches, it’s perfectly proportioned as a bag charm or keychain without being bulky.
It’s customizable in any color palette. Swap the ballet pink for red and the buttercream for white and you’ve got a totally different vibe.
Materials and Tools You’ll Need
Before you cast on (or, you know, magic ring on), gather everything below so you’re not hunting for your yarn needle mid-project.
Yarn: Light fingering weight, 60% cotton / 40% acrylic blend. The pattern uses Cotton Corner (#3) yarn in three colors: Ballet Pink — 8g Olive — 7g Buttercream — 5g
A great substitute option is any light fingering-weight cotton blend you have on hand. Lion Brand 24/7 Cotton in a fingering weight or a similar smooth, slightly structured cotton yarn will give you that clean stitch definition this project needs. Avoid anything too fuzzy — you want those flower petals to pop!
Hook: 3mm (no direct US letter equivalent — it falls between B-1 and C-2, closer to C-2). Stick with 3mm for the best results on this one.
Stuffing: approximately 3g of polyester fiberfill
Scissors
Yarn needle (for weaving in ends and assembly)
Stitch markers (trust me, you’ll want these — especially for tracking rounds on the wrapping)
Keychain attachment (a lobster clasp keyring works perfectly)
Abbreviations and Stitch Guide
All stitches are written in US crochet terms.
mr alt — Magic Ring Alternative: If you’re not comfortable with the magic ring, start by chaining 2 and working your stitches into the second chain from the hook. Pull the tail to close.
sc — Single Crochet: Your classic workhorse stitch. Insert hook, yarn over, pull through, yarn over, pull through both loops.
inc — Increase: Work 2 single crochets into the same stitch. This is how you grow your rounds outward.
FLO — Front Loops Only: Insert your hook under only the front loop of the stitch (the loop closest to you). Working FLO creates a raised ridge on your piece and is used here to add the decorative ruffle at the top of the wrapping. It looks fancier than it sounds, we promise!
BLO — Back Loops Only: Insert your hook under only the back loop of the stitch (the loop away from you). Working BLO leaves a visible ridge of unworked loops on the surface — this is what you’ll use later to attach the bouquet cap and the bottom frills.
ch — Chain: Yarn over and pull through the loop on your hook.
sl st — Slip Stitch: Insert hook, yarn over, pull through both the stitch and the loop on your hook in one motion. Used here to join rounds and to attach pieces to each other.
hdc — Half Double Crochet: Yarn over first, then insert hook, yarn over again, pull through, then yarn over and pull through all three loops. Taller than a single crochet, shorter than a double.
hdcinc — Half Double Crochet Increase: Work 2 half double crochets into the same stitch.
mr — Magic Ring: Create an adjustable loop with your yarn, work your stitches into the loop, then pull the tail to close the center tightly. This is used for the flowers and gives you that clean, hole-free center.
dc — Double Crochet: Yarn over, insert hook, yarn over and pull through, yarn over and pull through 2 loops, yarn over and pull through remaining 2 loops. This stitch forms the flower petals — it’s what gives them that lovely puffed shape.
Tip: The flowers are the trickiest part to visualize until you’ve made your first one. After your magic ring, each petal is made by chaining 2, working 4 double crochets, chaining 2, and slip stitching back to the center. Once you complete one petal, the rest click into place. You’ve got this!
Step-by-Step Crochet Flower Bouquet Keychain Pattern Instructions
This pattern is made in separate pieces that are assembled at the end. Work through each section in order and you’ll have a tidy little bouquet before you know it.
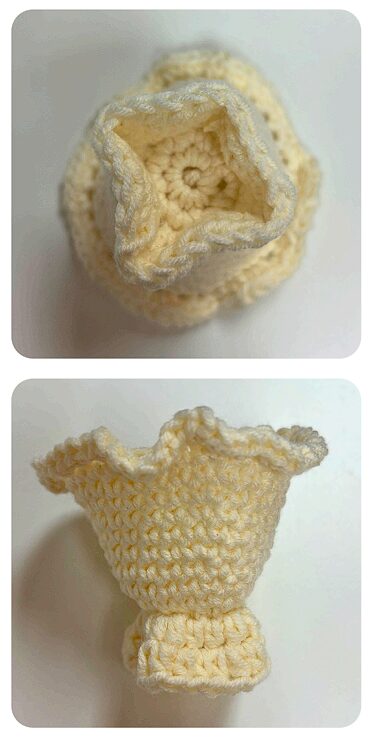
Part 1: The Wrapping (Buttercream)
This is the cone-shaped base of your bouquet — the part that looks like paper wrapping around flowers. Work in continuous rounds unless told otherwise.
Step 1: Using buttercream yarn and your magic ring alternative, single crochet 8 stitches into the ring. Pull the tail gently to close the ring. Place a stitch marker in the first stitch of each round so you don’t lose your place. [8 sts]
Step 2: Increase in every stitch around. [16 sts]
Step 3: Working in BLO only for this entire round, (sc 3, inc) — repeat 4 times. [20 sts]
Note: Those unworked front loops from Round 3 are precious real estate. You’ll come back to attach the Bottom Frills there later. Don’t accidentally crochet into them!
Step 4: (sc 9, inc) — repeat 2 times. [22 sts]
Step 5: sc in every stitch around. [22 sts]
Step 6: (sc 5, inc, sc 5) — repeat 2 times. [24 sts]
Step 7: sc in every stitch around. [24 sts]
Pro Tip: Rounds 5 and 7 are your “breathe easy” rounds — no increases, just straight single crochets all the way around. Use these rounds to double-check your stitch count before moving forward!
Step 8: (sc 11, inc) — repeat 2 times. [26 sts]
Step 9: (sc 6, inc, sc 6) — repeat 2 times. [28 sts]
Step 10: (sc 13, inc) — repeat 2 times. [30 sts]
Step 11: (sc 7, inc, sc 7) — repeat 2 times. [32 sts]
Step 12: Working in FLO only, chain 1. Increase in every stitch around — that’s 32 increases total. Slip stitch into the ch 1 at the beginning to join. Fasten off. This creates that beautiful ruffled top edge of the wrapping!
Pro Tip: Count to make sure you’ve worked all 32 increases in Round 12 before you fasten off. It’s easy to skip one when you’re working quickly into the front loops only!
Part 2: Bottom Frills (Buttercream)
These add that gorgeous layered tissue-paper effect at the base of the bouquet.
Step 13: Secure your buttercream yarn into the front loops you left open in Round 3 of the wrapping. Chain 2. Work (hdc 3, hdcinc) — repeat 4 times. Slip stitch into the ch 2 at the beginning. [20 sts]
Step 14: Chain 2. Work (hdc 2, hdcinc, hdc 2) — repeat 4 times. Slip stitch into the ch 2. [24 sts] Fasten off.
That rippled ruffle is looking so good already, isn’t it?
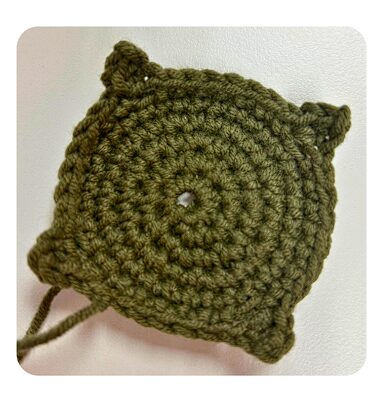
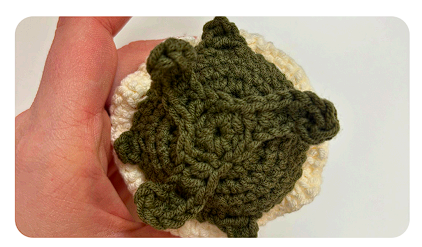
Part 3: Bouquet Cap (Olive Green)
This flat circular piece sits on top of the wrapping and holds all your beautiful flowers and leaves.
Step 15: With olive yarn and magic ring alternative, sc 8 into the ring. [8 sts]
Step 16: Increase in every stitch around. [16 sts]
Step 17: (sc 1, inc) — repeat 8 times. [24 sts]
Step 18: (inc, sc 2) — repeat 8 times. [32 sts]
Step 19: sc in every stitch around. [32 sts]
Pro Tip: After Round 19, your cap should lay pretty flat. If it’s curling up, your gauge may be a little tight — try loosening your tension slightly, or go up to a 3.25mm hook.
Step 20: (sc 6, ch 3, skip 1 chain, sc, hdc, slip stitch onto the main piece) — repeat 4 times. Fasten off. This creates four little points on the cap that become the “petals” of the green wrapping — exactly like a real flower bouquet!
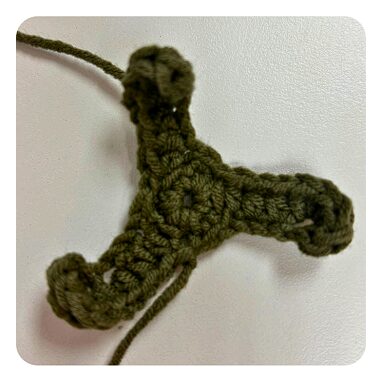
Part 4: Leaves (Olive Green)
These dimensional leaves are one of the most charming details of the whole project.
Step 21: With olive yarn and magic ring alternative, sc 9 into the ring. [9 sts]
Step 22: (sc 1, ch 5, skip 1 chain, hdc 5 into the same stitch, hdc 3, skip a stitch on the main piece, sc 1) — repeat 3 times. Fasten off.
This creates three leaves fanning out from a center point. The key here is to work 5 half double crochets into that same stitch after skipping one chain — this is what gives each leaf its rounded, padded shape. It looks wild while you’re working it, but the finished leaf is absolutely adorable.
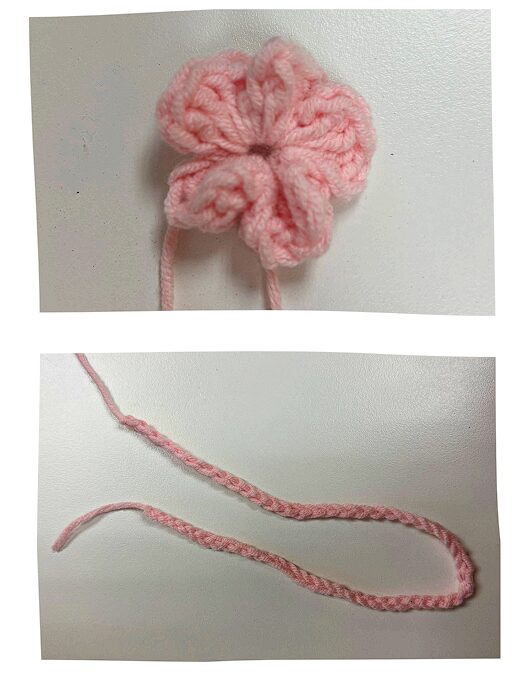
Part 5: Flowers — Make 7 (Ballet Pink)
You’re making seven flowers total. Yes, seven! They go fast, and each one only takes a few minutes.
Step 23: Start each flower with a magic ring — not the alternative this time. Use the real magic ring method so you can pull the center completely closed and get that tight, tidy flower center. Into the ring, work (ch 2, dc 4, ch 2, sl st) — repeat 5 times to create 5 petals. Fasten off. Pull the magic ring tail tight to close the center. Repeat to make 7 flowers total.
Pro Tip: Make all 7 flowers back to back while you’re in the zone. Put on a podcast, settle in, and knock them all out at once before moving on to assembly. It goes faster than you think!
Part 6: Bow (Ballet Pink)
Step 24: Chain 50. Fasten off. That’s it! This simple chain becomes your sweet little bow at the base of the bouquet.
Assembly: Putting It All Together
You’ve got all your pieces — now comes the really fun part. Take a breath, lay everything out in front of you, and work through the steps below in order.
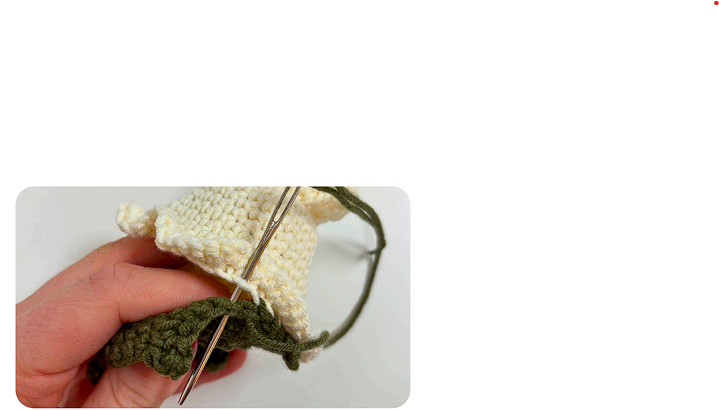
Step A — Attach the cap to the wrapping: Using your yarn needle and olive yarn, sew the green bouquet cap onto the top of the wrapping. Work through the back loops only of the wrapping as you sew — this keeps the join neat. Leave the four points of the cap unstitched so they stick out freely. When you’ve almost completely closed the seam, pause and stuff the wrapping firmly with your 3g of fiberfill, then finish sewing closed.
Step B — Attach the leaves: Sew the olive leaf piece onto the center of the green cap. Here’s the important part: do not sew down the leaf tips. They’re supposed to stand up and give your bouquet that fresh-picked, dimensional look!
Step C — First three flowers: Sew three of your pink flowers into the spaces between the leaves on top of the cap.

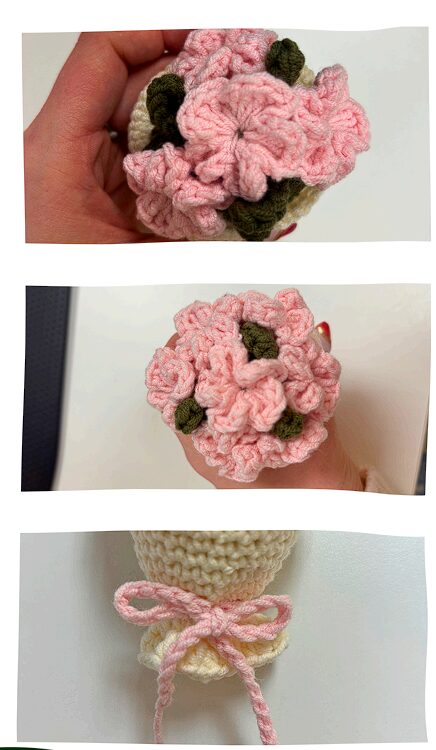
Step D — Center flower: Sew one flower directly into the center of the leaves and the cap, right in the middle. This becomes the star of the show!
Step E — Remaining three flowers: Sew the final three flowers onto the green cap in the spaces underneath the leaves — tucked in slightly to frame that center flower like a real bouquet would. This layering is what makes the finished piece look so full and lush.
Step F — Add the bow: Thread both ends of your chain-50 bow through one stitch at the point where the bottom frills meet the base of the wrapping. Tie it into a bow, adjust the loops until it looks perfect, and trim the ends to your desired length.
All that’s left is to attach your keychain hardware to the top, weave in any remaining ends, and give your tiny bouquet a little fluff and squeeze to get the shape just right.
You did it! That is a hand-crocheted flower bouquet keychain, and it is gorgeous. You should be so proud.
Styling and Usage Ideas
This little flower bouquet keychain is way too cute to keep to yourself. Here are a few ideas that’ll make you want to make a dozen:
Clip it to your everyday tote bag or purse for an instant pop of handmade charm — the pink and buttercream combo goes with everything.
Bundle it with a small gift card, a bar of nice soap, or a jar of tea as a complete handmade gift set. Wrap it in tissue paper and you have a boutique-worthy present for under five dollars in materials.
Make a set in different color combinations — dusty blue and cream for a cottagecore vibe, red and white for Valentine’s Day, or orange and brown for a beautiful fall version — and sell them at your local craft fair. These would fly off the table.
Hang a few from a small tabletop display at a baby shower or bridal shower. They double as party favors and decorations at the same time!
Save This Crochet Flower Bouquet Keychain Pattern!
If you found this tutorial helpful, please pin it to your crochet Pinterest board so you can find it again — and so your fellow crochet-loving friends can discover it too. The more the merrier in this crafty little community!
Happy hooking, friend. You’ve earned every single one of those seven flowers.