Crochet the Cutest Little Companion: Free Mini Plush Duck Pattern
Free Crochet Duck Plush Pattern: DIY Mini Amigurumi Keychain
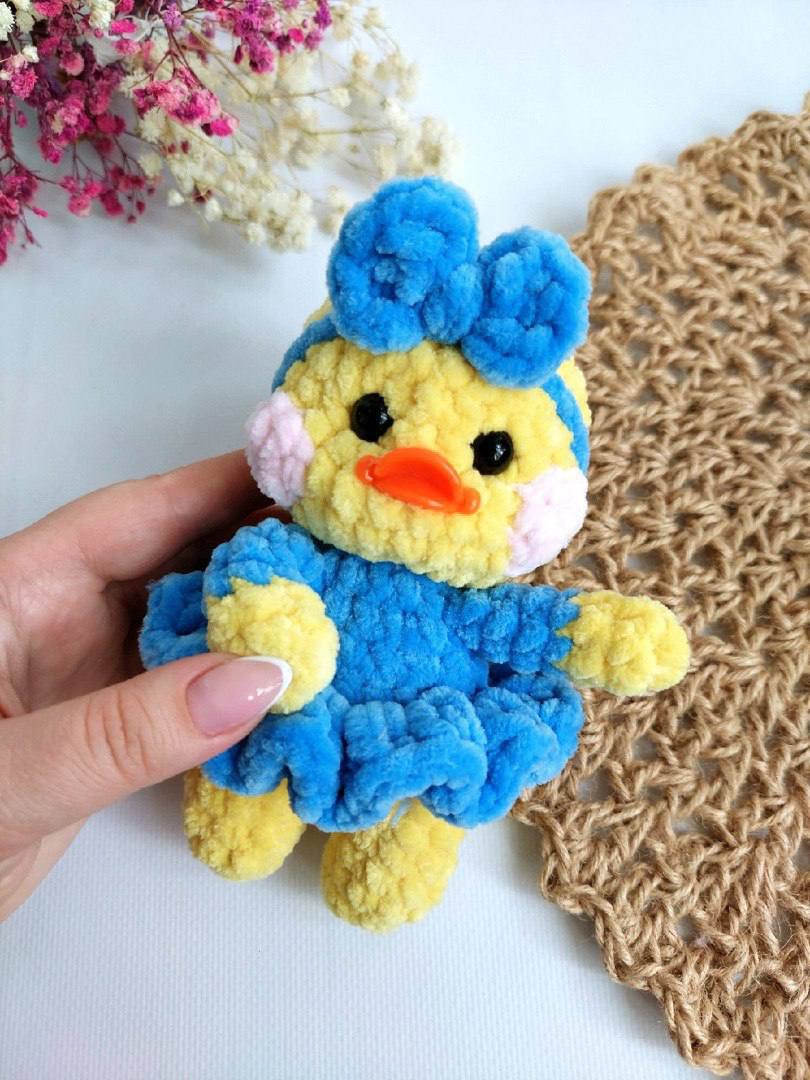
Looking for a quick, adorable crochet project? This mini plush duck amigurumi pattern is perfect for crafters of all skill levels! Made with plush velvet yarn, this cute little duckling wears a sweet ruffled dress and a matching bow headband. Measuring approximately 6 inches (15 cm) tall, it makes a wonderful bag charm, keychain, or handmade gift.
Materials and Tools
- Plush Yarn (Super Bulky / Weight 6):
- Yellow (approx. 1/4 skein for head, body, legs, arms)
- Blue (or your choice of dress/bow color)
- Pink (small amount for cheeks)
- Fine / Sport Weight Cotton Yarn (Weight 2): Orange (for the beak)
- Hooks:
- US size G/6 (4.5 mm) for plush yarn
- US size C/2 (2.0 mm) for cotton beak
- Safety Eyes: 10 mm
- Plastic Beak (Optional): 1 in x 0.4 in (2.5 cm x 1 cm) instead of crocheting one
- Stuffing: Polyester fiberfill
- Notions: Tapestry needle, stitch marker, scissors, strong thread for face sculpting, optional super glue gel
Crochet Abbreviations (US Terms)
- MR: Magic Ring
- sc: Single crochet
- inc: Increase (2 single crochet in the same stitch)
- dec: Decrease (single crochet 2 together)
- ch: Chain
- dc: Double crochet
- sl st: Slip stitch
- BLO: Back loops only
- st(s): Stitch(es)
- rnd(s): Round(s)
Pattern Notes
Work in continuous spirals without joining at the end of each round unless specified otherwise. Stuff the plushie firmly as you go using fiberfill.
Step-by-Step Pattern Instructions
Legs, Body, and Head (Worked in One Piece)
Legs (Make 2)
Using Yellow plush yarn and 4.5 mm hook:
Rnd 1: 6 sc in MR (6)
Rnd 2: (1 sc, inc) * 3 (9)
Rnds 3–5: 9 sc (9) — 3 rounds
Fasten off the first leg. Repeat Rnds 1–5 for the second leg, but do not cut the yarn on the second leg.
Joining Legs & Lower Body
Rnd 6: Ch 3 on second leg, join to the first leg with 1 sc. Work 8 more sc around the first leg, 3 sc along the chain, 9 sc around the second leg, and 3 sc along the opposite side of the chain (24)
Rnds 7–8: 24 sc (24) — 2 rounds
Dress & Upper Body
Change color to Blue plush yarn.
Rnd 9: 24 sc (24)
Rnd 10: 24 sc in BLO (24)
Rnd 11: (2 sc, dec) * 6 (18)
Rnds 12–13: 18 sc (18) — 2 rounds
Rnd 14: (1 sc, dec) * 6 (12)
Head
Change color back to Yellow plush yarn.
Rnd 15: (inc) * 12 (24)
Rnd 16: (5 sc, inc) * 4 (28)
Rnds 17–21: 28 sc (28) — 5 rounds
Note: Insert safety eyes between Rnds 20 and 21, leaving 2–3 stitches between them.
Rnd 22: (5 sc, dec) * 4 (24)
Rnd 23: (2 sc, dec) * 6 (18)
Rnd 24: (1 sc, dec) * 6 (12)
Rnd 25: (dec) * 6 (6)
Fasten off, cinch the remaining opening shut through the front loops, weave in the end, and hide inside the head.
Arms / Wings (Make 2)
Do not stuff the arms.
Start with Yellow plush yarn and 4.5 mm hook:
Rnd 1: 6 sc in MR (6)
Rnds 2–3: 6 sc (6) — 2 rounds
Change color to Blue plush yarn:
Rnds 4–7: 6 sc (6) — 4 rounds
Fasten off, leaving a long tail for sewing.
Pink Cheeks (Make 2)
Using Pink plush yarn and 4.5 mm hook:
Rnd 1: 6 sc in MR (6)
Fasten off, leaving a long tail for sewing.
Crochet Beak (Optional)
If you are not using a plastic flat beak, crochet one using Orange cotton yarn and 2.0 mm hook:
Rnd 1: 6 sc in MR (6)
Rnd 2: (inc) * 6 (12)
Rnd 3: (1 sc, inc) * 6 (18)
Fasten off, leaving a long tail for sewing.
Dress Skirt
Attach Blue plush yarn to the remaining front loops of Rnd 10 on the body.
Work 3 dc into each front loop across the entire round. Join with a sl st to the first st, fasten off, and weave in ends.
Bow & Headband
Bow:
Using Blue plush yarn and 4.5 mm hook:
Make a Magic Ring. Into the ring work: (ch 3, 3 dc, ch 3, sl st) twice. Pull the magic ring tight to form the bow shape. Fasten off and leave a tail for sewing or attaching.
Headband:
Using Blue plush yarn, ch 27. Join with a sl st to the first ch to form a loop (ensure it fits around the head). Sew or glue the bow to the headband ring.
Facial Sculpting and Assembly
Eye Indentation (Sculpting):
- Thread a needle with strong matching yellow thread.
- Insert needle from the bottom back of the head/neck area out near the inner corner of the right eye.
- Pass thread across to the outer corner of the right eye and re-insert, bringing the needle out near the inner corner of the left eye.
- Pass thread to the outer corner of the left eye and re-insert, bringing needle back to the base of the head.
- Pull both ends firmly to pull the eyes back into the face slightly. Tie a secure double knot and hide the ends inside the head.
Final Assembly:
- Sew the cheeks directly under the safety eyes on both sides.
- Sew or glue the beak centered directly between the eyes.
- Sew the arms to the sides of the body 1 round below the neck seam.
- Place the headband with the bow onto the duck’s head.
Your adorable amigurumi plush duck is now complete! Attach a key ring or bag clip to convert it into a plush charm.