
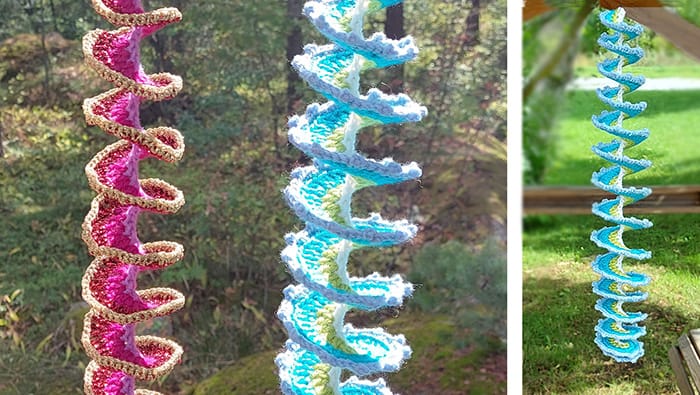
Crochet Wind Spinner: Easy DIY Garden & Balcony Decor
Create a vibrant crochet wind spinner to add a splash of color to your veranda, balcony, or garden! This beginner-friendly crochet project is quick to make and perfect for using up leftover yarn.
Discover a clever crochet tip to save time and yarn while crafting this delightful wind spinner.
Explore how to craft wind spinners using twine or cord for alternative textures.
Customize your crochet wind spinner to any length you desire and create a stunning display with a group of spinners. Embellish your handmade wind spinner with:
- Tassels
- Beads
- Pompons
- Crystals
- Bells (considerate placement for neighbors!)
- Battery-operated LED lights
- Ribbons
Time-Saving Crochet Tip
While crocheting a wind spinner is simple, the repetition can be lengthy, especially for longer spinners. To streamline the process and conserve yarn, this pattern modifies the third row from typical spiral patterns. Instead of increasing with three stitches in each stitch, we use two stitches plus a chain one. This technique maintains the spiral size while making it lighter, faster, and more yarn-efficient.
Easy Crochet Wind Spinner Pattern: Step-by-Step Guide
Learn how to crochet a wind spinner of any length with this easy-to-follow pattern. This design features a tapered shape at both ends.
A link to a detailed video tutorial is available below the written pattern!
Crochet Abbreviations (US Terms)
- Ch – Chain
- Yo – Yarn over
- St, Sts – stitch, stitches
- Fsc – Foundation single crochet (Slip knot, ch2, insert hook into first chain stitch, yo, pull up loop, yo, pull yarn through first loop on hook, yo, pull yarn though both loops on hook). Video tutorial available.
- Sc – single crochet
- Hdc – half double crochet
- Dc – double crochet
Materials You’ll Need:
- Up to 4 colors of similar weight yarn for a colorful wind spinner.
- Crochet hook suitable for your yarn. Find my favorite crochet hook recommendations!
- Stitch marker (or scrap yarn)
- Thread or fine cord for hanging your decorative wind spinner
Crochet Wind Spinner Instructions:
Start, Row 1:
Fsc to your desired wind spinner length. Cut yarn. Place a stitch marker at the beginning of your foundation chain.
Row 2:
Starting at the stitch marker, join a new yarn color. 2 sc in 1st st, (2 sc in next st), repeat 8 more times. (2 hdc in next st), repeat 9 more times. Repeat (2 dc in next st) until 20 sts remain in foundation chain. (2 hdc in next st), repeat 9 more times. (2 sc in next st), repeat 9 more times. Cut yarn.
Row 3:
Starting at the stitch marker, skip the 1st st. Join a new yarn color. (2 sc in next st, ch1), repeat 6 more times. (2 hdc in next st, ch1), repeat 6 more times. Repeat (2 dc in next st, ch1) until 14 sts remain in foundation chain. (2 hdc in next st, ch1), repeat 6 more times. (2 sc in next st, ch1), repeat 6 more times. Cut yarn.
Row 4: Edging
Starting at the stitch marker, join a new yarn color. Sc in the back loop of every stitch from the previous row, including chain stitches. Fasten off and weave in all yarn ends.
Finishing:
Shape your crochet spiral wind spinner. Attach thread or cord for hanging to the end marked with the stitch marker. Remove stitch marker. Hang and enjoy your beautiful DIY wind spinner!
