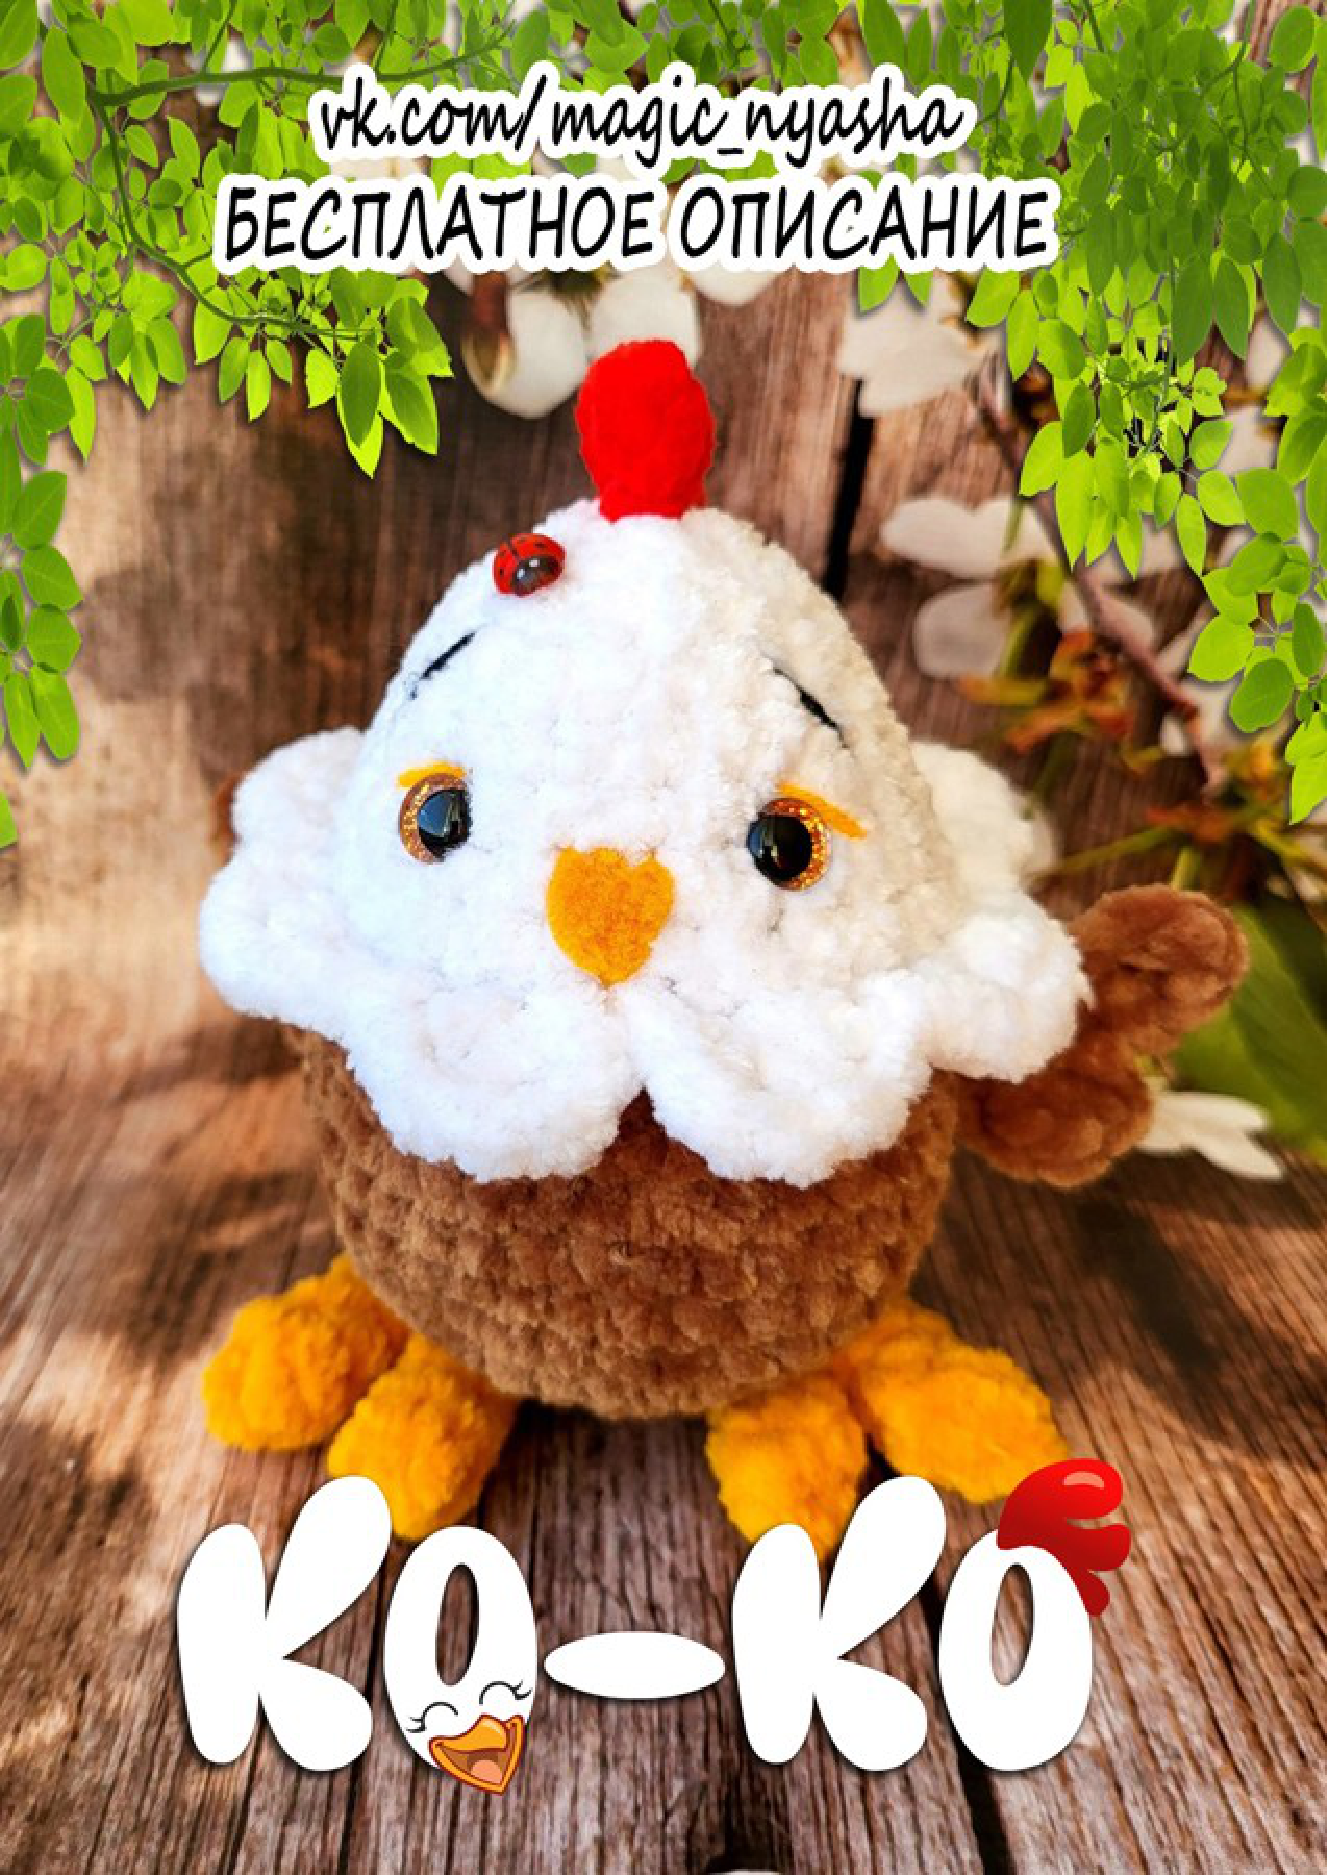
Crochet Your Adorable Gingerbread Bull Pattern Today!
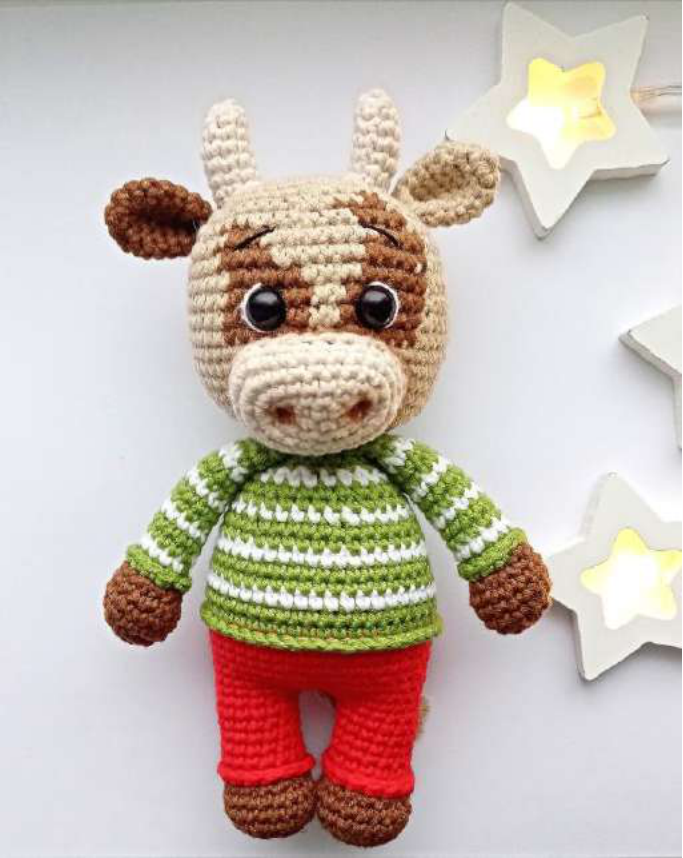
Master the ‘Gingerbread’ Bull: A Delightful Crochet Pattern for All Seasons
Welcome, fellow crafters, to Crochetto! We’re absolutely thrilled to share this charming “Gingerbread” Bull crochet pattern with you. Perfect for gifting, decorating, or simply adding a touch of handmade joy to your home, this adorable amigurumi bull will capture hearts wherever it goes. This detailed guide offers professional SEO crochet patterns content, ensuring you have all the instructions you need to bring this cute character to life. Whether you’re an experienced crocheter looking for a fun new project or eager to expand your skills, you’ll find every step clearly laid out. So grab your hook, choose your favorite yarn colors, and let’s begin this wonderful creative journey!
Materials and Tools
- YarnArt Jeans yarn No. 48 (beige) – for the head, tail.
- YarnArt Jeans yarn No. 05 (milk/off-white) – for the snout, horns.
- YarnArt Jeans yarn No. 90 (red) – for the legs (pants).
- YarnArt Jeans yarn No. 69 (green) – for the body, arms (sweater).
- YarnArt Jeans yarn No. 62 (white) – for the body, arms (sweater), eye whites (split thread).
- YarnArt Jeans yarn No. 70 (brown) – for the arms, legs, spots on the eyes.
- Black “Iris” thread – for eyebrows.
- Crochet hook No. 2mm.
- Safety eyes 0.8 mm.
- Stuffing.
- Needle.
- Scissors.
- Brown pastel or pencil for toning the nostrils.
Abbreviations
- CH – chain stitch
- SC – single crochet
- INC – increase
- DEC – decrease
- SL ST – slip stitch
Arms (Make 2)
Start crocheting with brown yarn.


Row 1. 6 sc into an amigurumi ring (6)
Row 2. 6 increases (12)
Row 3. (2sc, inc) 4 times (16)
Row 4-5. Crochet 16 sc (16)
Row 6. (1 sc, dec) 4 times, 4 sc (12)
Work 5 offset stitches to hide the color change. Work the offset stitches as sc.
Change to green yarn. Change yarn color, alternating: 2 rows (green) 1 row (white)
Row 7. Crochet 12 sc in the back loops only.
Row 8-19. Crochet 12 sc through both loops, alternating colors. (12)
Stuff the arm: firmly at the bottom, lightly in the rest, the top can be left unstuffed. Crochet both edges together.
Join green yarn to the front loops of row 7 and crochet 12 sc. Fasten off, cut the yarn and hide the ends.
Crochet the second arm in the same way.
Legs (Make 2)
Start crocheting with brown yarn.
Row 1. 8 sc into an amigurumi ring (8)
Row 2. 8 increases (16)
Row 3. (3sc, inc) 4 times (20)
Row 4-5. Crochet 20 sc (20)
Row 6. 2 sc, (1 sc, dec) 5 times, 3 sc (15)
Change to red yarn.
Row 7. Crochet 15 sc in the back loops only.
Row 8-12. Crochet 15 sc (15)
Stuff the leg firmly with stuffing. Fasten off and cut the yarn.
Crochet the second leg in the same way, but do not cut the yarn, instead, start joining the two legs together and move on to the body!
Body
Continue crocheting with red yarn.


Make 3 ch and join to the first leg with 1 sc.
Row 13. 15 sc, 3 sc (along the ch chain) 2 times. (36) Place a marker.
Row 14. 14 sc, 5 inc, 14 sc, 3 inc (44)
Row 15-20. Crochet 44 sc (6 rows) without changes. (44)
Change to green yarn.
Row 21. Crochet 44 sc in the back loops only. (44)
Row 22. Crochet 44 sc through both loops with green color (44)
Row 23. Crochet 44 sc with white color (44)
Continue crocheting according to the pattern, alternating yarn color: 2 rows (green) 1 row (white).
Row 25. 10 sc, dec, 20 sc, dec, 10 sc (42)
Row 26. Crochet 42 sc (42)
Row 27. (5 sc, dec) 6 times (36)
Row 28. Crochet 36 sc (36)
Row 29. (4 sc, dec) 6 times (30)
Row 30. Crochet 30 sc (30)
Row 31. (3 sc, dec) 6 times (24)
Row 32. Crochet 24 sc (24)
Row 33. (2 sc, dec) 6 times (18)
Row 34. Crochet 18 sc (18)
In the next row, you need to attach the arms to the body.
Row 35. 4sc (back), 5sc together with the arm, 4sc (front), 5 sc with the arm. (18)
Change to beige yarn.
Row 36. Crochet 18 sc (18)
In the next row, we move on to the head!
Head
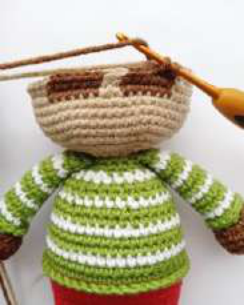
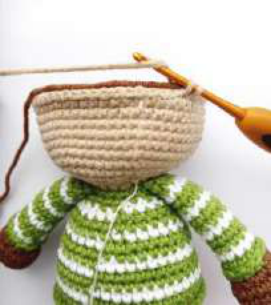
Row 37. Crochet 18 increases (36)
Row 38. (5 sc, inc) 6 times (42)
Row 39. (6 sc, inc) 6 times (48)
Row 40. (7 sc, inc) 6 times (54)
Row 41-50. Crochet 54 sc (10 rows) (54)
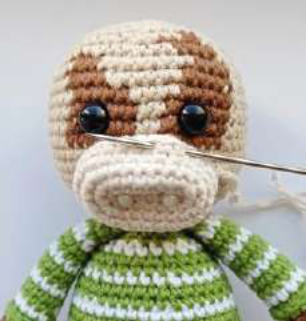
Insert eyes between rows 46 and 47. Between the eyes, 5 stitches apart.
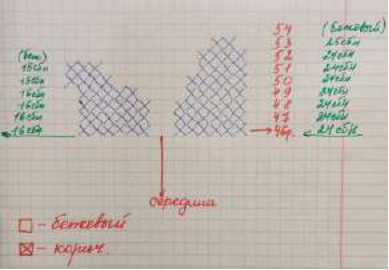
To crochet the spots on the eyes, start introducing brown yarn from row 45. Row 46. (as I got it) 24sc (beige), 6sc (brown), 2sc (beige), 6sc (brown), 16sc (beige), crochet according to the pattern. Weave in the brown and beige threads alternately into the stitches to avoid creating floats.
Row 51. (7 sc, dec) 6 times (48)
Row 52. (6 sc, dec) 6 times (42)
Row 53. (5 sc, dec) 6 times (36)
Row 54. (4 sc, dec) 6 times (30)
Row 55. (3 sc, dec) 6 times (24)
Row 56. (2 sc, dec) 6 times (18)
Row 57. (1 sc, dec) 6 times (12)
Row 58. Crochet 6 decreases, cut the yarn, tighten the remaining loops using a needle through the front loops. Hide the yarn.
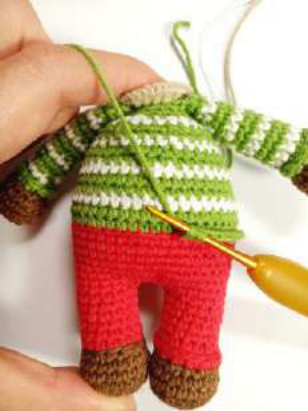
Take green yarn and start crocheting the bottom of the sweater. Join to row 21 of the body at the front loops and crochet 44 sc. Fasten off the yarn and hide the ends. Take red yarn, join to row 7 on the legs and crochet the pants (15 sc) into the front loops on both legs.
Snout
Start crocheting with milk/off-white yarn.
Row 1. Chain 6, starting from the second chain from the hook, crochet:
Row 2. 4sc, 3sc in the fifth stitch, 3sc, inc (12)
Row 3. Inc, 3sc, 3inc, 4sc, inc (17)
Row 4. Inc, 6sc, 3inc, 6sc, inc (22)
Row 5. Inc, 8sc, 3inc, 9sc, inc (27)
Row 6-7. Crochet 27 sc, (2 sl st at the end of row 7)
Fasten off, cut the yarn, leaving a long tail for sewing.
Assembly
Sew the snout to the head, stuffing it with filler.
- Make nostril indentations, using the same color yarn as the snout.
- Gently indent the eyes (insert the needle into row 46 next to the eye, go down one stitch and insert the needle, pull out at row 46 of the opposite eye, pulling the thread. Re-insert one stitch down and pull out at row 46 of the opposite eye. Repeat several times, gently indenting the eyes.
- Embroider whites around the eyes with white yarn, split in half.
- Embroider eyebrows with black “Iris” thread.
Ears (Make 2)
Start crocheting with beige yarn.
Row 1. 6sc into an amigurumi ring (6)
Row 2. (1sc, inc) 3 times (9)
Row 3. (2sc, inc) 3 times (12)
Row 4-7. 12 sc (4 rows) (12)
Crochet together, cut the yarn (leave a long tail for sewing), fold in half and sew.
Crochet the second ear in the same way, with brown yarn. (optional)
Sew the ears to the head approximately between rows 7 and 8.
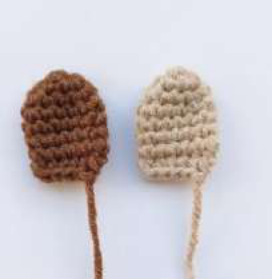
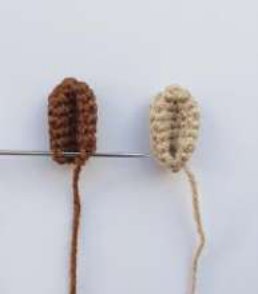
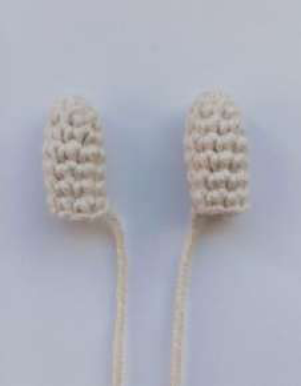
Horns (Make 2)
Start crocheting with milk/off-white yarn.
Row 1. 6sc into an amigurumi ring (6)
Row 2. Crochet 6 sc (6)
Row 3. (1sc, inc) 3 times (9)
Row 4-7. 9 sc (4 rows), (sl st at the end of row 7) (9)
Fasten off, cut the yarn, leaving a long tail for sewing. Lightly stuff the horns.
Sew the horns to the head between the ears, approximately at row 5.
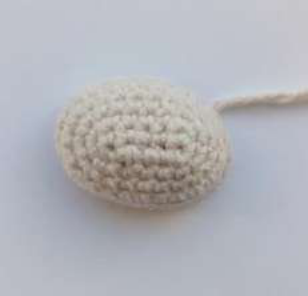
Tail
Start crocheting with beige yarn.

Chain 13, starting from the 2nd chain from the hook, crochet 12 sc and in the last stitch another sl st. Make a tassel on the tail and sew the tail to the bull’s body.
Your “Gingerbread” Bull is now ready to spread cheer! This makes a perfect gift for any occasion, especially for the New Year, or as a delightful addition to your own amigurumi collection. We wish you creative success and many even stitches!
We absolutely love seeing your handmade creations. When you share your finished “Gingerbread” Bull on social media, don’t forget to mention the original author of this wonderful master class, @jenny_fun_toys, and tag @Crochetto so we can admire your work! Happy crocheting!