Crochet Your First Amigurumi Puppy
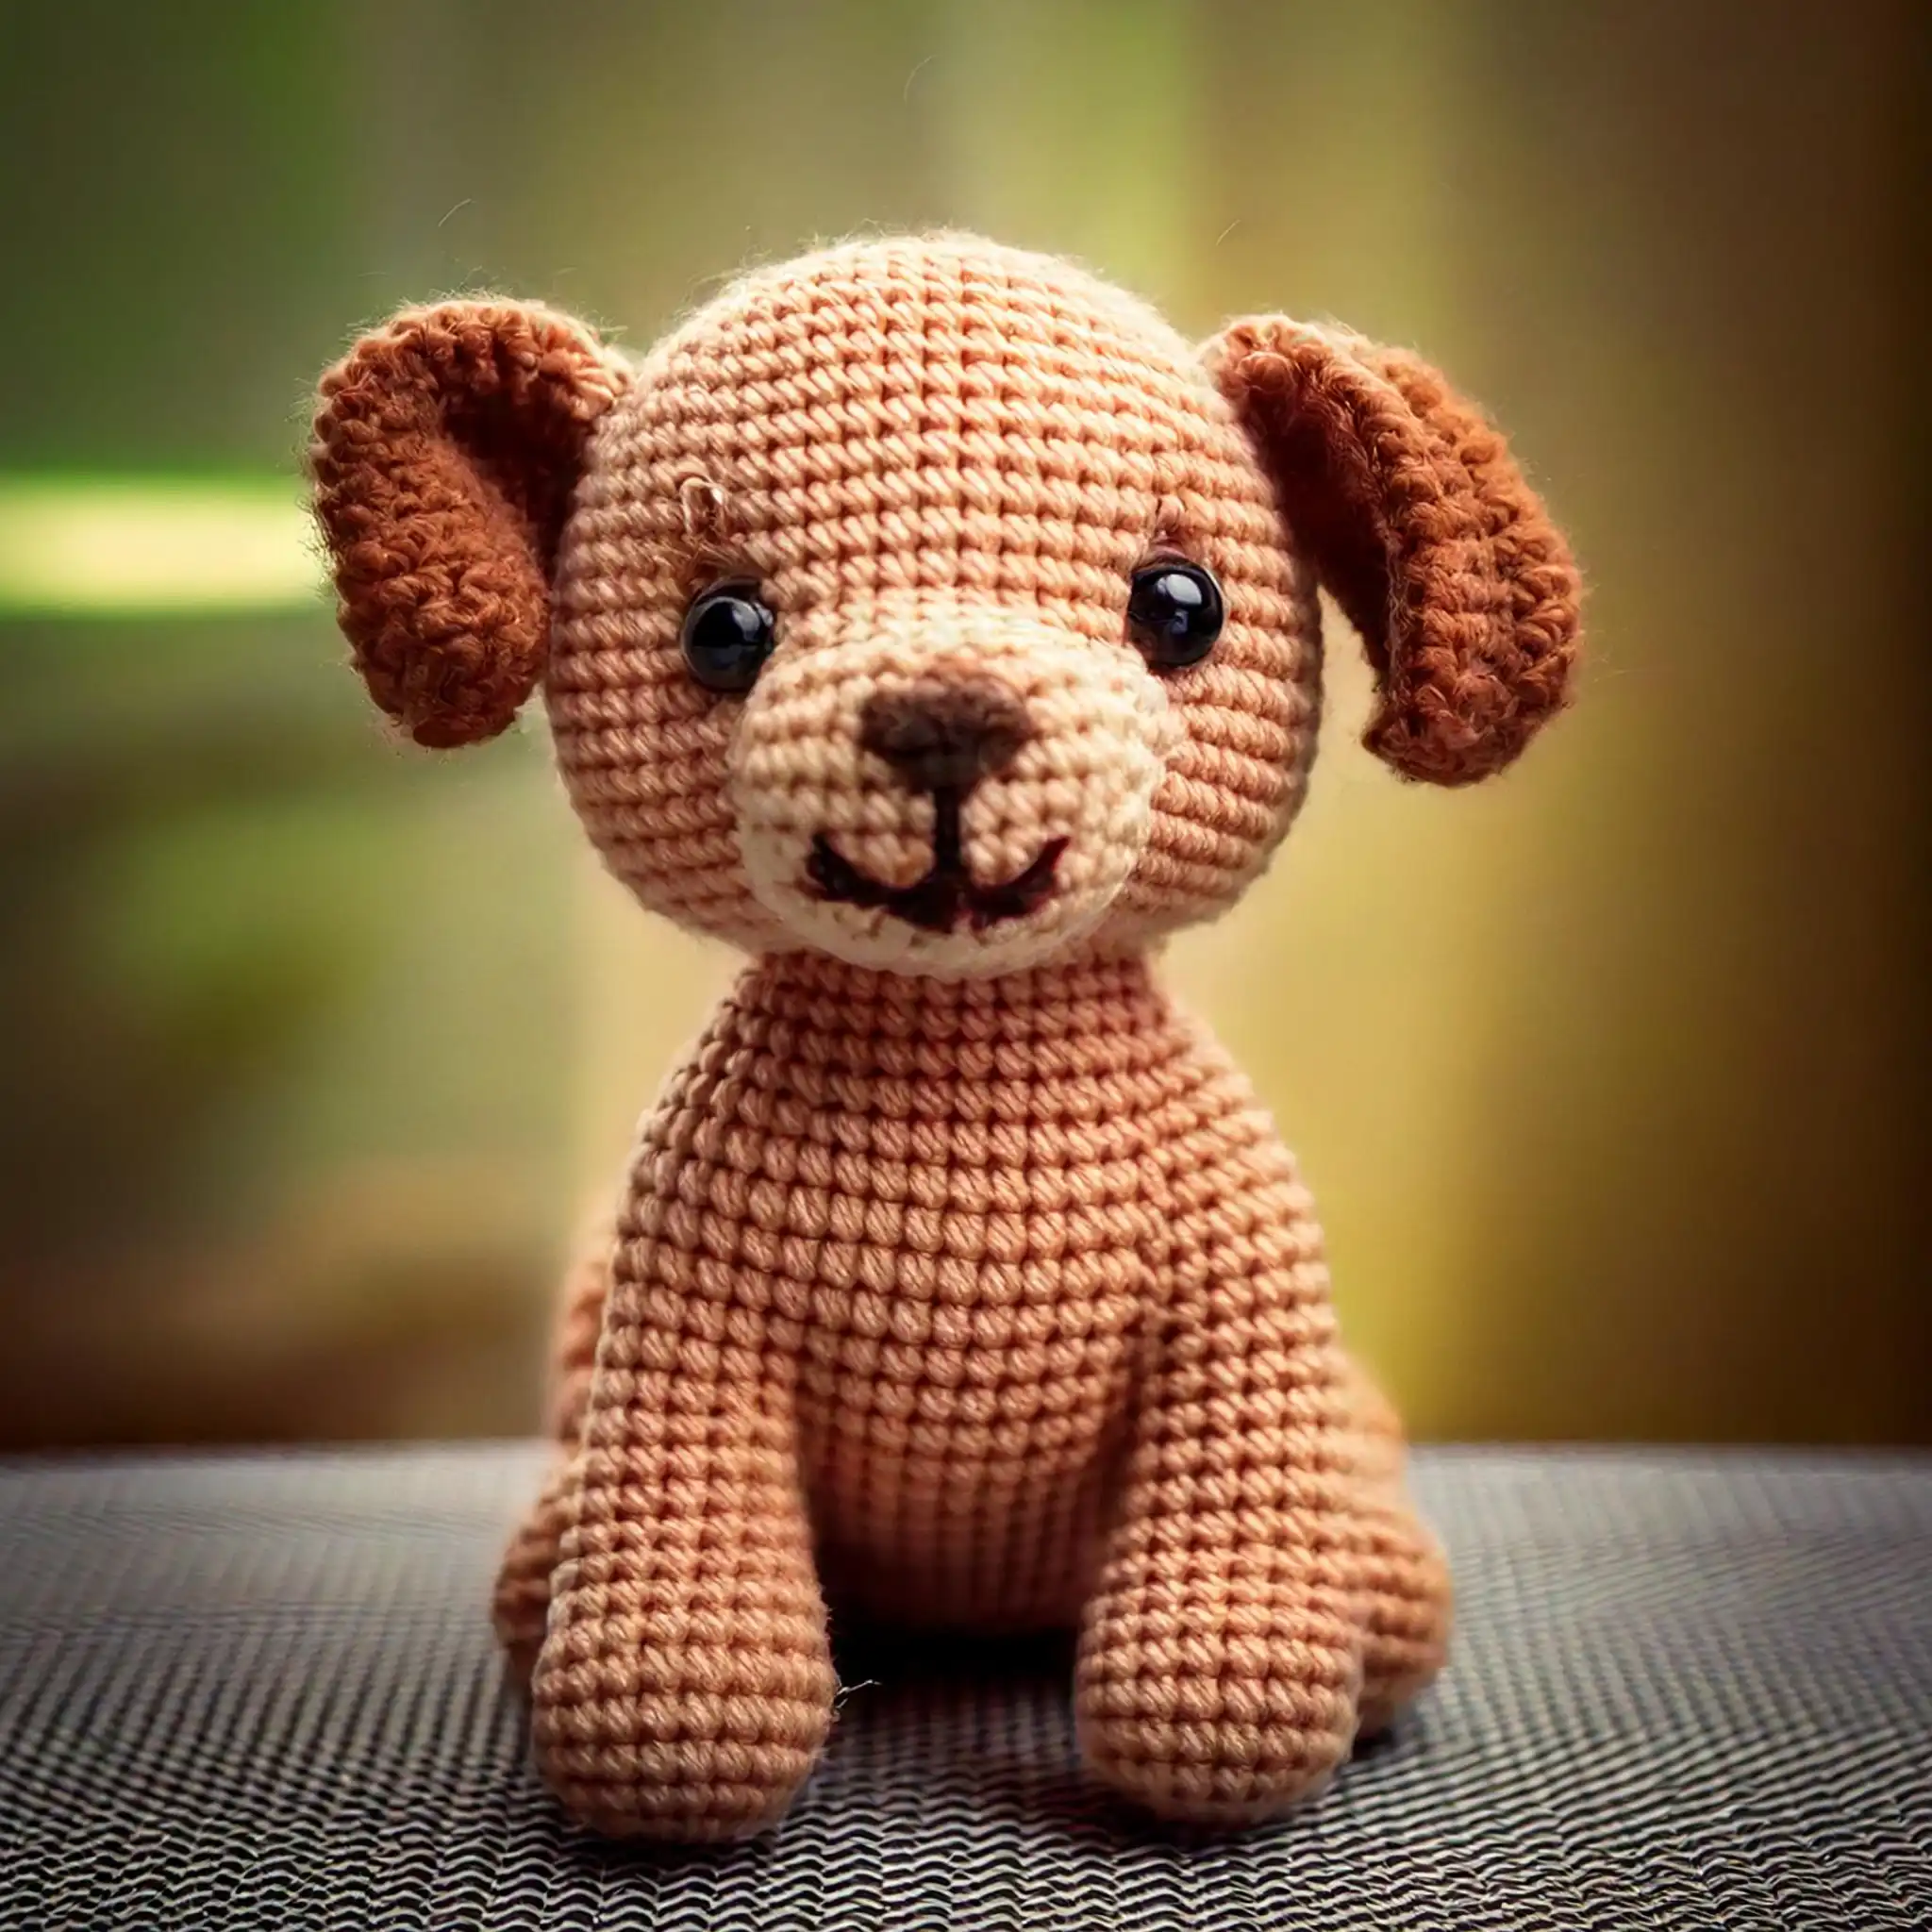
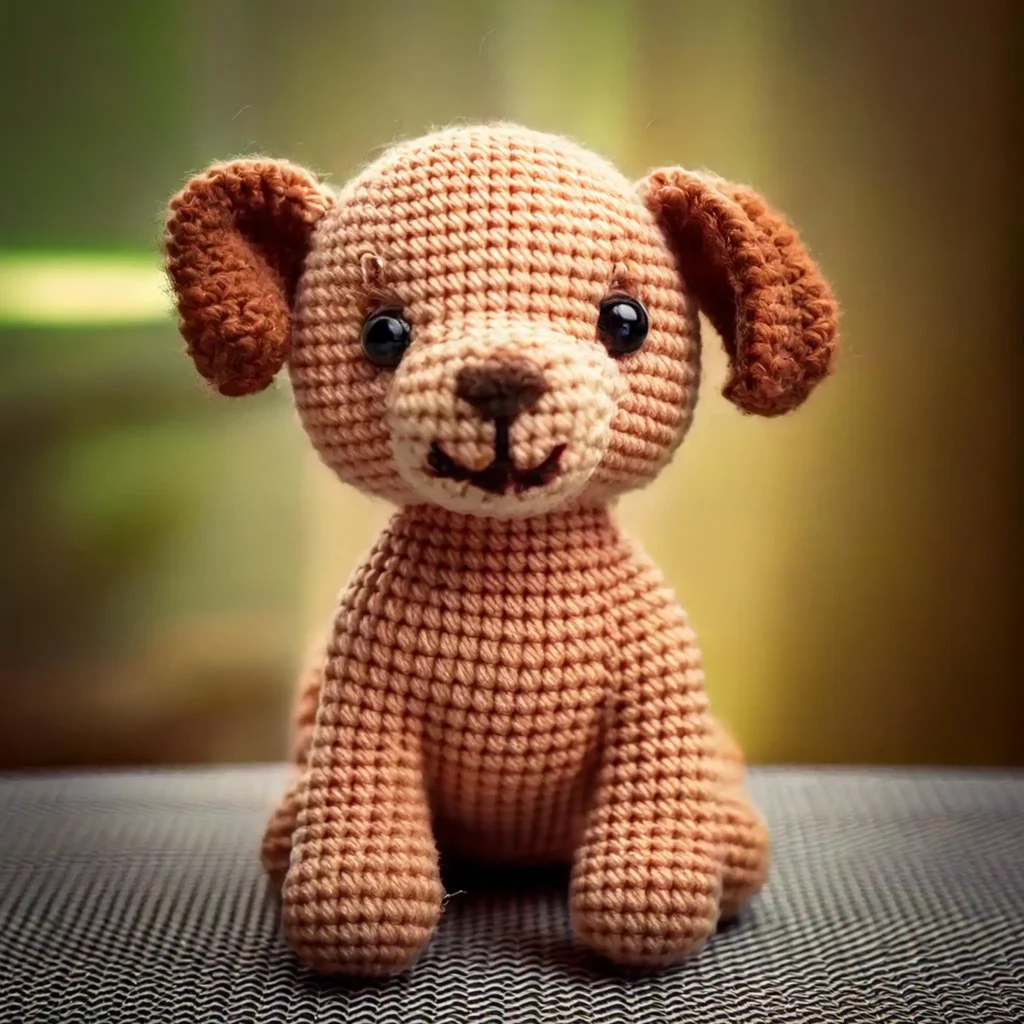
Are you ready to enter the delightful world of amigurumi? This step-by-step guide will help you create your very own adorable crocheted puppy, perfect for beginners who want to try their hand at making stuffed animals.
Amigurumi Puppy Pattern
Are you ready to enter the delightful world of amigurumi? This step-by-step guide will help you create your very own adorable crocheted puppy, perfect for beginners who want to try their hand at making stuffed animals.
Essential Materials
- Light brown worsted weight yarn (size 4) — for the body, head, arms, legs, and tail
- Darker brown yarn — for the ears
- 3.5mm crochet hook
- Safety eyes (12mm black)
- Fiberfill stuffing
- Yarn needle
- Stitch markers
- Scissors
- Black embroidery thread — for the nose and mouth
Basic Techniques You’ll Need
- Magic ring/magic circle
- Single crochet (sc)
- Increase (inc)
- Decrease (dec)
- Fastening off
- Sewing pieces together
Step-by-Step Instructions
Head and Body (worked as one piece)
Start with light brown yarn:
- Round 1: 6 sc into magic ring (6)
- Round 2: Inc in each st around (12)
- Round 3: Sc 1, inc — repeat around (18)
- Round 4: Sc 2, inc — repeat around (24)
- Rounds 5-8: Sc in each st around (24)
- Round 9: Sc 2, dec — repeat around (18)
- Round 10: Sc 1, dec — repeat around (12)
- Start stuffing the head firmly.
- Round 11: Sc in each st around (12)
- Round 12: Inc in each st around (24)
- Rounds 13-18: Sc in each st around (24)
- Round 19: Sc 2, dec — repeat around (18)
- Round 20: Sc 1, dec — repeat around (12)
- Stuff the body firmly.
- Round 21: Dec around (6)
- Fasten off and weave in end.
Ears (make 2)
With darker brown yarn:
- Round 1: 6 sc in magic ring (6)
- Round 2: Inc in each st around (12)
- Rounds 3-4: Sc in each st around (12)
- Fasten off with a long tail for sewing.
Arms (make 2)
With light brown yarn:
- Round 1: 6 sc in magic ring (6)
- Round 2: Sc 1, inc — repeat around (9)
- Rounds 3-4: Sc in each st around (9)
- Round 5: Sc 1, dec — repeat around (6)
- Rounds 6-8: Sc in each st around (6)
- Stuff lightly as you go.
- Fasten off with a long tail for sewing.
Legs (make 2)
With light brown yarn:
- Round 1: 6 sc in magic ring (6)
- Round 2: Sc 1, inc — repeat around (9)
- Rounds 3-5: Sc in each st around (9)
- Round 6: Sc 1, dec — repeat around (6)
- Rounds 7-10: Sc in each st around (6)
- Stuff lightly as you go.
- Fasten off with a long tail for sewing.
Tail
With light brown yarn:
- Round 1: 4 sc in magic ring (4)
- Rounds 2-5: Sc in each st around (4)
- Fasten off with a long tail for sewing.
Assembly Tips
- Attach safety eyes between rounds 6-7 of the head.
- Embroider the nose between rounds 8-9 using black embroidery thread.
- Create a simple smile with a straight stitch below the nose.
- Sew ears to the top sides of the head at slight angles.
- Attach arms to the sides of the body, aligning them just below the neck area.
- Attach legs to the bottom of the body so that the puppy can sit.
- Sew the tail to the back of the body, centered between the legs.
- Check stuffing and add more if needed before closing up any final seams.
Pro Tips for Beginners
- Use stitch markers to track the beginning of rounds.
- Stuff firmly but not so tight that stitches stretch.
- Maintain consistent tension to keep stitches even.
- Count stitches at the end of each round to ensure accuracy.
- Attach parts securely to prevent them from coming loose over time.
Troubleshooting Common Issues
- Visible holes? Use a smaller hook size to tighten stitches.
- Uneven stitches? Practice maintaining even tension throughout.
- Stuffing showing? Consider crocheting tighter or using finer yarn.
- Floppy ears or limbs? Insert pipe cleaners or soft wire for support (ensure ends are safely tucked in).
Care Instructions
- Spot clean only with a damp cloth.
- Air dry completely after cleaning.
- Avoid direct sunlight to prevent color fading.
- Reshape while damp if necessary.
Final Notes
Remember, your first amigurumi doesn’t need to be perfect! Each handmade item has its own character and charm. With practice, your stitches will become more even and your confidence will grow.
- Time needed: Approximately 3-4 hours for beginners
- Skill level: Beginner-friendly
- Finished size: Approximately 6 inches tall
This pattern is intended for personal use only.
Enjoy crafting your cute amigurumi puppy! If you have any more questions or need further assistance, feel free to ask.

