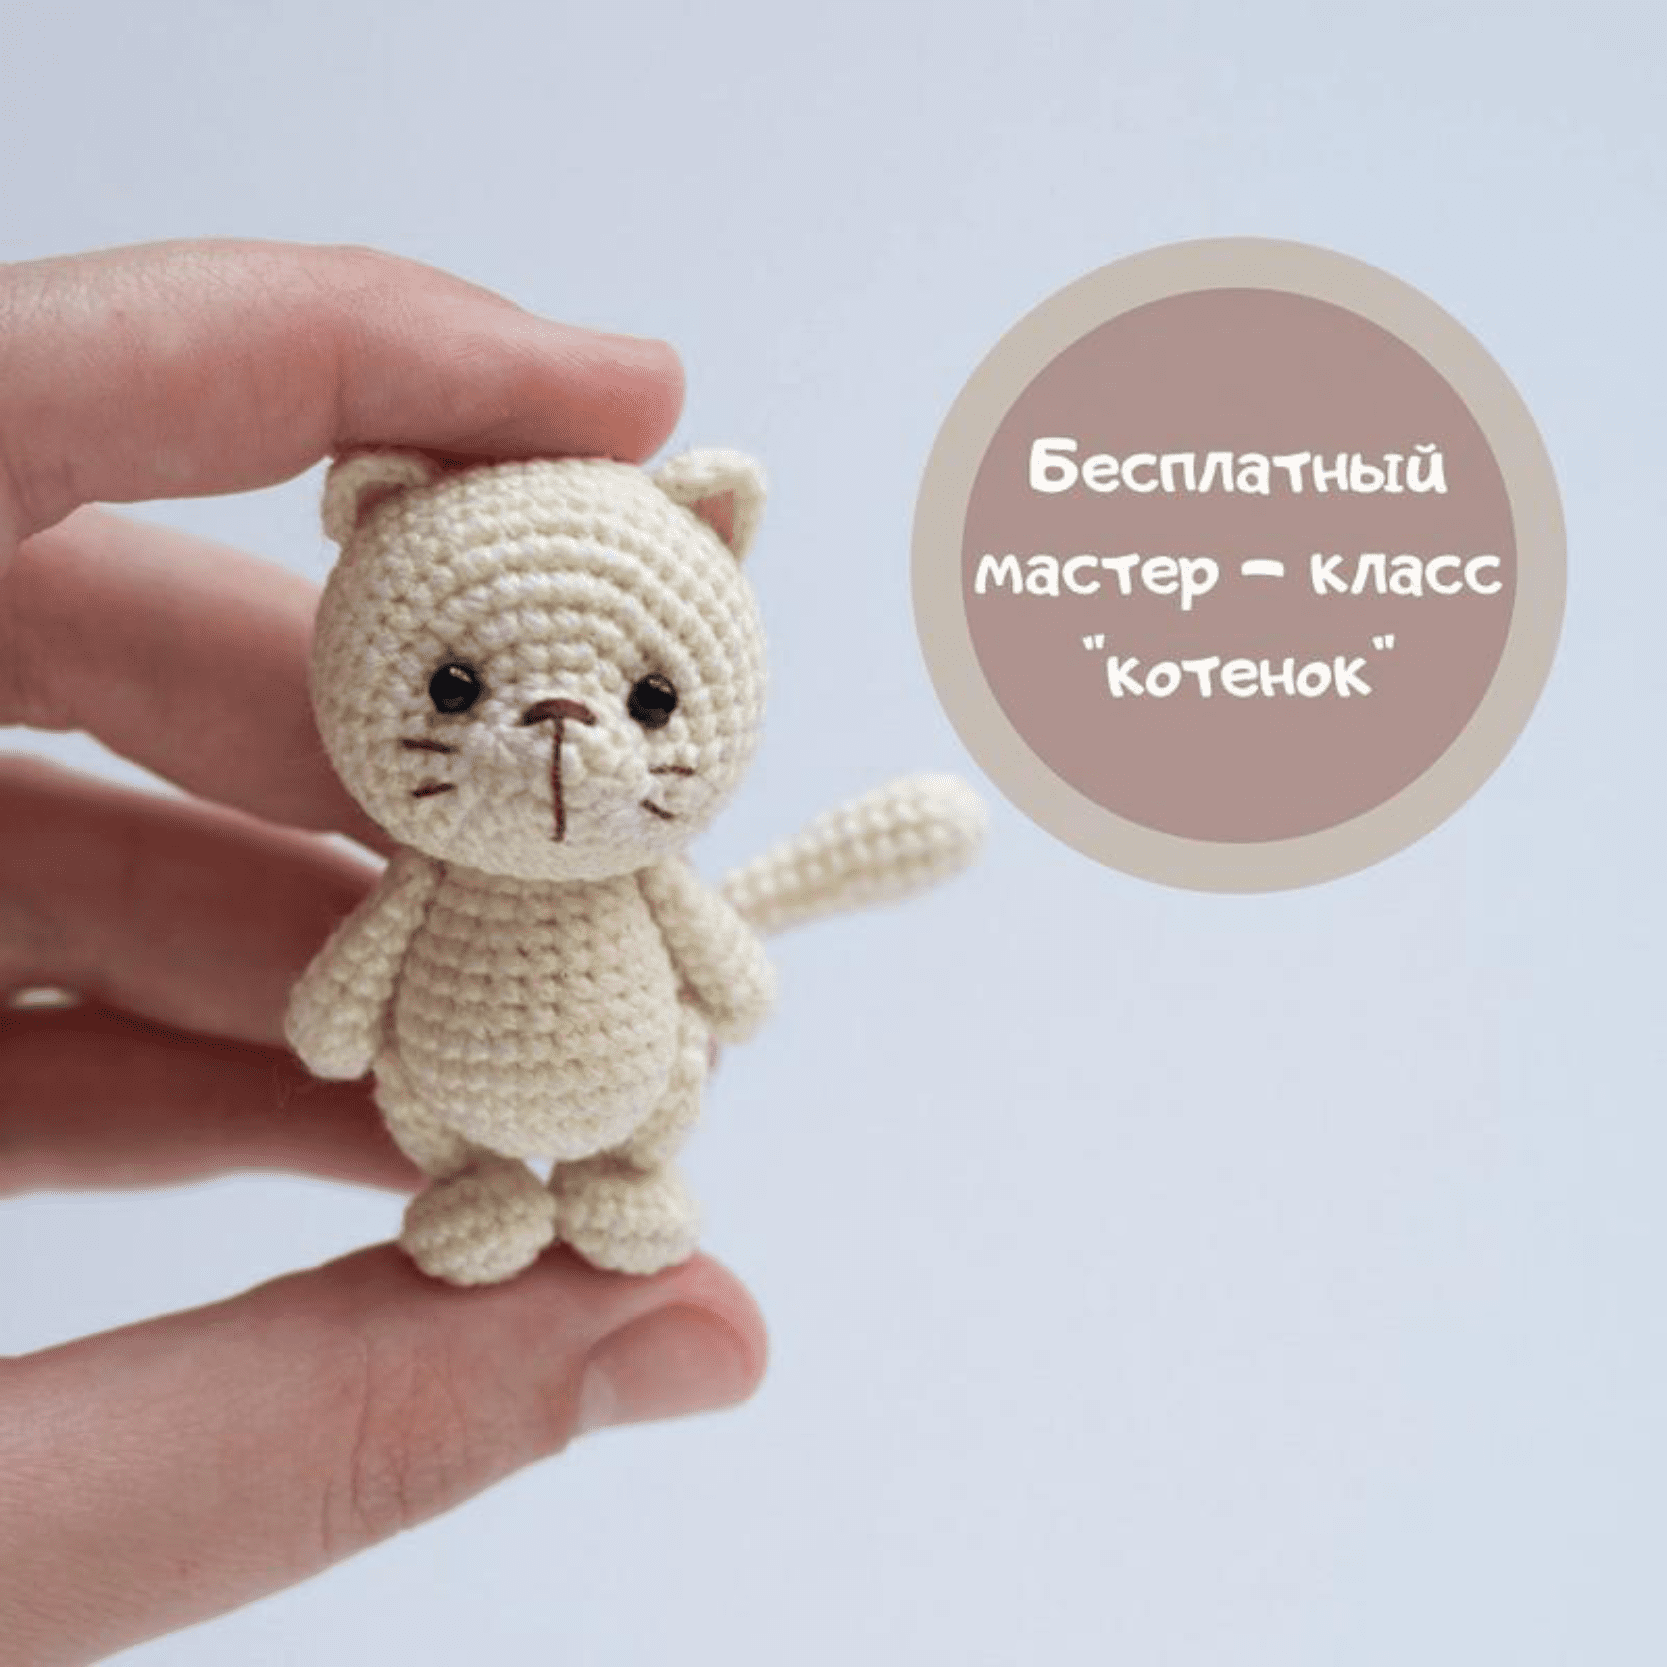
Crochet Your Own Adorable Kitten!
Materials
To create this adorable kitten, you will need the following materials:
- Yarn of your choice (cotton or plush yarn works best)
- Crochet hook suitable for your yarn size
- Safety eyes (approximately 5-7mm)
- Fiberfill stuffing
- Embroidery thread for the nose and whiskers
- Strong thread for jointing the limbs
- Yarn needle and scissors
Abbreviations (US Terms)
- MR – Magic Ring
- sc – Single Crochet
- sl st – Slip Stitch
- ch – Chain
- inc – Increase (2 sc in one stitch)
- dec – Decrease (crochet 2 sc together)
- Rnd – Round
- (…) * n – Repeat instructions in brackets “n” times
- […] – Total number of stitches in the round

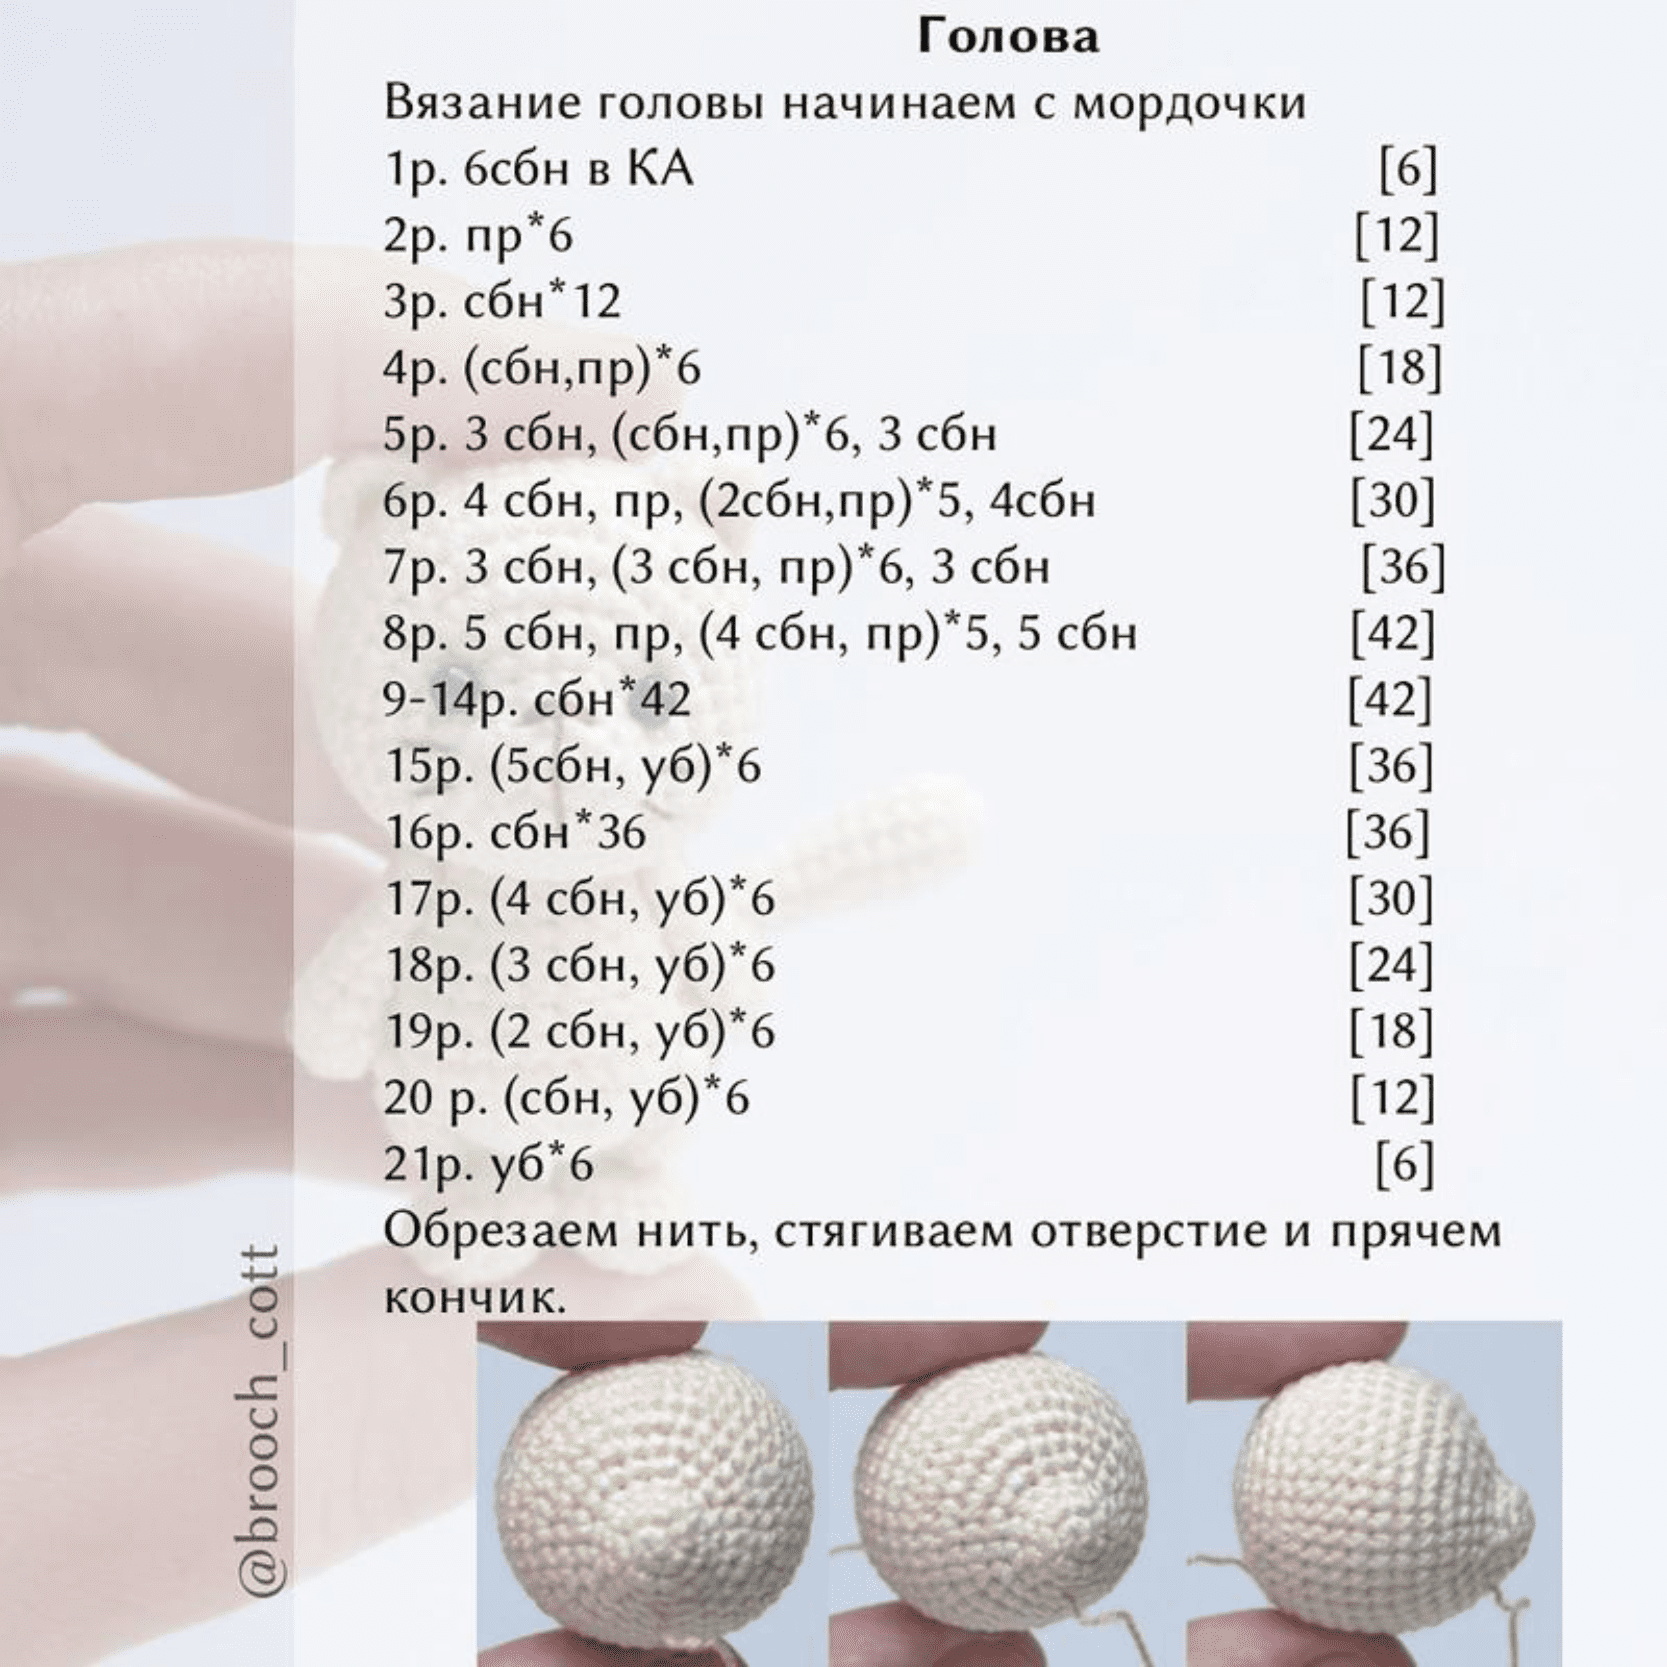
Head
We begin crocheting the head from the muzzle and work our way back.

- Rnd 1: 6 sc in MR [6]
- Rnd 2: inc * 6 [12]
- Rnd 3: 12 sc [12]
- Rnd 4: (sc, inc) * 6 [18]
- Rnd 5: 3 sc, (sc, inc) * 6, 3 sc [24]
- Rnd 6: 4 sc, inc, (2 sc, inc) * 5, 4 sc [30]
- Rnd 7: 3 sc, (3 sc, inc) * 6, 3 sc [36]
- Rnd 8: 5 sc, inc, (4 sc, inc) * 5, 5 sc [42]
- Rnd 9-14: 42 sc [42]
- Rnd 15: (5 sc, dec) * 6 [36]
- Rnd 16: 36 sc [36]
- Rnd 17: (4 sc, dec) * 6 [30]
- Rnd 18: (3 sc, dec) * 6 [24]
- Rnd 19: (2 sc, dec) * 6 [18]
- Rnd 20: (sc, dec) * 6 [12]
- Rnd 21: dec * 6 [6]
Cut the thread, tighten the hole with a needle, and hide the tail inside the head.
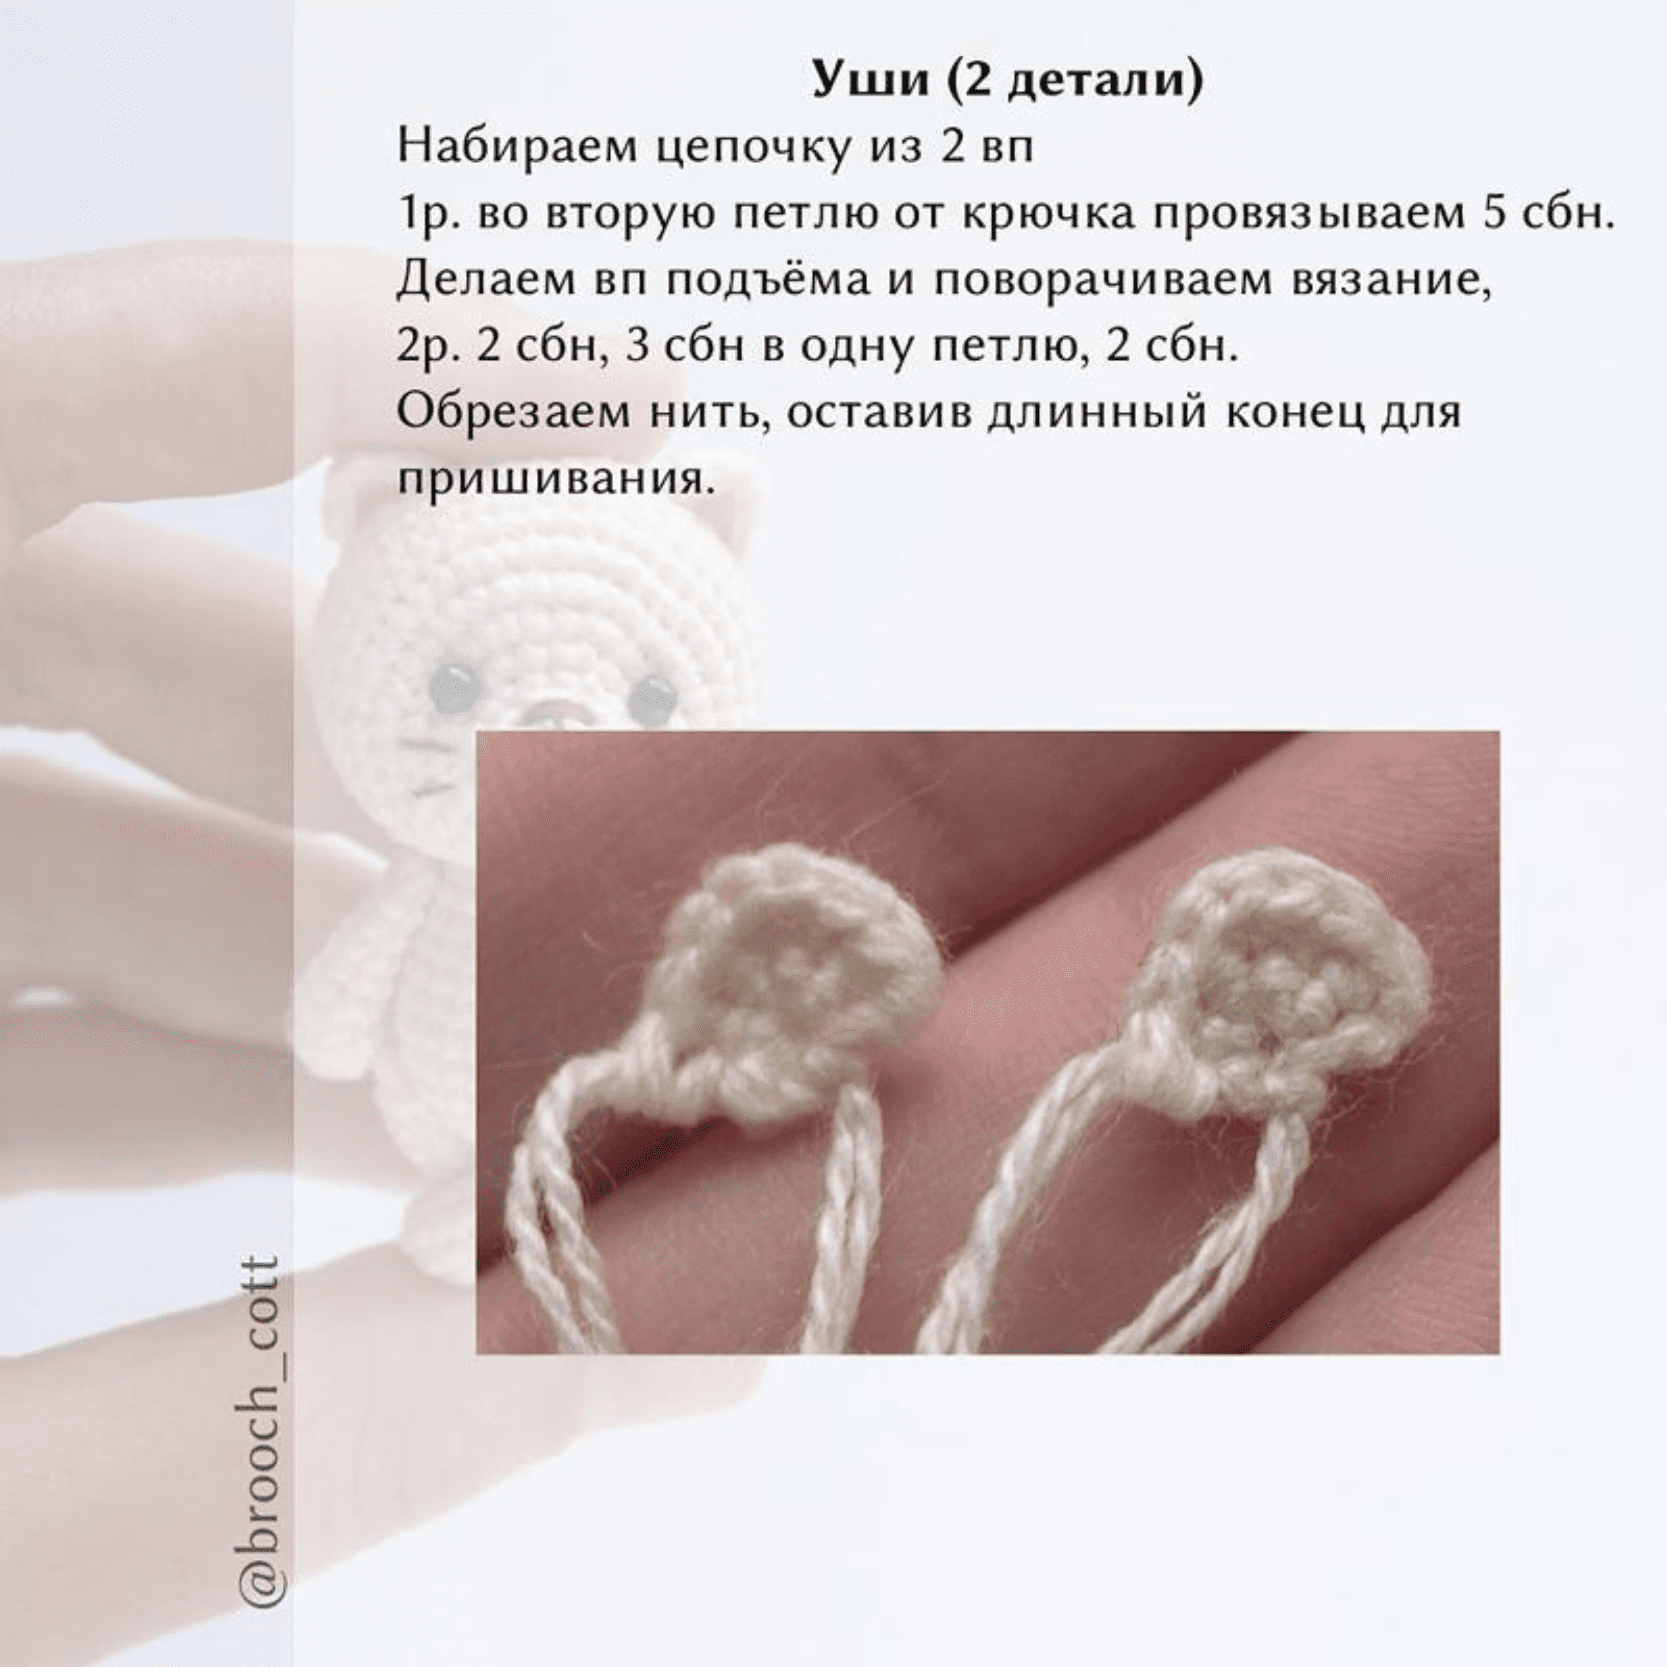
Ears (Make 2)
Chain 2 to start.
- Rnd 1: In the second loop from the hook, crochet 5 sc. Ch 1, turn.
- Rnd 2: 2 sc, 3 sc in one stitch, 2 sc.
Cut the thread, leaving a long tail for sewing.
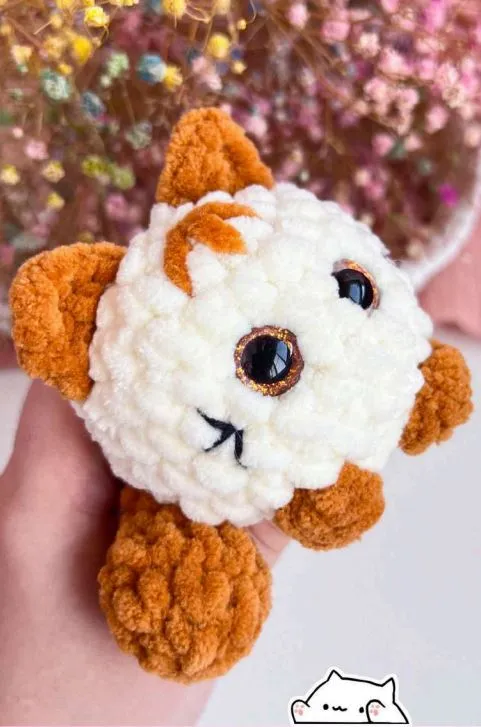
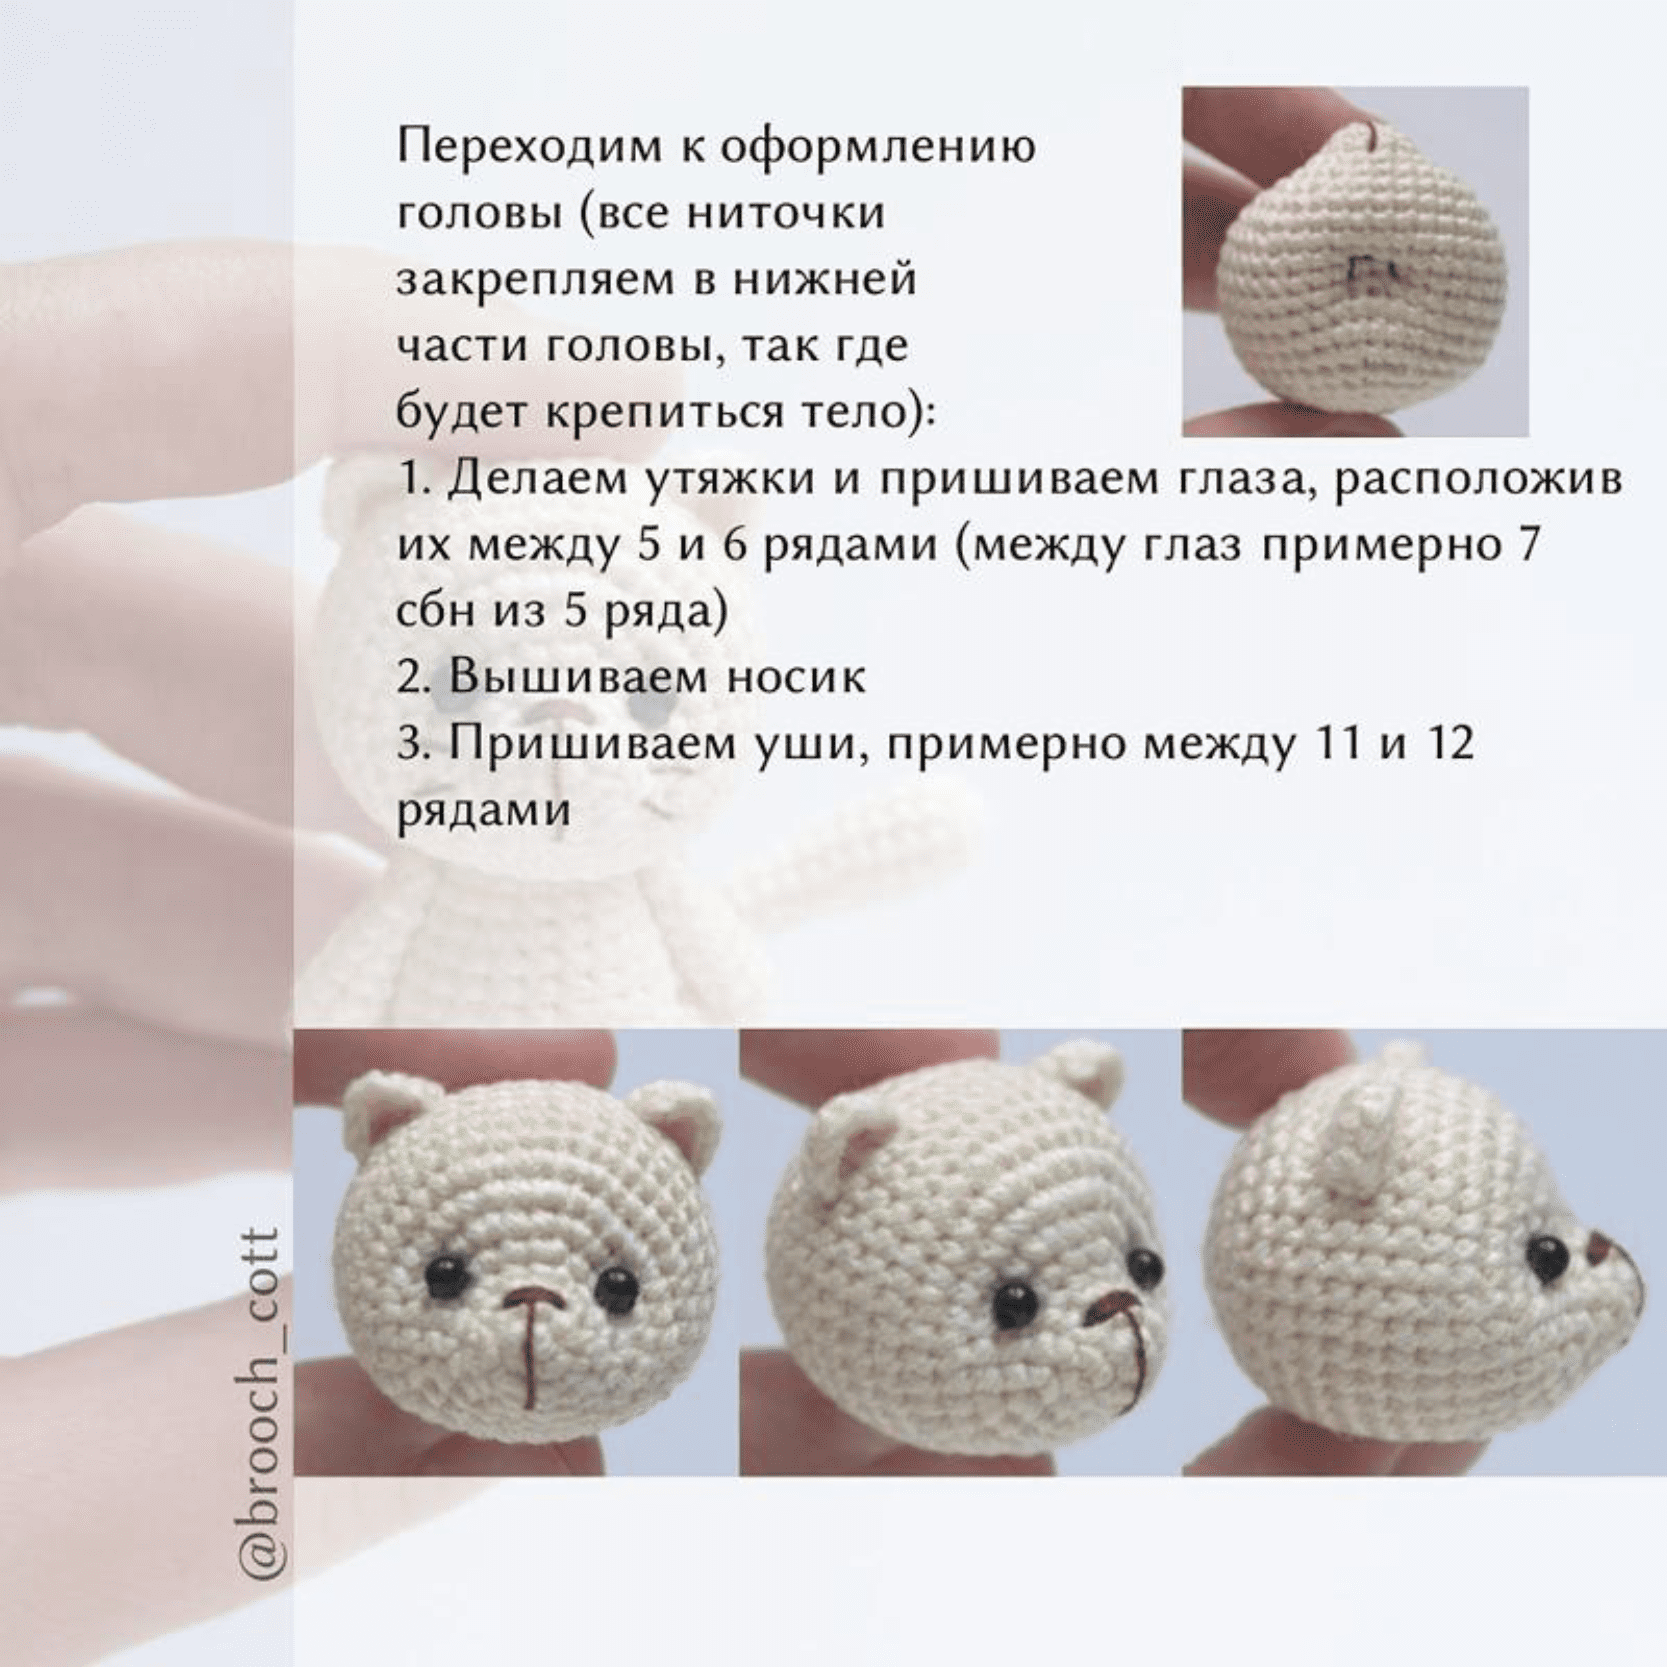
Face Detailing
Note: Secure all thread ends at the bottom of the head where the body will eventually be attached to keep them hidden.
- Tightening: Sculpt the face by tightening the eye area. Sew or insert safety eyes between Rounds 5 and 6 (approx. 7 stitches apart in Round 5).
- Nose: Embroider a small triangle nose between the eyes.
- Ears: Sew the ears to the head, positioned approximately between Rounds 11 and 12.
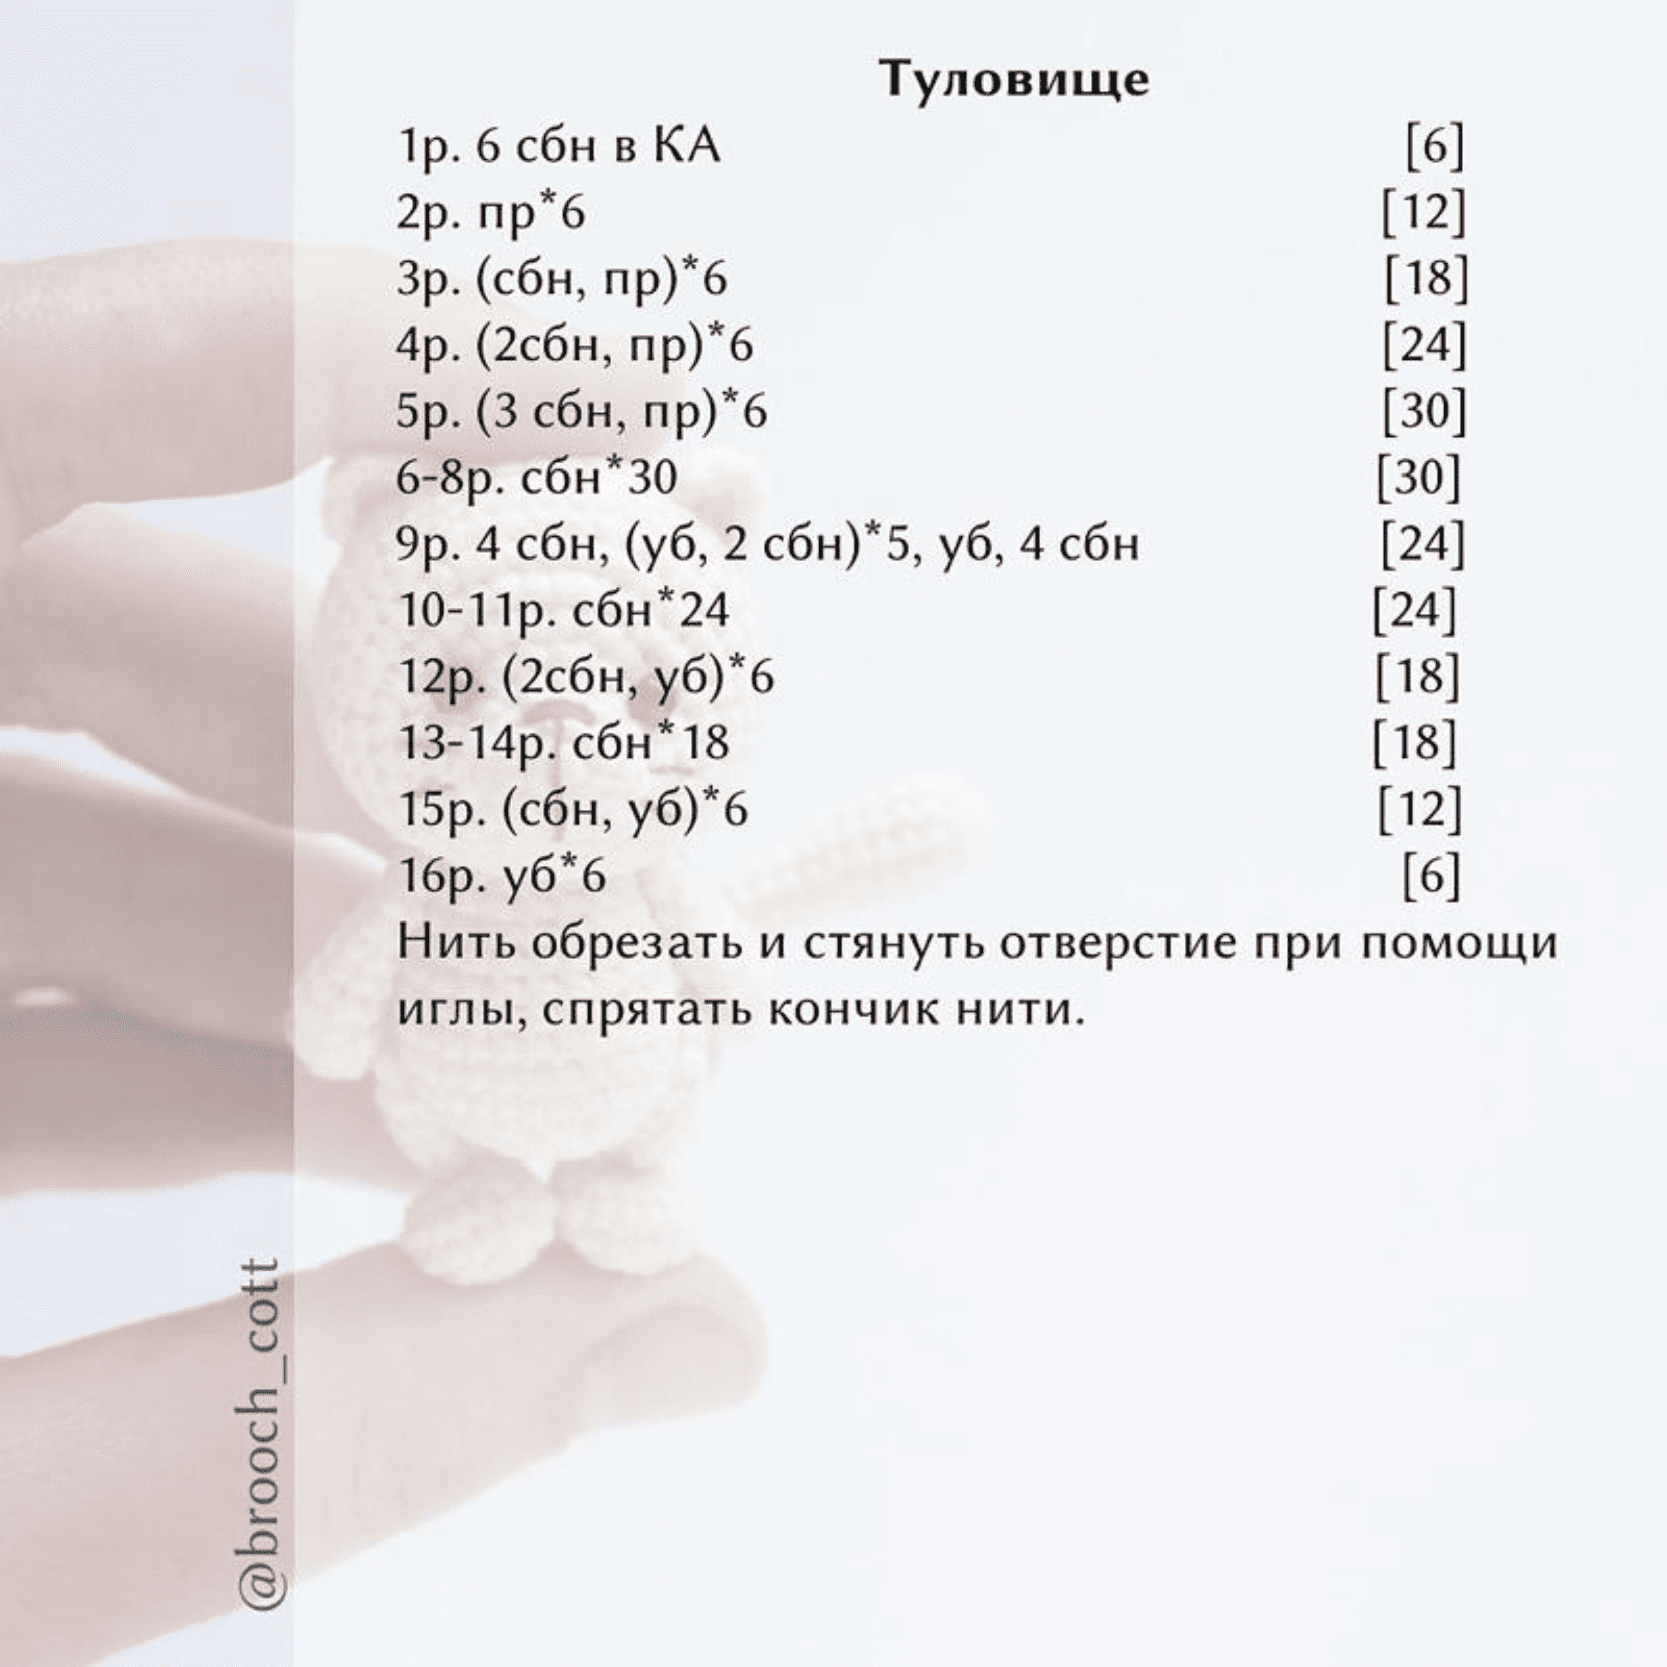
Body
- Rnd 1: 6 sc in MR [6]
- Rnd 2: inc * 6 [12]
- Rnd 3: (sc, inc) * 6 [18]
- Rnd 4: (2 sc, inc) * 6 [24]
- Rnd 5: (3 sc, inc) * 6 [30]
- Rnd 6-8: 30 sc [30]
- Rnd 9: 4 sc, (dec, 2 sc) * 5, dec, 4 sc [24]
- Rnd 10-11: 24 sc [24]
- Rnd 12: (2 sc, dec) * 6 [18]
- Rnd 13-14: 18 sc [18]
- Rnd 15: (sc, dec) * 6 [12]
- Rnd 16: dec * 6 [6]
Cut the thread and tighten the hole using a needle; hide the thread end.
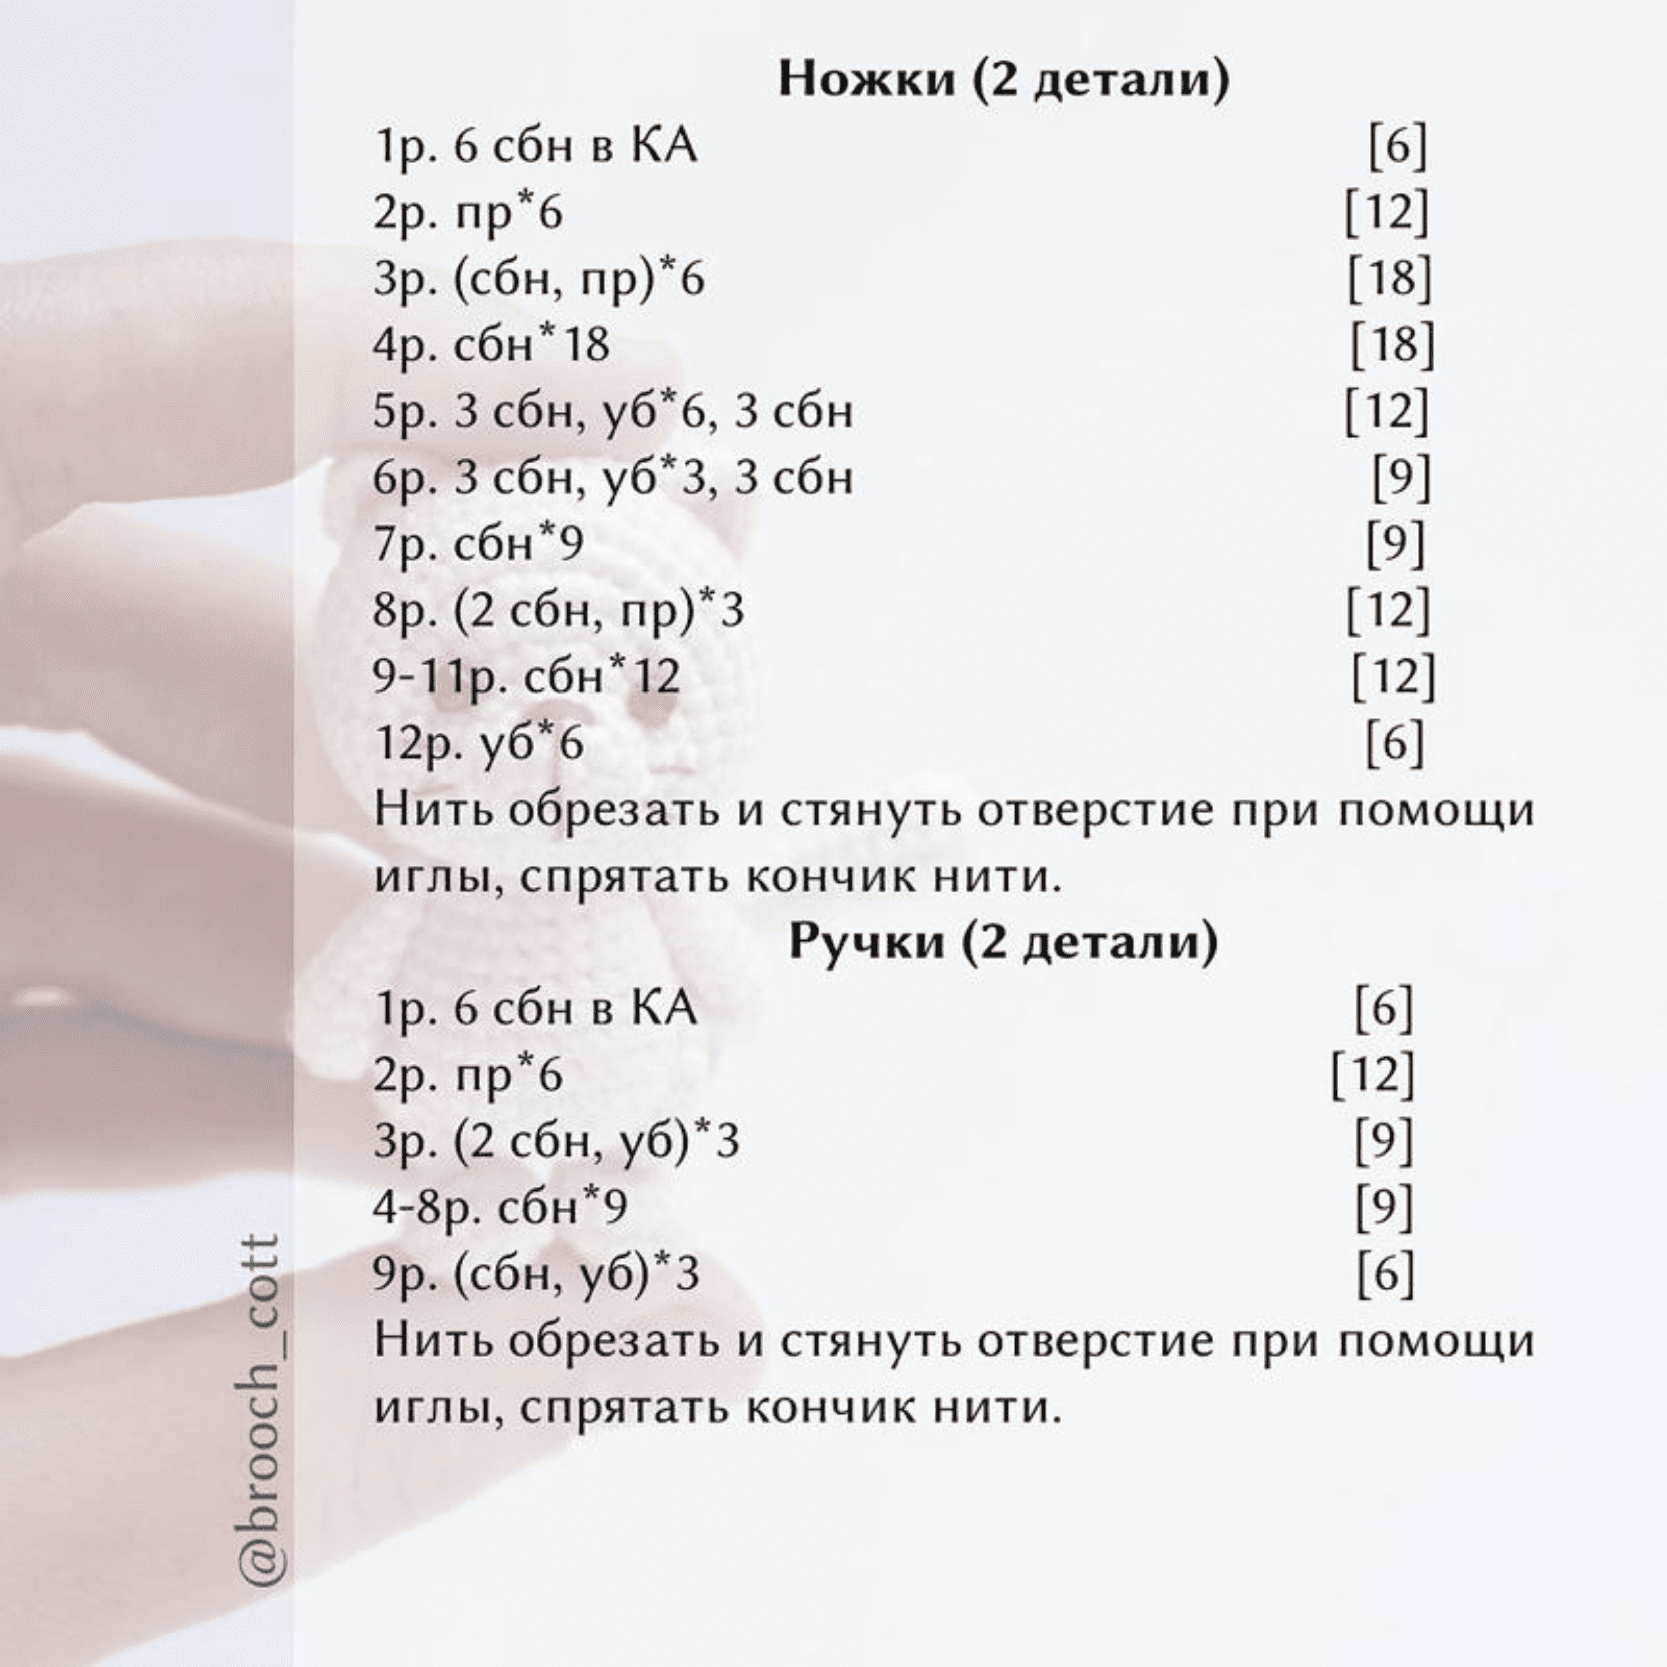
Legs (Make 2)
- Rnd 1: 6 sc in MR [6]
- Rnd 2: inc * 6 [12]
- Rnd 3: (sc, inc) * 6 [18]
- Rnd 4: 18 sc [18]
- Rnd 5: 3 sc, dec * 6, 3 sc [12]
- Rnd 6: 3 sc, dec * 3, 3 sc [9]
- Rnd 7: 9 sc [9]
- Rnd 8: (2 sc, inc) * 3 [12]
- Rnd 9-11: 12 sc [12]
- Rnd 12: dec * 6 [6]
Fasten off and hide the thread.
Arms (Make 2)
- Rnd 1: 6 sc in MR [6]
- Rnd 2: inc * 6 [12]
- Rnd 3: (2 sc, dec) * 3 [9]
- Rnd 4-8: 9 sc [9]
- Rnd 9: (sc, dec) * 3 [6]
Fasten off and hide the thread.
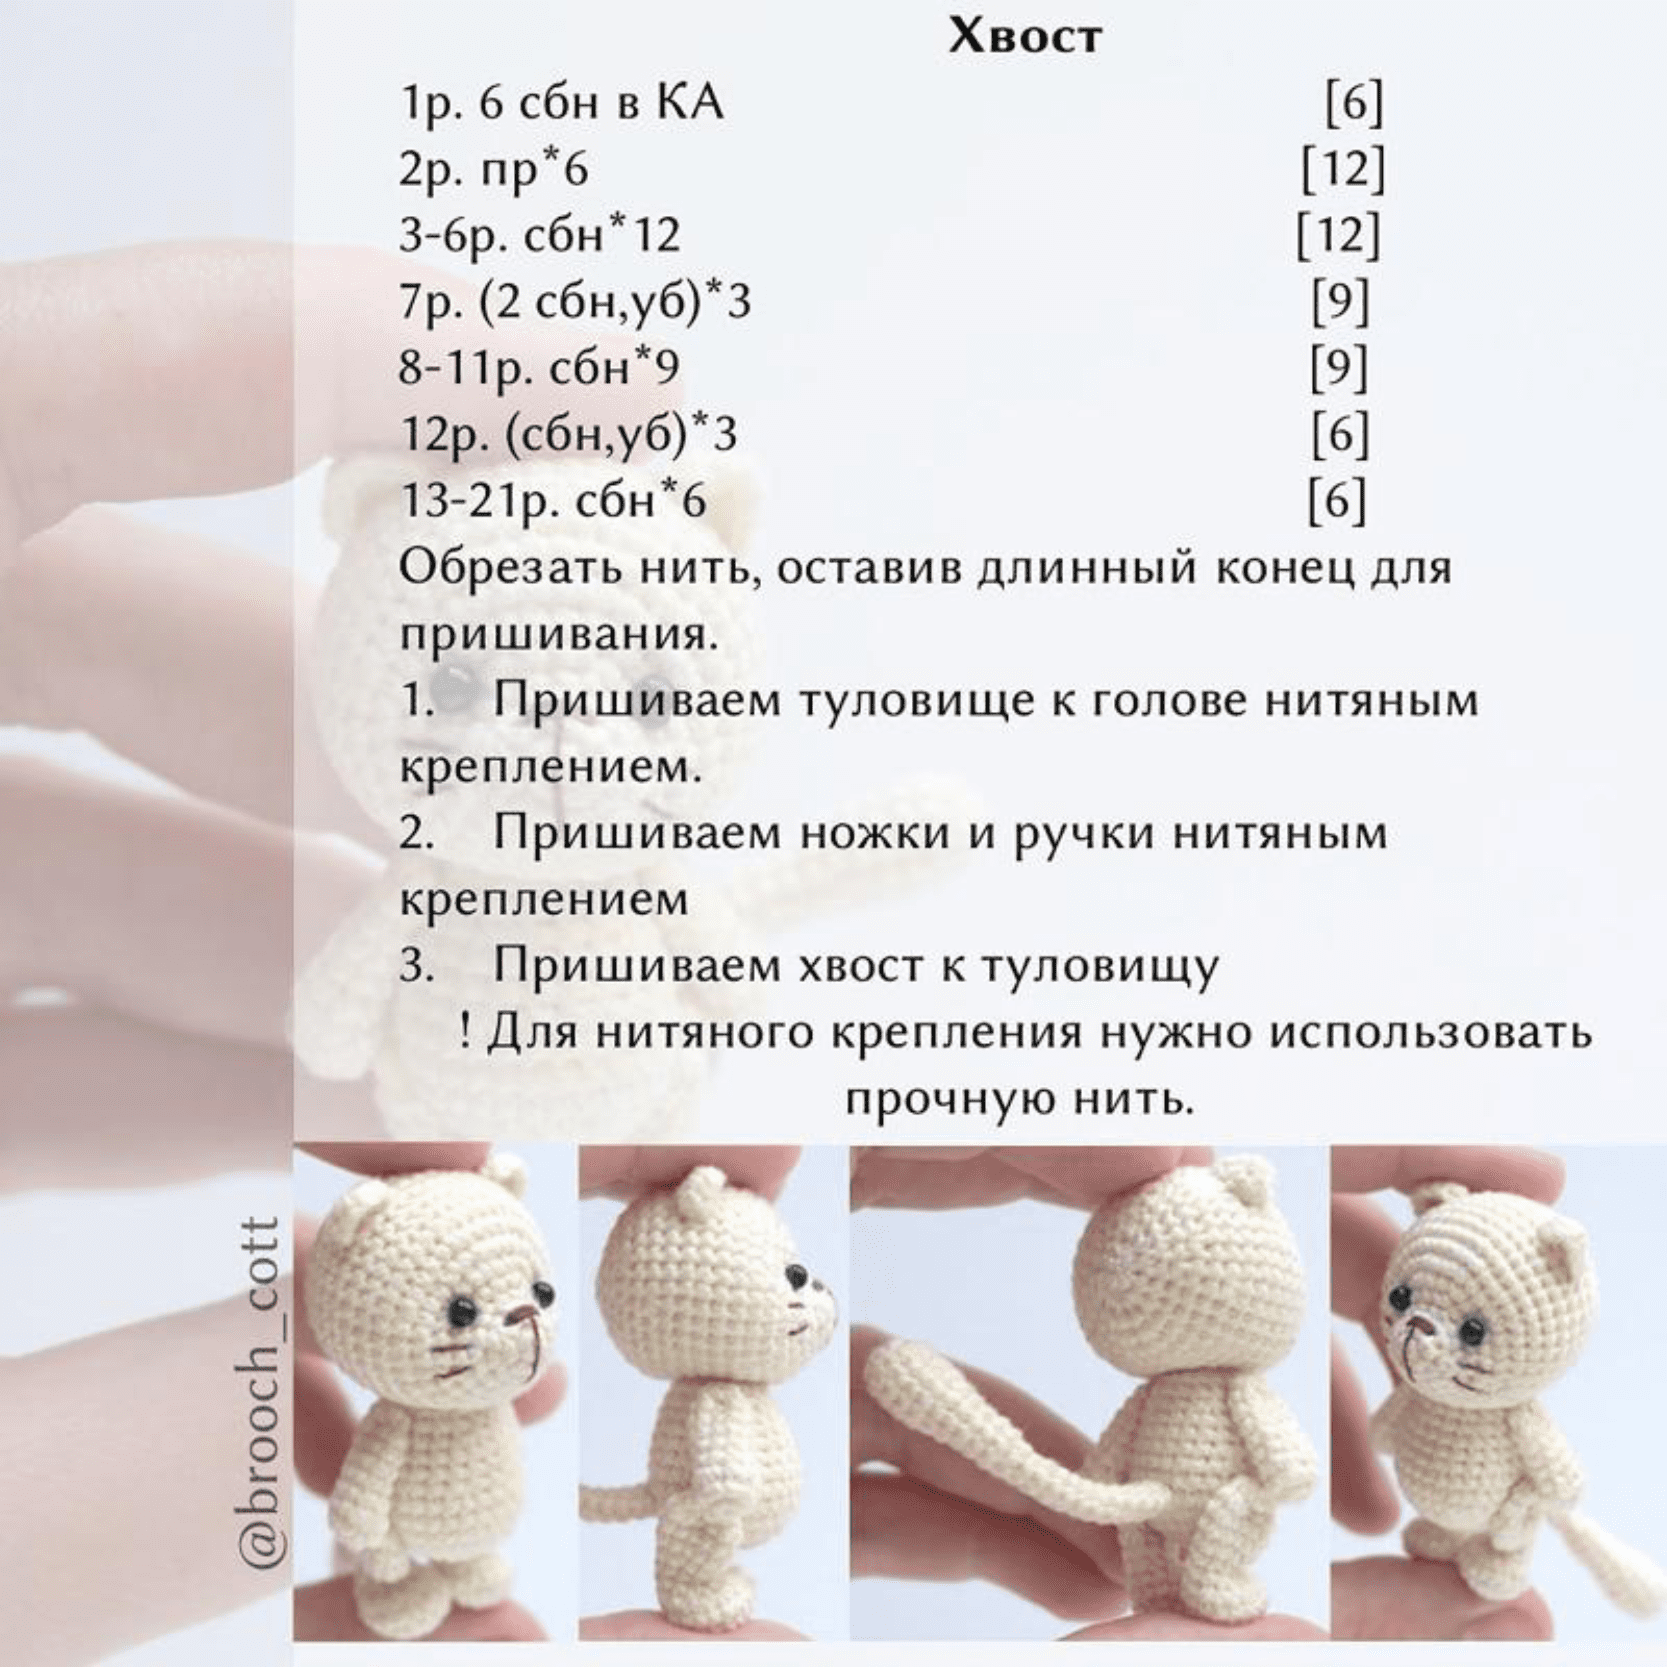
Tail
- Rnd 1: 6 sc in MR [6]
- Rnd 2: inc * 6 [12]
- Rnd 3-6: 12 sc [12]
- Rnd 7: (2 sc, dec) * 3 [9]
- Rnd 8-11: 9 sc [9]
- Rnd 12: (sc, dec) * 3 [6]
- Rnd 13-21: 6 sc [6]
Cut the thread, leaving a long tail for sewing.
Assembly
- Body to Head: Attach the body to the head using a thread joint. This allows the head to move or rotate.
- Limbs: Attach the legs and arms using the thread jointing method so they remain poseable.
- Tail: Sew the tail securely to the back of the body.
Tip: Use a very strong, durable thread for jointing to ensure the kitten stays together during play!
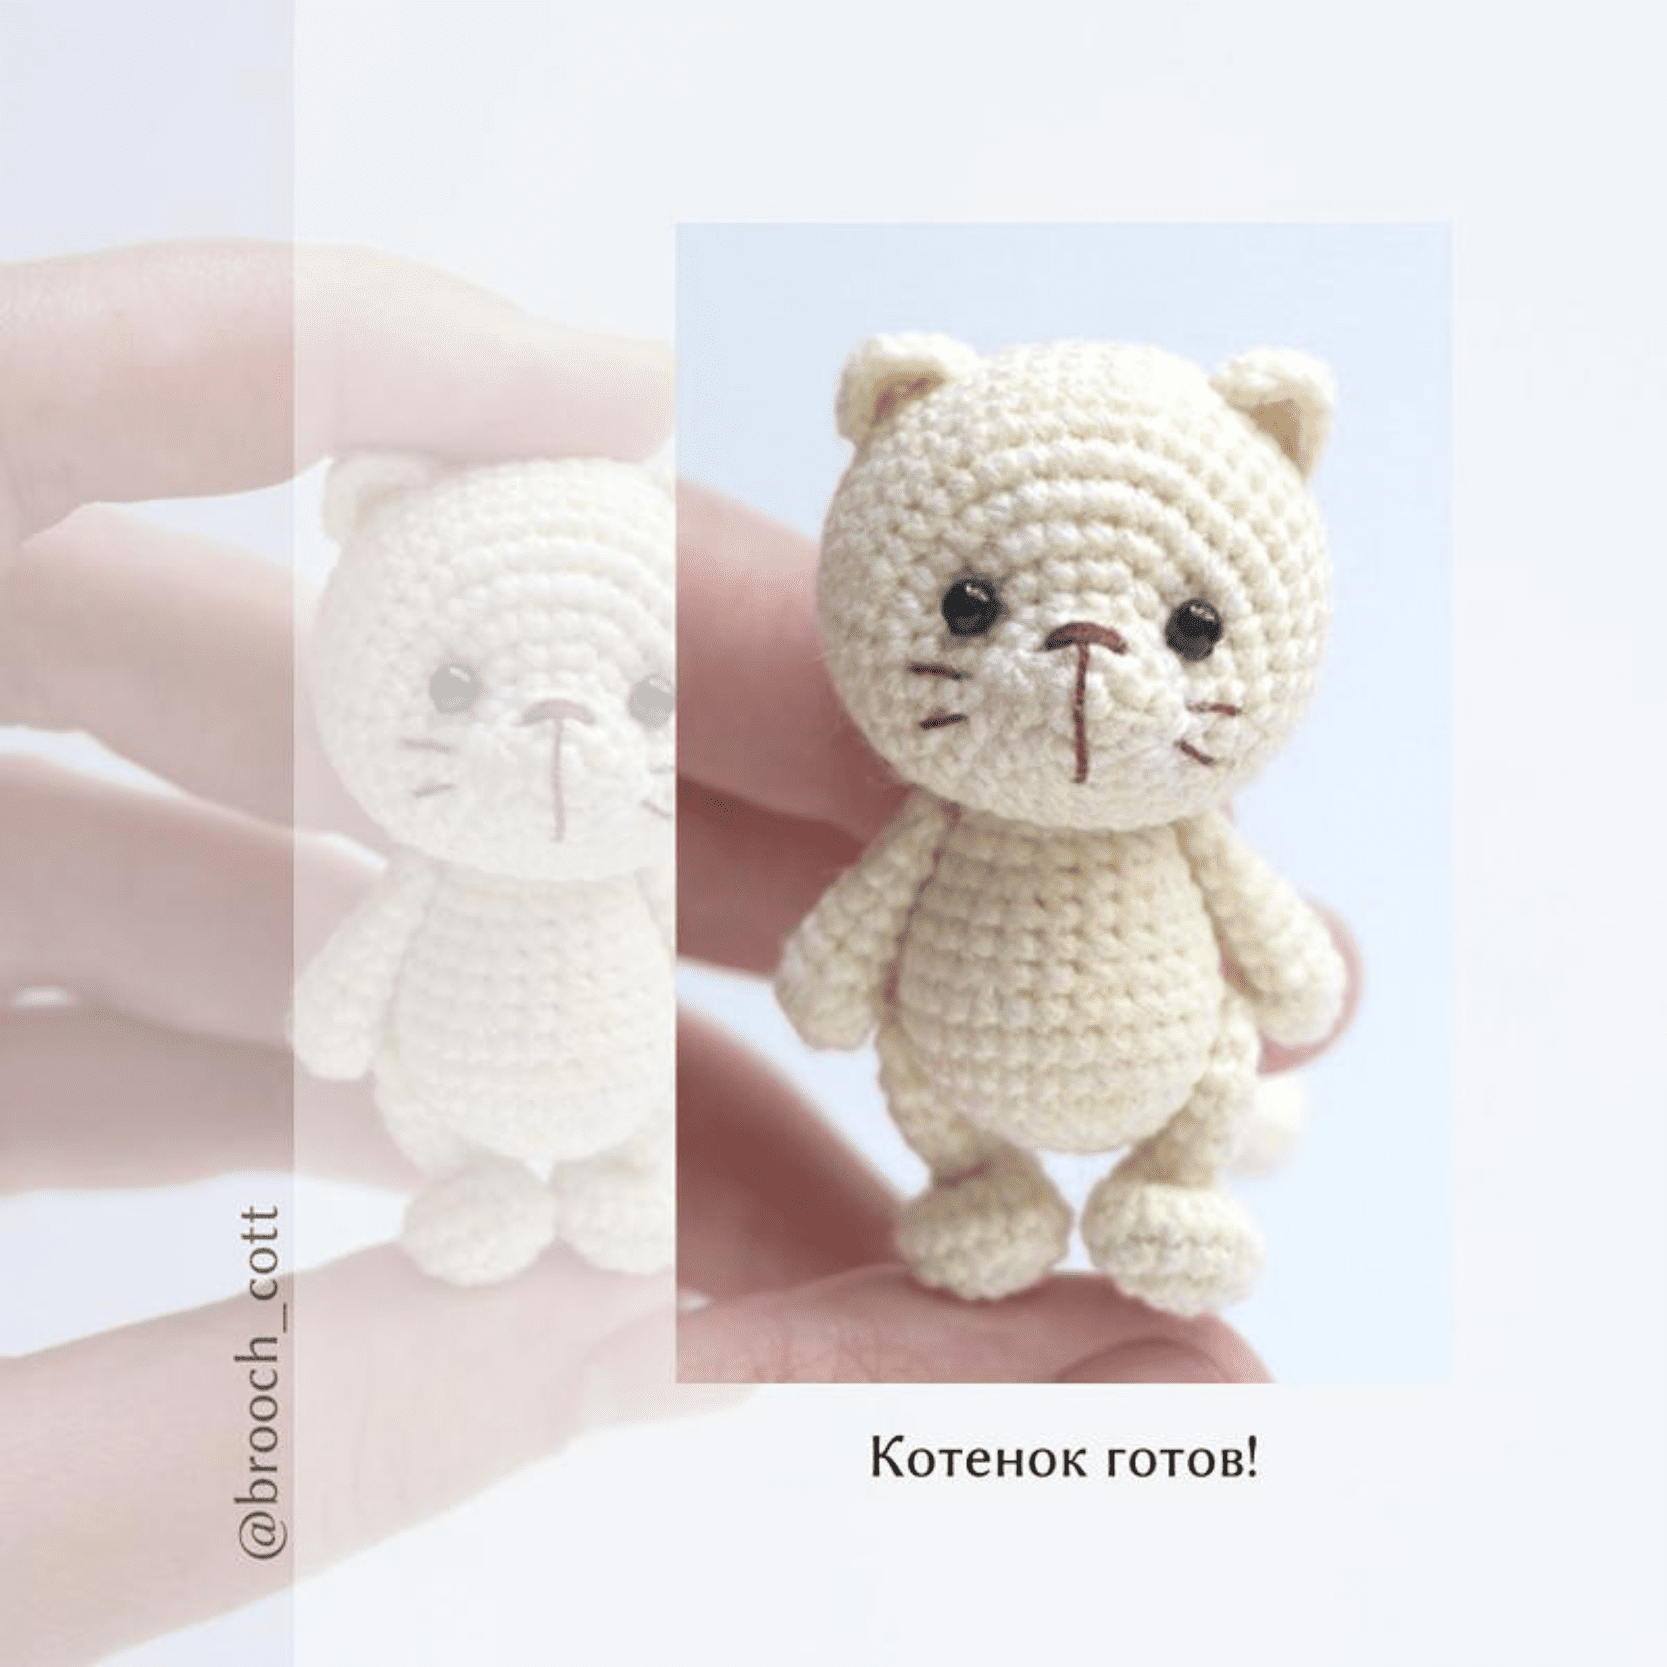
Finished!
Your little kitten is now complete! These make wonderful gifts or pocket-sized companions.