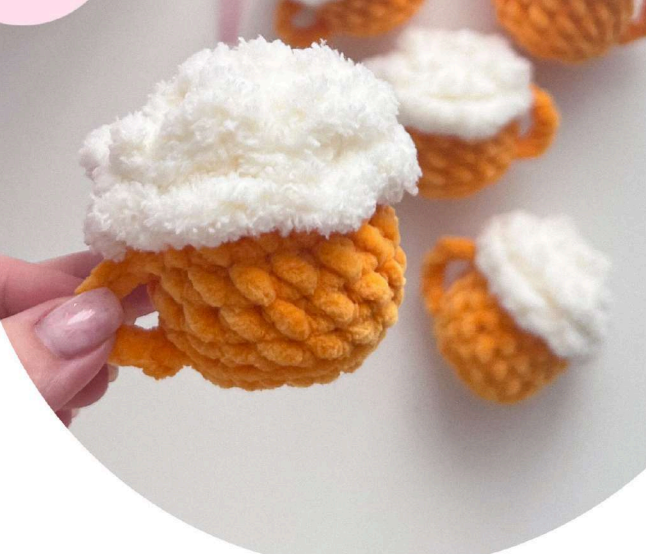
Crochet Your Own Beer Mug: Free Master-Class!
Hello, fellow crafters! Get ready to raise a toast to your next delightful crochet project – an adorable Amigurumi Beer Mug! Whether you’re celebrating a special occasion or simply love unique amigurumi, this free pattern will guide you step-by-step to create your very own charming beer mug.
This pattern assumes basic amigurumi crochet skills. Don’t worry if you’re new to some techniques; just focus on your stitches, and remember that slight adjustments to single crochet counts or decreases can help maintain symmetry as you work. We encourage you to pay close attention to stitch placement for the best results.

Let’s grab our hooks and yarn, and get ready for some happy crocheting and easy stitches!
Materials You’ll Need
Yarn
Filler (stuffing)
Hook 3.5 mm
Needle (for weaving in ends)
Markers
Scissors
Yarn Used in This Pattern:
Milk – Wolans Bunny baby #100-02, 2 g used.
Orange – YarnArt Dolce #853, 5 g used.
Fluffy – Alize Softy #62, 2 g used.

Abbreviations
MR – magic ring
Sl st – slip stitch
Ch – chain stitch
Sc – single crochet
Inc – increase (2 sc in one stitch)
Dec – decrease (2 sc with one vertex)
(…) x N – repeat data in parentheses N times
Let’s Get Started!
Mug Base (Orange Thread)
Crochet with orange thread:
1. 8 sc in MR
2. 8 inc (16)
3. Through back loops only: 16 sc
4. Through both loops: 16 sc
5. Through both loops: 16 sc
6. 15 sc, mug handle (through front loop: sc, 5 ch, between rows 3 and 4 on the outside of the mug we crochet sl st)
Secure the orange thread, cut it and hide it. We won’t need it anymore.
Mug Top (Milky Thread)
Attach the milky thread to the back loop of the 6th row.
7. Through back loops of the 6th row crochet: 16 sc.
8. Through both loops: 8 dec.
Stuff the mug and close the crochet. Cut the thread and hide it.
Beer Foam (Fluffy Thread)
Next, attach the thread to the 6th row, in my case it’s a fluffy thread. We will use it to make beer foam.
Note: In the next row I imitate the foam with 2 ch, but sometimes I crochet 3 or 4 ch, instead of two. I always do this randomly, so that the texture of the foam is different. In the center (where we closed the crochet) I make 3 combinations, so that there are no holes without foam in the very center of the mug.
After finishing the work, cut and hide the thread.

We hope you had a fantastic time crocheting your Amigurumi Beer Mug! Your finished creation is a testament to your wonderful crafting skills. We love seeing your unique makes, so please share your completed beer mug on social media and tag Crochetto. This delightful pattern was designed by Alinushka_Vyazhet, so please remember to give credit to the original author when you share your finished project.
Happy crafting, and keep those hooks busy!