Doo Doo Doo! 🦈 Adorable Baby Shark Crochet Pattern!
Do you hear that catchy tune playing in your head? *Du-du-du-du-du-du!* The iconic Baby Shark has captured the hearts of children and adults worldwide, making it a beloved theme for everything from birthday parties to everyday toys. For crafters, this global phenomenon presents a delightful opportunity: creating your very own *baby shark crochet pattern* project! Whether you’re a seasoned crocheter looking for your next fun challenge or a beginner eager to dive into amigurumi, this comprehensive guide will equip you with everything you need to embark on your Baby Shark crafting adventure. Imagine the joy on a child’s face receiving a handmade Baby Shark plushie, or the cozy comfort of a themed blanket. This article is your one-stop resource for understanding, finding, and mastering the art of the *baby shark crochet pattern*.
This guide is designed to navigate you through the waters of Baby Shark crochet, from selecting the perfect yarn to troubleshooting common pitfalls. We’ll explore various project types, share essential techniques, and help you discover where to find the best patterns, both free and paid. Get ready to transform yarn into fin-tastic creations that will make a splash!
### Why Everyone Loves a Baby Shark Crochet Pattern
The enduring popularity of Baby Shark isn’t just a fleeting trend; it’s a cultural touchstone for young families. This makes any *baby shark crochet pattern* project incredibly meaningful. Hand-crocheted items carry a special warmth and personal touch that store-bought toys often lack. When you create a Baby Shark, you’re not just making an item; you’re crafting a piece of joy, a tangible connection to a beloved character. These items make perfect gifts for birthdays, holidays, or just because, delighting toddlers and preschoolers. From cuddly plushies to adorable hats, a handmade *baby shark crochet pattern* can bring the song to life in a unique and tangible way. It’s also an incredibly rewarding experience for the crafter, offering a sense of accomplishment and a chance to express creativity. Beyond gifts, imagine the sheer delight of having a soft, huggable Baby Shark created by your own hands for your little one to cherish.
### Who is This Guide For?
This guide is for anyone who has fallen in love with the idea of creating a *baby shark crochet pattern* project. Whether you are:
* **A Parent or Grandparent:** Looking to make a special, personalized gift for your child or grandchild.
* **A Beginner Crocheter:** Eager to learn new techniques and create a recognizable, rewarding project.
* **An Experienced Crafter:** Seeking inspiration for your next amigurumi or themed project.
* **A DIY Enthusiast:** Who loves handmade items and enjoys the creative process.
* **Someone Looking for Unique Gift Ideas:** Wanting to craft something truly memorable.
No matter your skill level, we’ll break down the process into manageable steps, ensuring your *baby shark crochet pattern* journey is smooth and enjoyable.
## Essential Tools & Materials for Your Baby Shark Crochet Project
Before you dive deep into the world of Baby Shark crochet, gathering the right tools and materials is crucial. Having everything at hand ensures a smooth and enjoyable crafting experience, preventing frustrating interruptions. Think of these as your fishing gear for catching the perfect Baby Shark!
### Yarn Selection: Colors and Types
The yarn is the heart of your *baby shark crochet pattern*. For the classic Baby Shark, you’ll primarily need **yellow** yarn. However, don’t forget the rest of the family! Mommy Shark is typically pink, Daddy Shark blue, Grandma Shark orange, and Grandpa Shark green.
* **Type:** For plushies (amigurumi), **acrylic yarn** is highly recommended. It’s affordable, widely available, comes in a vast array of colors, and is easy to work with. Importantly, it’s machine washable, making it practical for children’s toys. If you want a super soft, cuddly feel, consider **chenille** or **velvet yarn**, though these can be trickier for beginners due to their texture which can obscure stitches.
* **Weight:** **Worsted weight (Aran/10-ply)** acrylic yarn is a popular choice as it’s versatile and readily available. For smaller, more detailed projects, you might opt for DK (double knitting) yarn.
* **Colors:** Beyond the main body colors, you’ll need **white** for the belly and mouth, and **black** (or another contrasting color) for the eyes, if you’re not using safety eyes. Small amounts of **red** for the mouth interior might also be desired.
### Choosing the Right Crochet Hook
Your crochet hook size will largely depend on the yarn weight you choose and the desired density of your finished object. For amigurumi projects, it’s generally recommended to use a hook a size or two smaller than what the yarn label suggests. This creates a tighter fabric, which prevents stuffing from showing through gaps in your stitches.
* For worsted weight yarn, a **3.5mm (E) to 4.5mm (G)** hook is a common range for amigurumi.
* For bulkier yarns like chenille, you’ll need a larger hook, perhaps a **5.0mm (H) or 6.0mm (J)**.
Experiment with different hook sizes with your chosen yarn to find the one that gives you a firm, even fabric without being too stiff.
### Stuffing, Safety Eyes, and Other Notions
These essential notions complete your *baby shark crochet pattern* project:
* **Fiberfill (Stuffing):** Polyester fiberfill is the standard choice for amigurumi. It’s lightweight, washable, and holds its shape well. Ensure you have plenty – it’s surprising how much stuffing a plushie can take!
* **Safety Eyes:** These plastic eyes come with a washer backing that secures them firmly in place, making them child-safe. They are highly recommended for toys intended for young children. Choose a size appropriate for your Baby Shark’s head (e.g., 9mm-12mm). If you’re making a toy for a baby under 3, consider embroidering the eyes with black yarn for ultimate safety.
* **Yarn Needle (Tapestry Needle):** Essential for weaving in ends and sewing parts together. Look for one with a blunt tip and a large eye.
* **Stitch Markers:** Invaluable for keeping track of your rounds when working in continuous spirals, especially for beginners tackling a *baby shark crochet pattern*.
* **Scissors:** For cutting yarn.
* **Measuring Tape:** Useful for checking dimensions as you go.
* **Pins:** To hold pieces in place before sewing, ensuring proper alignment.
### Printable Checklist for Your Baby Shark Crochet Pattern Project
To make your preparation easy, here’s a quick checklist:
* **Yarn:** Main body color (Yellow, Pink, Blue, etc.), White, Black (or eye color), Red (optional)
* **Crochet Hook:** Appropriate size for yarn (e.g., 3.75mm/F or 4.0mm/G)
* **Fiberfill Stuffing**
* **Safety Eyes:** Appropriate size (or black yarn for embroidered eyes)
* **Yarn Needle**
* **Stitch Markers**
* **Scissors**
* **Measuring Tape (optional)**
* **Pins (optional)**
Having these items ready will ensure a smooth start to your very own *baby shark crochet pattern* project.
## Mastering the Basic Stitches for Your Baby Shark
Even the most intricate *baby shark crochet pattern* relies on a foundation of basic crochet stitches. Understanding and mastering these core techniques will empower you to tackle almost any amigurumi or blanket project. Don’t be intimidated; with a little practice, you’ll be crocheting like a pro in no time!
### Foundation Stitches: Magic Ring and Chain
Every great crochet project starts with a strong foundation. For amigurumi, including your *baby shark crochet pattern*, the **Magic Ring (or Magic Circle)** is your best friend. This technique creates a tight, adjustable loop that eliminates the hole often found at the beginning of crochet in the round, giving your plushie a professional finish. If a magic ring feels daunting, an alternative is to chain 2 and then work your first stitches into the second chain from the hook, though this will leave a small hole.
The **Chain Stitch (ch)** is another fundamental building block. It’s used to create the starting foundation for rows, or as part of a stitch itself. You’ll use it to create the initial chain for flat pieces like blankets, or perhaps to form small loops for fins.
### The Go-To Stitches: Single Crochet (SC) and Half Double Crochet (HDC)
For amigurumi, the **Single Crochet (SC)** is king. This compact stitch creates a dense fabric, perfect for holding stuffing securely without gaps. Most *baby shark crochet pattern* designs for plushies will rely heavily on single crochet worked in continuous rounds. Practice getting an even tension with your SC stitches – consistency is key for a smooth, shapely Baby Shark.
The **Half Double Crochet (HDC)** is a slightly taller stitch than the SC, offering a bit more drape and speed. While SC is dominant for amigurumi, you might find HDC used in some patterns for specific features or for elements of a *baby shark crochet pattern* blanket, where a slightly looser fabric is desirable.
### Increasing and Decreasing for Shape
To give your Baby Shark its iconic shape – from the tapered tail to the rounded head – you’ll need to master **increasing** and **decreasing** stitches.
* **Increasing (inc):** This involves working two or more stitches into a single stitch from the previous round. This expands your work, creating curves and wider sections. For example, “sc2inc” means single crochet 2 stitches into the next stitch.
* **Decreasing (dec):** This involves working two or more stitches together into a single stitch, effectively reducing the stitch count. This is crucial for shaping and tapering parts of your Baby Shark. The most common decrease in amigurumi is the **invisible decrease (invdec)**, which helps maintain a smooth fabric and is less noticeable than a standard single crochet two together (sc2tog).
Practicing these shaping techniques will ensure your Baby Shark has the perfect silhouette.
### Working in Rounds for Amigurumi Baby Shark Crochet Pattern
Most amigurumi, including a stuffed Baby Shark, are worked in continuous spirals, meaning you don’t join rounds with a slip stitch or chain at the end of each round. Instead, you simply continue crocheting into the first stitch of the previous round. This technique creates a seamless fabric, which is ideal for plush toys.
* **Using a stitch marker:** This is absolutely essential when working in continuous rounds. Place your stitch marker in the first stitch of each new round to keep track of where one round ends and the next begins. Without it, you’ll quickly lose your place, leading to miscounts and frustration.
* **Counting stitches:** Always count your stitches at the end of each round, especially when increasing or decreasing. A single miscount can throw off your entire *baby shark crochet pattern* project.
Mastering these foundational techniques will give you the confidence to tackle any *baby shark crochet pattern* and create a truly adorable character.
## Exploring Different Baby Shark Crochet Pattern Styles
The versatility of crochet means the beloved Baby Shark can take many forms! While the cuddly plushie is often the first thing that comes to mind, there are numerous other creative ways to incorporate a *baby shark crochet pattern* into your crafting repertoire. Let’s explore some of the most popular and imaginative styles.
### Amigurumi Baby Shark: The Classic Plushie
This is arguably the most sought-after *baby shark crochet pattern*. Amigurumi refers to the Japanese art of crocheting small stuffed animals. The classic Baby Shark plushie is typically worked in rounds, creating a seamless, three-dimensional figure. These patterns usually involve crocheting separate pieces for the body, fins, and sometimes the mouth, which are then stuffed and sewn together. The beauty of an amigurumi Baby Shark is its huggability and portability, making it a perfect companion for little ones.
* **Key Features:** Soft stuffing, distinct body shape, dorsal fin, pectoral fins, tail fin, and the iconic white belly and wide mouth. Safety eyes are commonly used to bring the character to life.
* **Skill Level:** Can range from beginner-friendly patterns using basic shapes to more intricate designs with complex shaping and color changes. Look for *free baby shark crochet pattern for beginners* if you’re just starting out.
* **Customization:** You can easily adapt the size by changing yarn weight and hook size, or personalize it with embroidered initials.
### Baby Shark Blankets: Cuddle Up!
Imagine wrapping your little one in a cozy blanket featuring their favorite shark! *Easy baby shark crochet blanket pattern* options often come in two main styles:
1. **Character Blanket:** This design incorporates the entire Baby Shark character into the blanket itself. It might be a large, flat, shark-shaped blanket with armholes (like a wearable blanket), or a traditional rectangular blanket with a large Baby Shark applique sewn onto it. Some patterns feature a hooded design where the hood is shaped like Baby Shark’s head, complete with fins and eyes.
2. **Themed Blanket:** These blankets feature shark fin motifs, wave patterns, or a color scheme reminiscent of the Baby Shark family, perhaps with smaller Baby Shark appliques scattered across the surface. These are excellent for those who want a more subtle nod to the theme.
Blanket patterns often use basic stitches like single crochet, half double crochet, or double crochet, making them accessible to crocheters of various skill levels.
### Baby Shark Hats & Appliques: Wearable Fun
What could be cuter than a baby or toddler wearing a Baby Shark hat? A *baby shark hat crochet pattern free* or paid can transform yarn into an adorable accessory for dress-up, photoshoots, or everyday wear. These hats typically feature the shark’s characteristic fins and eyes, often with the mouth shaping around the face. They can be designed for newborns up to older children.
**Appliques** are smaller, flatter crocheted pieces that can be sewn onto virtually anything – clothing, bags, blankets, or even other crochet projects. A small Baby Shark applique is a fantastic way to add a touch of the theme without committing to a full character project. They are often quick to make and great for using up yarn scraps.
### Finger Puppets and Small Accents
For those looking for quick, portable projects, a *baby shark crochet pattern* for finger puppets is ideal. These miniature versions are perfect for imaginative play on the go. They are also fantastic stash-busters, using very small amounts of yarn.
Other small accents could include:
* **Keychains:** A tiny stuffed Baby Shark for a backpack or keyring.
* **Coasters:** Flat, shark-shaped coasters for a themed party.
* **Ornaments:** Small Baby Shark figures to hang.
These smaller projects are excellent for honing your skills, practicing shaping, and making multiple characters from the Baby Shark family. Each style offers a unique way to bring the beloved Baby Shark to life through your crochet hook.
## Step-by-Step Approach to a Baby Shark Crochet Pattern (General Guidance)
While every *baby shark crochet pattern* will have its unique instructions, there’s a general flow that most amigurumi projects follow. Understanding this typical progression will help you interpret patterns more effectively and anticipate the next steps, making your crafting journey smoother and more enjoyable. Think of this as your roadmap for the deep sea of crochet!
### Understanding Your Pattern: Reading Abbreviations
Before you even pick up your hook, take a moment to review your chosen *baby shark crochet pattern*. Most patterns use standard crochet abbreviations (e.g., sc = single crochet, inc = increase, dec = decrease, ch = chain, sl st = slip stitch, fo = fasten off). Look for a legend or abbreviation key, usually at the beginning or end of the pattern. Pay close attention to any specific notes about stitch counts at the end of each round (e.g., “(24)” indicating 24 stitches in the round). A common challenge for beginners is misinterpreting these, so a quick review can save hours of frustration.
### Body Construction: Starting from the Tail
Many amigurumi shark patterns begin by working from the tail towards the head. This allows for a smooth transition from the tapered tail fin to the wider body. You’ll typically start with a magic ring or a small chain, then gradually increase your stitches over several rounds to create the necessary width for the body. This section will form the main bulk of your Baby Shark. Ensure your tension is consistent here, as it will affect the overall shape and firmness of your plushie. As you progress, you’ll start stuffing the body as it gets larger, often in increments, to ensure even distribution of fiberfill.
### Adding Fins and Details
Once the main body is shaped, you’ll move on to adding the distinctive fins. These are often crocheted separately and then sewn onto the body, or in some simpler *baby shark crochet pattern* designs, they might be crocheted directly onto the body.
* **Dorsal Fin:** The prominent fin on the shark’s back. It usually involves working in rows or small rounds to create a triangular or curved shape.
* **Pectoral Fins:** The two side fins. These are typically smaller and more elongated, often designed to stick out slightly.
* **Tail Fin:** The iconic bifurcated (forked) tail. This can be made as one piece and attached, or the pattern might guide you to split the last few rounds of the body into two sections to form the tail halves, then join them.
When attaching fins, use pins to hold them in place and ensure symmetrical placement before sewing them securely with your yarn needle. Precision in placement greatly contributes to the final look of your *baby shark crochet pattern* project.
### The Iconic Mouth and Eyes
No Baby Shark is complete without its signature wide grin and expressive eyes!
* **Mouth:** The mouth is often crocheted as a separate piece, usually a flattened oval or semicircle in white, with a small red (or pink) inner mouth section. This piece is then sewn onto the front of the shark’s head. Some patterns might instruct you to embroider the mouth directly onto the face.
* **Eyes:** For amigurumi, **safety eyes** are the most common and recommended choice for children over three. These come with washers that snap onto the back, securing them permanently. Before attaching, carefully determine the best placement for your eyes, as once they’re on, they’re very difficult to remove without damaging your work. If making for a very young child (under 3), embroidering the eyes with black yarn is the safest option. Alternatively, you can crochet small circles for eyes and sew them on securely.
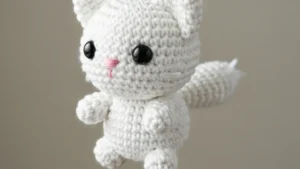
This image, which perfectly captures the fun and spirit of a crocheted Baby Shark, illustrates the finished look we’re aiming for:

*Alt Text: An adorable crocheted Baby Shark plushie, illustrating a completed baby shark crochet pattern.*
### Assembling Your Baby Shark
Once all the individual pieces are crocheted, the final, crucial step is assembly. This often involves the most patience and can make or break the finished look of your *baby shark crochet pattern*.
* **Sewing:** Use your yarn needle and the tail ends of your crocheted pieces to securely stitch them to the main body. Use a whip stitch or mattress stitch for neat, strong seams. Ensure all pieces are firmly attached, especially for toys that will be handled frequently by children.
* **Stuffing:** Continue to add fiberfill as you sew, especially for smaller limbs or sections, making sure the stuffing is evenly distributed to prevent lumps. The goal is a firm, shapely plushie, not squishy or lumpy.
* **Weaving in Ends:** After all pieces are assembled, carefully weave in any remaining yarn tails using your yarn needle. This prevents your project from unraveling and gives it a clean, professional finish.
Following these general steps will guide you through bringing your very own *baby shark crochet pattern* to life, piece by piece, stitch by stitch.
## Pro Tips for a Perfect Baby Shark Crochet Creation
Creating a truly outstanding *baby shark crochet pattern* isn’t just about following instructions; it’s about mastering the nuances of crochet. These pro tips will elevate your work from good to glorious, ensuring your Baby Shark is as perfect as can be!
### Achieving Consistent Tension
Tension refers to how tightly or loosely you pull your yarn while crocheting. Inconsistent tension leads to uneven stitches, visible gaps, and a lumpy, misshapen final product. For amigurumi like a Baby Shark, consistent, tight tension is paramount.
* **Practice:** The best way to achieve consistent tension is through practice. Work on swatches until your stitches look uniform.
* **Hook Grip:** Experiment with different ways of holding your hook and yarn until you find a comfortable grip that allows for even tension.
* **Yarn Properties:** Some yarns are more elastic than others. Acrylic yarns generally offer good stitch definition and are forgiving for beginners.
If your *baby shark crochet pattern* is coming out too stiff, your tension might be too tight; if it’s too floppy or has holes, it might be too loose. Adjust your grip or consider going up/down half a hook size.
### Seamless Color Changes for Your Baby Shark Crochet Pattern
Baby Shark’s classic look involves a distinct yellow body and a white belly. Achieving seamless color changes is crucial for a professional finish. A jagged or messy color change can detract from the overall appeal.
* **The Invisible Join:** For single crochet, when you’re about to complete the last yarn over (YO) of the stitch *before* the color change, drop the old color and pick up the new color to complete the stitch. This pulls the new color through the loops, making the transition cleaner.
* **Carrying Yarn:** For small sections of color change, you can “carry” the unused color along the inside of your work by crocheting over it. This eliminates the need to cut and reattach yarn constantly, especially for short color bursts like stripes or the side of the mouth. Ensure you don’t pull too tightly when carrying, as it can make your fabric pucker.
* **Weaving Ends Securely:** Always leave a tail of a few inches for both the old and new colors, and weave them in thoroughly after changing colors. This secures the transition and prevents unraveling.
### Stuffing Techniques for a Smooth Finish
Proper stuffing is an art form! An under-stuffed Baby Shark will be floppy and sad, while an over-stuffed one might bulge awkwardly.
* **Stuff as you go:** For larger sections of your *baby shark crochet pattern*, especially the body, stuff incrementally. Add a small amount of fiberfill, gently pushing it into place with a stuffing tool (or the blunt end of your crochet hook, or even chopsticks) to fill out the shape evenly.
* **Don’t overstuff:** While you want it firm, don’t pack it so tightly that the stitches stretch and create gaps.
* **Pay attention to curves:** Ensure that all curves and corners are well-stuffed to maintain the intended shape. The snout and fins often require careful attention to stuffing to hold their form.
* **Smooth surface:** After stuffing, gently “massage” your plushie to distribute the fiberfill evenly and eliminate any lumps.
### Securing All Parts Safely
When crafting a *baby shark crochet pattern* for children, safety is paramount. Loose parts can be choking hazards.
* **Safety Eyes:** As mentioned, use safety eyes with washers and ensure they are securely fastened *before* you stuff and close up the head. Pull firmly on them to test their security. For infants and toddlers, **embroidered eyes** are always the safest option.
* **Sewing:** Take your time sewing on fins, mouths, and other appendages. Use strong, tight stitches (like a whip stitch) and double-check that they are firmly attached. Pull on each piece to test its security.
* **Weave in Ends Meticulously:** Loose yarn tails can be a hazard. Weave in all ends thoroughly, preferably by running them through the stitches multiple times in different directions within the stuffing, making them virtually impossible to pull out.
By applying these professional tips, your *baby shark crochet pattern* project will not only look fantastic but will also be durable and safe for its intended recipient.
## Where to Find Your Ideal Baby Shark Crochet Pattern
The internet is a treasure trove for crafters, offering a vast ocean of *baby shark crochet pattern* resources. From free tutorials to meticulously designed paid patterns, knowing where to look can save you time and ensure you find exactly what you need to bring your Baby Shark to life.
### Free Baby Shark Crochet Pattern Resources (YouTube, Blogs)
For those on a budget or looking for a quick, accessible guide, free patterns are a fantastic starting point.
* **YouTube Tutorials:** Platforms like YouTube are excellent for visual learners. You can find numerous “how to crochet baby shark plushie” videos that walk you through each step, often in real-time. This can be incredibly helpful for understanding complex stitches or assembly processes. Search for “baby shark crochet pattern tutorial” to find these gems.
* **Craft Blogs and Websites:** Many talented crafters share their patterns for free on their personal blogs or popular crafting sites. These often include detailed written instructions, photos, and sometimes even video links. A quick Google search for “free baby shark crochet pattern” will yield many results. Be sure to check the comments section or creator’s reputation for pattern clarity before you begin. These resources are often a great place to find an *easy baby shark crochet blanket pattern* or smaller applique designs.
While free patterns are wonderful, always remember to respect the designer’s copyright and terms of use, especially if you plan to sell finished items.
### Paid Patterns: Investing in Quality and Unique Designs
Investing in a paid *baby shark crochet pattern* often means you’re getting a professionally written, thoroughly tested, and often more unique design. These patterns typically offer:
* **Detailed Instructions:** Clear, well-organized, and often include extensive photo tutorials.
* **Customer Support:** Many designers offer support if you have questions or run into issues.
* **Unique Variations:** You might find more intricate designs, different sizes, or patterns for the entire Baby Shark family (Mommy, Daddy, Grandma, Grandpa, and more!).
* **Convenience:** Often available for instant download, allowing you to start crocheting immediately.
**Popular Platforms for Paid Patterns:**
* **Etsy:** A fantastic marketplace for independent crochet designers. Search “baby shark crochet pattern” to discover a wide range of unique designs, from amigurumi to hats. You can often see reviews from other crafters.
* **Ravelry:** A comprehensive database for knitting and crochet patterns. You can filter by project type, yarn weight, difficulty level, and whether a pattern is free or paid. It’s an invaluable tool for finding an *amigurumi shark free pattern* or a specific *baby shark crochet pattern* variation.
* **Dedicated Design Websites:** Many professional crochet designers have their own websites where they sell patterns.
Consider the complexity of the design, the clarity of the sample photos, and the designer’s reviews when choosing a paid pattern.
### Adapting and Customizing Patterns
Once you’re comfortable with basic crochet and have worked through a *baby shark crochet pattern* or two, you might feel adventurous enough to adapt or customize designs.
* **Size Changes:** You can often make a pattern larger or smaller by simply changing your yarn weight and hook size. Thicker yarn and a larger hook will result in a bigger shark, and vice-versa. Remember to adjust stuffing accordingly.
* **Color Variations:** Beyond the classic yellow, you can crochet Baby Shark in any color you desire! Or experiment with stripes.
* **Adding Embellishments:** Personalize your Baby Shark with embroidered details, small bows, or unique fin shapes.
* **Combining Elements:** Take the head from one *baby shark crochet pattern* and the body style from another to create a truly unique piece.
Remember that adapting patterns requires a good understanding of crochet mechanics, but it’s a rewarding way to make your Baby Shark truly one-of-a-kind.
## Safety First: Creating Baby Shark Toys for Children
When crafting anything for children, especially infants and toddlers, safety must be your top priority. A handmade *baby shark crochet pattern* gift is full of love, but it also needs to be free of hazards. Taking extra precautions ensures that your crocheted masterpiece brings joy, not worry.
### Choosing Child-Safe Materials
The materials you select form the foundation of a safe toy.
* **Yarn:** Opt for yarns that are durable, washable, and free from harmful dyes. Acrylic yarn is generally a safe choice because it’s hypoallergenic, doesn’t shed much, and can withstand frequent washing. For babies, ensure the yarn is soft and doesn’t irritate sensitive skin. Avoid novelty yarns with long strands or fuzzy textures that could unravel or shed tiny fibers, posing an inhalation risk. Look for yarns certified by organizations like OEKO-TEX Standard 100, which ensures they are free from harmful substances.
* **Stuffing:** Use only new, clean polyester fiberfill. Avoid repurposing old pillow stuffing or cotton balls, as they can harbor allergens or not hold up well to washing. Make sure the fiberfill is non-toxic and washable.
* **Embellishments:** Be extremely cautious with small embellishments. Buttons, beads, bells, or loose ribbons can easily come off and become choking hazards. If a decorative element isn’t absolutely necessary or can’t be sewn on with extreme permanence, it’s best to omit it for toys intended for young children.
### Securely Attaching Features
The most critical safety consideration for any *baby shark crochet pattern* plushie is the secure attachment of all its parts.
* **Eyes:**
* **For children under 3 years old (or any child who still puts toys in their mouth):** Absolutely **do not use plastic safety eyes**. While they are called “safety eyes,” they are still a potential choking hazard if they come loose. The safest option is to **embroider the eyes** directly onto the toy using black yarn. Use multiple stitches to create a solid, flat eye that cannot be pulled off.
* **For children 3 years and older:** Safety eyes are generally acceptable, but they *must* be installed correctly. Push the eye post through the fabric, then firmly press the washer onto the post from the inside. You should hear a distinct click. Tug hard on the eye from the outside to confirm it’s secure. Once the head is stuffed and closed, it’s nearly impossible to remove them without damaging the crochet fabric.
* **Fins and Mouths:** All crocheted pieces – fins, mouths, gills, etc. – should be sewn on with extreme care and durability. Use a strong sewing method (like a whip stitch or mattress stitch) and go over seams multiple times. Use the same yarn you crocheted the piece with, or a strong sewing thread in a matching color. After sewing, give each piece a firm tug to ensure it won’t detach during play.
* **Yarn Tails:** Weave in all yarn tails thoroughly. Do not just cut them short. Run the tails back and forth through several stitches within the body of the toy, and even into the stuffing, for at least an inch or two. This prevents them from unraveling or being pulled out and becoming a choking risk.
By meticulously following these safety guidelines, your handmade *baby shark crochet pattern* creation will be a cherished, safe, and durable companion for any child.
## Beyond the Original: Expanding Your Baby Shark Crochet Family
The Baby Shark song isn’t just about one shark; it’s a whole family affair! Once you’ve mastered your initial *baby shark crochet pattern*, you’ll likely feel inspired to create the entire fin-tastic family. Expanding beyond the original yellow character adds more fun, more color, and more opportunities for imaginative play.
### Mommy, Daddy, Grandma, Grandpa, and More!
The beauty of the Baby Shark family is that the core design remains largely the same, primarily changing in size and color.
* **Mommy Shark (Pink):** Typically slightly larger than Baby Shark, with a sweet, nurturing expression.
* **Daddy Shark (Blue):** The largest of the family, often depicted with a more robust build.
* **Grandma Shark (Orange):** Characterized by her gentle demeanor, sometimes with glasses or a wise expression (embroidered features work well here).
* **Grandpa Shark (Green):** Often sporting a mustache or a thoughtful look, the elder statesman of the family.
When crocheting the whole family, consider using progressively larger hook sizes or working more increase rounds for Daddy Shark to ensure he’s noticeably bigger. For Grandma and Grandpa Shark, you might add subtle details like embroidered eyebrows, spectacles, or even small crocheted bow ties to enhance their personality. A comprehensive *crochet pattern for baby shark family* will guide you through the specific sizing and details for each member, often using the same foundational *baby shark crochet pattern* with minor adjustments.
### Themed Accessories
Beyond the sharks themselves, you can extend your creativity to themed accessories that complement your Baby Shark family.
* **Ocean-Themed Backgrounds:** Crochet a simple blue blanket with wave patterns or small green “seaweed” appliques to create an underwater playmat for your shark family.
* **Coral Reef Elements:** Small crocheted coral pieces or colorful fish can add to the immersive play experience.
* **Storage Bags:** Design a drawstring bag with a Baby Shark applique to keep the entire family together.
* **Party Decor:** If you’re creating for a Baby Shark-themed party, you can make garlands of mini sharks, centerpieces, or even *baby shark party decor crochet* items like cup holders or small gift bags.
Creating the entire Baby Shark family and their accessories is a wonderfully engaging project. It not only provides hours of crocheting enjoyment but also results in a full set of beloved characters ready for countless imaginative adventures. This also makes for an incredibly impressive *crochet gifts baby shark theme* set for any child.
## Troubleshooting Common Crochet Challenges
Even experienced crocheters encounter challenges. When working on a *baby shark crochet pattern*, especially amigurumi, certain issues pop up more frequently than others. Knowing how to identify and solve them can save you from frogging (ripping out stitches) your entire project!
### Uneven Stitches or Gaps
This is a common issue, particularly for beginners.
* **Problem:** Your crocheted fabric looks inconsistent, with some stitches tighter or looser, leading to a bumpy texture or visible holes where stuffing might peek through.
* **Solution:**
* **Consistent Tension:** As mentioned before, practice is key. Try to maintain the same grip and yarn tension throughout your work.
* **Hook Size:** If you consistently have gaps, try going down half a hook size. This will make your stitches tighter. If your work is too stiff, go up half a size.
* **Yarn Type:** Some yarns, like super fuzzy ones, naturally hide stitches and can make unevenness less noticeable. However, for a *baby shark crochet pattern* that uses smooth acrylic, consistency is vital.
### Running Out of Yarn
A frustrating moment, especially when you’re almost done!
* **Problem:** You’re nearing the end of your project, and your current skein of yarn is running low.
* **Solution:**
* **Weigh Your Yarn:** Before starting, if your pattern has a yarn usage estimate, weigh your skein. If you’re short, you might need another.
* **Buy Extra:** When purchasing yarn for a specific project, especially a larger one like a *baby shark crochet pattern* plushie, always buy an extra skein if possible. It’s better to have too much than too little.
* **Yarn Dye Lots:** If you need to buy more yarn mid-project, try to find a skein with the *same dye lot* number. Dye lots ensure consistency in color. If you can’t, integrate the new yarn in an inconspicuous spot or at a natural seam if possible, as there might be a slight color difference.
* **Creative Solutions:** If you’re desperate, and it’s for a small, non-critical piece, you might slightly reduce the stuffing or carefully unravel a small portion of a hidden starting chain to get a few extra inches of yarn.
### Miscounting Stitches
The bane of every crocheter’s existence! Miscounting stitches can lead to skewed shapes, incorrect sizing, and patterns that simply don’t work out.
* **Problem:** Your stitch count at the end of a round doesn’t match the pattern, or your increases/decreases are off-center.
* **Solution:**
* **Stitch Markers:** Use a stitch marker in the first stitch of *every* round when working in continuous spirals. This clearly defines the start and end of each round.
* **Count Frequently:** Don’t wait until the very end of your project to realize your count is off. Count your stitches at the end of every round, especially after increase or decrease rounds.
* **Highlight Your Pattern:** As you complete each round, check it off on your written pattern.
* **Focus:** Crochet can be meditative, but when working on shaping, give it your full attention to avoid distractions.
* **Frog and Recount:** If your count is off, don’t try to “fix” it by skipping stitches or adding extra ones later. It will almost always result in an uneven or lopsided shape. It’s usually faster and less frustrating in the long run to frog back to the point of the error and recount carefully. This might mean frogging several rounds, but it’s worth it for a beautifully shaped *baby shark crochet pattern*.
By addressing these common challenges proactively, you’ll ensure your *baby shark crochet pattern* project is a joyful and successful endeavor.
## Showcasing Your Finished Baby Shark Crochet Pattern Project
You’ve put in the time, effort, and love, and now your magnificent *baby shark crochet pattern* creation is complete! Don’t let your masterpiece languish in a corner. Sharing your work is not only a fantastic way to celebrate your achievement but also to inspire others and connect with the vibrant crafting community.
### Photography Tips for Crafters
Good photos can make your finished project truly shine!
* **Good Lighting:** Natural light is your best friend. Place your Baby Shark near a window, but out of direct sunlight, to avoid harsh shadows.
* **Clean Background:** Use a simple, uncluttered background that doesn’t distract from your beautiful crochet work. A plain wall, a wooden surface, or even a soft blanket can work wonders.
* **Multiple Angles:** Take photos from different angles – front, side, back, and maybe a close-up of details like the eyes or fins.
* **Context:** Show your Baby Shark in action! Place it with a child (if appropriate and with permission), or next to props that suggest its scale (like a hand).
* **Edit Lightly:** A little editing to adjust brightness, contrast, and color balance can make a big difference, but don’t overdo it.
### Sharing on Social Media
The online crafting community is incredibly supportive and eager to see new creations.
* **Platforms:** Instagram, Facebook crochet groups, Pinterest, and Ravelry are prime spots for sharing.
* **Hashtags:** Use relevant hashtags to increase visibility. Beyond #babysharkcrochetpattern, consider #amigurumi, #crochetaddict, #handmade, #crochettoy, #diycrafts, #craftersofinstagram, and #makersgonnamake.
* **Credit:** If you used a specific *baby shark crochet pattern*, always credit the designer! It’s good etiquette and helps other crafters find the pattern.
* **Engage:** Respond to comments and questions. Be part of the conversation!
Remember that video link? It’s a great example of how creators share their projects! You can check it out here:
[https://www.youtube.com/watch?v=egg0zGfo62g](https://www.youtube.com/watch?v=egg0zGfo62g)
## Quick Takeaways: Your Baby Shark Crochet Journey
* **Preparation is Key:** Gather all your yarn, hooks, stuffing, and notions *before* starting your *baby shark crochet pattern* project.
* **Master the Basics:** Single crochet, magic ring, increases, and decreases are your core tools for amigurumi.
* **Safety First:** When crafting for children, prioritize embroidered eyes for infants and securely attach all parts.
* **Explore Variations:** Beyond the classic plushie, consider blankets, hats, or finger puppets, expanding your *baby shark crochet pattern* horizons.
* **Consistency is Crucial:** Maintain even tension and count your stitches frequently for a perfectly shaped Baby Shark.
* **Troubleshoot Smartly:** Don’t be afraid to frog back to fix errors; it leads to a better end result.
* **Share Your Work:** Showcase your handmade Baby Shark on social media and connect with the crafting community!
## FAQs About Baby Shark Crochet Patterns
### Q1: What kind of yarn is best for a baby shark crochet pattern for a toddler?
**A1:** For toddlers, **acrylic yarn** is generally recommended. It’s durable, washable, hypoallergenic, and comes in a wide range of colors. Look for worsted weight (Aran) acrylic for a good balance of size and ease of use, ensuring it’s soft to the touch.
### Q2: Can a beginner successfully make an amigurumi baby shark plushie?
**A2:** Yes! Many *free baby shark crochet pattern for beginners* are available. While amigurumi requires learning basic stitches like single crochet, increases, and decreases, the shape of Baby Shark is relatively simple. Look for patterns with clear instructions and accompanying video tutorials.
### Q3: How do I make sure my crocheted Baby Shark toy is safe for a baby?
**A3:** For babies under three, **do not use plastic safety eyes**. Instead, embroider the eyes securely with black yarn. Ensure all fins and other sewn-on parts are attached very firmly, and weave in all yarn tails completely to prevent choking hazards. Use new, clean, non-toxic fiberfill.
### Q4: Where can I find a good quality baby shark crochet blanket pattern?
**A4:** You can find excellent *easy baby shark crochet blanket pattern* options on platforms like Ravelry, Etsy, and dedicated crochet blogs. Search for “Baby Shark blanket crochet pattern” or “crochet shark tail blanket” for various styles, from character blankets to themed designs.
### Q5: What’s the average time it takes to complete a baby shark crochet pattern?
**A5:** The time varies greatly depending on the pattern’s complexity, your skill level, and the size of the project. A small amigurumi Baby Shark might take 4-8 hours for an experienced crocheter, while a beginner might take 10-15 hours. A *baby shark crochet pattern* for a large blanket could take 20-40 hours or more.
## Ready to Dive In? Your Next Baby Shark Crochet Pattern Awaits!
Congratulations! You’ve navigated the comprehensive waters of creating your very own *baby shark crochet pattern* project. From understanding the appeal of these delightful characters to gathering your essential tools, mastering key stitches, exploring diverse project styles, and ensuring safety, you now have a solid foundation for success. The joy of bringing a beloved character to life with your own hands is truly unparalleled, and the reactions of those who receive your handmade Baby Shark will make every stitch worthwhile.
Remember, every stitch is a step closer to a fin-tastic creation. Don’t be afraid to experiment with colors, add your unique flair, or even design your own *baby shark crochet pattern* variation once you feel confident. The world of crochet is vast and full of possibilities, and your Baby Shark adventure is just the beginning. So, grab your hook, select your yarn, and let the rhythmic motion of crochet bring the “doo-doo-doo-doo-doo-doo” to life right in your hands. Happy crocheting!