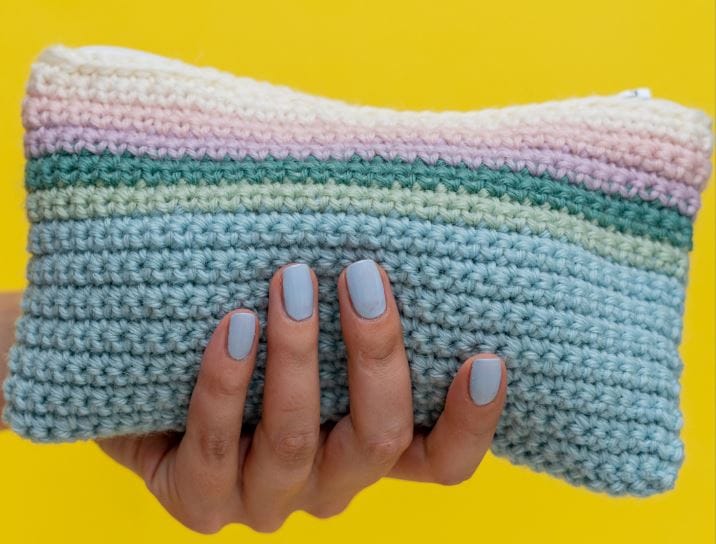
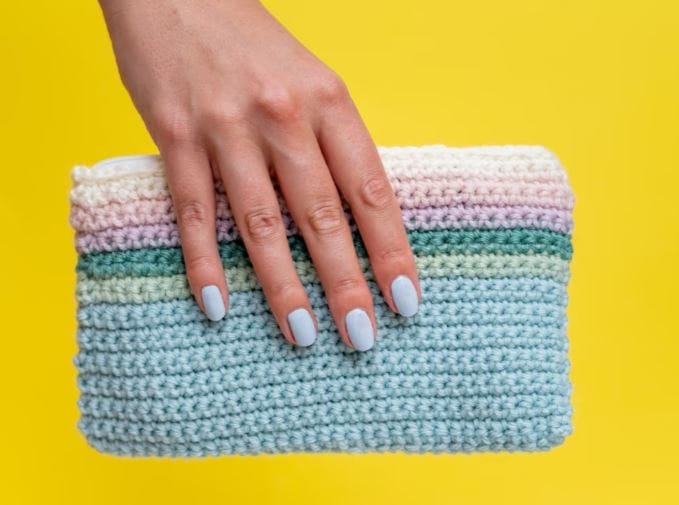
Easy Striped Crochet Pouch: A Beginner-Friendly DIY Project
Hello, crochet friends! Are you looking for a simple yet stylish project to practice your basic crochet skills? This Striped Crochet Pouch is perfect for beginners—it’s quick, fun, and oh-so-useful! Whether you want a cute pencil case, a mini clutch, or a little organizer for your craft supplies, this pouch is a great way to practice double crochet (single crochet in US terms) while creating something practical.
The best part? You only need a few basic supplies, and the stripes make it look extra special. Let’s dive in!
Table of Contents
Materials Needed
Here’s what you’ll need to make your own Striped Crochet Pouch:
- Yarn:
- 1 × 100g ball of Paintbox Yarns 100% Wool Worsted in Seafoam Blue (Color A)
- OR 100g (5 × 20g balls) of Paintbox Yarns 100% Wool Worsted Mini Ball Pack in Daydream
- OR individual 100g balls in:
- Pistachio Green (B)
- Slate Green (C)
- Dusty Rose (D)
- Ballet Pink (E)
- Champagne White (F)
- Hook: 5mm (H/8) crochet hook
- Notions:
- 20 cm (8 in) zip
- Needle and matching thread for sewing the zip
- Scissors
- Yarn needle for weaving in ends
Abbreviations & Notes
Before we begin, here’s a quick guide to the crochet terms used in this pattern:
- ch = chain
- dc (sc) = double crochet (single crochet in US terms)
- ss = slip stitch
- st(s) = stitch(es)
- rs = right side
- ws = wrong side
- rep = repeat
Important Notes:
- Turning chains do not count as stitches.
- Always turn your work at the end of each round.
- The first stitch of each round is worked into the last stitch of the previous round.
Crochet Pattern Instructions
Step 1: Creating the Base
- Start with Color A (Seafoam Blue).
- Make a foundation chain: Chain 35.
- Round 1 (Wrong Side):
- Work 1 dc (sc) into the second chain from the hook.
- Continue working 1 dc (sc) into each chain across.
- When you reach the end, rotate your work and crochet 1 dc (sc) into the opposite side of each chain stitch.
- Join with a ss to the first stitch and turn.
- You should now have 68 stitches in total.
Step 2: Building the Pouch Sides
- Round 2:
- Chain 1 (does not count as a stitch).
- Work 1 dc (sc) into each stitch around.
- Join with a ss and turn.
- Rounds 3–14: Repeat Round 2 for 12 more rounds (total of 14 rounds in Color A).
- Fasten off Color A.
Step 3: Adding Stripes
- Join Color B (Pistachio Green or Daydream).
- Rounds 15–16: Work 2 rounds of dc (sc) in each stitch, joining with a ss and turning at the end of each round.
- Fasten off Color B.
- Join Color C (Slate Green).
- Rounds 17–18: Repeat 2 rounds of dc (sc).
- Continue this pattern, switching colors every 2 rounds:
- Color D (Dusty Rose) – Rounds 19–20
- Color E (Ballet Pink) – Rounds 21–22
- Color F (Champagne White) – Rounds 23–24
Step 4: Finishing the Pouch
- Round 25: Work a slip stitch (ss) into each stitch around.
- Fasten off and weave in all loose ends.
Assembly Instructions
- Blocking (Optional): Lightly steam or block the pouch to define the edges.
- Attaching the Zip:
- Place the zip along the top opening of the pouch (on the wrong side).
- Sew it in place using a needle and matching thread.
- For extra security, use Color E (Ballet Pink) to slip stitch the first two stitches on either side over the zip ends.
Helpful Tips for Beginners
✔ Keep your tension even—this helps your pouch maintain a neat shape.
✔ Count your stitches at the end of each round to ensure you don’t accidentally add or drop any.
✔ Experiment with colors! This pattern is perfect for using up leftover yarn.