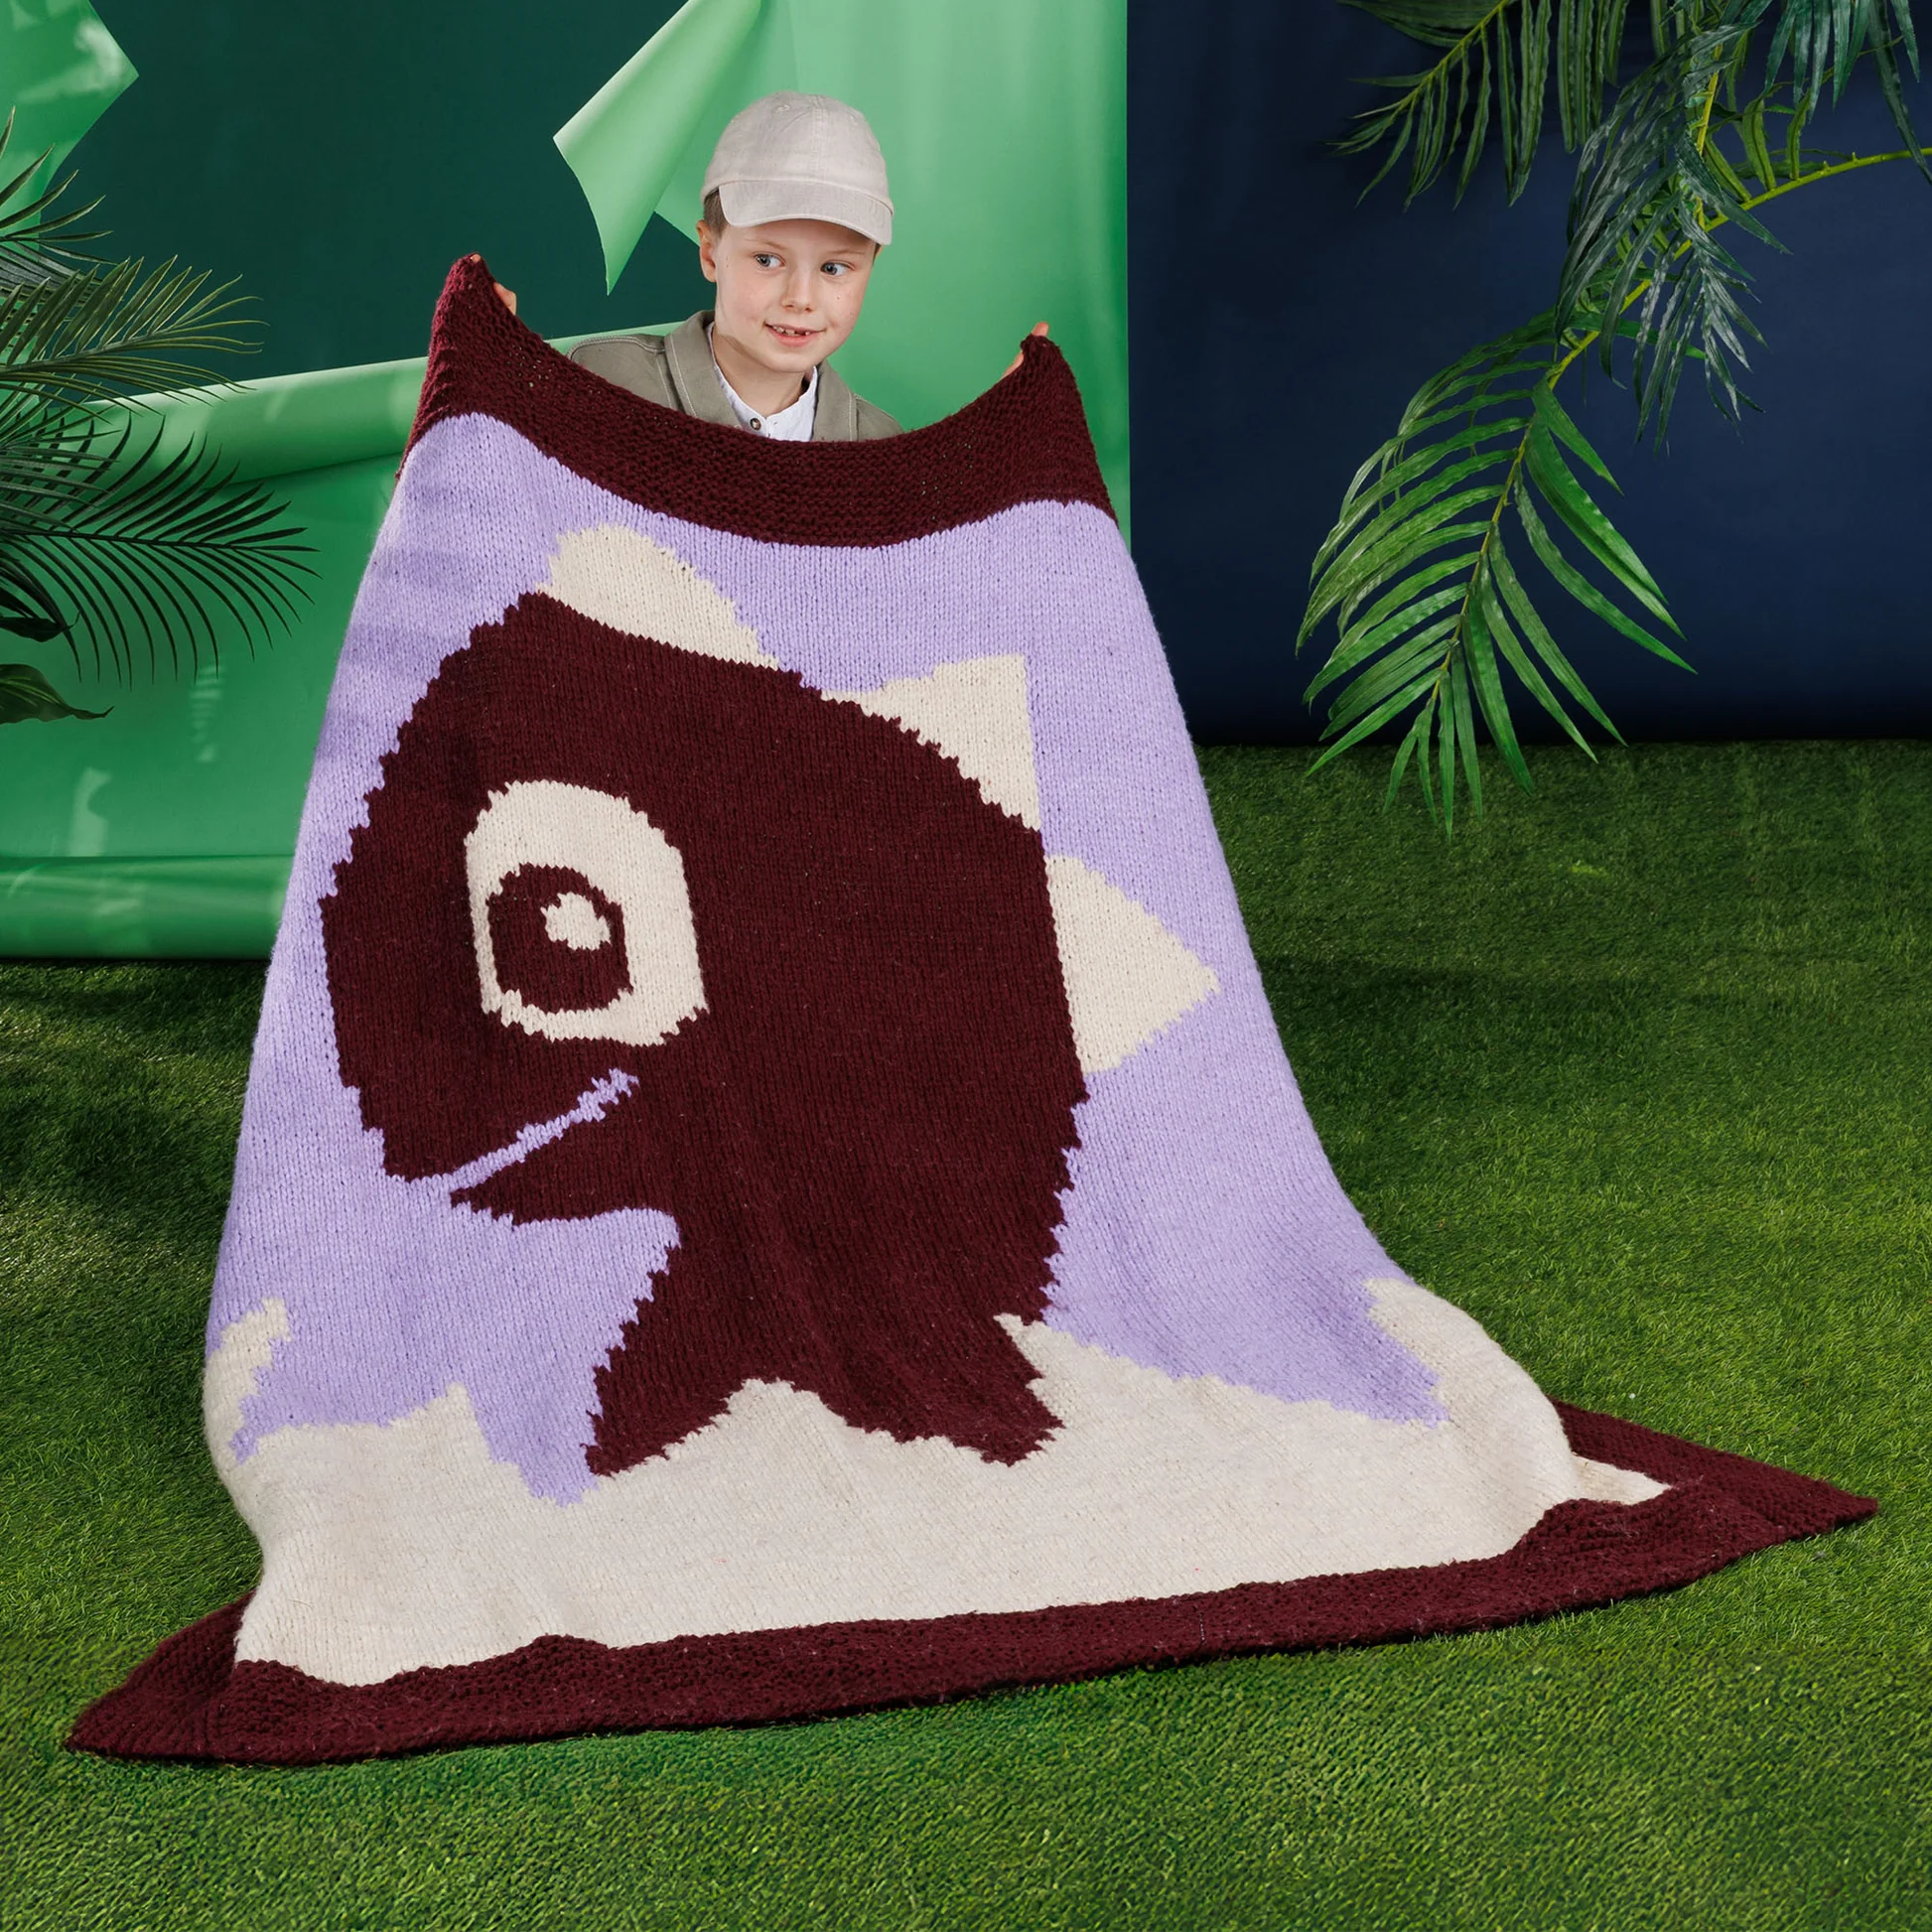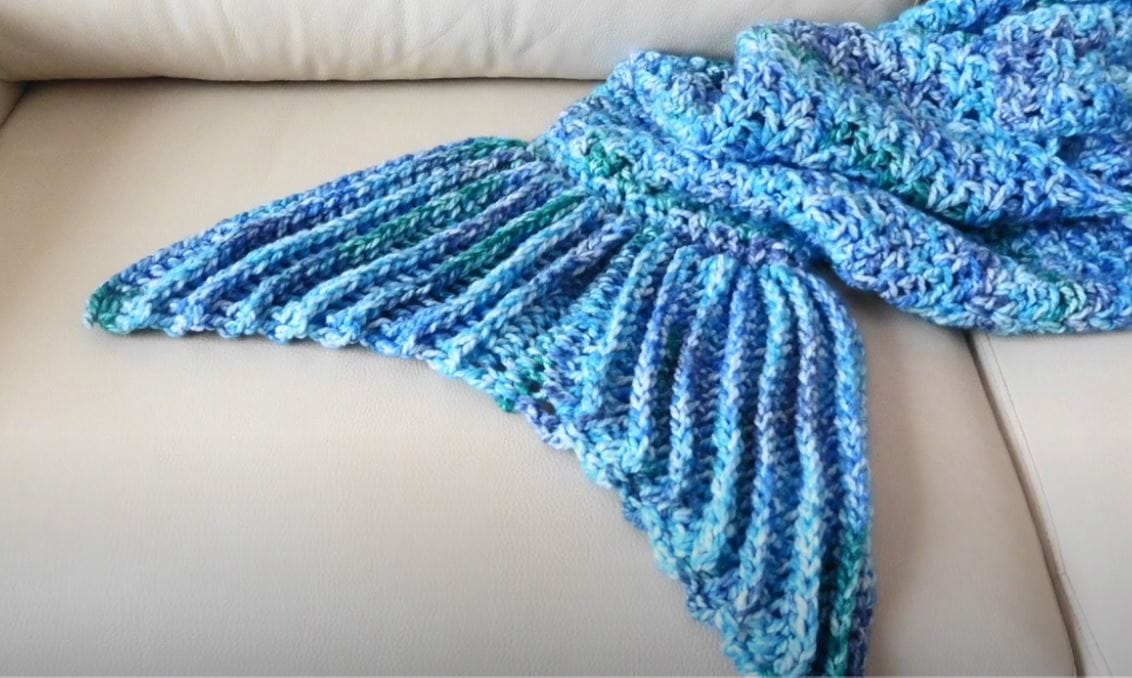
How to Crochet Mermaid Tail Blanket: Free Pattern & Tutorial
Hi crochet lovers! Have you ever dreamed of snuggling up on the couch like a magical mermaid? Well, grab your hooks, because today we’re making that dream a reality with this cozy and enchanting crochet mermaid tail blanket!
This pattern is a fan favorite for a reason. It’s made with bulky yarn, so it works up incredibly fast, and it’s designed for ultimate comfort. The top part is open like a traditional blanket, making it easy to slip into, while the bottom is a closed cocoon to keep your feet nice and toasty.

We’ll be using basic stitches like single crochet and double crochet, making this a fantastic project for confident beginners or anyone looking for a satisfying and quick make. You can even adapt it into a fully closed sleeping bag!
So, let’s stop talking and start hooking. Your cozy mermaid adventure awaits!
Materials and Tools

Before you start, gather your supplies. Here’s what you’ll need for this magical project:
- Yarn: 600g of Bulky Weight Yarn (Category 5 or 6)
- Crochet Hook: 10 mm hook
- Scissors
- Tapestry Needle (for weaving in ends and assembly)
Abbreviations (US Terms)
- ch: chain
- sc: single crochet
- dc: double crochet
- sl st: slip stitch
- bpdc: back post double crochet
- V-st: V Stitch (2 dc in the same stitch or space)
Free Crochet Mermaid Tail Blanket Pattern
This pattern is broken down into three main parts: the blanket body (cocoon), the tail fin, and the final assembly.
Part 1: The Cocoon (Bottom Section – Rounds 1-20)
This is the closed part of the blanket where your feet will go. We’ll start by creating a small oval base and then working our way up.
Round 1:
- Start with a slip knot and ch 15. This forms the base. (For a wider or narrower base, you can adjust the number of chains).
- Ch 3 extra (counts as your first dc).
- Work 1 dc in the 4th ch from the hook.
- Work 1 dc in each chain across until you reach the last chain.
- In the very last chain, work 4 dc. This will turn you to work along the other side of the starting chain.
- Continue working 1 dc in the bottom loop of each chain across (creating a mirror image of the first side).
- In the final space (where you made your first stitch after the ch-3), work 2 dc to complete the corner.
- Join with a sl st to the top of the beginning ch-3. You should have 4 stitches in each “corner” of your oval.
Round 2 (Even Round – No Increase):