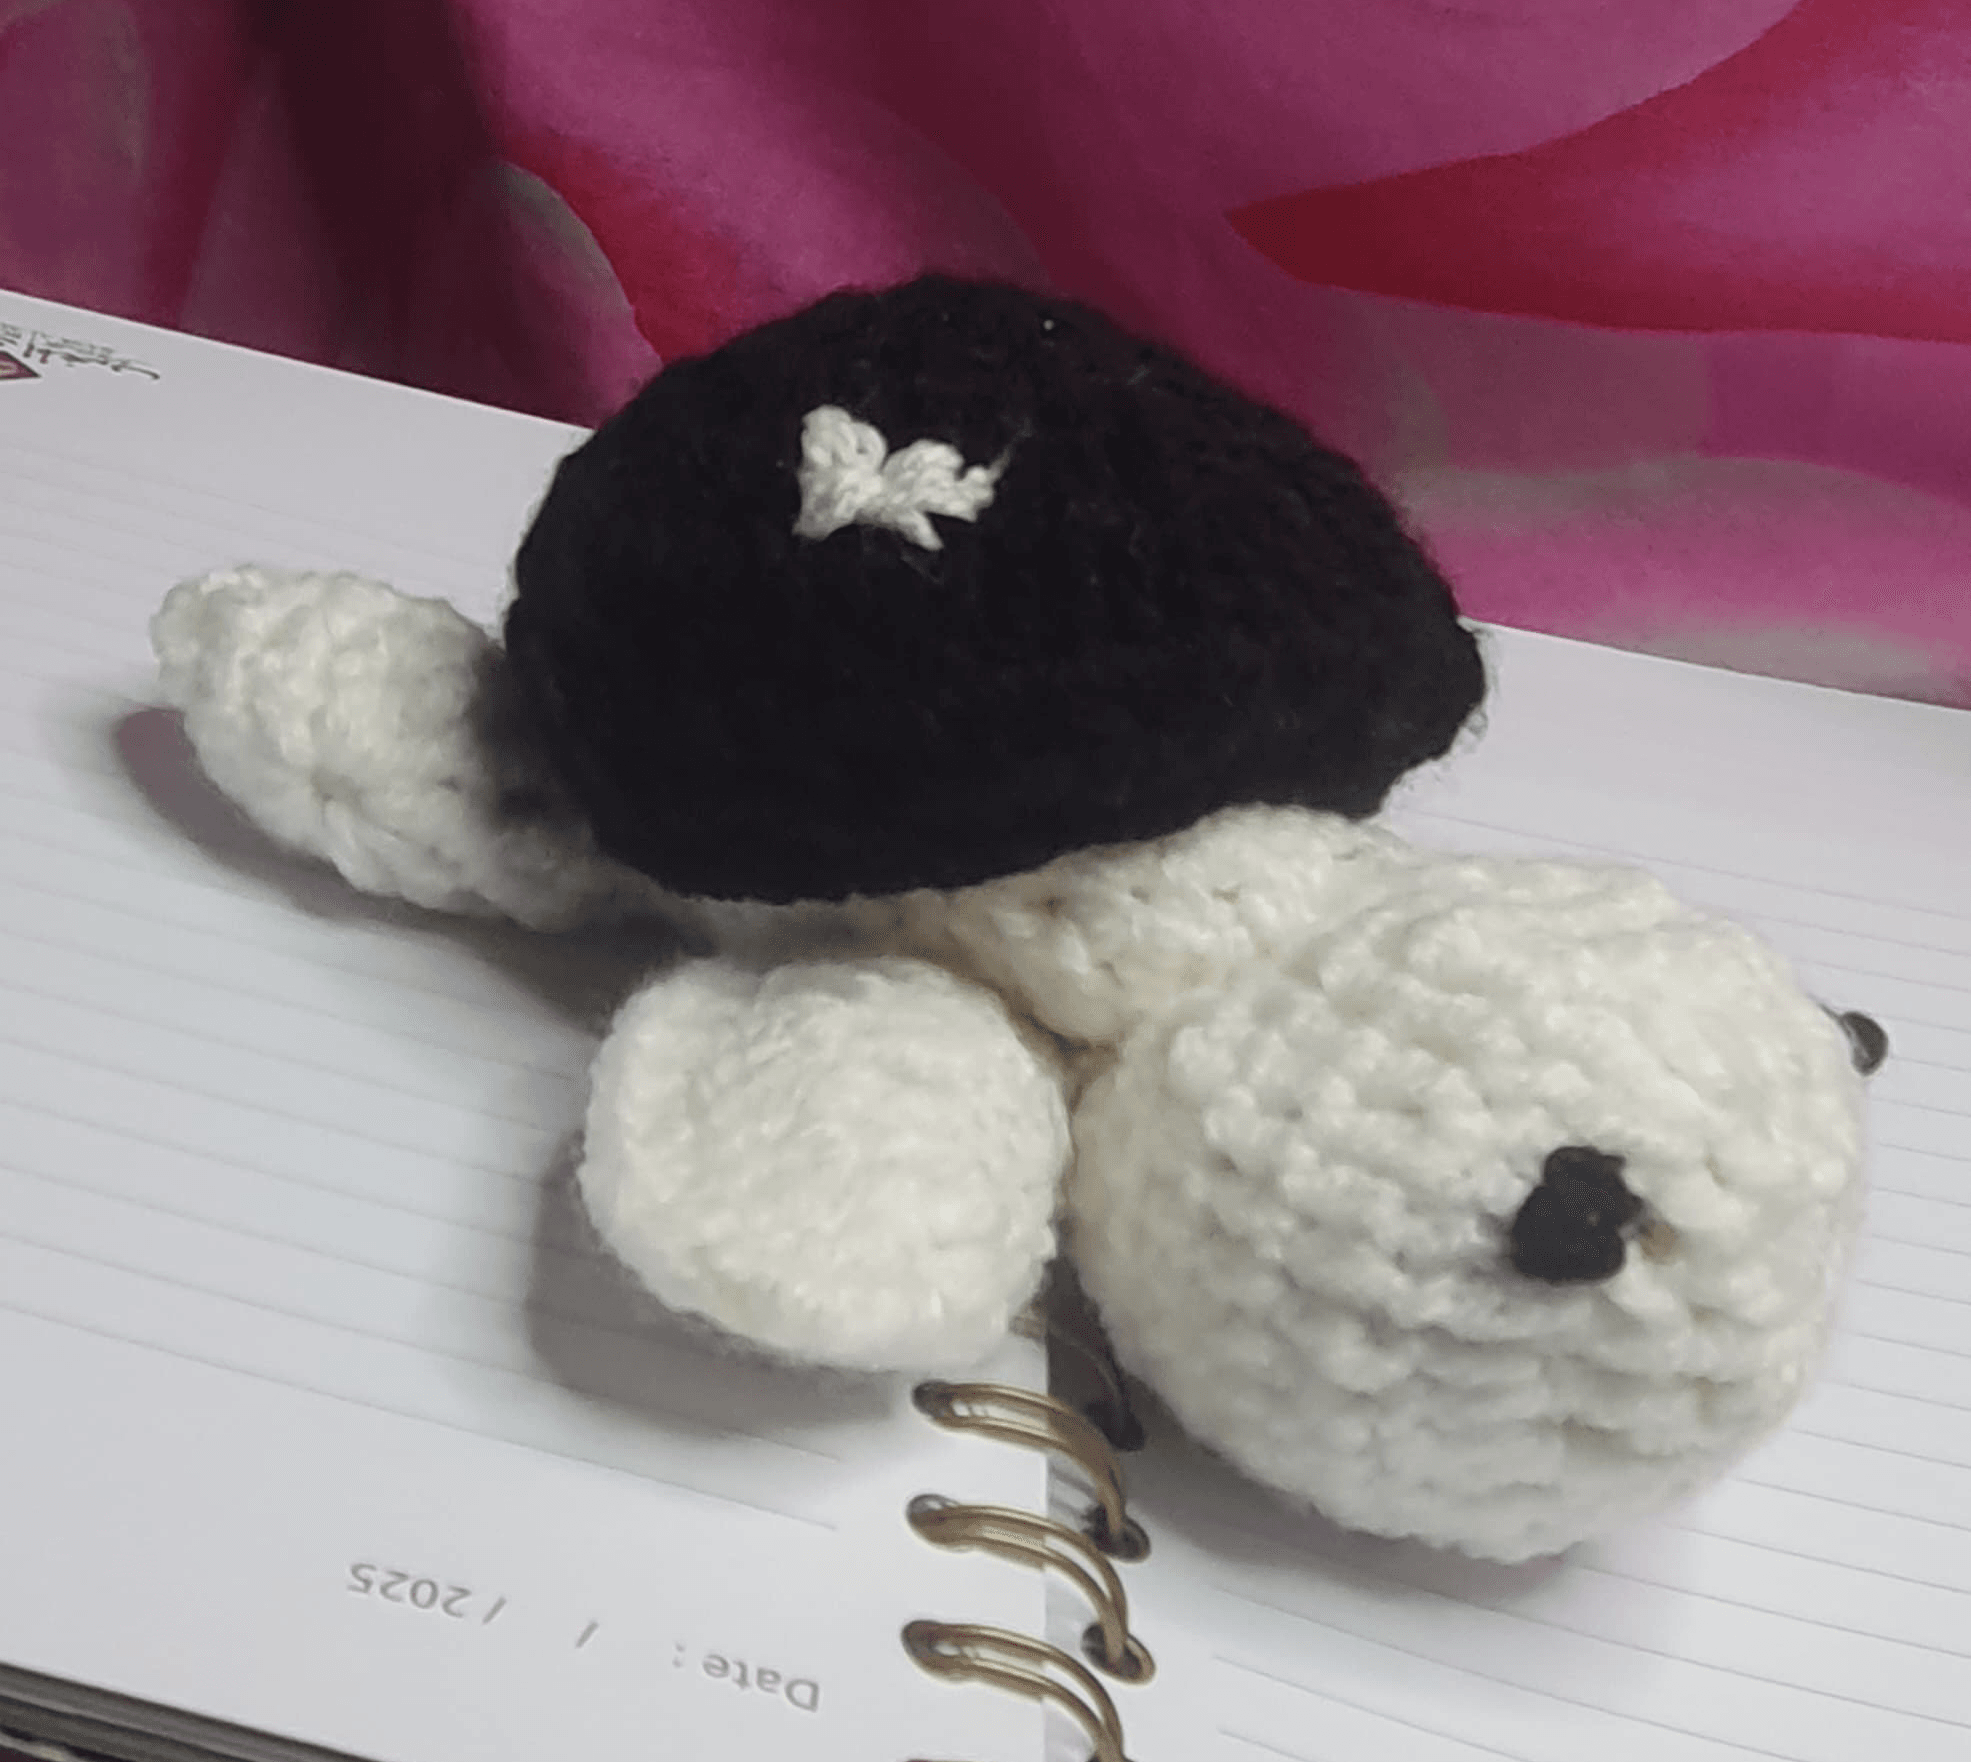
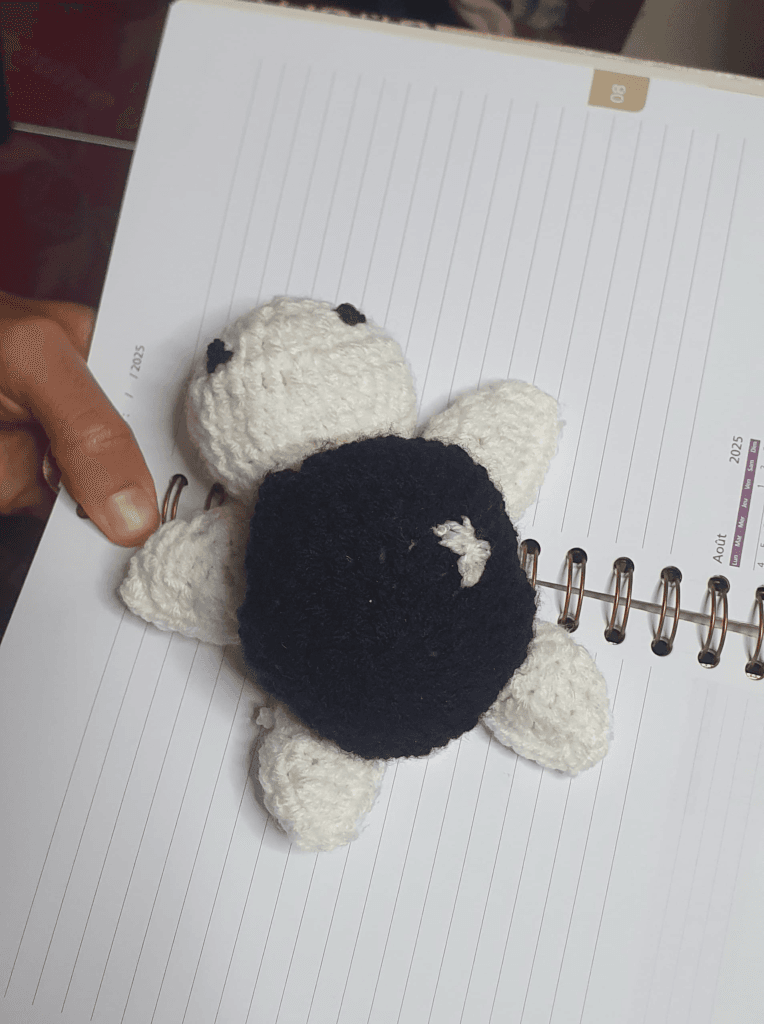
Shell-abrate Cuteness! Crochet Your Own Adorable Tiny Turtle – Free Pattern!
Hey crafty friends! 👋 Ever wanted to make something super cute and tiny that you can hold in your hand? Well, get your hooks ready because we’re diving into a fun project: crocheting a teeny-tiny turtle! 🐢
This little guy is perfect for beginners and uses just basic crochet stitches. Imagine how sweet he’ll look sitting on your desk, shelf, or even as a keychain charm! Let’s gather our supplies and get started on this shell-shockingly adorable project!
What You’ll Need:
- Yarn: We’re using lightweight yarn, about 2mm size. You’ll need black and white yarn – or any colors you like for your turtle! Get creative!
- Crochet Hook: A 2.5mm crochet hook is perfect for this yarn.
- Safety Eyes: You’ll need 6mm safety eyes to give your turtle some personality.
- Stuffing: Just a little bit of fiberfill or yarn scraps to make your turtle nice and squishy.
- Yarn Needle: For sewing pieces together and hiding those yarn ends.
- Scissors: To snip your yarn.
- Stitch Marker (Optional but helpful): This little tool helps you keep track of where each round begins, especially when you’re just starting out!
Let’s Learn Some Crochet Magic Words! (Abbreviations)
- MR: Magic Ring – This is how we start crocheting in a circle without any holes in the middle!
- sc: Single Crochet – Our main stitch! It’s like the building block of crochet.
- inc: Increase – This means we’re making our circle bigger by adding an extra stitch.
- dec: Decrease – This means we’re making our circle smaller by taking away a stitch.
- *( )6: Repeat everything inside the brackets 6 times. It’s like saying “do this pattern six times in a row!”
Ready to Crochet? Let’s Make Our Turtle Piece by Piece!
🐢 Part 1: Front Flippers (Make 2!) 🐢
Imagine these are the turtle’s little arms for swimming!
- Round 1 (R1): Make a Magic Ring (MR). Then, do 6 single crochet (6sc) stitches inside the magic ring. Pull the tail of the magic ring tight to close the circle. (You should have 6 stitches in this round)
- Think of it like making a tiny donut shape with yarn!
- Round 2 (R2): Increase (inc) in every stitch around. That means you’ll do 2 single crochet stitches in each stitch from the last round. (6 inc) (You should have 12 stitches now – we made it bigger!)
- Round 3 (R3): Now we’re going to do a pattern: *(single crochet (sc), increase (inc))6. This means you’ll do one single crochet in the first stitch, then an increase in the next stitch, and repeat that all the way around six times. (18) (You should have 18 stitches now – even bigger!)
- Repeat Round 3: Just do Round 3 again! (18) (Still 18 stitches, we’re keeping it the same size for a bit).
- Sew Edges Together: Fold your little flipper piece in half and single crochet the edges together to close it up. This makes it a flat flipper shape! Cut your yarn, leaving a little tail, and pull it through the last loop to tie it off. Then, hide the yarn tail inside the flipper using your yarn needle – like tucking it in!
🐢 Part 2: Rear Flippers (Make 2!) 🐢
These are the turtle’s back legs, also for swimming!
- Round 1 (R1): Make a Magic Ring (MR). Then, do 6 single crochet (6sc) stitches inside the magic ring. Close the circle. (6)
- Round 2 (R2): Increase (inc) in every stitch around. (6 inc) (12)
- Round 3 (R3): *(3 single crochet (3sc), increase (inc))3. This time, you’ll do three single crochet stitches, then an increase, and repeat that pattern three times around. (15) (You should have 15 stitches)
- Sew Edges Together: Just like the front flippers, fold it in half and single crochet the edges together to close. Cut your yarn, tie it off, and hide the yarn tail.
🐢 Part 3: Head 🐢
Let’s make the turtle’s cute little head!
- Round 1 (R1): Make a Magic Ring (MR). Then, do 6 single crochet (6sc) stitches inside the magic ring. Close the circle. (6)
- Round 2 (R2): Increase (inc) in every stitch around. (6 inc) (12)
- Round 3 (R3): *(single crochet (sc), increase (inc))6. (18)
- Rounds 4, 5, 6: Single crochet (sc) in each stitch around for three rounds. This means just do one single crochet in every stitch from the round before. (18) (Still 18 stitches for all three rounds – we’re making the head taller now, not wider).
- Put in the Safety Eyes: Now it’s time to give your turtle some eyes! Place the 6mm safety eyes between Round 4 and Round 5, about 7 stitches apart. Make sure they are securely attached!
- Round 7 (R7): *(single crochet (sc), decrease (dec))6. Now we’re making the head smaller to shape it! Do one single crochet, then a decrease, and repeat that six times around. (12)
- Round 8 (R8): Single crochet (sc) in each stitch around. (12)
- After Round 8: Do a few more single crochet stitches to make a little neck part. Cut your yarn, leaving a tail for sewing. We’ll stuff the head a little bit later.
🐢 Part 4: Shell 🐢
This is the turtle’s hard back!
- Round 1 (R1): Make a Magic Ring (MR). Then, do 6 single crochet (6sc) stitches inside the magic ring. Close the circle. (6)
- Round 2 (R2): Increase (inc) in every stitch around. (6 inc) (12)
- Round 3 (R3): *(single crochet (sc), increase (inc))6. (18)
- Round 4 (R4): *(2 single crochet (2sc), increase (inc))6. (24)
- Round 5 (R5): *(3 single crochet (3sc), increase (inc))6. (30)
- Rounds 6, 7: Single crochet (sc) in each stitch around for two rounds. (30) (Still 30 stitches for both rounds).
- Back Loop Only for Round 7: Important step! In Round 7, when you do your single crochet, only go through the back loop of each stitch from the previous round. Imagine each stitch has a “V” shape – we’re only hooking into the back part of the “V”. This will create a little ridge that helps us attach the bottom part of the turtle later!
- Round 8 (R8): Single crochet (sc) in each stitch around. (30)
- Cut your yarn and tie it off.
🐢 Part 5: Assembling Your Turtle! 🐢
Let’s put all the pieces together!
- Sew the Flippers to the Head: Sew the front flippers to the sides of the head, near the bottom. Sew the rear flippers a little further back on the sides of the head.
- Stuff the Head: Lightly stuff the head with fiberfill. Don’t overstuff it, we want it to be a nice shape.
- Attach the Head to the Shell: Now we’re going to crochet the head to the shell!
- Make a Knot: Make a slip knot on your hook with your yarn.
- Attach to the Shell: Find the “ridge” we made in Round 7 of the shell (the back loop only round). We’re going to crochet into this ridge and also into the stitches of the head to join them together.
- Crocheting the Shell and Head Together (Round 9):
- Back Loop Only on Shell: We’re still only working in the back loops of the shell’s Round 7 ridge.
- Stitch Placement: Follow this pattern around:
- Back loops of shell only:Single crochet (sc) in the back loops only of the shell all the way around, attaching the head as you go. Here’s the stitch count guide:
- 2 single crochet (2sc) on the 1st flipper
- 1 single crochet (1sc) space between flipper and head
- 5 single crochet (5sc) on the head
- 1 single crochet (1sc) space between head and flipper
- 2 single crochet (2sc) on the 2nd flipper
- 5 single crochet (5sc) on the head
- 1 single crochet (1sc) space between head and flipper
- 2 single crochet (2sc) on the 3rd flipper (rear flipper)
- 5 single crochet (5sc) on the head
- 2 single crochet (2sc) on the 4th flipper (rear flipper)
- 4 single crochet (4sc) to finish the round.
- (30 stitches total)
- Back loops of shell only:Single crochet (sc) in the back loops only of the shell all the way around, attaching the head as you go. Here’s the stitch count guide:
- Shaping the Body (Rounds 10-12): Now we’re going to make the bottom part of the turtle’s body smaller to close it up.
- Round 10 (R10): *(3 single crochet (3sc), decrease (dec))6. (24)
- Round 11 (R11): *(2 single crochet (2sc), decrease (dec))6. (18)
- Round 12 (R12): *(single crochet (sc), decrease (dec))6. (12)
- Stuff the Body (Lightly!): Now you can lightly stuff the body of the turtle. Don’t stuff it too much! We want a nice, gentle belly shape, not a super round ball. Too much stuffing will make it bulge and not look as cute.
- Round 13 (R13): Decrease (dec) in every stitch around. (6)
- Close the Opening: Cut your yarn and pull it through the last loop. Use your yarn needle to weave the yarn tail through the remaining 6 stitches, pull it tight to close the hole completely, and then hide the yarn tail inside the body.
🐢 Part 6: Tail 🐢
Let’s give our turtle a tiny tail!
- Make a Very Long Tail: Cut a long piece of yarn.
- Tail Shape: With your yarn needle, sew a little stitch and then slip stitch (sl st) in the same stitch to make a tiny knot or bump for the tail. Repeat this a few times to make a very small, stubby tail at the back of the turtle, where the body closes up. Tie off and hide the yarn tail.
You Did It! You Crocheted a Tiny Turtle! 🎉
Give your little turtle a name and find the perfect spot for them! These little guys are so much fun to make, and you can customize them with different colors and yarn types.
Share Your Turtles!
I would LOVE to see your tiny turtle creations! Tag me on social media [Your Social Media Links Here – e.g., Instagram @YourCrochetName, #TinyTurtleCrochet] so I can see your adorable shelled friends!
Happy Crocheting! 🧶 😊