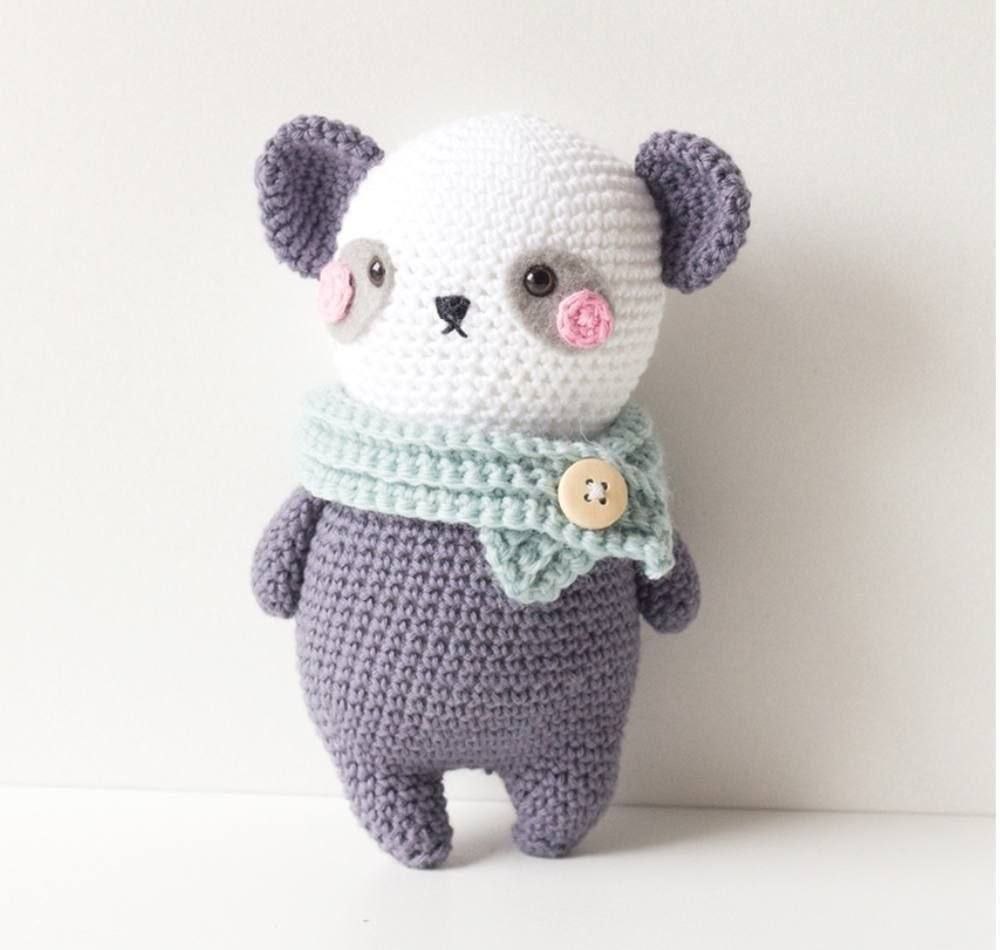
Stitch Your Own Cuddly Companion: Adorable Panda Amigurumi Pattern
“`html
Adorable Crochet Panda Amigurumi Pattern
Create your own cuddly companion with this detailed crochet panda pattern. This project is perfect for amigurumi lovers looking to make a sweet, stylized panda with a cozy little scarf. Follow the step-by-step instructions below to bring this cute bear to life!
Materials Needed
- Crochet Hooks: 3.0mm and 3.5mm (US C/2 and E/4)
- Yarn:
- White cotton (approx. 50g)
- Dark grey cotton (approx. 50g)
- Pink cotton (approx. 20g)
- Green wool (approx. 20g)
- Accessories:
- Black embroidery thread for the face
- Synthetic fiberfill stuffing
- Fabric glue
- Embroidery needle
- Grey felt (for eye patches)
- 5mm safety eyes
- One small wooden button
Abbreviations (US Terms)
- ch: chain
- sl st: slip stitch
- sc: single crochet
- mr: magic ring
- r: round
- incr: increase (2 sc in one stitch)
- decr: decrease (sc 2 together)
- BLO: back loop only
Step-by-Step Pattern
Legs and Lower Body
Legs (Make 2): Use grey yarn.
- r1: 4 sc in mr (4)
- r2: incr in each st (8)
- r3: 8 sc BLO (8)
- r4: (3 sc, incr) repeat 2 times (10)
- r5: (4 sc, incr) repeat 2 times (12)
- r6: (5 sc, incr) repeat 2 times (14)
- r7: 14 sc (14)
Finish the first leg with a slip stitch and cut the thread. Make the second leg, but do not cut the thread.
Connecting the Legs and Body:
- r8: Chain 4, work 14 sc across the first leg, chain 4, work 14 sc across the second leg (Total: 36)
- r9: 36 sc (36)
- r10: (8 sc, incr) repeat 3 times, 9 sc (39)
- r11: 10 sc, incr, 9 sc, incr, 8 sc, incr, 9 sc (42)
- r12: 11 sc, incr, 9 sc, incr, 9 sc, incr, 10 sc (45)
- r13: 11 sc, incr, 10 sc, incr, 10 sc, incr, 11 sc (48)
- r14-24: 48 sc (48)
- r25: 14 sc, decr, 5 sc, decr, 6 sc, decr, 6 sc, decr, 9 sc (44)
- r26: 44 sc (44)
Sew the opening between the two legs closed and begin stuffing the body.
- r27: 13 sc, decr, 20 sc, decr, 7 sc (42)
- r28: 42 sc (42)
- r29: (5 sc, decr) repeat 6 times (36)
- r30: (4 sc, decr) repeat 6 times (30)
- r31: 30 sc (30)
Finish with a slip stitch and stuff the body firmly.
The Head
Use white yarn.
- r1: 6 sc in mr (6)
- r2: incr in each st (12)
- r3: (1 sc, incr) repeat 6 times (18)
- r4: (2 sc, incr) repeat 6 times (24)
- r5: (3 sc, incr) repeat 6 times (30)
- r6: (4 sc, incr) repeat 6 times (36)
- r7: (5 sc, incr) repeat 6 times (42)
- r8: (6 sc, incr) repeat 6 times (48)
- r9-18: 48 sc (48)
- r19: (6 sc, decr) repeat 6 times (42)
- r20: 42 sc (42)
- r21: (5 sc, decr) repeat 6 times (36)
- r22-23: 36 sc (36)
- r24: (4 sc, decr) repeat 6 times (30)
Finish with a slip stitch. Leave a long tail for sewing the head to the body.
Front Arms (Make 2)
Use grey yarn.
- r1: 5 sc in mr (5)
- r2: incr in each st (10)
- r3-12: 10 sc (10)
Finish with a slip stitch and leave a tail for sewing. Stuff the arms lightly.
Tail
Use grey yarn.
- r1: 6 sc in mr (6)
- r2: incr in each st (12)
- r3: 12 sc (12)
- r4: decr repeat 6 times (6)
Finish with a slip stitch and stuff the tail.
Ears (Make 2)
Use grey yarn.
- r1: 6 sc in mr (6)
- r2: incr in each st (12)
- r3: (1 sc, incr) repeat 6 times (18)
- r4: (2 sc, incr) repeat 6 times (24)
- r5-7: 24 sc (24)
- r8: (2 sc, decr) repeat 6 times (18)
Finish with a slip stitch. Flatten the ears and sew them to the head (between rounds 8-10, leaving 14 stitches between the ears).
Cheeks (Make 2)
Use pink yarn.
- r1: 3 sc in mr (3)
- r2: incr in each st (6)
Fasten off and sew or glue the cheeks just below the eyes.
The Scarf
Use the 3.5mm hook and green wool.
- Chain until the piece is 26 cm (approx. 10.2 inches) long. Add 1 chain for the turning chain.
- Row 1: 1 sc in each chain across. Chain 1, turn.
- Row 2: 2 sc in each stitch BLO. Chain 1, turn.
- Row 3: 1 sc in each stitch BLO. Chain 1, turn.
- Row 4: 1 sc in each stitch BLO. Chain 1, turn.
- Row 5: 1 sc in each stitch BLO. Chain 1, turn.
Fasten off and weave in ends. Sew a wooden button about 1 cm (0.4 inches) from one end. Wrap the scarf around the panda’s neck in a cross pattern and sew it in place.
Assembly and Finishing Touches
- Eyes: Cut two oval patches from grey felt. Attach the 5mm safety eyes to the felt patches. Glue the felt patches to the head (at round 13, with 8 stitches between the eyes) and secure the safety eyes through the head.
- Face: Use black embroidery thread to sew a small “X” or triangle for the nose and mouth.
- Body Parts: Sew the head to the body, the front arms to the sides, and the tail to the back (between rounds 11-14).
“`