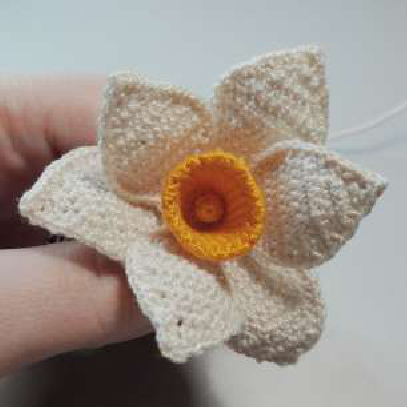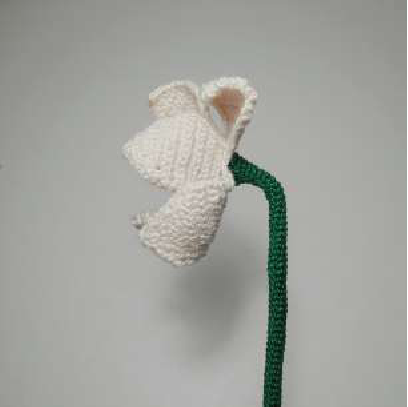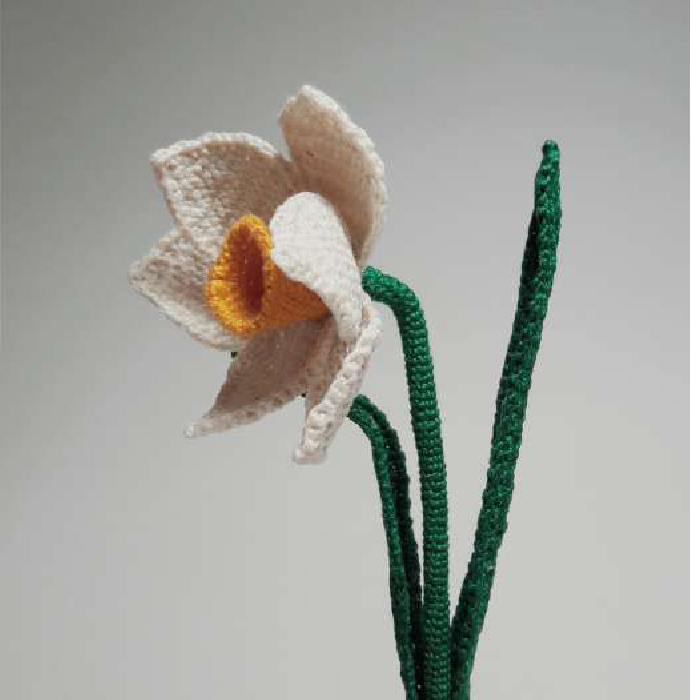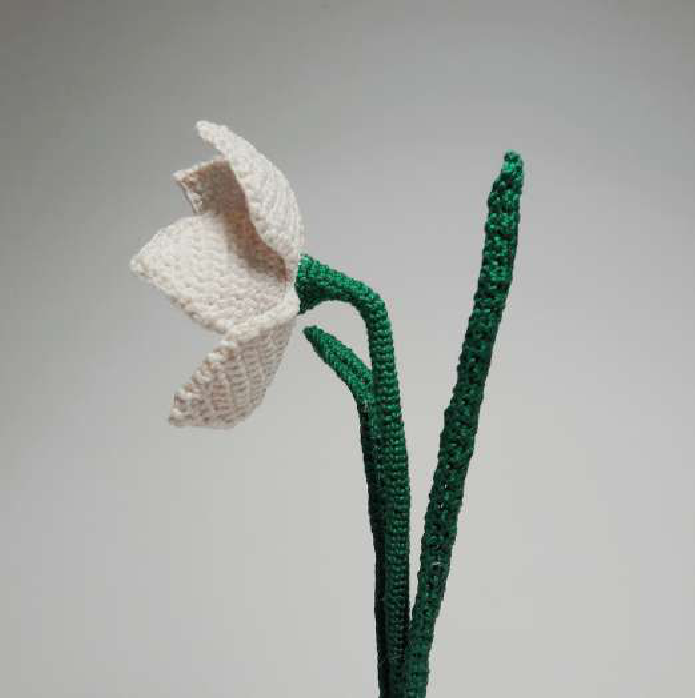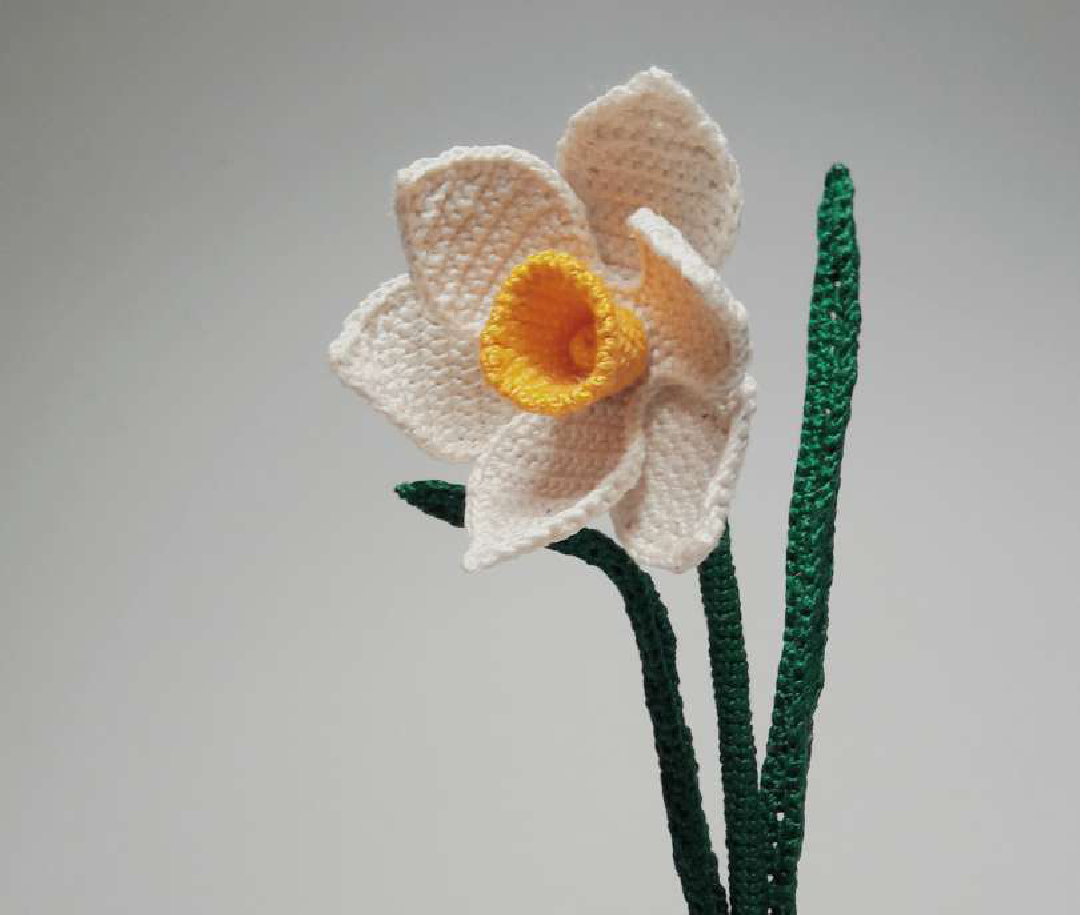
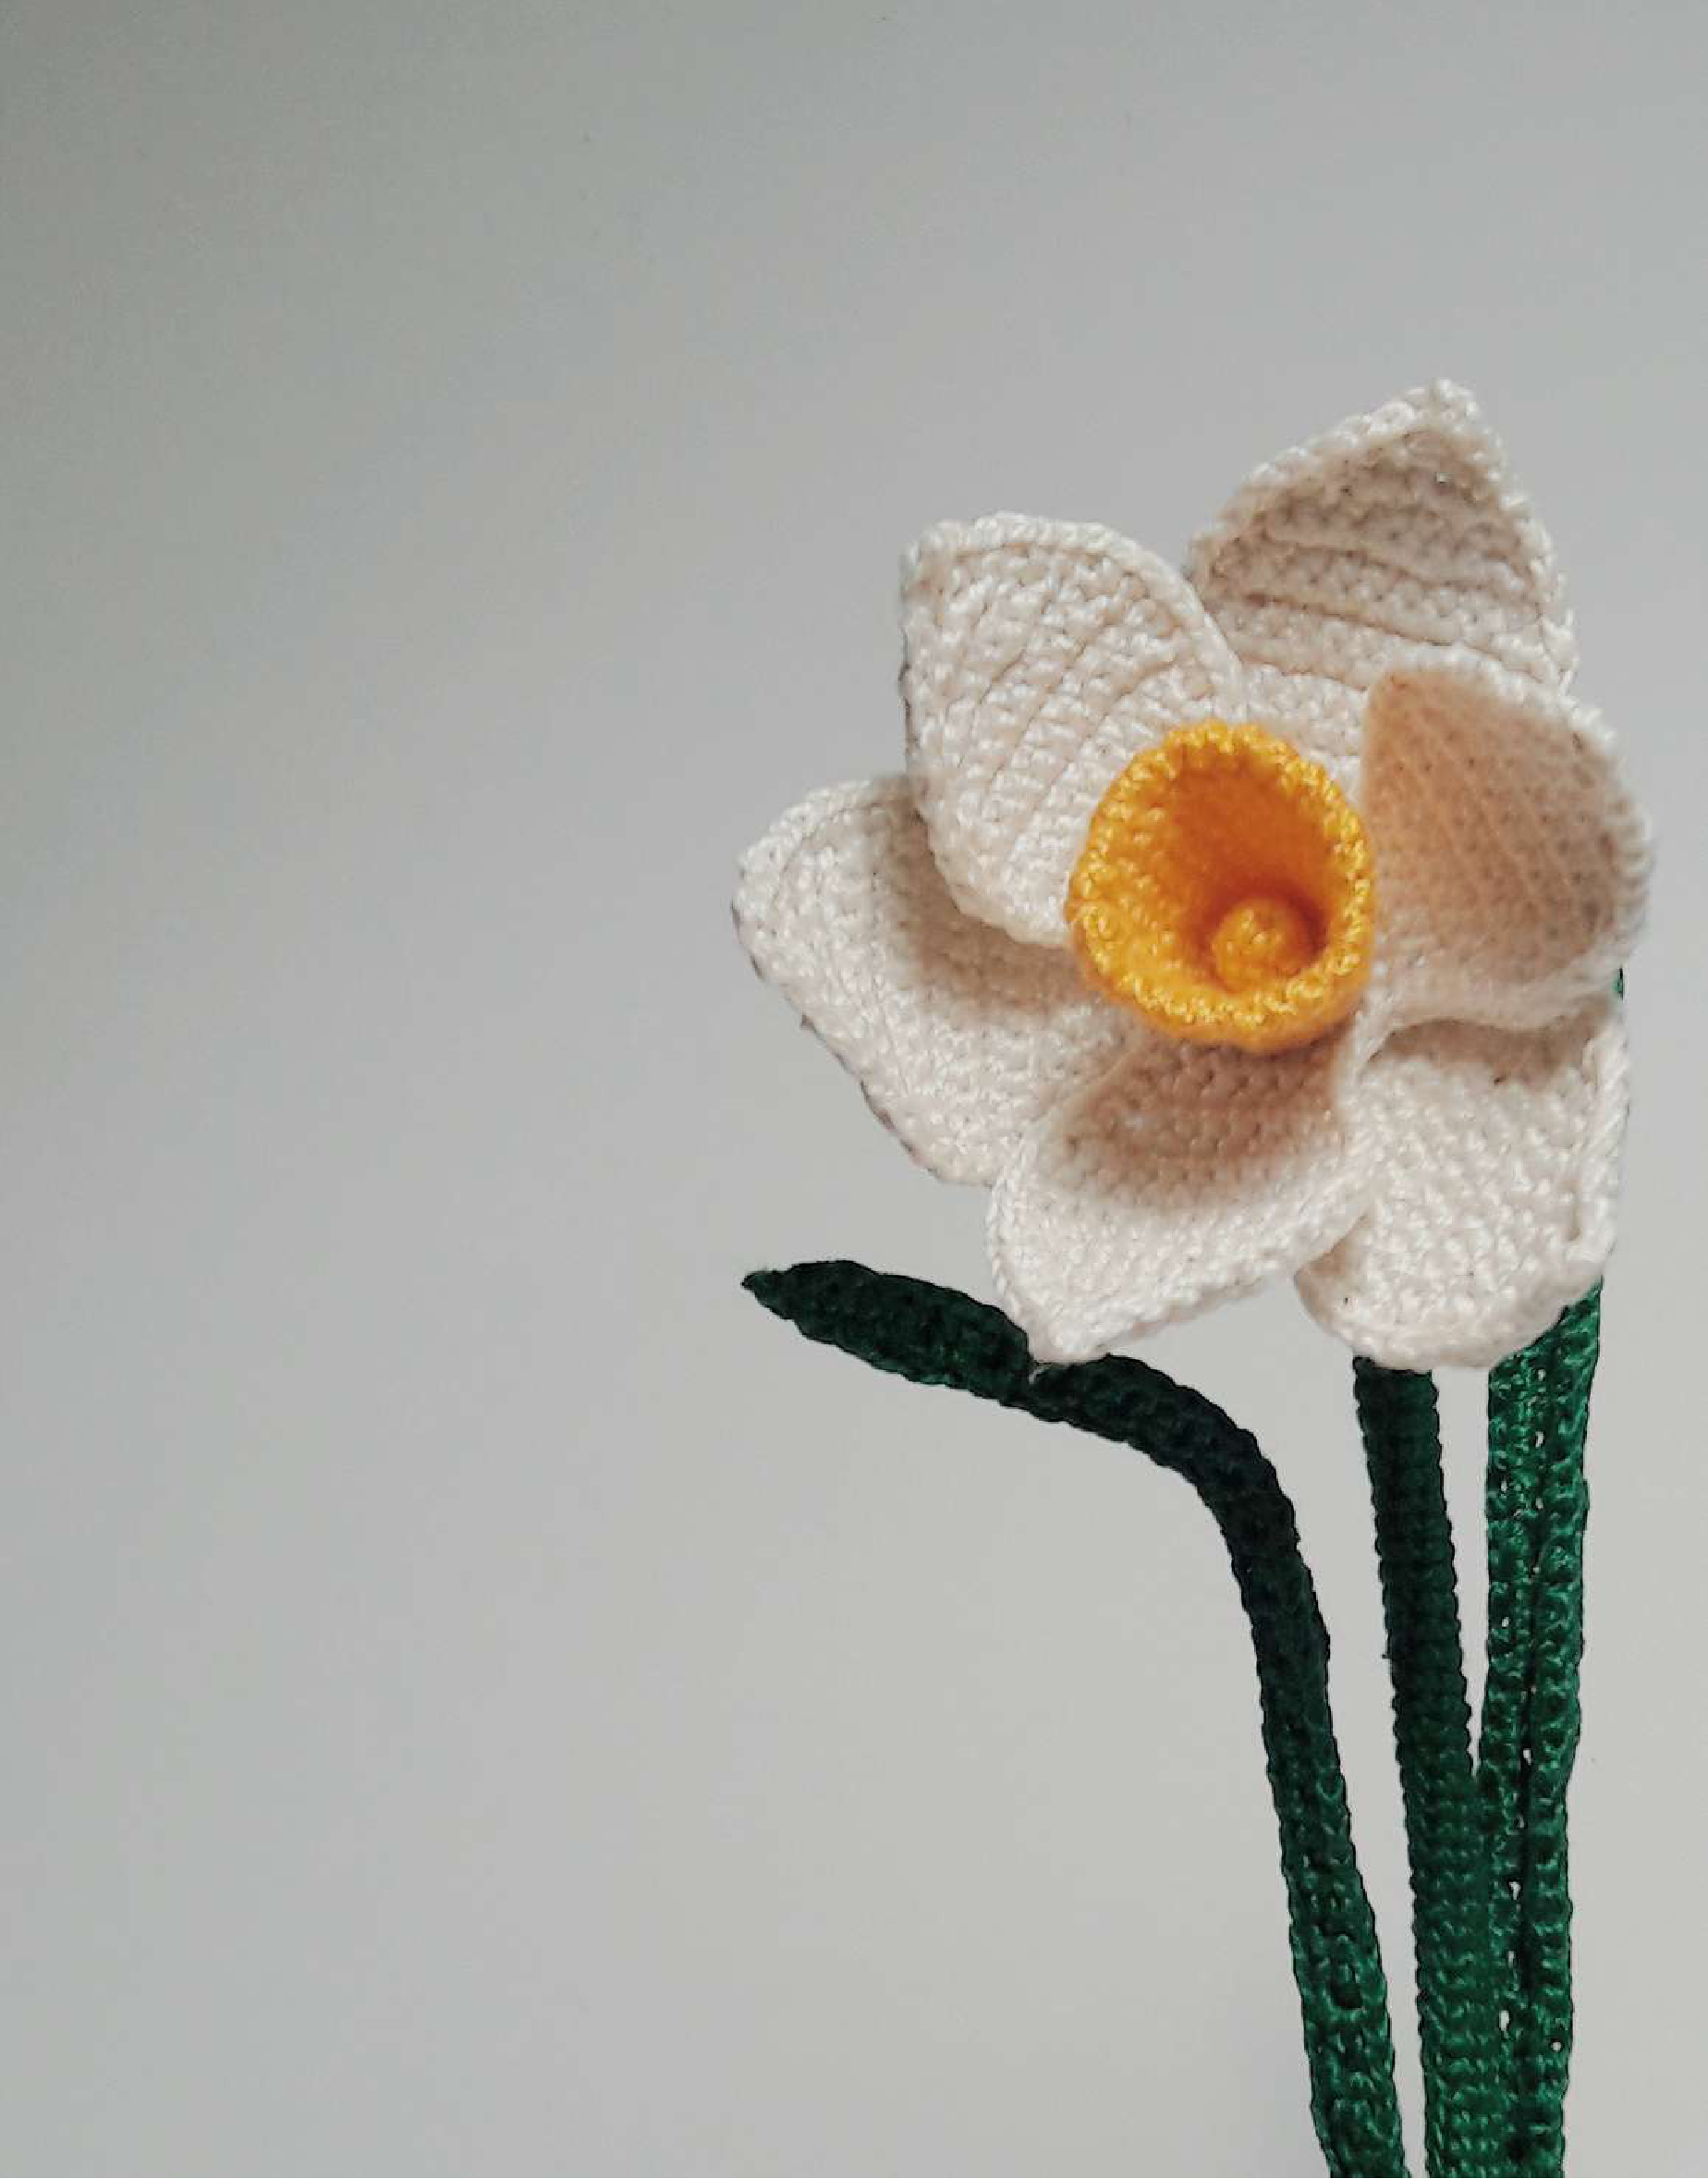
Stunning Crochet Daffodil Flower: Free Pattern
Bring a touch of everlasting spring into your home with this beautiful and realistic crochet daffodil pattern! Perfect for bouquets, home décor, or as a thoughtful handmade gift, this pattern will guide you step-by-step to create your very own stunning narcissus flower. Let’s gather our materials and get started on this joyful project!
Materials You’ll Need
- Yarn: Fine cotton yarn (like Iris PNK im. Kirova) in three colors: white, green, and yellow.
- Crochet Hook: A size that matches your yarn choice.
- Wire: 1mm diameter wire for the main stem and 0.3mm diameter wire for shaping the petals and leaves (optional, but recommended).
- Stiffening Agent: Starch paste or diluted PVA glue to help the flower hold its shape (optional).
- Needle: A tapestry needle for sewing the parts together.
Abbreviations (US Crochet Terms)
- MR: Magic Ring (or Amigurumi Ring)
- ch: Chain Stitch
- sc: Single Crochet
- sl st: Slip Stitch
- inc: Increase (work 2 single crochet stitches in the same stitch)
- dec: Decrease (crochet two stitches together)
- sc3tog: Triple Decrease (crochet three stitches together)
- (…) * N: Repeat the instructions in the parentheses N times.
- (…): The total number of stitches in the round or row.
- BLO: Back Loops Only
- FLO: Front Loops Only
Crochet Daffodil Pattern
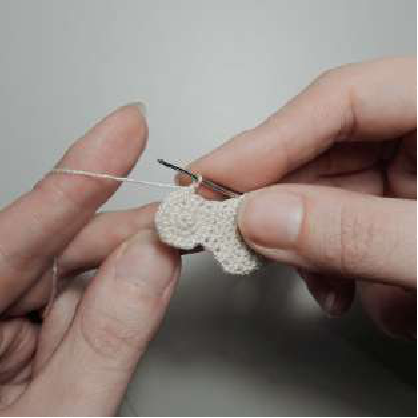
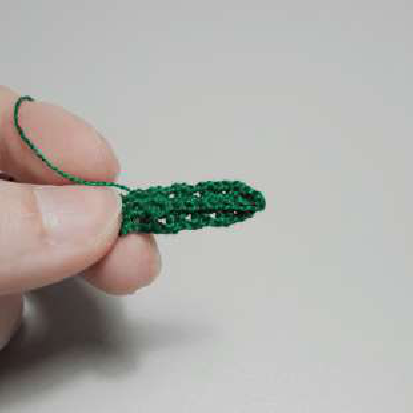
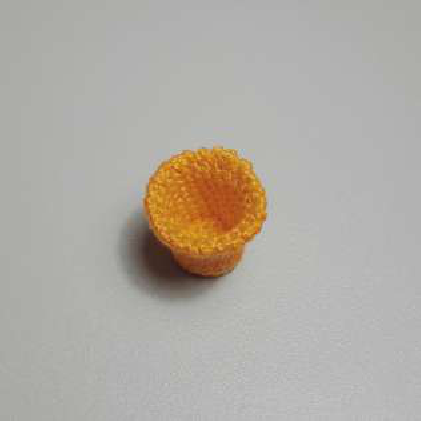
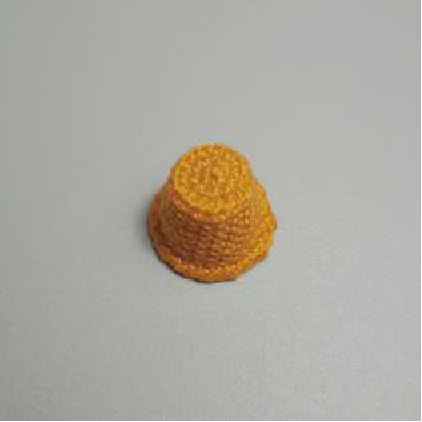
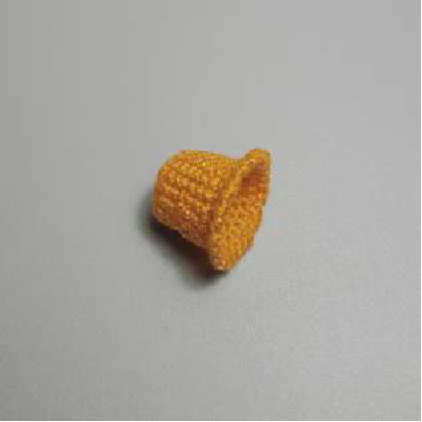
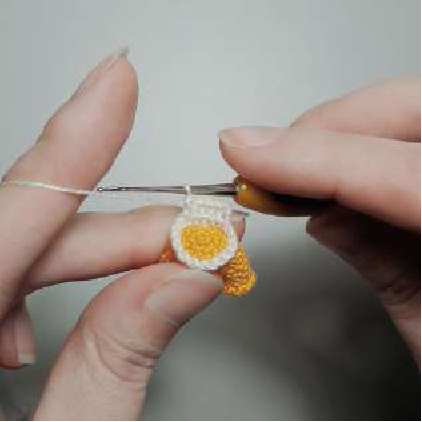
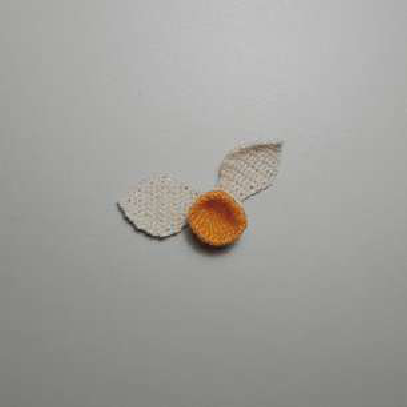
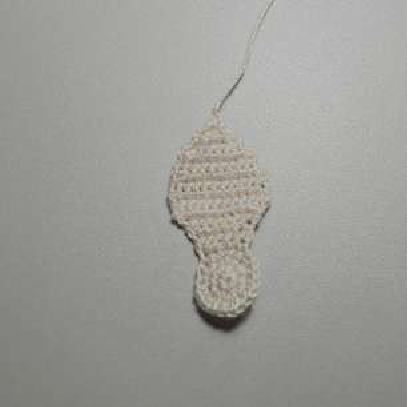
Part 1: The Crown (Trumpet)
We’ll start with the iconic center of the daffodil. Using your yellow yarn:


- Row 1: Start with 6 sc into a MR. (6)
- Row 2: Work an increase in each stitch around. (12)
- Row 3: [1 sc, inc] repeat 6 times. (18)
- Row 4: Working in the Back Loops Only (BLO), sc in each stitch around. (18)
- Rows 5-6: Work 1 sc in each stitch for two rows. (18)
- Row 7: [4 sc, inc] repeat 3 times. (21)
- Rows 8-9: Work 1 sc in each stitch for two rows. (21)
- Row 10: [5 sc, inc] repeat 3 times. (24)
- Rows 11-12: Work 1 sc in each stitch for two rows. (24)
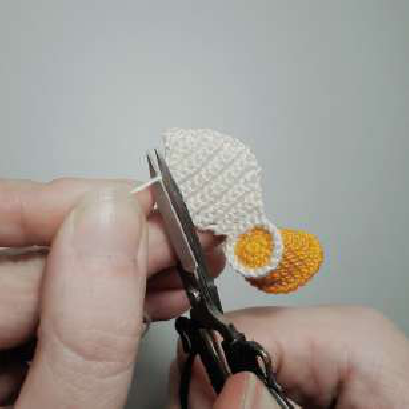
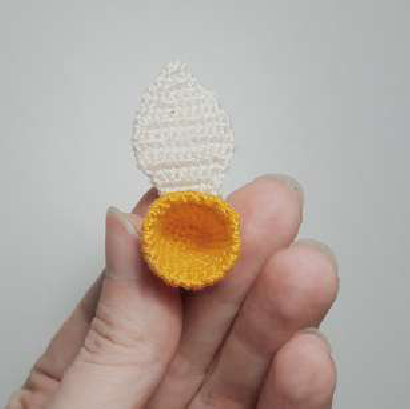
- Row 13: Create a decorative edge by working 1 reverse single crochet (crab stitch) in each stitch around. (24)
Fasten off and weave in the ends.
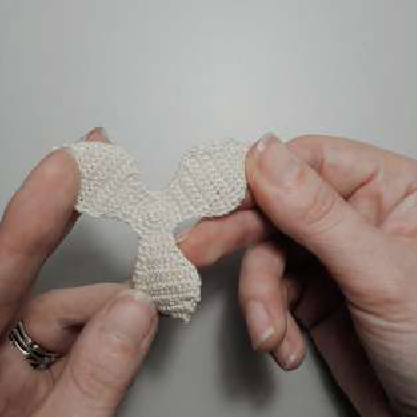
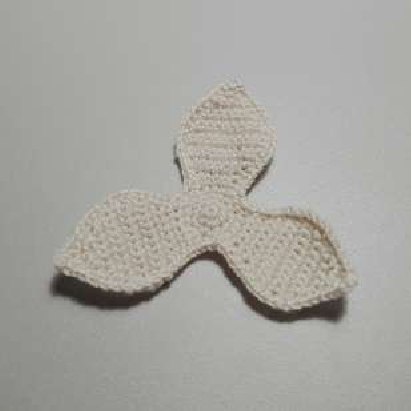
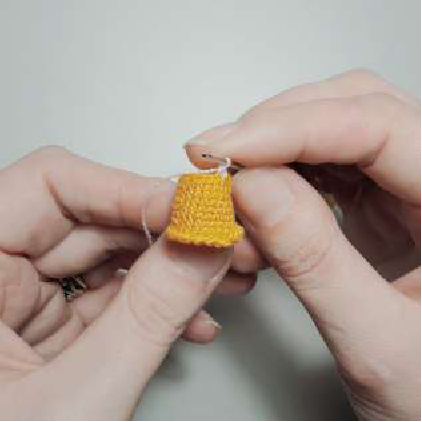
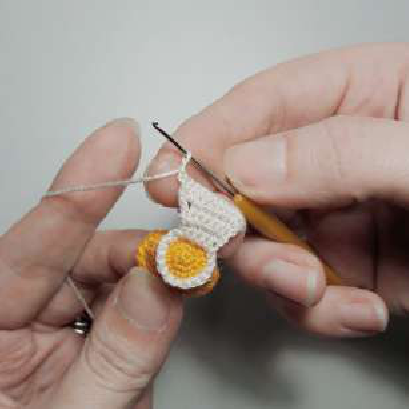
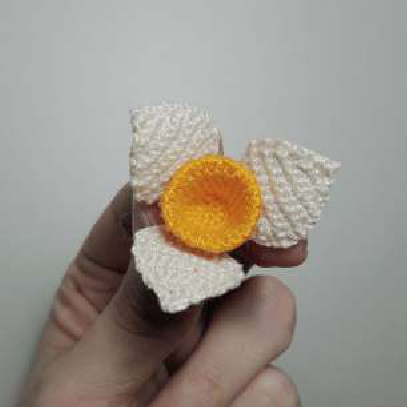
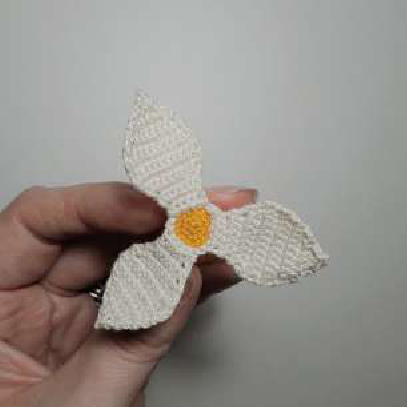
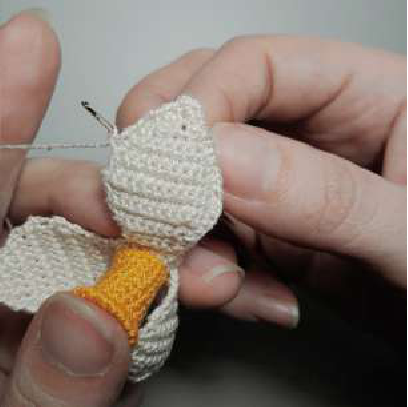
Part 2: The Top Three Petals
Join your white yarn to the front loops of Row 4 of the crown and work 18 sc around. Do not cut the yarn. We will now work the first petal in turning rows.
First Petal:
- Row 1: 5 sc, ch 1, turn. (5)
- Row 2: 5 sc, ch 1, turn. (5)
- Row 3: inc, 3 sc, inc, ch 1, turn. (7)
- Row 4: 7 sc, ch 1, turn. (7)
- Row 5: inc, 5 sc, inc, ch 1, turn. (9)
- Row 6: inc, 7 sc, inc, ch 1, turn. (11)
- Rows 7-9 (3 rows): 11 sc, ch 1, turn. (11)
- Row 10: dec, 7 sc, dec, ch 1, turn. (9)
- Row 11: 9 sc, ch 1, turn. (9)
- Row 12: dec, 5 sc, dec, ch 1, turn. (7)
- Row 13: dec, 3 sc, dec, ch 1, turn. (5)
- Row 14: dec, 1 sc, dec, ch 1, turn. (3)
- Row 15: Work a triple decrease (sc3tog). (1)
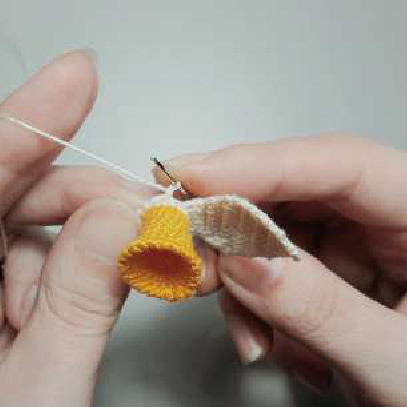
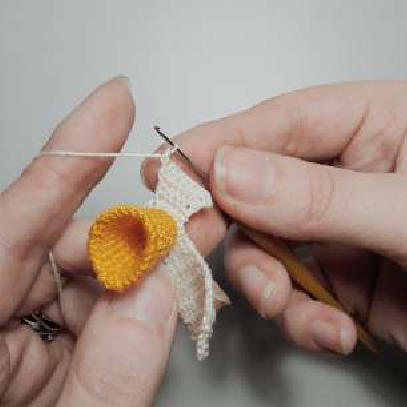
Fasten off and hide the end. To make the next two petals, skip one stitch from the base, join the yarn, and repeat the pattern above twice more.
Once all three top petals are done, single crochet around the edges to give them a clean finish. If you are using the thin wire for shaping, crochet over it now.
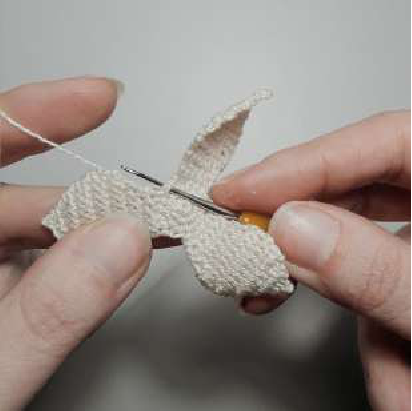
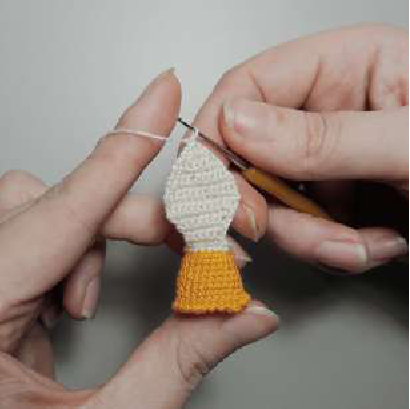
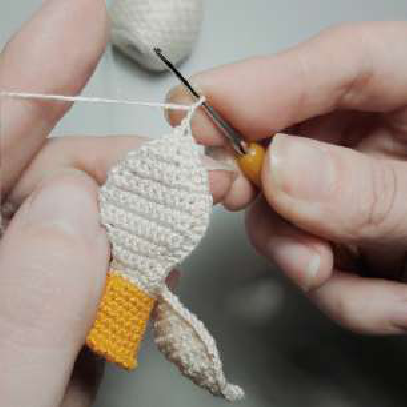
Part 3: The Bottom Three Petals
This part is created separately and will be layered behind the top petals. Using white yarn:
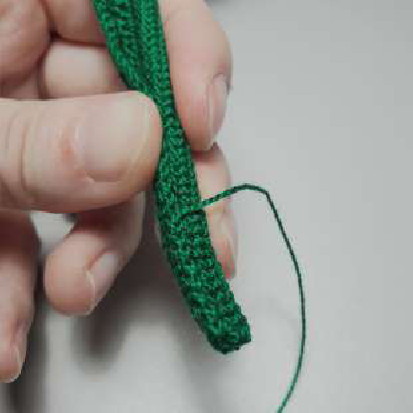
- Row 1: 6 sc into MR. (Note: Don’t pull the ring completely tight; the stem wire will pass through here later.) (6)
- Row 2: [inc] * 6. (12)
- Row 3: [1 sc, inc] * 6. (18)
Do not cut the yarn. We’ll now work the petals directly onto this base.
First Petal:
- Row 1: Working in the Front Loops Only (FLO) of Row 3, work 5 sc, ch 1, turn. (5)
- Row 2: inc, 3 sc, inc, ch 1, turn. (7)
- Rows 3-4 (2 rows): 7 sc, ch 1, turn. (7)
- Row 5: inc, 5 sc, inc, ch 1, turn. (9)
- Row 6: inc, 7 sc, inc, ch 1, turn. (11)
- Rows 7-9 (3 rows): 11 sc, ch 1, turn. (11)
- Row 10: dec, 7 sc, dec, ch 1, turn. (9)
- Row 11: dec, 5 sc, dec, ch 1, turn. (7)
- Row 12: dec, 3 sc, dec, ch 1, turn. (5)
- Row 13: dec, 1 sc, dec, ch 1, turn. (3)
- Row 14: Work a triple decrease (sc3tog). (1)
Fasten off. Skip one stitch on the base, join the yarn, and repeat the pattern for the second and third petals.
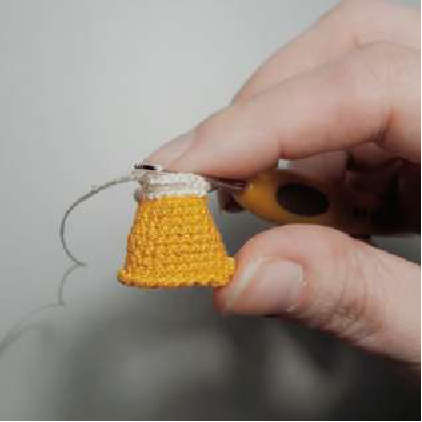
Just like the top petals, finish by working a round of single crochet around the edges, crocheting over wire if you choose to.
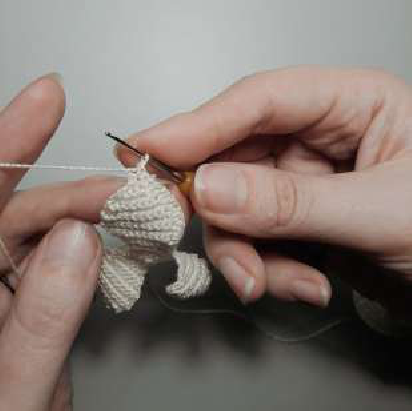
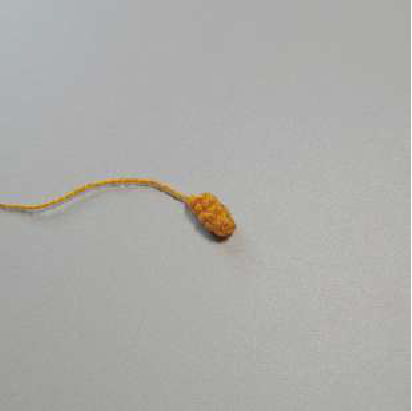
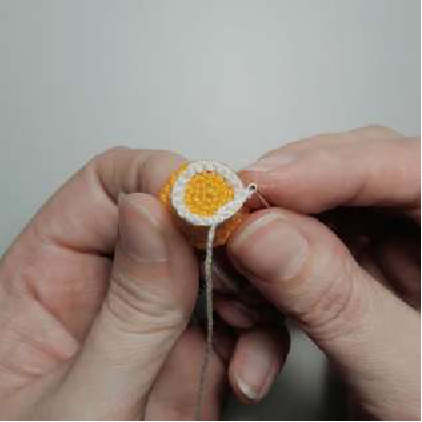
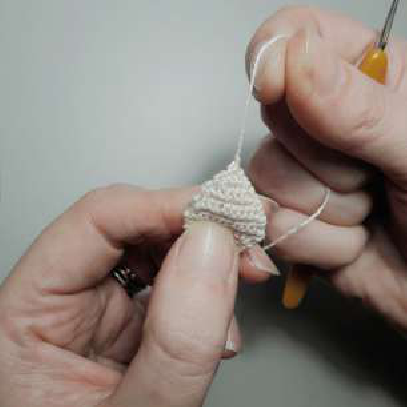
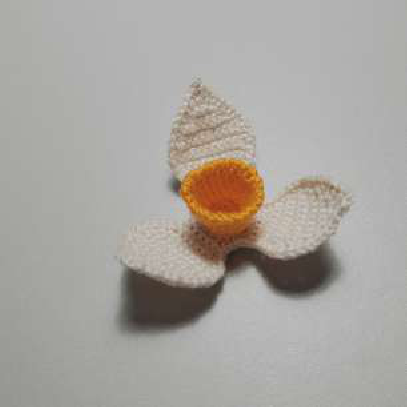
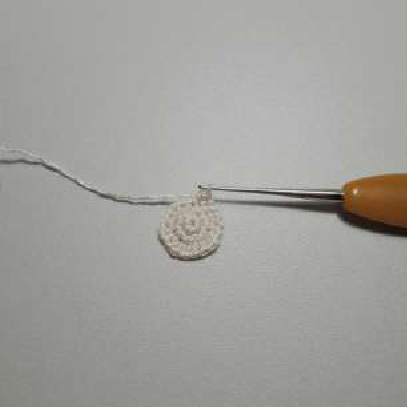
Part 4: The Center (Instead of Stamens)
Using yellow yarn, create a small center piece.
- Row 1: 6 sc into MR. (6)
- Rows 2-4 (3 rows): 6 sc. (6)
Fasten off, leaving a long tail for sewing.
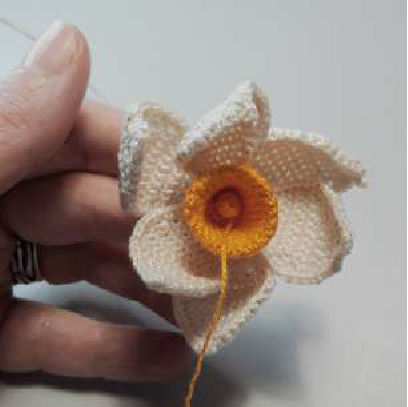
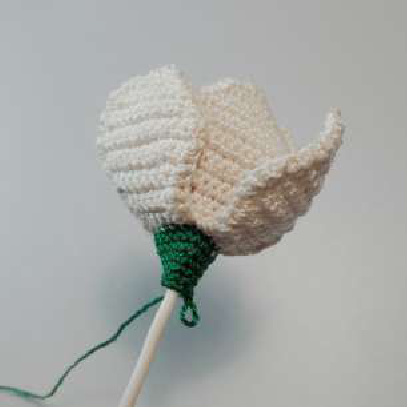
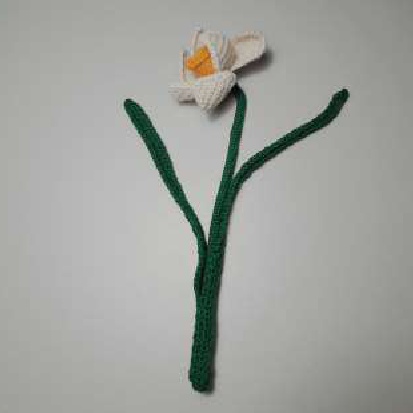
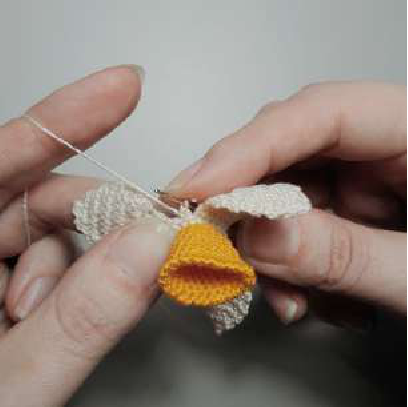
Assembly & Finishing
Step 1: Assembling the Flower Head
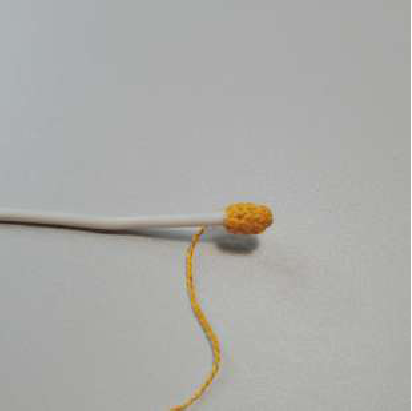
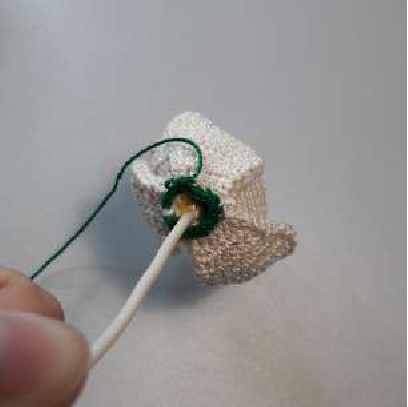
- Cut your 1mm stem wire to the desired length. Apply a bit of glue to one tip and insert it into the small center piece.
- Thread the top petals (with the crown attached) onto the wire.
- Next, thread the bottom petals onto the wire.
- Use the yarn tail from the center piece to stitch all three layers (center, top petals, bottom petals) together securely. Make sure to arrange the petals so they are staggered for a natural look.
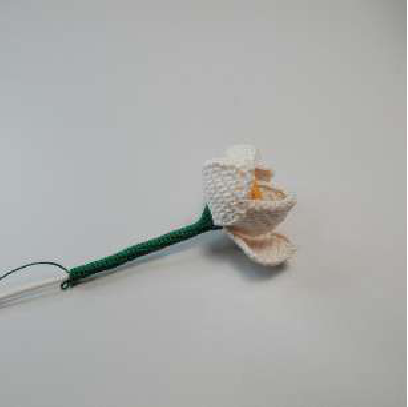
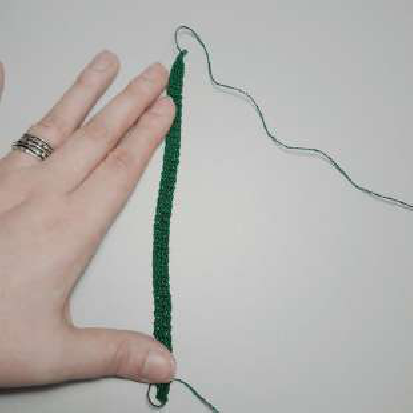
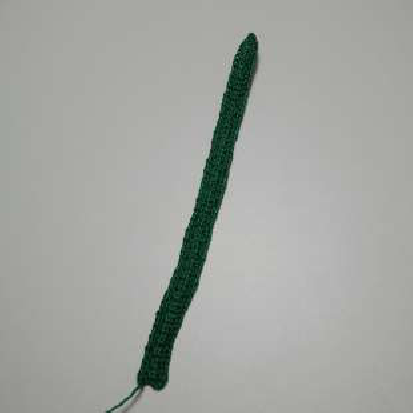
Step 2: Crocheting the Stem
Attach your green yarn to the unused back loops of Row 3 of the bottom petal base. You will now crochet down the wire to form the stem.
- Row 1: Work 18 sc into the back loops. (18)
- Row 2: 18 sc. (18)
- Row 3: [4 sc, dec] * 3. (15)
- Row 4: [3 sc, dec] * 3. (12)
- Row 5: [2 sc, dec] * 3. (9)
- Row 6: 9 sc. (9)
- Row 7: [1 sc, dec] * 3. (6)
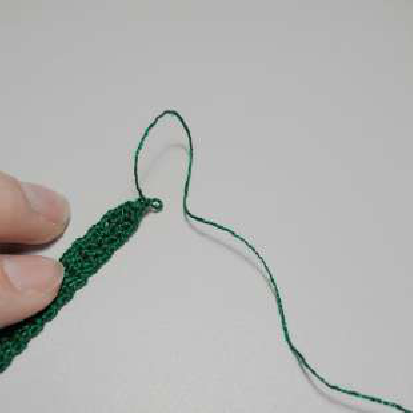
Continue crocheting 6 sc in a spiral around the wire until you reach your desired stem length (the example uses 90 rows). Fasten off.
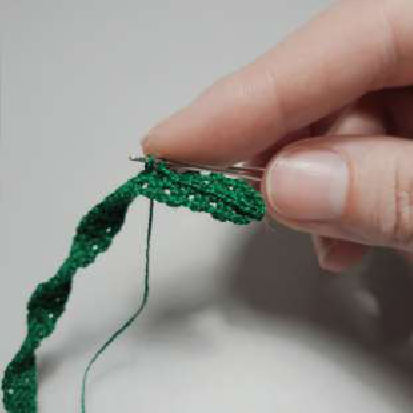
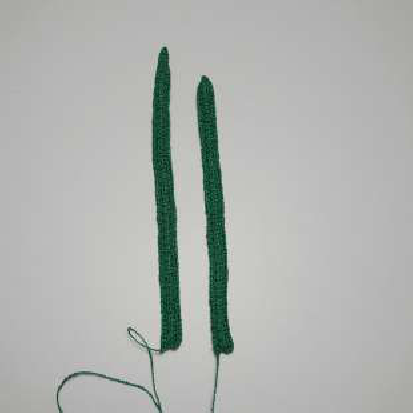
Step 3: Making the Leaves (Make 1 or 2)
Using green yarn, work in turning rows.
- Chain 4. Starting from the second chain from the hook, work 3 sc. Ch 1, turn.
- Continue crocheting rows of 3 sc until the leaf is your desired length.
- To create the tip, make a triple decrease (sc3tog).
- Do not cut the yarn. Work slip stitches down the side of the leaf to get back to the starting edge.
- Now, single crochet all the way around the entire leaf to create a border. If using wire, crochet over it during this step to make the leaf posable.
Step 4: Final Touches
Sew the leaves securely to the stem at your desired height.
If you want your flower to be extra sturdy, you can carefully brush the petals and leaves with starch paste or a diluted PVA glue solution and let them dry in the desired shape.
And that’s it! Your beautiful crochet daffodil is complete. Happy crocheting!
A Note from the Designer
This masterclass is intended for personal use only. It may not be copied, modified, or used in part or whole for other works, used for commercial purposes, published online, or transferred to other persons. The sale of toys made from this pattern is permitted online. I would be very grateful if you credit the author. Thank you for your understanding.
Connect with Irina Rybolovleva
- Instagram: @irina_rybolovleva
- VKontakte: vk.com/irina_rybolovleva
With love, Irina Rybolovleva