The Cutest highland cow crochet pattern free: Easy & Adorable Amigurumi! 🐄💖
Create Your Own Cuddly Companion: The Ultimate Highland Cow Crochet Pattern Tutorial
Welcome, fellow crochet enthusiasts, to the most comprehensive guide for crafting your very own adorable Highland Cow! These shaggy, lovable creatures from the Scottish Highlands have captured hearts worldwide, and now you can bring their charm into your home with this detailed highland cow crochet pattern. Whether you’re an experienced amigurumi artist or just starting your crochet journey, this tutorial will walk you through every stitch, helping you create a delightful, huggable plushy.
Why Choose This Highland Cow Crochet Pattern?
There’s something uniquely captivating about Highland Cows – their fluffy coats, gentle eyes, and distinct horns make them instantly recognizable and incredibly endearing. This specific highland cow crochet pattern is designed to be straightforward yet rewarding, resulting in a charming plushy that makes a perfect gift or a cherished addition to your own collection. Get ready to transform yarn into an adorable bovine friend!
Getting Started: Essential Materials for Your Highland Cow Crochet Pattern
Before we dive into the stitches, gather all your supplies. Having everything ready will make your crocheting process smooth and enjoyable:
- 5mm Crochet Hook: Or adjust based on your yarn weight and desired stitch tension. The goal is tight stitches to prevent stuffing from showing through.
- Yarn Needle: Essential for sewing pieces together and weaving in ends.
- Scissors: For cutting yarn.
- Safety Eyes (12mm recommended): These give your cow its adorable expression. Always ensure they are securely fastened for safety, especially if gifting to children.
- Two Colors of Yarn:
- Color A (Darker Color): This will be your main body color, typically a brown, dark red, or black to mimic the Highland Cow’s natural coat.
- Color B (Lighter Color): Used for the snout, and the bottom of the arms and legs. A cream, beige, or light grey works perfectly.
While specific brands were mentioned in the original tutorial, the key is to choose a high-quality worsted weight yarn that holds its shape well for amigurumi projects. Look for soft yet durable options that won’t pill easily.
- Stuffing: Polyester fiberfill is ideal for amigurumi, providing a soft, plump finish.
Your Step-by-Step Highland Cow Crochet Pattern Tutorial
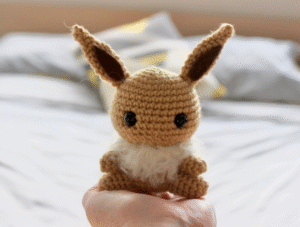
To help you visualize each step of this delightful highland cow crochet pattern, here’s a helpful video tutorial and an image of the finished plushy. Refer to them as you work through the instructions!
Watch the detailed steps for this Highland Cow crochet pattern.

Your finished adorable Highland Cow, created with this detailed crochet pattern!
Crocheting the Legs (Make 2)
Ready to start crafting your adorable highland cow crochet pattern? Let’s begin with the legs. You’ll start with your lighter color yarn (Color B) for the bottom of the hooves.
First Leg
Round 1: Start with a magic ring. (If you use the two-chain method: slip knot, chain 2, then work 6 single crochets into the first chain.) Or, simply create a magic ring and work 6 single crochets into it. (6 stitches)
Round 2: 6 increases (2 single crochets in each stitch). (12 stitches)
Round 3: Single crochet in each of the 12 stitches around. At the end of this round, you will color change to your darker color (Color A).
Color Change: On the last single crochet of Round 3, insert your hook, pull through a loop (you’ll have two loops on your hook). Drop Color B, pick up Color A, and pull Color A through both loops to complete the stitch. Tie the ends of Color A and Color B together securely, then trim Color B.
Round 4 (with Color A): Single crochet in each of the 12 stitches around.
Once Round 4 is complete, leave a very small tail, cut the yarn, and pull through to fasten off. Your first leg is done!
Second Leg
Create the second leg identically to the first, following the same steps:
Round 1 (with Color B): Magic ring with 6 single crochets. (6 stitches)
Round 2 (with Color B): 6 increases. (12 stitches)
Round 3 (with Color B): Single crochet in each of the 12 stitches. Color change to Color A on the last stitch.
Round 4 (with Color A): Single crochet in each of the 12 stitches.
Do NOT finish off the second leg. Keep your hook in the loop; we’re now going to connect the legs.
Connecting the Legs & Crocheting the Body
With both legs complete, it’s time to connect them and shape the body – a pivotal step in your highland cow crochet pattern journey. Place a stitch marker in the last stitch of your second leg.
Connecting Round
- From the second leg, chain 2.
- Grab your first leg. Locate the first stitch of its last round (the lowest stitch). Insert your hook into this stitch from the outside and single crochet into it.
- Single crochet around the first leg (11 more single crochets). You will have worked into all 12 stitches of the first leg.
- Now, single crochet into the 2 chains you made. Work one single crochet into each chain.
- Finally, single crochet around the second leg. Start in the stitch immediately after your stitch marker (do not go into the stitch with the stitch marker itself). Single crochet around the second leg, working your way back to the stitch marker.
This completes your first round of the body. Move your stitch marker up to the last stitch of this connecting round. (You should have 28 stitches in total: 12 from leg 1 + 2 from chains + 12 from leg 2 + 2 from other side of chains. Total 28 stitches).
Body Rounds (with Color A)
Round 2: Single crochet in each stitch all the way around, including the other side of the two chains you made to connect the legs. (28 stitches)
Round 3: (6 single crochets, 1 increase) repeated 4 times. (32 stitches)
Rounds 4-7: Single crochet in each of the 32 stitches around for four straight rounds. (32 stitches per round)
Now that you’ve completed your increase and straight rounds, we’ll begin shaping the body with decreases.
Round 8: (2 single crochets, 1 decrease) repeated 8 times. (24 stitches)
Round 9: Single crochet in each of the 24 stitches around. (24 stitches)
Round 10: (2 single crochets, 1 decrease) repeated 6 times. (18 stitches)
Round 11 (Final Body Round): (1 single crochet, 1 decrease) repeated 6 times. (12 stitches)
Remove your stitch marker. Leave a small tail (about 6-8 inches), cut the yarn, and pull through to fasten off.
Stuffing the Body: Now, stuff the body firmly. Make sure to push stuffing down into the legs first to give them shape, then fill the rest of the body evenly.
Crocheting the Arms (Make 2)
Next up in our highland cow crochet pattern are the cute, stubby arms. You’ll start with Color B for the “hoof” part.
Arm Rounds
Round 1 (with Color B): 8 single crochets into a magic ring. (8 stitches)
Round 2 (with Color B): (3 single crochets, 1 increase) repeated 2 times. (10 stitches). On the last increase of this round, color change to your darker color (Color A). Tie the ends of Color A and Color B together, then trim Color B.
Rounds 3-6 (with Color A): Single crochet in each of the 10 stitches around for four straight rounds. (10 stitches per round)
Round 7 (Final Arm Round): (3 single crochets, 1 decrease) repeated 2 times. (8 stitches)
Leave a long tail for sewing (about 12 inches), cut the yarn, and pull through to fasten off. Your first arm is complete! Now, create a second arm identical to the first.
Stuffing the Arms: Add a small amount of stuffing to each arm, just enough to give them some shape without making them too firm. You want them to be slightly floppy for charm.
Crocheting the Head
The head is where your Highland Cow truly comes to life! Follow this section of the highland cow crochet pattern carefully, using your main Color A yarn.
Head Rounds (with Color A)
Round 1: 6 single crochets into a magic ring. (6 stitches)
Round 2: 6 increases. (12 stitches)
Round 3: (1 single crochet, 1 increase) repeated 6 times. (18 stitches)
Round 4: (2 single crochets, 1 increase) repeated 6 times. (24 stitches)
Round 5: (3 single crochets, 1 increase) repeated 6 times. (30 stitches)
Round 6 (Final Increase Round): (4 single crochets, 1 increase) repeated 6 times. (36 stitches)
Now that we’re done with increases, we’ll work straight rounds to build up the head’s height.
Rounds 7-9: Single crochet in each of the 36 stitches around for three straight rounds. (36 stitches per round)
Now, let’s start decreasing to shape the top of the head.
Round 10: (4 single crochets, 1 decrease) repeated 6 times. (30 stitches)
Round 11: (3 single crochets, 1 decrease) repeated 6 times. (24 stitches)
Round 12: (2 single crochets, 1 decrease) repeated 6 times. (18 stitches)
Adding Safety Eyes
It’s time to give your Highland Cow its soulful eyes! Grab your 12mm safety eyes. Looking at your head piece, count down from the top (where you just finished Round 12). Place the eyes between rounds 9 and 10. Space them approximately 8 stitches apart. This will leave enough room in the center for the snout later. Secure the washers firmly on the back of the eyes.
Finishing the Head
Round 13 (Last Head Round): (1 single crochet, 1 decrease) repeated 6 times. (12 stitches)
Remove your stitch marker. Leave a very long tail for sewing (about two ruler lengths is good), cut the yarn, and pull through to fasten off.
Stuffing the Head: Stuff the head firmly. Ensure it’s well-filled, especially around the eyes, to give it a nice shape. Your cow head is now complete! It might look a bit funny on its own, but it will come to life once attached to the body.
Pro Tips for Your Highland Cow Crochet Pattern
To truly make your crocheted Highland Cow unique and perfect, consider these additional tips:
Choosing the Right Yarn & Hook
- Yarn Weight Matters: While worsted weight is standard, you can experiment with chunky yarn and a larger hook for a bigger, squishier cow, or sport weight yarn and a smaller hook for a miniature version. Just remember to keep your stitches tight enough to prevent stuffing from showing.
- Tension is Key: Consistent tension throughout your highland cow crochet pattern ensures a uniform and well-shaped finished product. If your stitches are too loose, go down a hook size.
Adding Character: Details & Finishing
- The Shaggy Look: For that iconic Highland Cow fluffiness, you can lightly brush your finished plushy with a pet slicker brush. This pulls up the yarn fibers, creating a fuzzy, realistic texture. Test on a small, hidden area first!
- Facial Details: Besides safety eyes, you can embroider a simple nose and mouth with black or dark brown yarn after the snout is attached.
- Horns & Hair Tuft: While not included in the basic instruction, many amigurumi Highland Cows feature small horns (crocheted or felt) and a prominent hair tuft (yarn fringed and sewn on) between the horns. These small additions can greatly enhance the character of your highland cow crochet pattern creation.
Troubleshooting Common Issues
- Gaps Between Legs: If you find small holes where the legs connect, use your yarn needle and the tail from one of the legs to neatly sew them closed before stuffing.
- Uneven Stuffing: Take your time with stuffing! Use small pieces of fiberfill and push them firmly and evenly into all parts of the body, legs, and head. A stuffing tool or the back of a crochet hook can help.
Share Your Creation!
You’ve now mastered the art of creating your own delightful amigurumi Highland Cow! We hope this detailed highland cow crochet pattern has been clear and enjoyable to follow. From its sturdy legs to its charming head, every stitch contributes to bringing this beloved creature to life. Once your magnificent highland cow crochet pattern creation is complete, you’ll want to ensure it stays looking its best. For long-term care, gentle spot cleaning is usually sufficient, but for deeper cleaning, hand wash in cold water with mild soap, reshape, and air dry.
We can’t wait to see your finished Highland Cows! Share your photos online and inspire others to try this rewarding highland cow crochet pattern. Happy crocheting!