Tiny Tiger, Big Cuddles: Free Plush Amigurumi Crochet Pattern
Free Mini Plush Tiger Amigurumi Crochet Pattern
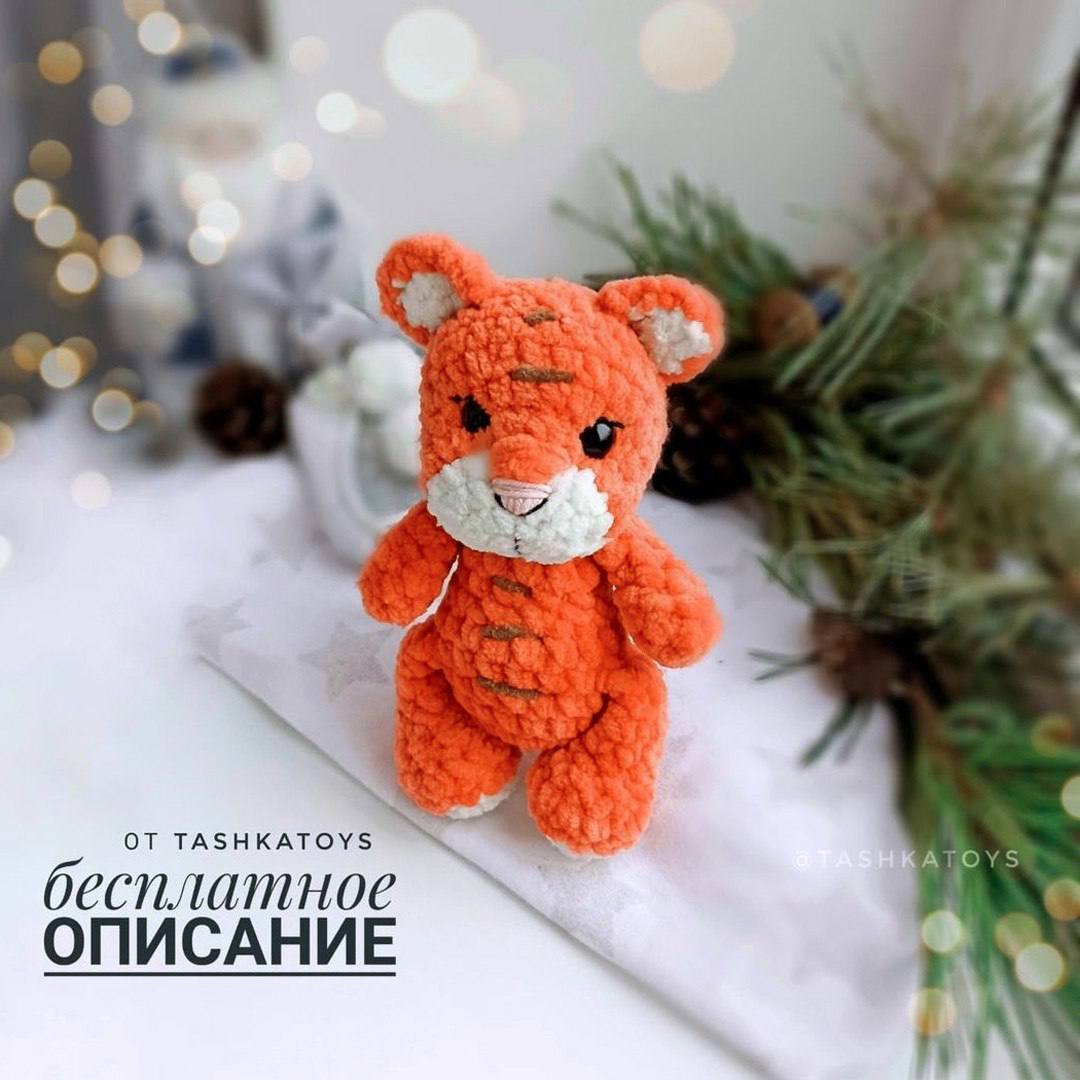
Create your own adorable plush mini tiger with this easy-to-follow crochet pattern! Designed for beginners and intermediate crocheters alike, this project uses plush super bulky yarn to create a soft, cuddly pocket-sized tiger. Follow the step-by-step instructions below to make your own cute tiger companion.
Materials and Supplies
- Yarn: Plush/velvet chunky yarn in Orange and White (e.g., Chenille or Super Bulky Plush Yarn)
- Crochet Hook: 3.5 mm to 4.5 mm (or size suitable for your chosen yarn)
- Safety Eyes: 6 mm or 8 mm black safety eyes
- Embroidery Thread: Pink (for nose) and Dark Brown/Black (for stripes and eye detailing)
- Fiberfill: Polyester stuffing
- Tools: Yarn needle, stitch marker, scissors, pins for assembly
Crochet Abbreviations (US Terms)
- MR: Magic Ring
- sc: Single Crochet
- inc: Increase (2 single crochet in the same stitch)
- dec: Decrease (single crochet 2 stitches together)
- sl st: Slip Stitch
- ch: Chain
- st / sts: Stitch / Stitches
- FO: Fasten Off
Pattern Instructions
Head
Start with White yarn.
- Round 1: 6 sc in MR [6]
- Round 2: 6 inc [12]
- Round 3: (2 sc, inc) × 4 [16]
- Round 4: 2 sc, 4 inc, 10 sc [20]
- Round 5: Switch to Orange yarn. Work 20 sl st around [20]
- Round 6: 5 sc, 4 inc, 11 sc [24]
- Rounds 7–11 (5 rounds): 24 sc [24]
Note on Eyes: Insert safety eyes between Rounds 6 and 7, spaced about 7 stitches apart.
- Round 12: (2 sc, dec) × 6 [18]
- Round 13: (1 sc, dec) × 6 [12]
Stuff the head firmly with fiberfill.
- Round 14: 6 dec [6]
Fasten off, weave the tail through the front loops of the remaining 6 stitches, pull tight to close, and hide the end.
Ears (Make 4 pieces: 2 White, 2 Orange)
Worked in rows.
- Row 1: 3 sc in MR, ch 1, turn [3]
- Row 2: 1 sc, inc, 1 sc, ch 1, turn [4]
- Row 3: 4 sc [4]
Joining the Ear Pieces:
Place one White piece and one Orange piece with wrong sides together. Using Orange yarn, sc along the three outer sides to join the two pieces together. Fasten off, leaving a tail for sewing.
Pin and sew the ears to the head between Rounds 10 and 11, spaced 4 to 5 stitches apart.
Arms (Make 2)
Using Orange yarn.
- Round 1: 6 sc in MR [6]
- Rounds 2–4 (3 rounds): 6 sc [6]
- Round 5: 2 sc, dec, 1 sc, inc [6]
- Rounds 6–7 (2 rounds): 6 sc [6]
Fold the top edge flat and crochet 3 sc across both layers to close the top. Fasten off. Do not stuff arms.
Legs (Make 2)
Start with White yarn.
- Round 1: 6 sc in MR [6]
- Round 2: 6 inc [12]
- Round 3: Switch to Orange yarn. (5 sc, inc) × 2 [14]
- Round 4: 14 sc [14]
- Round 5: 3 sc, 4 dec, 3 sc [10]
- Round 6: 3 sc, 2 dec, 3 sc [8]
- Rounds 7–8 (2 rounds): 8 sc [8]
- Round 9: (2 sc, dec) × 2 [6]
- Round 10: 1 sc, fold top flat and crochet 3 sc across both layers to close [3]
Fasten off. Stuff only the lower foot portion lightly.
Body
Using Orange yarn.
- Round 1: 6 sc in MR [6]
- Round 2: 6 inc [12]
- Round 3: (1 sc, inc) × 6 [18]
- Round 4: 18 sc [18]
- Round 5 (Creating the Tail): 16 sc, ch 6. Starting in the 2nd chain from hook, work 1 sl st, 4 sc down the chain. To avoid gaps, make 1 sc into the next stitch on the body, then work 1 sc joining the end of the tail to the body, 1 sc [18]
- Round 6 (Attaching Legs): 1 sc, 3 sc working through both the 1st leg and body, 6 sc, 3 sc working through both the 2nd leg and body, 5 sc [18]
- Round 7: 18 sc [18]
- Round 8: (1 sc, dec) × 6 [12]
- Rounds 9–10 (2 rounds): 12 sc [12]
- Round 11: (4 sc, dec) × 2 [10]
- Round 12 (Attaching Arms): 2 sc, 3 sc working through both the 1st arm and body, 2 sc, 3 sc working through both the 2nd arm and body [10]
- Round 13 (Short Row for Head Angle): 3 sc, turn, ch 1, 3 sc [3]
Fasten off, leaving a long tail for sewing the body to the head. Stuff the body firmly with fiberfill.
Assembly and Facial Details
- Neck Connection: Sew the body to the base of the head using the long yarn tail from Round 13. The slight neck elevation created by the short row helps the head tilt downward naturally.
- Face Sculpting (Eye Indentations): Using orange or strong thread, pass needle from the neck opening to the outer corner of one eye, across to the inner corner, and back down to the neck. Pull gently to create eye sockets, tie off securely, and repeat for the second eye.
- Nose & Muzzle Embroidery: Using pink embroidery floss or yarn, embroider a small triangular nose on the white muzzle area. Add a straight vertical line downward from the nose to define the mouth.
- Stripes: Using dark brown or black embroidery thread, stitch small horizontal stripe details onto the forehead, sides of the face, and tummy area.
Your cute plush tiger is complete!