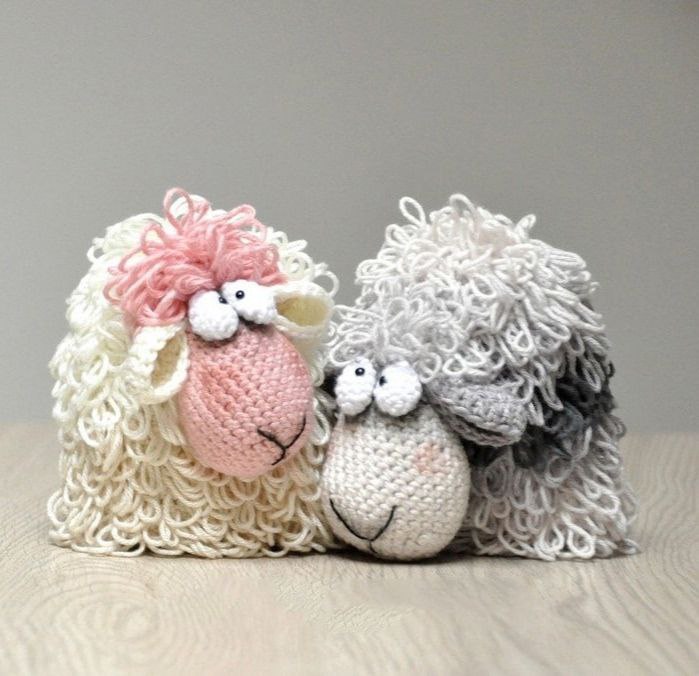
Woolly & Wonderful: Crochet Your Own Adorable Curly Sheep
“`html
How to Crochet a Cute Curly Sheep: A Detailed Step-by-Step Guide
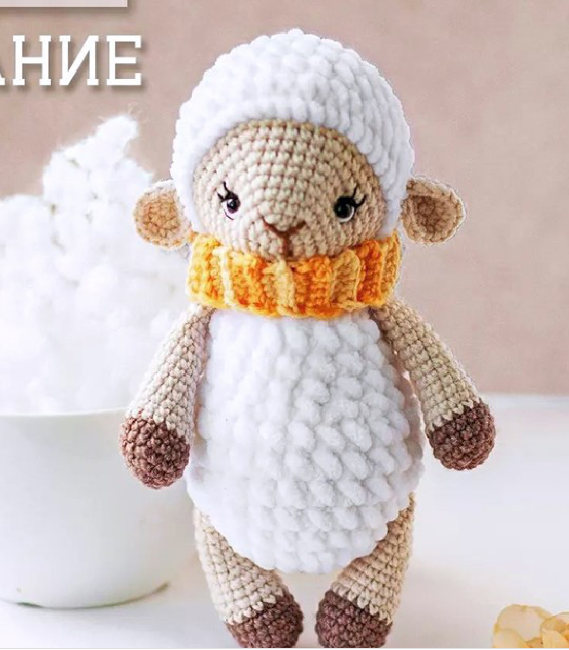
Create your own adorable, textured amigurumi sheep with this comprehensive pattern. This sheep features a unique “curly” wool effect created by alternating standard stitches with extended long stitches, giving it a realistic and cuddly look.
Materials Needed
- Crochet Hook: 2mm
- Yarn: Cotton yarn (Suggested colors: Pink for the head, White for the eyes, and Beige for the body)
- Eyes: Two 3mm black safety eyes or black beads
- Stuffing: Synthetic fiberfill for the head and body
- Tools: Sewing needle, large tapestry needle, scissors
- Embroidery: Black thread for the nose
- Optional: Pastels, textile paints, or eyeshadow with a small brush for adding blush to the cheeks and nose
Abbreviations (US Terms)
- ch: chain
- sc: single crochet
- hdc: half double crochet
- sl st: slip stitch
- inc: increase (two stitches in one)
- dec: decrease (join two stitches into one)
- BLO: back loop only
- Long St: Long/Extended stitch (used to create the curly texture)
Special Instructions
This toy is worked largely on the “wrong side” so that the pulled loops of the long stitches remain on the inside or create the desired external texture. When the pattern specifies “Long St,” ensure you are creating the extended loop to achieve the woolly effect.
Step-by-Step Pattern
The Ears (Make 2)
Worked in rows using beige yarn.
- Row 1: 6 sc in a magic ring, ch 1, turn (6)
- Row 2: 6 inc, ch 1, turn (12)
- Row 3: (1 sc, inc) 6 times, ch 2, turn (18)
- Row 4: 18 hdc
Finish by working a sl st into the first stitch of the row to close it. Close the side opening by working a few sc through both edges or simply sew it shut.
The Eyes (Make 2)
Worked using white yarn.
- Row 1: 4 sc in a magic ring (4)
- Row 2: 4 inc (8)
- Rows 3-5: 8 sc
- Row 6: 4 dec (4)
Close the hole and fasten off, leaving a long tail (about 5 inches) for sewing.
The Head
Worked using pink yarn. Note: Rows highlighted as Long St are worked as extended stitches rather than single crochet.
- Row 1: 6 sc in a magic ring (6)
- Row 2: 6 inc (12)
- Row 3: (1 sc, inc) 6 times (18)
- Row 4: (2 sc, inc) 6 times (24)
- Row 5: (3 sc, inc) 6 times (30)
- Rows 6-12: 30 sc
- Row 13: 6 sc, dec, (2 sc, dec) 4 times, 6 sc (25)
- Row 14: 25 sc
- Row 15: 5 sc, dec, (2 sc, dec) 4 times, 6 sc (20)
- Row 16: 20 sc
- Row 17: (2 sc, dec) 5 times (15)
- Row 18: 15 sc
- Row 19: (3 sc, dec) 3 times (12)
- Row 20: 12 Long St
- Row 21: (1 sc, inc) 6 times (18)
- Rows 22-23: 18 Long St
- Row 24: (1 Long St, dec Long St) 6 times (12)
- Row 25: 6 dec Long St (6)
Close the opening, fasten off, and stuff the head firmly with fiberfill.
The Body
Worked in continuous spiral rounds using beige yarn.
- Row 1: 16 ch
- Row 2: Inc in 2nd ch from hook, 13 sc, 4 sc in the last ch; work along the opposite side of the chain: 13 sc, inc (34)
- Row 3: 1 sc, inc, 13 sc, inc, 2 sc, inc, 13 sc, inc, 1 sc (38)
- Row 4: 2 sc, inc, 14 sc, inc, 3 sc, inc, 14 sc, inc, 1 sc (42)
- Row 5: (6 sc, inc) 6 times (48)
- Row 6: 48 Long St (worked in BLO only!)
- Row 7: 48 sc
- Rows 8-24: Alternate rows: one row of 48 Long St, followed by one row of 48 sc.
- Row 25: (6 sc, dec) 6 times (42)
- Row 26: 42 Long St
- Row 27: (5 sc, dec) 6 times (36)
- Row 28: 36 Long St
- Row 29: (4 sc, dec) 6 times (30)
- Row 30: 30 Long St
- Row 31: (3 Long St, dec Long St) 6 times (24)
- Row 32: (2 Long St, dec Long St) 6 times (18)
- Row 33: (1 Long St, dec Long St) 6 times (12)
- Row 34: 6 dec Long St (6)
Close the hole, fasten off, and stuff the body firmly.
Final Assembly & Finishing Touches
Adding the Face
- Nose: Using black embroidery thread, sew a small “V” shape. Start at the magic ring (Row 1), bring the needle up through Row 3, and finish the top of the V at Row 5.
- Eyes: Sew the white eye pieces under the first row of Long St (Row 20), positioned on either side of the center line. Insert the black safety eyes/beads into the center of the white pieces.
- Ears: Sew the ears onto Row 19, positioned on either side of the eyes.
Attaching the Head to the Body
- Insert a sewing needle through the back of the body and bring it out the opposite side.
- Insert the needle into the back of the head, then bring it out a few stitches away in the same row.
- Pass the needle back into the body and exit a few stitches away from the starting point. Pull tight.
- Repeat this process a second time to ensure the head is secure. Tie a strong knot and hide the thread ends inside the body.
Final Details
For a professional look, use a small brush and a bit of pastel or eyeshadow to add soft pink shading around the eyes and on the tip of the nose.
“`