7 Easy Steps: Crochet Ruffle Hat Tutorial – Stunning Beginner-Friendly Guide
Are you looking for a fun and easy way to make a cozy crochet ruffle hat? This tutorial will guide you through 10 simple steps to create a stylish hat, perfect for cold days. Even if you’re new to crochet, you’ll be able to follow along using basic stitches like half double crochet (HDC) and double crochet (DC). Let’s get started!
Crochet Ruffle Hat Tutorial: What You Need
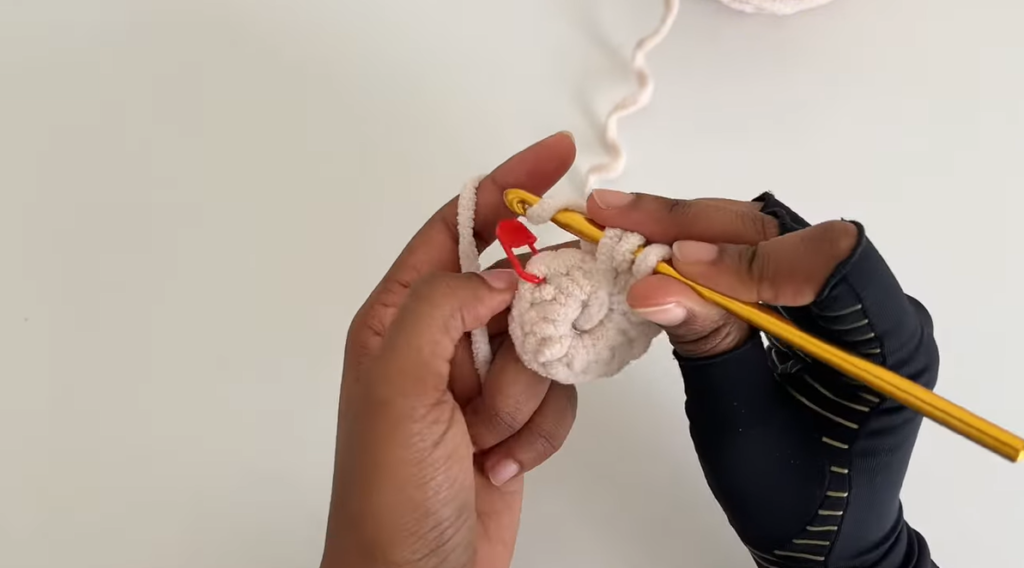
Materials:
- Yarn: Two skeins of medium-weight polyester yarn (chenille yarn recommended for a soft feel). If you want a longer brim, use an extra skein.
- Crochet Hook: Size 6.5 mm (or 7 mm, depending on your yarn label).
- Stitch Marker: Helps you remember where you started each round.
- Scissors: For cutting the yarn.
- Tapestry Needle: Used to tuck in and hide loose yarn ends.
- Measuring Tape: To check the size of your hat.
Step-by-Step Instructions for Your Crochet Ruffle Hat
Step 1: Start with a Magic Circle
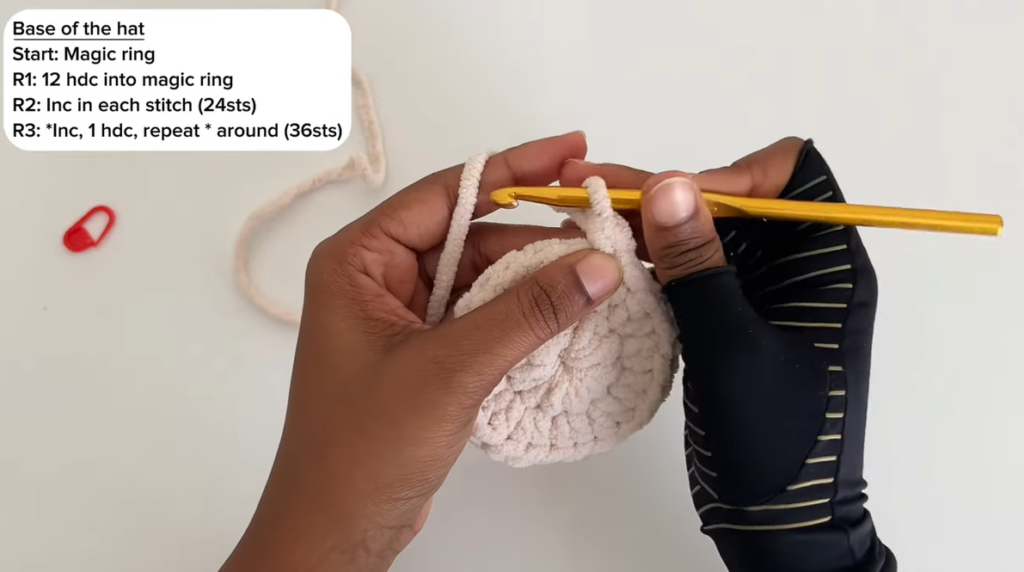
- Create a magic circle.
- Begin with a single crochet (counts as your first HDC).
- Work a second HDC, then place a stitch marker in this stitch.
- Add 10 more HDCs, so you have a total of 12 HDCs.
- Slip stitch into the second HDC (where the stitch marker is) to close the round.
- Chain one and pull the yarn tight to finish the round.
Step 2: Close the Magic Circle
- Gently pull the center tail to tighten the circle. Be careful not to pull too hard to avoid breaking the yarn.
Step 3: Round Two
- In the loop where you fastened off, start with a single crochet followed by an HDC in the same stitch.
- Place the stitch marker on the second HDC.
- For each stitch in this round, work two HDCs.
- By the end of the round, you should have 24 HDCs.
- Slip stitch into the marked HDC and chain one to finish.
Step 4: Round Three
- Start by making a single crochet, then a half double crochet (HDC) in the same stitch.
- Place the stitch marker on the second HDC.
- Work one HDC in the next stitch, then two HDCs in the stitch after.
- Continue this pattern until you have 36 HDCs.
- Slip stitch into the marked HDC, chain one, and finish the round.
Step 5: Round Four
- Start with a single crochet followed by an HDC in the same stitch.
- Work an increase (two HDCs) in every third stitch.
- At the end of this round, your base should be 6-6.5 inches wide.
Step 6: Build the Body of the Hat
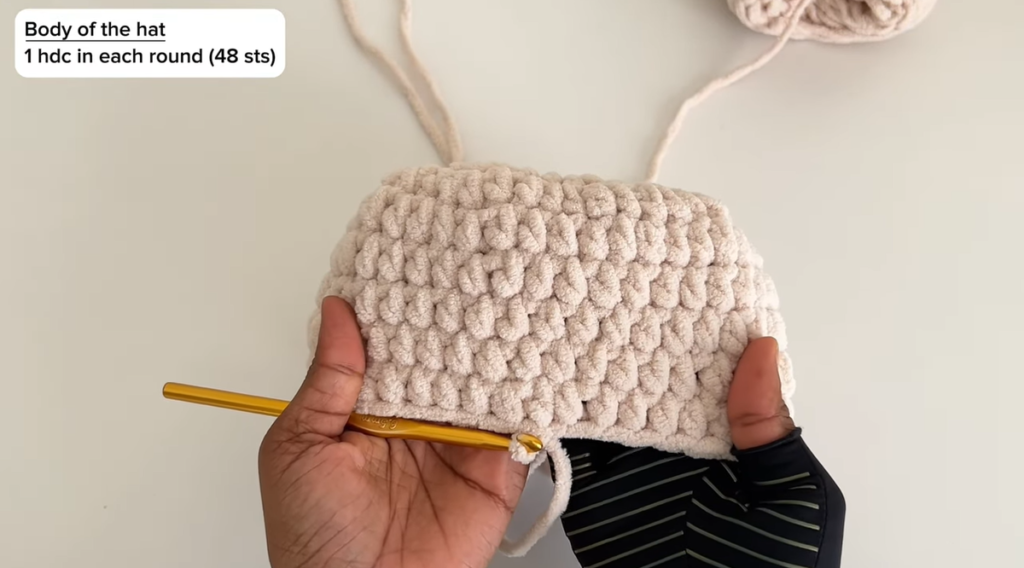
- Work five rounds of single HDCs in each stitch, without any increases.
- The body of your hat should be about 3.5 to 3.75 inches tall.
- If you want the hat taller, add one more round of HDCs.
Step 7: Create the Ruffle
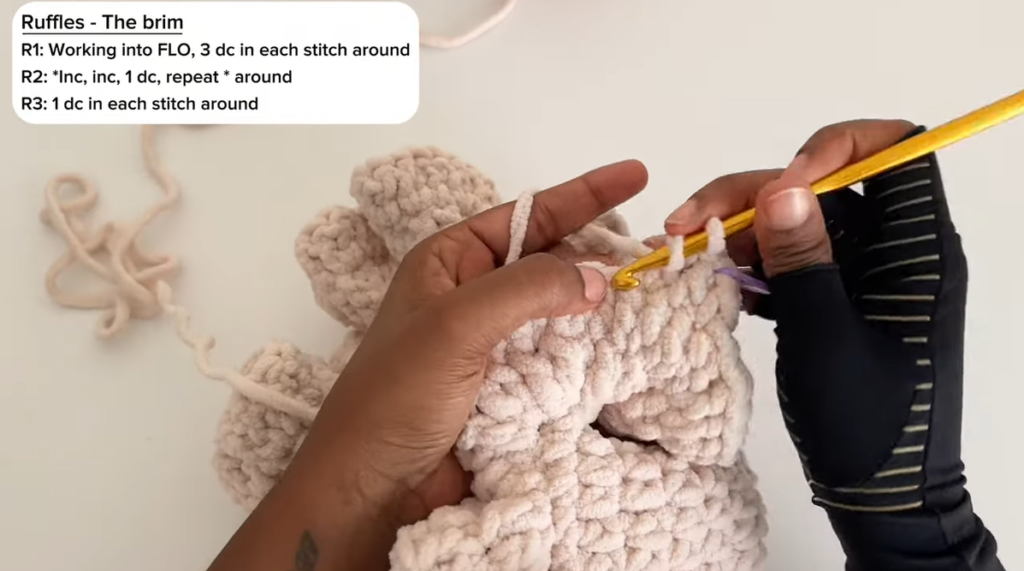
- For the ruffles, crochet in the front loop only.
- Work three rounds of double crochet (DC) in the front loops.
- This will give your hat a ruffled edge for a fun and unique look.
Finishing Touches
- Use the tapestry needle to weave in loose ends.
- Trim any extra yarn.
- Measure your hat to make sure it fits your desired size.
Congratulations! You’ve finished your crochet ruffle hat! It’s perfect for keeping warm or giving as a handmade gift. Happy crocheting!

