21 Unique Easy Craft Ideas You’ll Actually Finish
I love craft ideas. I also love finishing crafts.
Those two things do not always overlap.
Because a lot of “easy DIYs” are secretly three trips to the store, a hot glue injury, and a pile of half painted wood shapes staring at you from the corner like. Hey. Remember me?
So this list is different. It’s for normal people with normal attention spans and normal amounts of time. Most of these you can start and finish in one sitting. Some are “make it tonight, enjoy it tomorrow” type projects. And none of them require you to own a scroll saw or have a dedicated craft room.
A quick note before we jump in. If you want to actually finish these, do this one thing.
Pick one project. Set a timer for 30 minutes. Start messy. Do not organize supplies for 20 minutes first. Just start.
Ok. Here we go.
1. Pressed flower bookmark (no fancy press needed)
This is one of those crafts that looks like you bought it at a cute little shop.
You’ll need:
- A few small flowers or leaves (flat ones work best)
- Parchment paper or printer paper
- A heavy book
- Clear packing tape or laminating sheets
- Scissors
How to do it:
- Press your flowers inside paper in a heavy book for a few days. If you’re impatient, use a warm iron for a quick press (low heat, no steam, parchment on both sides).
- Arrange the dried bits on a strip of paper.
- Tape over it carefully, or laminate it.
- Trim the edges, round the corners if you feel fancy.
It’s fast, it’s calming, and it makes reading feel… slightly more put together.
2. No sew fleece hand warmers (microwave heat packs)
These are little cozy heat packs you can reheat. Great for cold hands, cramps, or just sitting dramatically on the couch.
You’ll need:
- Two small squares of fleece or cotton (about 5×5 inches)
- Uncooked rice (or flaxseed)
- Needle and thread OR fabric glue OR a simple fold and tie method
How to do it:
- Put fabric squares together.
- Leave a small opening.
- Fill with rice.
- Close it up. Sew, glue, or do a tied fringe edge if you’re using fleece.
Microwave 20 to 30 seconds. Start small. Nobody wants to discover “too hot” the hard way.
3. Painted “match strike” jar (functional and cute)
This one feels oddly satisfying because it’s both decor and a tiny life upgrade.
You’ll need:
- Small jar with a lid (spice jar works)
- Acrylic paint (optional)
- Strike paper from a matchbox or a match striker sticker
- Mod Podge or strong glue
- Matches
How to do it:
- Paint the lid or jar if you want.
- Glue strike paper to the side.
- Fill with matches.
Now you have a cute little setup for candles. It’s the kind of thing that makes you feel like a person who has their life together. Even if your laundry situation says otherwise.
4. One sheet paper star garland
If you want something pretty without committing to a huge project, this is it.
You’ll need:
- A sheet or two of scrapbook paper (or old book pages, or brown paper bag)
- Scissors
- String
- Glue or tape
How to do it:
- Fold paper accordion style.
- Tie in the center.
- Fan out both sides and glue ends together to make a star.
- Make a few and attach to string.
Hang it on a wall, across a shelf, in a window. Suddenly the room is nicer.
5. “Fake stained glass” frame with a Sharpie and glue
This is ridiculously fun. Also very forgiving. If you mess up, you can peel the glue lines off and redo.
You’ll need:
- Glass from a thrifted frame
- Black glue (or regular school glue + black acrylic paint)
- Sharpies or paint markers
- A simple pattern (print one, or doodle)
How to do it:
- Put your pattern behind the glass.
- Trace the outlines with black glue. Let it dry.
- Color in sections with Sharpie.
It looks way harder than it is. Which is basically my favorite kind of craft.
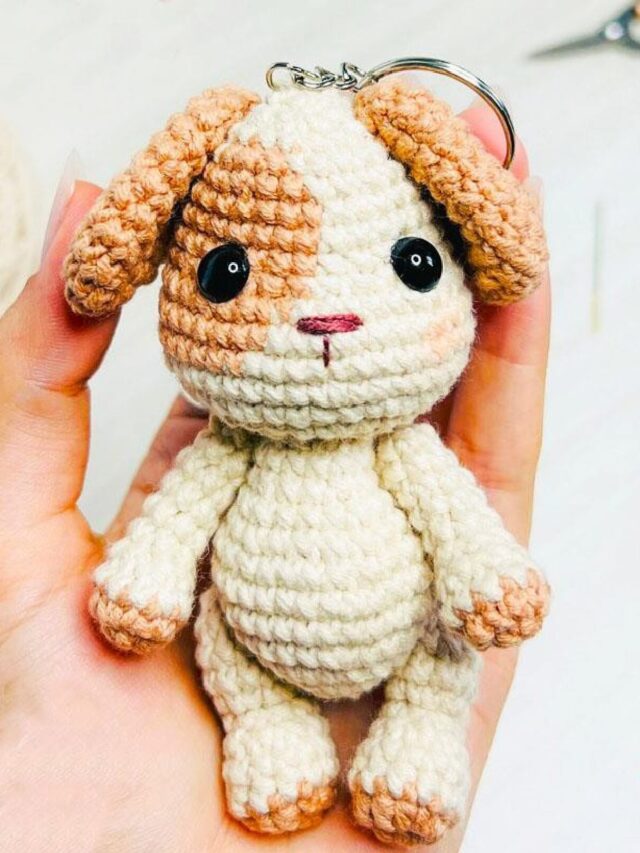
6. 5 minute beaded keychain (with a secret purpose)
Make one that’s not just cute. Make it useful. Like a little wrist loop so you stop dropping your keys.
You’ll need:
- Keyring + small chain or clasp
- Pony beads or letter beads
- Stretch cord or nylon cord
How to do it:
- Cut cord, string beads.
- Tie strong knots. Like, really strong.
- Clip to keyring.
Bonus idea: spell something funny. Or your kid’s name. Or a word you need to see daily like “BREATHE” or “NOPE”.
7. Scrappy fabric coasters (no sewing, just layering)
If you have fabric scraps, old jeans, or even a worn out flannel shirt, this is a good way to use them.
You’ll need:
- Fabric scraps
- Cardboard circles (or cork, or felt)
- Mod Podge or fabric glue
- Scissors
How to do it:
- Cut a circle base.
- Layer fabric bits on top with glue.
- Seal with a thin coat of Mod Podge.
They end up looking a little rustic and artsy. Like you meant it.
8. Clay ring dish (the easiest “I made this” gift)
Air dry clay is a cheat code.
You’ll need:
- Air dry clay
- Rolling pin (or a bottle)
- Small bowl (for shaping)
- Paint or gold marker (optional)
- Clear sealer (optional)
How to do it:
- Roll clay flat.
- Cut a circle (cup rim works).
- Press into a bowl to form the dish shape.
- Let dry, then paint the edges.
This is the kind of gift people actually use. For rings, earrings, hair pins, random little things that usually end up on the counter.
9. “Recipe card” family memory cards
This isn’t a typical craft, but it’s so easy and weirdly meaningful.
You’ll need:
- Blank index cards
- Pen
- Optional: stickers, washi tape
How to do it: Write one memory per card. Like:
- “Grandma’s loud laugh at Sunday dinner”
- “The time we got lost and it was fine”
- “Dad’s spaghetti that was always too salty”
Decorate if you want. Put them in a little box. It becomes this tiny time capsule that you actually finish because it’s just writing.
10. Book page wall art (for the non painters)
If you want “art” but do not want to paint, yes.
You’ll need:
- Old book pages (thrift store books are great)
- Canvas or cardstock
- Glue
- Optional: black paint for a silhouette, or a quote cutout
How to do it:
- Tear pages into rough shapes.
- Glue down in layers.
- Add a simple silhouette or a bold word in the center.
It looks textured and intentional, even though you’re basically just gluing paper down while listening to a podcast.
11. Easy marbled mugs (the nail polish trick, simplified)
This one is fun. But please, do it with ventilation and accept that it’s “hand wash only.”
You’ll need:
- Plain ceramic mug
- Nail polish
- A disposable container of warm water
- Toothpick
- Gloves (optional)
How to do it:
- Drip a couple nail polish colors into water.
- Swirl lightly with a toothpick.
- Dip the mug quickly.
- Let dry.
Don’t overthink it. The messy ones look the coolest.
12. Minimalist yarn wall hanging (no loom, no stress)
Wall hangings can get complicated. This one does not.
You’ll need:
- A stick or wooden dowel
- Yarn
- Scissors
How to do it:
- Cut several yarn strands, fold them in half.
- Lark’s head knot them onto the stick.
- Trim into a simple V shape or straight line.
That’s it. If you want extra, add one braided piece across. But you don’t have to.
13. Painted plant pot with a “one shape” rule
If you struggle with design, make a rule that makes it easy.
Rule ideas:
- Only dots
- Only stripes
- Only triangles
- Only one color + white
You’ll need:
- Terracotta pot
- Acrylic paint
- Brush or sponge
How to do it:
- Paint your base if you want.
- Repeat your one shape pattern.
- Seal if you care, or don’t. You might want to consider using some of these top coats and sealers for crafts for a more lasting finish.
It turns out modern looking because you limited yourself. Which is very annoying advice, but it works.
14. Photo magnet set (the “finish in 20 minutes” craft)
This is a practical craft. And it’s basically instant gratification.
You’ll need:
- Small printed photos
- Adhesive magnet strips or magnet dots
- Scissors
How to do it:
- Trim photos.
- Stick magnets on the back.
- Put them on the fridge immediately, because otherwise they will sit on a table forever.
Do a set of 6 and you’re done. That’s the whole project.
15. Paper bead bracelet (from junk mail, yes really)
This sounds like a kid craft. It can look surprisingly good if you pick one color palette.
You’ll need:
- Paper (magazines, junk mail, scrapbook paper)
- Glue stick
- Toothpick or skewer
- Clear glue or Mod Podge for sealing
- String
How to do it:
- Cut long skinny triangles.
- Roll from the wide end around the toothpick.
- Glue the tip down.
- Seal and let dry using a good sealant like Mod Podge which you can find more about here.
- String into a bracelet.
It’s a great “hands busy” craft for evenings.
16. “Fancy” candles made from leftovers (no melting, no mess)
If you’ve ever had a candle burn down and leave a sad ring of wax, don’t throw it out. Instead, refill it.
You’ll need:
- A mostly used candle jar
- Tea lights or small candles
- Optional: cinnamon stick, dried orange slice for looks
How to do it:
- Clean out loose debris.
- Pop a tea light right into the jar.
- Add a cinnamon stick beside it if you want the cozy vibe.
It’s not a perfect refill candle. It’s a quick hack that makes the jar useful again, which is the whole point.
17. Wrapped bangle bracelets (yarn or embroidery floss)
This is one of those crafts you can do while watching a show.
You’ll need:
- Plain bangles (cheap ones from a craft store)
- Embroidery floss or yarn
- Glue
How to do it:
- Dab glue, wrap floss tightly.
- Keep going. That’s it.
- Knot and glue the end.
Make 3 in colors that go together and suddenly it looks like a set you bought.
18. DIY “calm jar” that actually looks nice
A calm jar is basically a glitter snow globe without the snow globe drama.
You’ll need:
- Clear jar with lid
- Warm water
- Clear glue or glycerin (optional, slows glitter)
- Glitter (fine glitter works best)
- A drop of food coloring (optional)
How to do it:
- Fill jar with warm water.
- Add glitter.
- Add a spoonful of clear glue for slower swirl.
- Close lid tight.
Shake it when your brain feels loud. It’s a legit little reset. You can also explore more about making such calming creations like the glitter jar for added relaxation!
19. Stamped linen napkins (using a potato, because why not)
Yes, potato stamps. But make it chic.
You’ll need:
- Plain cloth napkins or fabric scraps
- Fabric paint
- Potato
- Knife (carefully)
How to do it:
- Cut a simple shape into the potato. A half moon, a square, a leaf.
- Dip into paint, stamp a repeating pattern.
- Let dry and heat set if required by the paint.
They look handmade in a good way. Not in a “school art fair” way.
20. “Open when” letters (the easiest heartfelt craft)
This is the kind of craft that feels like you put in so much effort. But it’s just envelopes and honesty.
You’ll need:
- Envelopes
- Paper
- Pen
- Stickers or washi tape (optional)
How to do it: Label envelopes with prompts like “Open when you need a laugh,” “Open when you can’t sleep,” “Open when you miss me,” or “Open when you need motivation.” Write a note for each. Add a tea bag, a photo, a dumb doodle, a list of reasons you love them.
This is a finishable craft because there’s no “perfect.” It’s just you.
21. A mini “junk journal” with zero pressure rules
A junk journal is like a scrapbook for people who don’t want to scrapbook.
You’ll need:
- Any notebook (or folded printer paper stapled together)
- Glue stick
- Random paper bits: receipts, tags, packaging, ticket stubs
- Pen
How to do it:
- Glue one or two bits per page.
- Write a sentence. Just one. Examples: “Good coffee, bad mood, then better.” Or “Found this receipt in my pocket, apparently I bought a muffin.”
- Close it. Done.
You can do five pages in one sitting. You can also do one page and still count it as finished, honestly.
How to actually finish your craft (so it doesn’t become a guilt pile)
A few tiny rules that help a lot.
1. Choose projects with a hard stopping point.
Like “make 4 magnets” or “one ring dish.” Not “redo the whole entryway decor.”
2. Use the supplies you already have first.
If you need to buy 12 items, it’s not an easy craft. It’s a hobby expansion.
3. Decide your version of done.
Is it “good enough to use”? Great. Because perfect is where crafts go to die.
If you want, tell me what supplies you already have. Like “I’ve got yarn, glue, cardboard, and paint.” I can point you to the 3 easiest ones from this list that’ll feel the most satisfying to finish fast.
Additionally, consider implementing some strategies on how to plan and organise your craft projects effectively. This can significantly reduce the chances of your projects becoming guilt piles.
FAQs (Frequently Asked Questions)
What makes these craft ideas different from typical DIY projects?
These craft ideas are designed for normal people with normal attention spans and time. Most can be started and finished in one sitting or enjoyed the next day, without requiring specialized tools or a dedicated craft room.
How can I ensure I actually finish a craft project from this list?
Pick one project, set a timer for 30 minutes, and start messy without spending time organizing supplies first. Just dive right in to increase your chances of finishing.
What materials do I need for making pressed flower bookmarks without a fancy press?
You’ll need small flat flowers or leaves, parchment or printer paper, a heavy book for pressing, clear packing tape or laminating sheets, and scissors.
How do I make no-sew fleece hand warmers that can be microwaved?
Use two small squares of fleece or cotton (about 5×5 inches), fill them with uncooked rice or flaxseed leaving a small opening, then close it up by sewing, gluing, or tying fringed edges. Microwave for 20-30 seconds to heat.
Can you explain how to create a painted match strike jar that’s both functional and decorative?
Take a small jar with a lid (like a spice jar), optionally paint the lid or jar with acrylic paint, glue strike paper from a matchbox onto the side using Mod Podge or strong glue, then fill the jar with matches for a cute candle lighting setup.
What is an easy way to make a ‘fake stained glass’ frame using simple supplies?
Use glass from a thrifted frame and place your pattern behind it. Trace outlines with black glue (or school glue mixed with black acrylic paint) and let dry. Then color sections with Sharpies or paint markers. If you mess up, peel off the glue lines and redo.