Crochet Your Own Cuddle Buddy: A Step-by-Step Bunny Pattern
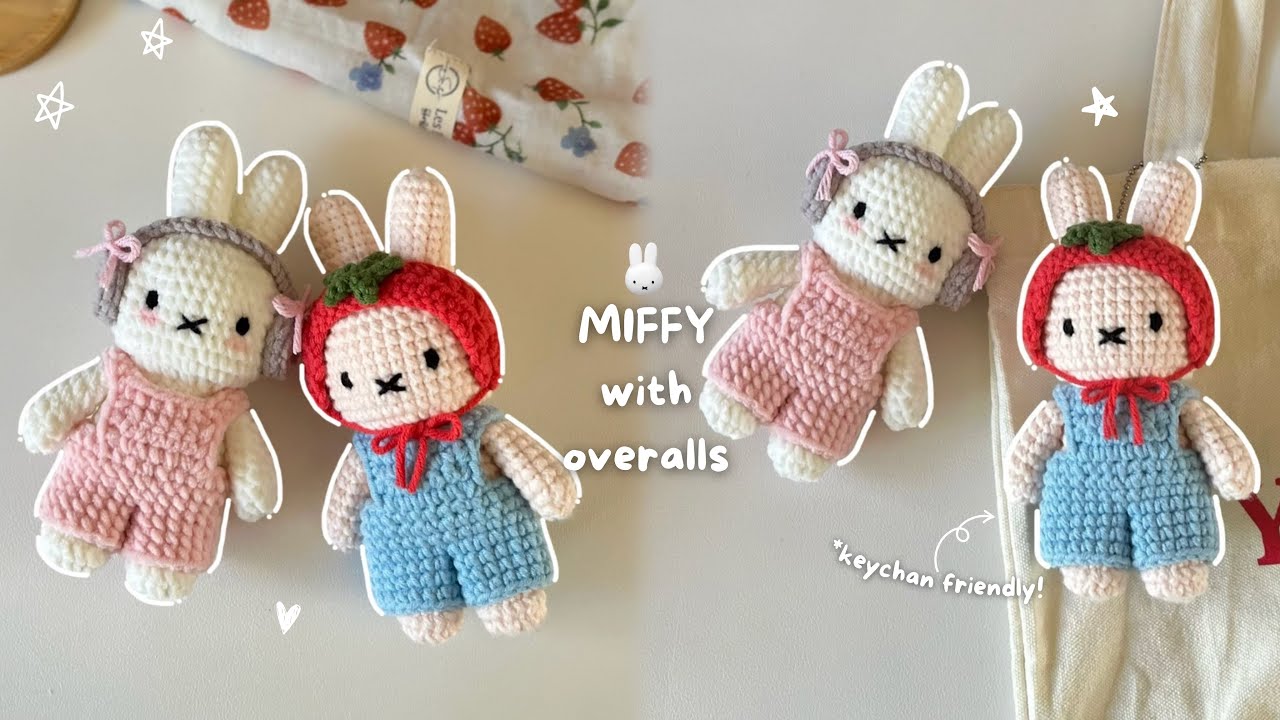
Ready for a fun crochet adventure? I’m so excited to share this pattern for the cutest bunny ever! Don’t worry if you’re not a pro, I’ll walk you through each step. This little fella is so fun to make and will be your new favorite squishy friend. Let’s grab our yarn and hooks, and get crafting!
- Yarn: Pick your favorite colors! I used a nice color for the bunny and different colors for the overalls and accessories.
- Crochet Hook: Make sure it matches your yarn weight. If you’re not sure, check the yarn label.
- Stitch Marker: This is like a little helper that keeps track of the end of rounds.
- Scissors: For cutting the yarn.
- Tapestry Needle: For weaving in ends and sewing pieces together.
- Stuffing: To make our bunny nice and squishy.
- Optional: Safety eyes or black yarn for embroidering the eyes.
Crochet Abbreviations (aka, secret code)
- MR: Magic Ring. It’s like a fancy knot.
- SC: Single Crochet. It’s the basic stitch, you got this.
- Inc: Increase. That means you put two SC in one stitch.
- Dec: Decrease. That’s when you make two stitches into one.
- Ch: Chain. Like the beginning of most crochet projects.
- Sl st: Slip Stitch. It helps join your rounds.
- FLO: Front Loop Only.
Let’s Start With The Hands
- Round 1: Make a magic ring and then do 8 SC into that ring. Pull the end tight. This is the start of everything!
- Round 2: 3 SC, then 1 Inc, and repeat that one more time. (You’ll have 10 stitches)
- Rounds 3-8: Make 1 SC in each stitch around (10 SC total each round). Just keep going around and around.
- Close it up: After round 8, fold the top of the hand closed, insert the hook into two opposite stitches, and do a SC. Do this for a total of four SC. That closes the top of the hand. You don’t need to stuff it!
- Make a second hand!
Now for the Legs
- Round 1: MR and 8 SC into it.
- Round 2: 1 Inc into each stitch all the way around (16 SC)
- Round 3: 1 SC in each stitch around.
- Round 4: 4 SC, then 4 Dec using FLO, then 4 SC. (12 stitches)
- Round 5: 4 SC, 2 Dec using FLO, 4 SC. (10 stitches)
- Round 6: 1 SC in each stitch around.
- Finishing the First Leg: After Round 6, do 3 more SC. Cut the yarn.
- Second Leg: Make another leg just like the first one, all the way through Round 6 but this time, don’t cut the yarn! Stuff both legs nice and firm.
Joining the Legs
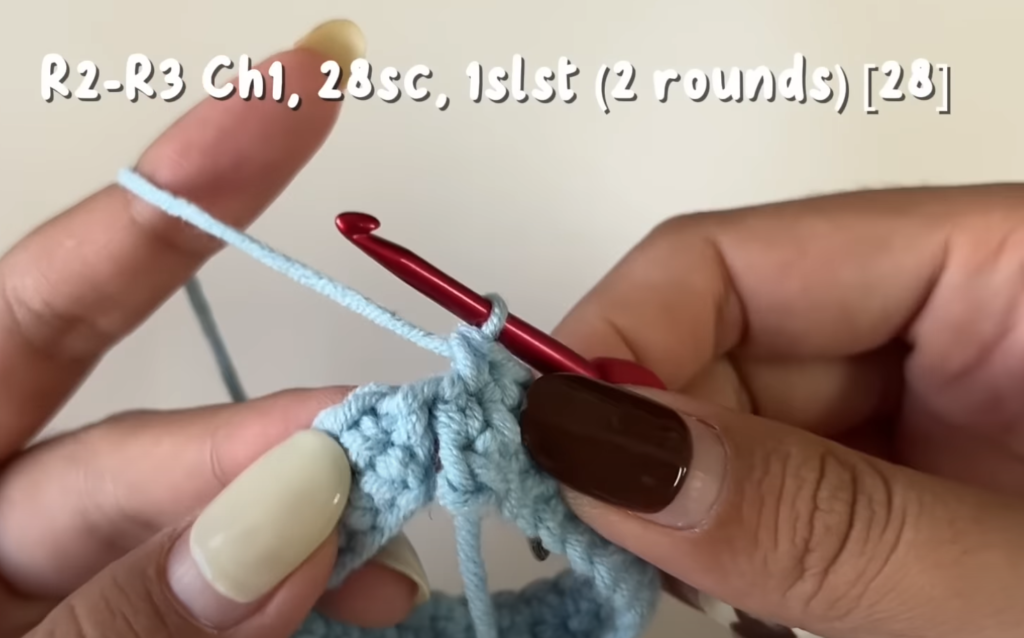
- Marking: On the first leg, count 6 stitches from the end of the yarn, and use a stitch marker to mark the 6th stitch. This is where we start joining
- Chain and Join: On the second leg, make 1 chain stitch. Then, go to that marked stitch on the first leg and make 1 SC. This starts Round 1 of the joined legs.
- Around We Go: Do 1 SC in each stitch of the first leg (10 SC), placing the yarn tail over the hook as you go, to hide it. When you get to that chain stitch, do a SC into the upper loop only of the chain.
- Second Leg: Now do 1 SC into each stitch of the second leg (10 SC). Then, do a SC into the lower loop only of the chain.
- Round 1 Total: You should have 22 stitches. Stuff the legs really well at this point.
The Body
- Round 2: 10 SC, 1 Inc, 10 SC, 1 Inc. (24 stitches)
- Round 3: 5 SC, 1 Inc, repeat 4 times. (28 stitches)
- Rounds 4-8: 1 SC in each stitch around.
- Round 9: 5 SC, 1 Dec, repeat 4 times. (24 stitches)
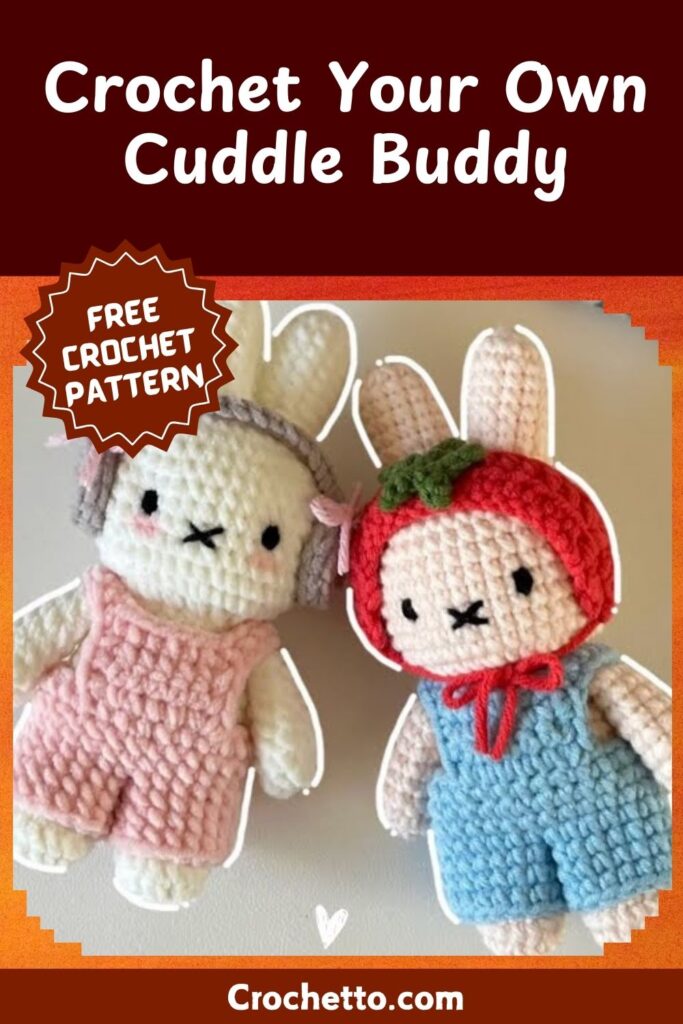
Adding the Arms
- Round 10: 4 SC, and now we are going to add the hand. Take one of your hands, hold it next to the body, insert your hook into both stitches at the same time (one from the hand, one from the body), and make 1 SC. Do this four times, to connect the entire hand to the body.
- Continuing: 8 SC on the body, connect the second hand to the body just like we did the first one, and then 4 more SC on the body. Stuff the body really well!
Shaping the Head
- Round 11: 2 SC, 1 Dec, repeat 6 times. (18 stitches)
- Round 12: 1 Inc into every stitch. (36 stitches) This is where we start the hat.
- Round 13: 8 SC, 1 Inc, repeat 4 times. (40 stitches)
- Round 14: 1 SC into every stitch around.
- Rounds 15-21: 1 SC into each stitch around. Just keep making the head rounder.
- Round 22: 3 SC, 1 Dec, repeat 8 times.
- Round 23: 1 SC, 1 Dec, 1 SC, repeat 8 times.
- Round 24: 1 SC, 1 Dec, repeat 8 times.
- Finishing the Head: After round 24 do 8 Dec, cut a long tail and sew up the hole using your needle and weaving through the front loops.
Ears
- Round 1: MR, 8 SC into ring
- Round 2: 1 SC, 1 Inc, repeat 4 times (12 SC).
- Rounds 3-9: 1 SC in each stitch around.
- Finishing: Stuff the ears, cut the yarn, leaving a long tail for sewing. Make two!
Time for the Details!
- Eyes: I embroidered eyes using black yarn, but you can use safety eyes if you prefer.
- Mouth: Embroider a little mouth one row below the eyes using black yarn too.
Let’s Make Overalls!
- Chains: Make 29 chains (or more if your bunny is bigger). Check by holding the chain around the bunny.
- Row 1: Starting in the second chain from the hook, do 1 SC in each chain. (28 SC). Sl st to join the row into a circle.
- Rows 2-3: Ch 1, and then 1 SC in each stitch around, and Sl st to join the round
- First Leg: Make 14 SC. Then, 4 chain, turn your piece, Sl st into the beginning of the first row to form a circle
- Rounds 2-4: Ch 1, and then 1 SC in each stitch around. When you get back to the chain section do 1 SC in upper loop only of each chain st, Sl st to join each round.
- Second Leg: Attach your yarn on the opposite side of your first leg and do the same thing as in step 5.
- Cut the yarn and put the overalls on your bunny!
Adding the Bib
- Mark the midle 6 chains above the two legs of the overalls, attach yarn and make 6 SC
- Ch 1, then 1 SC in each of the 6 st across, repeat for 2 more rows
- Now, start at the bottom of the bib and do 1 SC in each row on the side of the bib
- For the straps make 17 chains and starting in the second st from the hook, make 1 SC on the chain and then connect to the top of the bib. Repeat to the other side for the other strap.
- Now, 1 SC on each row of the left side of the bib.
Tomato Headband
- Chains: With red yarn, make 18 chains.
- Row 1: Start in the third chain from the hook, and make one half double crochet in each chain. (16 HDC)
- Row 2: Ch 2, then 1 half double crochet in each stitch across.
- Sides: Now, working down the sides of the rows, add 2 SC into the end of each row. (4 SC in total), then chain one and turn your piece. Make 2 Dec. Then chain one, turn again and then 1 Dec, then chain one and cut leaving a long tail. Repeat to the other side.
Leaf:
- Magic Ring: With green yarn, start a magic ring.
- First Leaf: Ch 3, in the second chain from hook do a slip stitch, and in the last chain make one SC, then slip stitch into the MR.
- Repeat: Do step 2 four more times for a total of 5 tiny leaves. Cut the yarn, leaving a long tail.
Headphones:
- Round 1: MR and do 7 SC into it, Sl st to join.
- Round 2: Ch 1, 1 inc in every st around, Sl st to join.
- Round 3: Ch 1, in Back Loop Only, make one SC into each st around, Sl st to join. Cut the yarn.
- Second Headphone: Make one more piece like the first headphone but don’t cut the yarn.
- Connecting: Make 15 chains and join with a Sl st to the first headphone. Then make a slip stitch to the next st on the first piece. Then you slip stitch along the chain working on the top loop of each chain. When you reach the other side, slip stitch to the next st of the second piece, cut the yarn with a long tail.
Putting It All Together
- Sew the ears to the sides of the hat.
- Sew the headphones on top of the head.
- Sew the headband onto the head, adding the tomato leaf to the top of the headband
- Weave in any loose ends, and you’re done!
Ta-da!
You made a super cute bunny with overalls and adorable accessories! It’s a little complicated but you got this, I know you do! You can change the colors and add more details to make yours even more awesome, It is all up to you! Let me know if you have any questions! Happy Crocheting!

