Crochet Your Own Cozy Framed Throw!
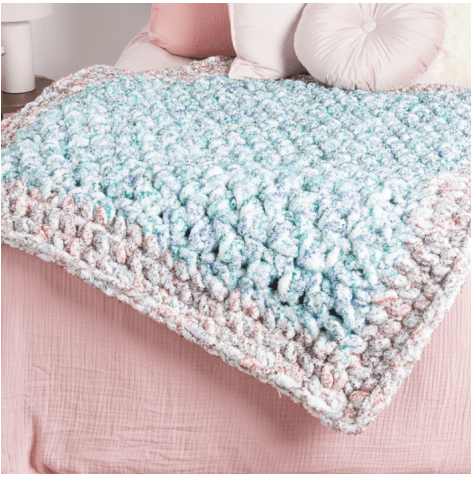
Ever dream of whipping up a super cozy, squishy blanket in practically no time? Get ready, because this Framed Crochet Throw pattern is your dream come true! Using wonderfully chunky yarn and a simple, textured stitch, this project is perfect for beginners and satisfyingly speedy for experienced crocheters.
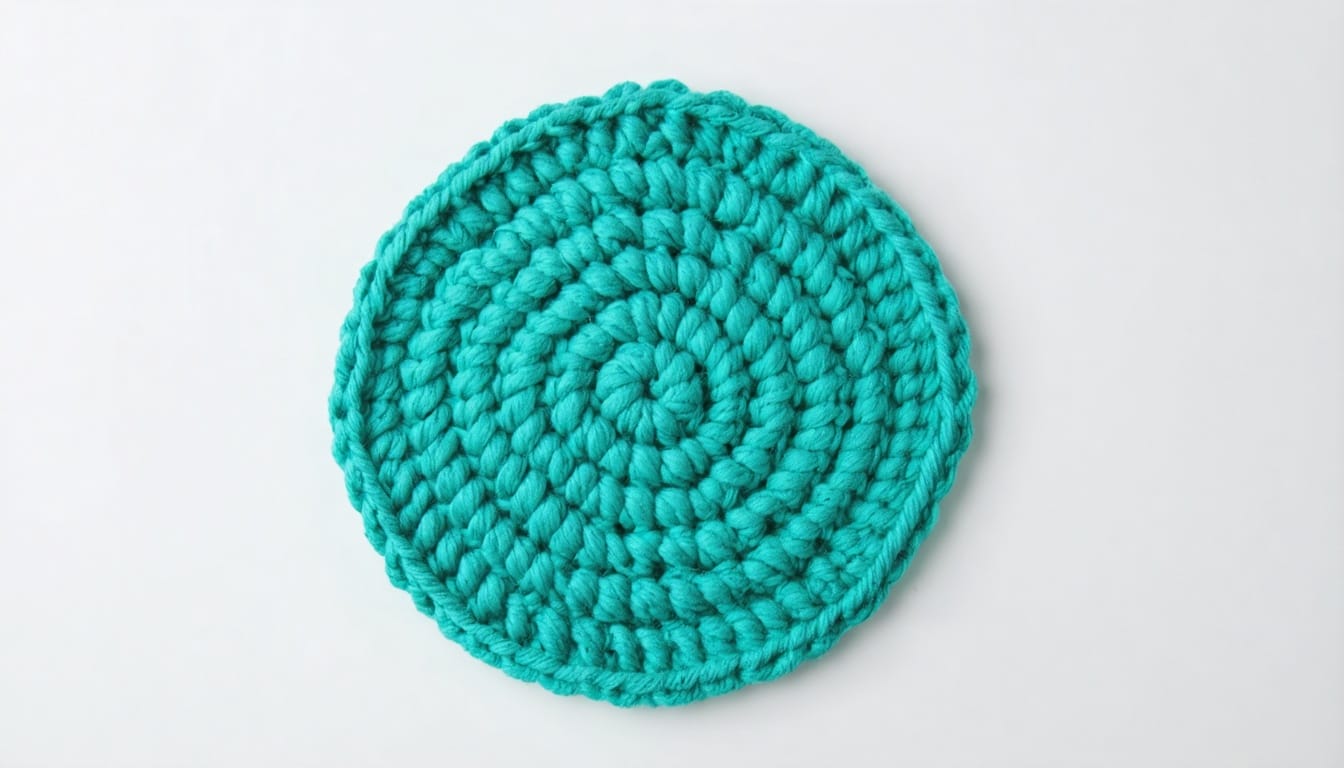
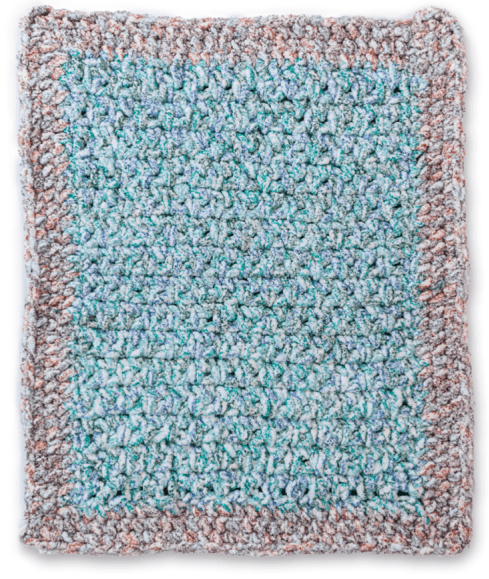
Imagine sinking into this plush throw on a chilly evening – pure bliss! The main body features the beautifully simple Moss Stitch, creating a lovely woven texture. Then, we add a contrasting border to give it that perfect “framed” look. It’s stylish, incredibly warm, and surprisingly easy to make.
Why You’ll Absolutely Love This Project:
- Super Speedy: Thanks to the jumbo yarn and large hook, this blanket works up FAST!
- Beginner Friendly: Uses basic stitches and a repetitive pattern. If you know how to chain and single crochet, you’re good to go!
- Amazingly Cozy: The thick yarn creates a wonderfully plush and warm fabric.
- Textured Delight: The Moss Stitch looks intricate but is super simple, adding gorgeous texture.
- Stylish Finish: The contrasting border gives it a polished, framed look that fits any decor.
Skill Level: Easy Peasy!
Finished Size: Approximately 43″ x 52″ (109.5 cm x 132 cm) – perfect for snuggling on the couch!
Ready to Get Hooking? Here’s What You’ll Need:
Yarn:
- Type: Bernat® Blanket Extra Thick Frosting™ (Jumbo weight #7; 21.2 oz/600 g; 65 yds/59 m per ball)
- Contrast A (Main Color): 3 balls (approx. 195 yds / 177 m) – Shown in Sereni-teal (34009)
- Contrast B (Border Color): 2 balls (approx. 130 yds / 118 m) – Shown in Cafe (34003)
Crochet Hook:
- Size U.S. U/50 (25 mm) crochet hook – Or whatever size you need to get the correct gauge.
Notions:
- A yarn needle (with a large eye!) for weaving in ends.
Gauge – Why It Matters (Even for Blankets!)
Getting the right gauge ensures your blanket will be the size stated in the pattern and that you’ll have enough yarn.
- Gauge: 3.5 single crochet stitches and 2.5 rows = 4 inches (10 cm) worked in the Moss Stitch pattern (counting both the single crochet stitches and the chain-1 spaces).
- How to Check: Make a small test swatch (maybe chain 10-12 and work about 4-5 rows of the Moss Stitch pattern described below). Measure the central 4 inches. If you have more stitches/rows than the gauge, try a larger hook. If you have fewer stitches/rows, try a smaller hook.
Crochet Lingo You Need to Know:
We’ll use standard US crochet terms. Here are the basics for this pattern:
- Approx = Approximately
- Beg = Begin(ning)
- Ch = Chain
- Pat = Pattern
- Rep = Repeat
- Rnd(s) = Round(s)
- RS = Right Side (the ‘front’ of your work)
- Sc = Single Crochet
- Sl st = Slip Stitch
- Sp(s) = Space(s) (often refers to the space created by a chain stitch in the previous row)
- St(s) = Stitch(es)
- WS = Wrong Side (the ‘back’ of your work)
The Star of the Show: The Moss Stitch
This stitch is made by alternating single crochet stitches and chain-1 stitches. You’ll work your single crochets into the chain-1 spaces from the row below, creating that lovely texture!
Let’s Crochet! Step-by-Step Instructions:
Main Section (The Cozy Center)
Grab your Contrast A yarn and your big hook!
- Foundation Chain: Ch 30.
- Row 1 (RS): Sc in the 2nd ch from your hook. *Ch 1, skip the next ch, sc in the next ch. Repeat from * all the way across the chain. Turn your work. (You should have 29 sts – counting both sc and ch-1 sps).
- Row 2: Ch 1 (this doesn’t count as a stitch). Sc in the very first sc. *Sc in the next ch-1 sp, ch 1, skip the next sc. Repeat from * until you have 2 sts left. Sc in the last ch-1 sp, then sc in the very last sc. Turn.
- Row 3: Ch 1. Sc in the very first sc. *Ch 1, skip the next sc, sc in the next ch-1 sp. Repeat from * until you have 2 sts left. Ch 1, skip the next sc, sc in the very last sc. Turn.
Keep Going!
- Repeat Rows 2 and 3 over and over again, building up that lovely Moss Stitch fabric.
- Continue until your blanket measures approximately 44 inches (112 cm) from the beginning.
- Important: Try to finish after completing a Row 2 repeat (so you end on a WS row).
- Fasten off Contrast A yarn, leaving a tail to weave in later.
Adding the Frame (The Border)
Now switch to your Contrast B yarn.
- Round 1 (RS):
- Join Contrast B with a sl st in the top right corner of your Main Section.
- Work across the top edge: Ch 1. Sc in the same sp as the sl st. *(Sc in each of the next 6 sts/sps, skip the next st/sp) – repeat this part 4 times total across the top. Work 3 sc all in the corner stitch/space.
- Work down the first side: Work 34 sc evenly spaced down the side edge. (Tip: Aim for roughly one sc per row-end, adjusting as needed to keep it flat). Work 3 sc all in the corner stitch/space.
- Work across the bottom edge (foundation chain edge): *(Sc in each of the next 6 sts/sps, skip the next st/sp) – repeat this part 4 times total across the bottom. Work 3 sc all in the corner stitch/space.
- Work up the second side: Work 34 sc evenly spaced up this side edge.
- Finish the starting corner: Work 2 sc in the very first sp where you joined (this completes the first corner group of 3 sc).
- Join with a sl st to the first sc you made in this round. (You should have 128 sc total).
- Round 2:
- Ch 1. Sc in the same sp as the last sl st.
- Sc in each sc around the entire blanket.
- Important Corners: When you reach the middle sc of each 3-sc corner group from Round 1, work 3 sc into that single stitch. This keeps your corners sharp!
- Join with a sl st to the first sc.
- Round 3:
- Repeat Round 2 exactly.
Fasten off Contrast B yarn.
Finishing Touches
Now for the final (and crucial) step:
- Using your yarn needle, carefully weave in all the loose ends on the WS of your blanket. Trim any excess yarn.
Tips for Success:
- Count Your Stitches: Especially on the border rounds, counting helps ensure everything lines up correctly.
- Use Stitch Markers: Place a stitch marker in the middle stitch of each 3-sc corner group as you work the border – it makes it much easier to find where to put your increases on the next round!
- Relax Your Tension: Jumbo yarn can be tiring on the hands. Keep your grip relaxed for comfortable crocheting and even stitches.
- Don’t Worry About Perfection: Handmade items have character! Slight variations just add to the charm.
And there you have it! Your very own Framed Crochet Throw, ready for maximum coziness. Pour yourself a warm drink, grab a good book or turn on a movie, and snuggle into your gorgeous handmade creation. Happy Crocheting!