Granny Bells Wrap Top
Granny Bells Wrap Top
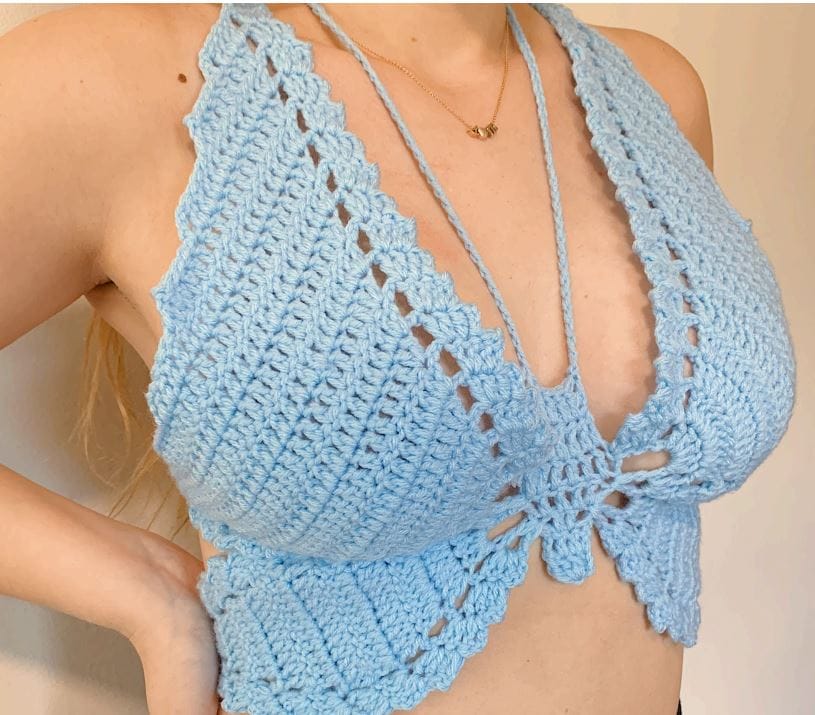
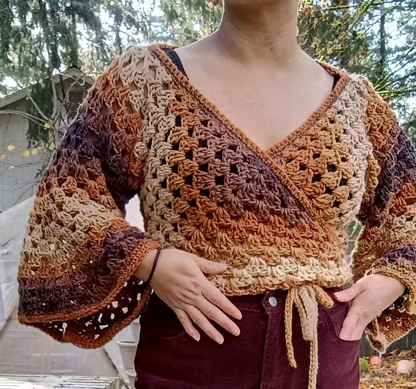
Welcome, fellow crochet enthusiasts, to a delightful pattern that blends classic charm with a modern, customizable fit! The Granny Bells Wrap Top is a unique garment designed to flatter and inspire. Featuring two elegant granny triangles that gracefully wrap across the front, a foundational granny square for the back, and adaptable sleeves, this top promises both comfort and style. As a made-to-measure pattern, it offers wonderful flexibility, allowing you to create a piece that truly fits your unique shape. Remember, acrylic yarn offers a lovely stretch, so consider planning for a touch of negative ease if you prefer a snug fit, or crochet to your exact measurements for a more relaxed feel. Let’s gather our supplies and begin this exciting project!
Materials
Worsted weight acrylic yarn (approximately 800 yards for a size M/L)
5.5mm hook
Scissors
Yarn needle
Measurements
Chest circumference measurement
Top of shoulder to mid-bicep
Front Triangles
Begin with a magic ring, ch3, dc2, ch1, dc3. Turn, ch3, dc2 in first st, ch1, [dc3, ch2, dc3] in ch1 sp from previous row, ch1, dc3 in last st. Turn and repeat this stitch pattern until your triangle half your bust measurement when you measure from the center cluster across to any right angle side. Make 2.
Back Square
Make a granny square for your back. Begin with a magic ring, ch3, dc2, ch1, dc3, ch1, dc3, ch1, dc3, ch1, slst to beg ch3. Next round, ch4, [dc3, ch2, dc3] in next ch1 space, ch1. Repeat around for 4 corners, last corner will be [dc3, ch1, dc2, slst in beg ch3]. Repeat pattern, doing {dc3, ch1] in ch1 spaces, and [dc3, ch2, dc3] in corners. Match your granny square width to the width of your front two triangles, when you put them together to make a square.
Attaching Front to Back
Seam your top points of your triangles to your back square. Start seam at mutual corners, then bring one or two clusters from the triangle up to create a wider shoulder seam. In other words, a few of the clusters along the diagonal side of the triangle will need to be seamed to the back square. Create your side seams, attaching back square to two triangles along right angle sides. Diagonal line should be creating your neckline and right angles should be creating the bottom and side seams.
Neckline
Sc two rows along two triangle diagonal edges and the top of the back. You may want to decrease a few stitches where the triangles and back meet to make a narrower neck opening and keep the top from slipping off your shoulders. Fasten off.
Ties & Hem
Create your ties by chaining the length you want. I chained 100 for a 35” waist. Sk the first ch and slst down your chain. Slst into the first st of the bottom of your top, starting at one triangle point. Ch1, sc across, ch 100, turn, sk first ch, slst down, sc across the bottom. Slst to your ch to make it look seamless. Fasten off.
Sleeves
Attach your yarn in the armhole seam and repeat the granny cluster st pattern until you reach half your bicep. For the next row, increase twice, evenly around the sleeve with a [dc, ch1, dc] in the ch sp. Next row is regular st, no increases. Repeat the 2 inc row, alternating with a reg row until you get the length you want. Finish each sleeve with two rows of sc. Weave in your ends (if you want) and you are done!
We hope you thoroughly enjoyed creating your Granny Bells Wrap Top! This versatile design is perfect for adding a touch of handmade charm to your wardrobe. We love seeing your unique interpretations, so please share your finished projects with the Crochetto community! Stay tuned for more inspiring patterns and tips from Crochetto, where every stitch tells a story. Happy crocheting!