Free Pattern: Crochet Adorable Valentine’s Bear, Bunny, Cat Magnets.
Crochet Your Own Sweet Valentine’s Day Animal Magnets: A Free Pattern
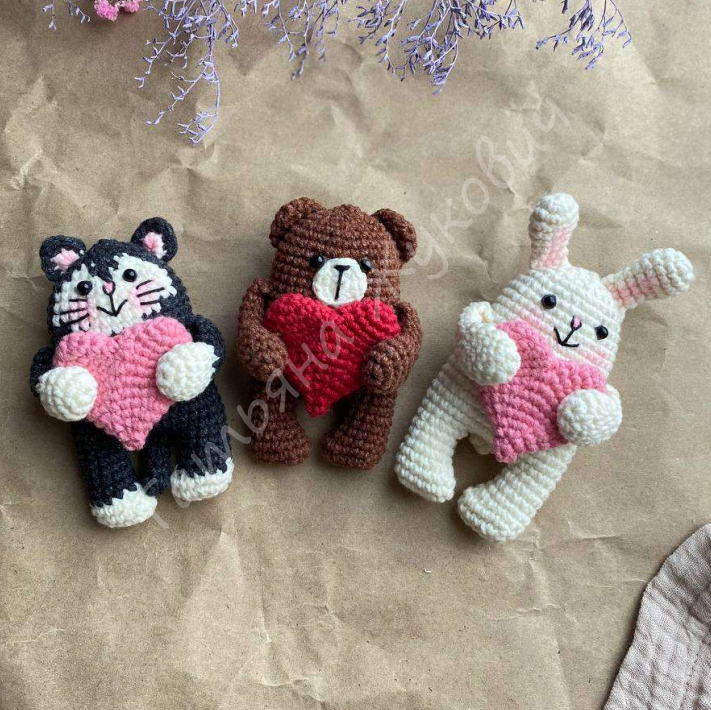
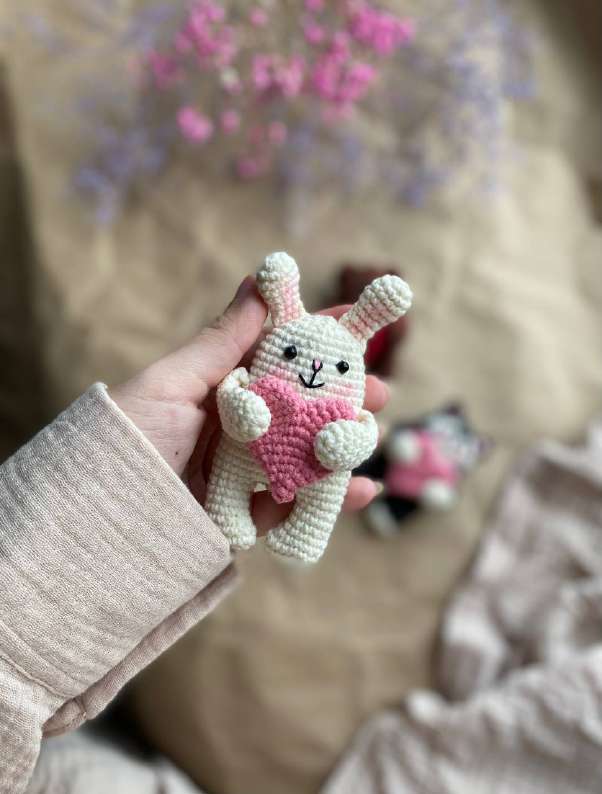
Welcome, fellow crafters! As Valentine’s Day approaches, what better way to spread love than with a handmade gift? This delightful free crochet pattern allows you to create the most adorable animal magnets – perfect for gifting to loved ones, adding a touch of charm to your fridge, or simply enjoying the creative process. Designed by the talented Tatyana Zhukovich, these little friends are sure to melt hearts. So, grab your yarn and hook, and let’s get started on creating something truly special!
Abbreviations
- MR: Amigurumi Ring
- ch: Chain stitch
- sc: Single crochet
- inc: Increase
- dec: Decrease
- hdc: Half double crochet
- dc: Double crochet
- sl st: Slip stitch
- (… )n times: Repeat what is indicated in parentheses n times
Materials You’ll Need
- YarnArt Jeans yarn (50 g/160 m):
- For the bear: brown (No. 70), milky (No. 03), burgundy (No. 51)
- For the bunny: milky (No. 03), pink (No. 78)
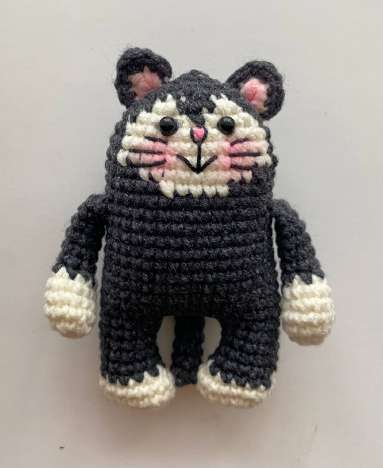
- For the cat: graphite (No. 28), milky (No. 03), pink (No. 78)
- Clover hook No. 1.75
- Needle for sewing parts
- Eyes 3 mm
- Stuffing
- Magnet 15 mm
- Scissors
- Blush or dry pastel for toning
- Black Iris thread for facial features
- Super glue “Moment-Crystal”
When using the recommended materials, each magnet will be approximately 8 cm tall (not including the ears).
Arms
Do not stuff this part.
For Bear and Bunny:
- Row 1: 6 sc in MR
- Row 2: 6 inc (12)
- Rows 3-5: 12 sc (3 rows)
- Row 6: (1 sc + dec) 4 times (8)
- Rows 7-11: 8 sc (5 rows)
Fold the part in half and crochet through both walls 4 sc. Cut the yarn.
For Cat:
Crochet the first 5 rows with milky color, then change to graphite.
Tail
Do not stuff this part.
For Bear and Bunny:
- Row 1: 6 sc in MR
- Row 2: 6 sc
Fold the part in half and crochet through both walls 3 sc. Cut the yarn.
For Cat:
Crochet the entire tail with graphite color.
- Row 1: 6 sc in MR
- Rows 2-7: 6 sc (6 rows)
Fold the part in half and crochet through both walls 3 sc. Cut the yarn.
Legs and Body
Stuff loosely as you go.
For Bear and Bunny:
Legs:
- Row 1: Chain 6, from the 2nd stitch from the hook: 4 sc, 3 sc in the last stitch, 3 sc, inc (12). Place marker.
- Row 2: 1 sc, inc, 3 sc, 2 inc, 4 sc, inc (16)
- Row 3: 16 sc
- Row 4: 4 sc, 4 dec, 4 sc (12)
- Rows 5-7: 12 sc (3 rows) + 6 sc
Cut the yarn on the first leg. Do not cut the yarn on the second leg and continue crocheting the body.
Body:
- Row 8: Chain 6, join to the first leg with a slip stitch, crochet 12 sc on the first leg, 6 sc on the chain, 12 sc on the second leg, 6 sc on the chain. Place marker.
- Rows 9-10: 36 sc (2 rows)
- Row 11: 14 sc, 3 sc together with the tail, 19 sc (36).
- Rows 12-17: 36 sc (6 rows)
Next, attach the arms.
- Row 18: 23 sc, 4 sc together with the arm, 9 sc (36)
Please note that first we attach the left arm, and in the next row, the right one.
- Row 19: 5 sc, 4 sc together with the arm, 27 sc (36)
- Rows 20-24: 36 sc (5 rows)
- Row 25: (4 sc + dec) 6 times (30)
- Row 26: 30 sc
- Row 27: (3 sc + dec) 6 times (24)
- Row 28: (2 sc + dec) 6 times (18)
- Row 29: (1 sc + dec) 6 times (12)
- Row 30: 6 dec (6)
Cinch the opening closed, hide the yarn end.
For Cat:
For the legs, crochet the first 3 rows with milky color, then change to graphite.
Body changes starting from Row 20:
- Row 20: G (graphite) – 31 sc, M (milky) – 5 sc (36)
- Row 21: G – 29 sc, M – 7 sc (36)
- Row 22: M – 2 sc, G – 25 sc, M – 9 sc (36)
- Row 23: M – 4 sc, G – 23 sc, M – 9 sc (36)
- Row 24: M – 4 sc, G – 23 sc, M – 9 sc (36)
- Row 25: M – 4 sc, G – (dec + 4 sc) 4 times, M – dec, 3 sc, G – 1 sc, M – dec (30)
- Row 26: M – 3 sc, G – 22 sc, M – 2 sc, G – 3 sc (30)
- Row 27: M – 2 sc, G – 1 sc, dec, (3 sc + dec) 5 times (24)
Then crochet everything with graphite color according to the pattern.
Ears
Do not stuff these parts.
Bear Ears:
- Row 1: 6 sc in MR
- Row 2: 6 inc (12)
- Row 3: 12 sc
Fold the part in half and crochet through both walls 6 sc. Leave yarn for sewing.
Bunny Ears:
- Row 1: 6 sc in MR
- Row 2: 6 inc (12)
- Rows 3-5: 12 sc (3 rows)
- Row 6: (1 sc + dec) 4 times (8)
- Rows 7-8: 8 sc (2 rows)
Fold the part in half and crochet through both walls 4 sc. Leave yarn for sewing.
Cat Ears:
First, crochet two parts with milky color.
- Row 1: In MR: 2 sc, 1 dc, 2 sc
Pull the ring tight, cut the yarn.
Now crochet two parts with graphite color.
- Row 1: In MR: 2 sc, 1 dc, 2 sc
Pull the ring tight, do not cut the yarn.
Place the graphite and milky colored parts wrong sides together and crochet together through both walls:
- Row 2: 2 sc, (1 hdc, 1 dc, 1 hdc) – in one stitch, 2 sc
Leave yarn for sewing.
Bear Muzzle
Crochet with milky color.
- Row 1: 6 sc in MR
- Row 2: 6 inc (12)
Leave yarn for sewing.
Heart
Do not stuff this part.
First Part:
- Row 1: 5 sc in MR
- Row 2: 5 inc (10)
- Row 3: (1 sc + inc) 5 times (15)
- Row 4: 15 sc
Cut the yarn.
Crochet the second part similarly. Do not cut the yarn, continue crocheting.
Join the parts with a slip stitch.
Crochet 14 sc, dec, 14 sc, dec. Place marker.
- Row 1: (13 sc + dec) 2 times (28)
- Row 2: (12 sc + dec) 2 times (26)
- Row 3: (11 sc + dec) 2 times (24)
- Row 4: (4 sc + dec) 4 times (20)
- Row 5: (3 sc + dec) 4 times (16)
- Row 6: (2 sc + dec) 4 times (12)
- Row 7: (1 sc + dec) 4 times (8)
- Row 8: 4 dec (4)
Close the opening, hide the yarn end.
Assembly and Finishing
- Sew on the ears. You can sew them on together or separately, as you prefer.
- Glue on the eyes. They can also be placed differently and in any rows.
- Sew on the muzzle for the bear.
- Embroider noses for all with black Iris thread, add whiskers for the cat. You can also embroider eyebrows and eyelashes.
- Tone the noses, cheeks, and ears using blush or dry pastel.
- Sew on the heart together with the arms. Insert the needle from the back, pass the needle through the body and the heart, catch the arm, and bring the needle back through the heart and body to the same point where you inserted the needle. Repeat with the second arm. Tie two knots and hide the yarn end.
- Glue the magnet (15 mm) to the back of the finished animal.
Your adorable animal magnets are now ready to bring a smile to anyone’s face!
We hope you enjoyed creating these charming Valentine’s Day animal magnets! Your handmade creations are a true testament to your skill and love. Don’t forget to share your finished projects with us on social media using #CrochettoMagnets – we absolutely love seeing your unique touches! For more delightful patterns and crafty inspiration, be sure to explore the rest of the Crochetto blog. Happy crocheting, and may your days be filled with warmth and creativity!