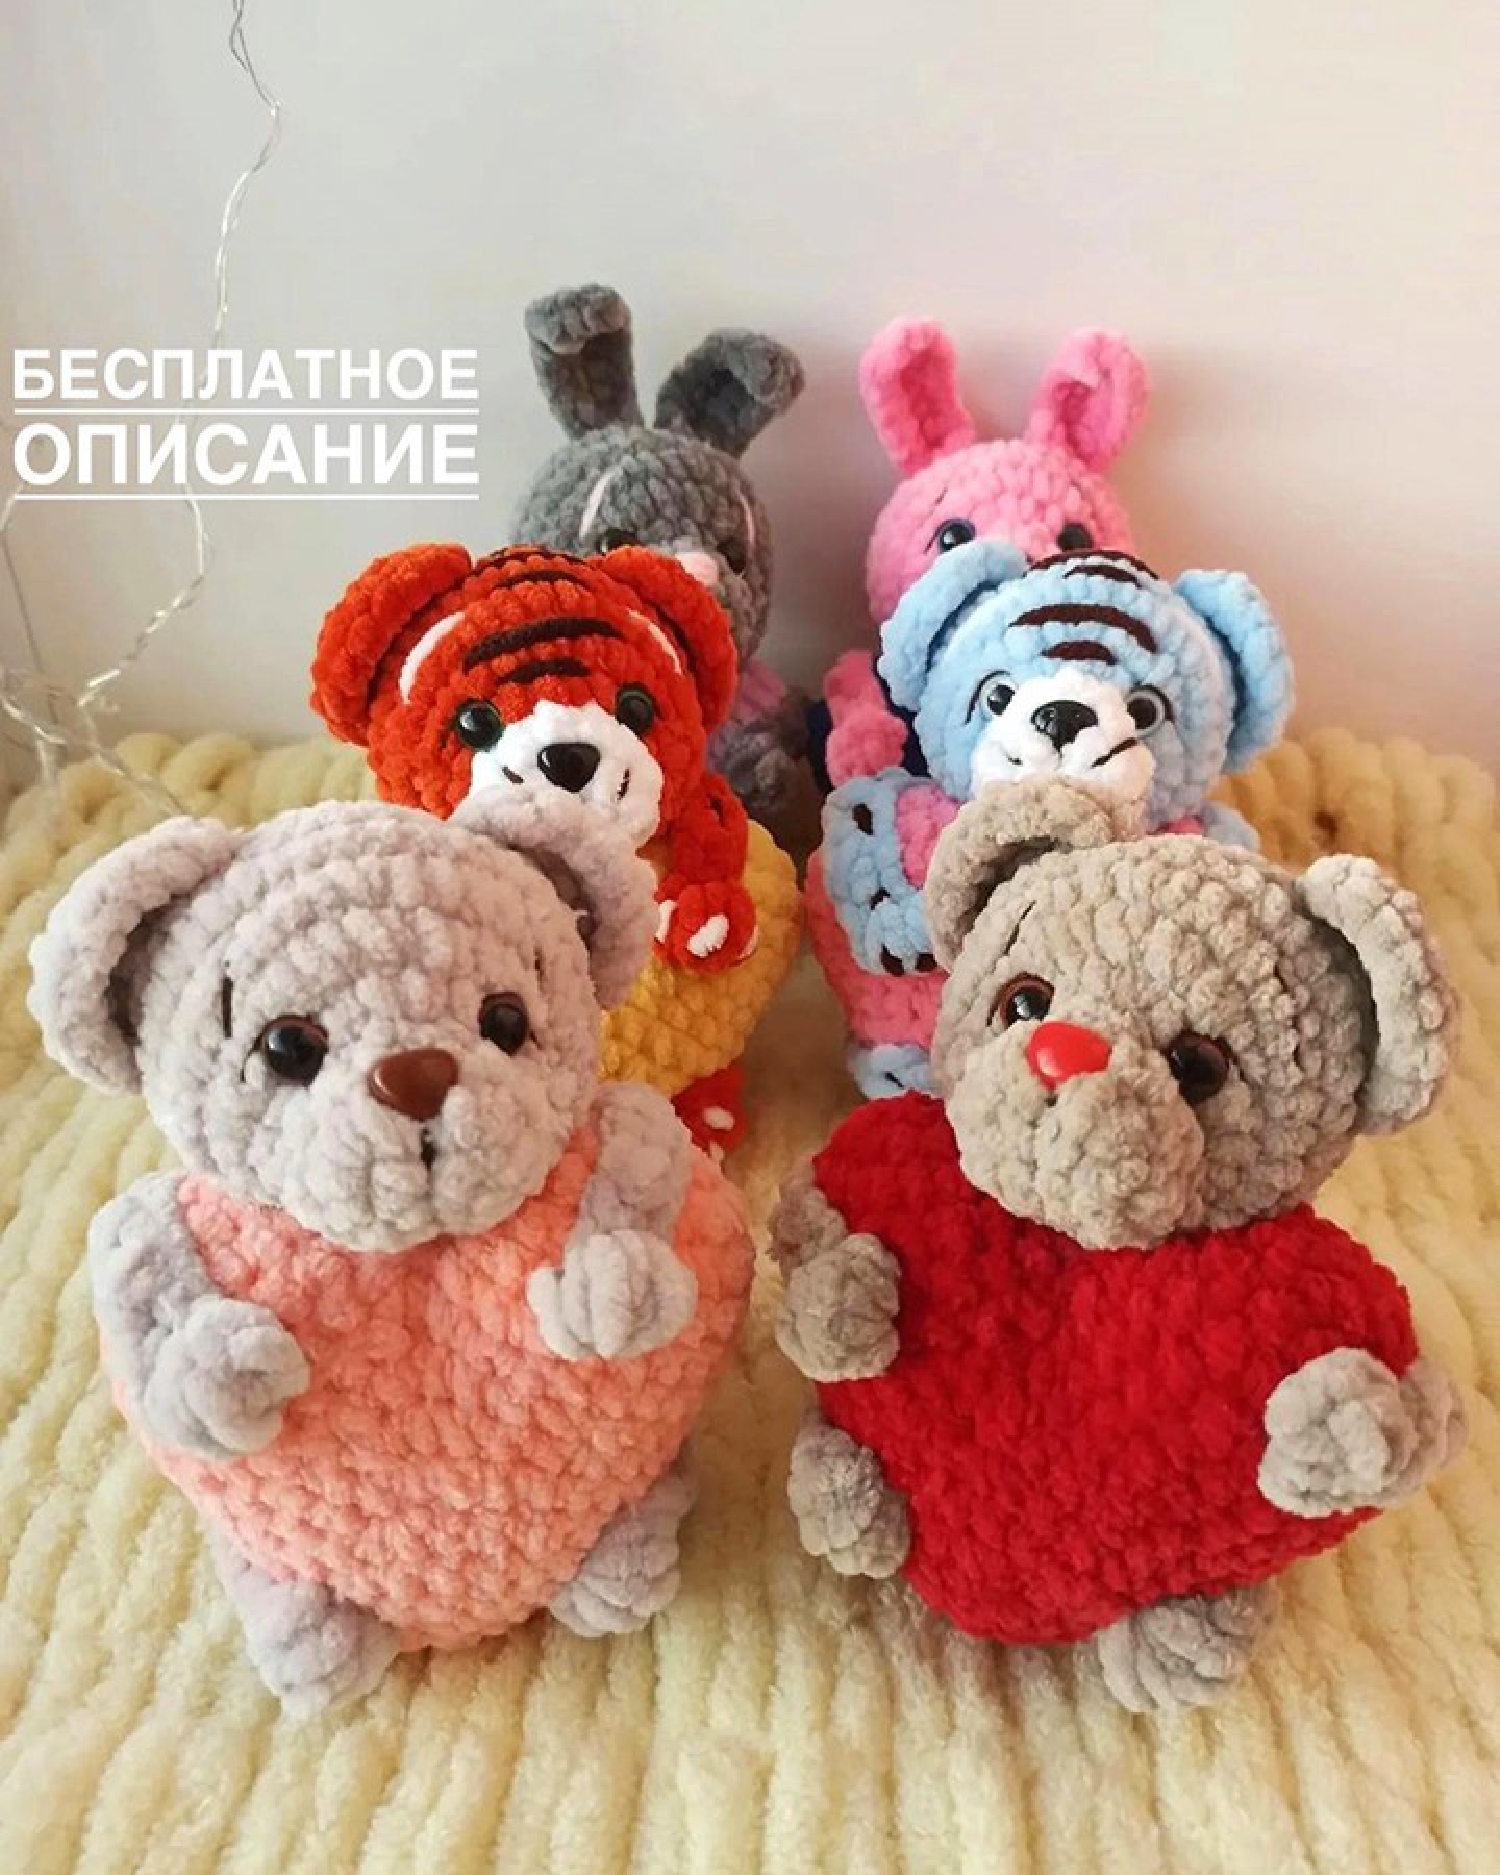
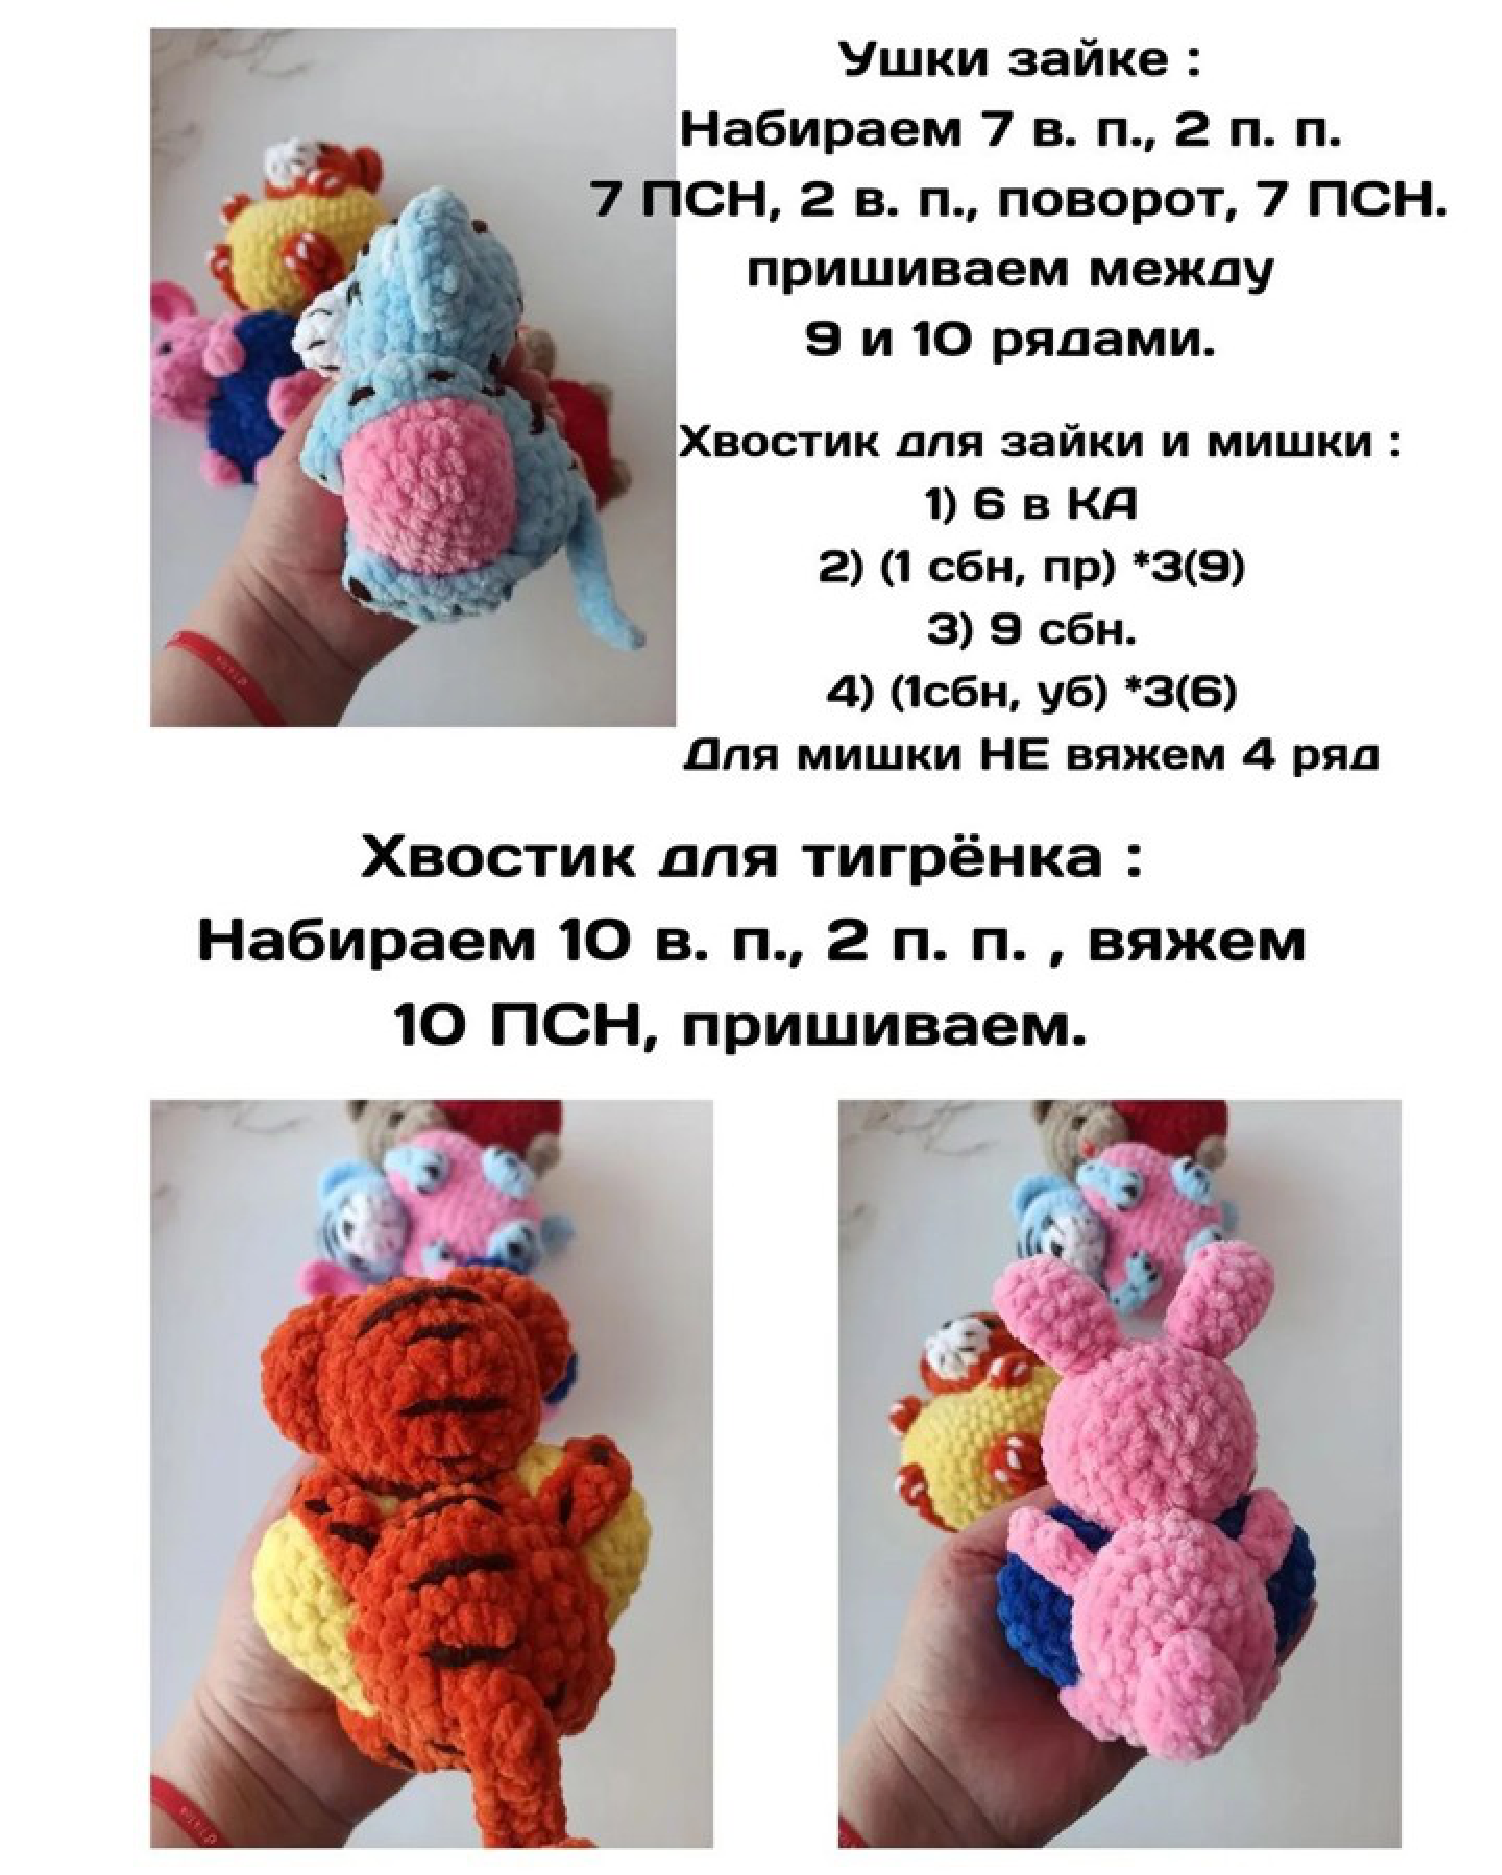
Crochet Adorable Animal Hearts: FREE Pattern!
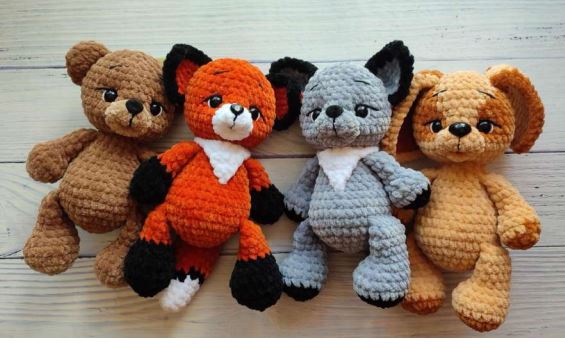
Hello, fellow crafters! Get ready to crochet the most adorable little valentines. This free pattern shows you how to create a sweet heart-shaped body that can be transformed into a charming tiger, a cuddly bear, or a cute bunny. These quick and easy projects are perfect for gifting to someone special or for decorating your space with a touch of handmade love. Let’s get our hooks ready!
Materials You’ll Need
- Yarn: Worsted or DK weight yarn in your chosen animal colors (e.g., orange/black/white for tiger, brown for bear, white/pink for bunny).
- Crochet Hook: Size appropriate for your yarn (e.g., 2.5mm – 3.5mm).
- Safety Eyes: 6mm to 8mm size.
- Stuffing: Polyester fiberfill.
- Yarn Needle: For sewing parts together and weaving in ends.
- Scissors.
- Black Embroidery Thread: For nose and other facial details.
Abbreviations (US Terms)
- MR: Magic Ring
- sc: Single Crochet
- inc: Increase (2 sc in the same stitch)
- dec: Decrease (crochet 2 stitches together)
- hdc: Half Double Crochet
- dc: Double Crochet
- ch: Chain
- (…) *X: Repeat the instructions in the parentheses X times.
- (…): The number in the final parentheses is the total stitch count for the round.
The Pattern
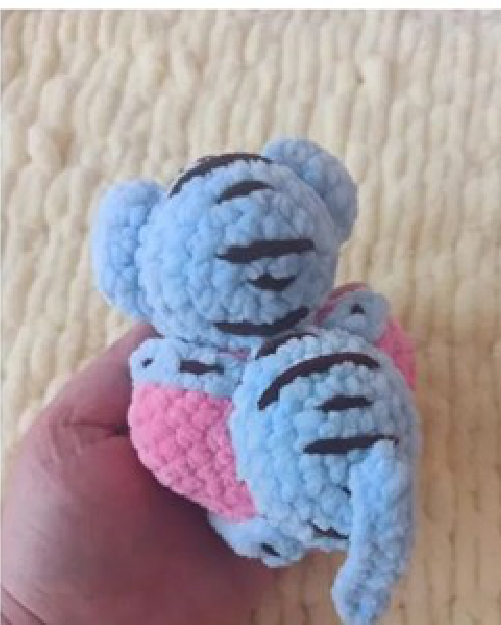
Part 1: The Heart (Main Body)
First, you will create the two top bumps of the heart separately and then join them to form the body.
Heart Bumps (Make 2)
Round 1: 7 sc into a MR. (7)
Round 2: 7 inc. (14)
Round 3: (1 sc, inc) *7. (21)
Rounds 4-5: 21 sc. (21)
Finish the first part and fasten off. For the second part, do not cut the yarn after Round 5. You will use it to join the two pieces.
Joining and Shaping the Body
Hold the two heart bumps together. Crochet through the loops of both pieces to join them with 5 sc. Now, continue crocheting in the round around the outer edge of both pieces.
Round 6: 38 sc around. (38)
Round 7: dec, 34 sc, dec. (36)
Round 8: (4 sc, dec) *6. (30)
Rounds 9-10: 30 sc. (30)
Round 11: (3 sc, dec) *6. (24)
Round 12: 24 sc. (24)
Round 13: (2 sc, dec) *6. (18)
Begin stuffing the heart firmly. Continue stuffing as you go.
Round 14: (1 sc, dec) *6. (12)
Round 15: (2 sc, dec) *3. (9)
Round 16: (1 sc, dec) *3. (6)
Fasten off, leaving a long tail. Weave the tail through the front loops of the final 6 stitches and pull tight to close the hole. Weave in the end.
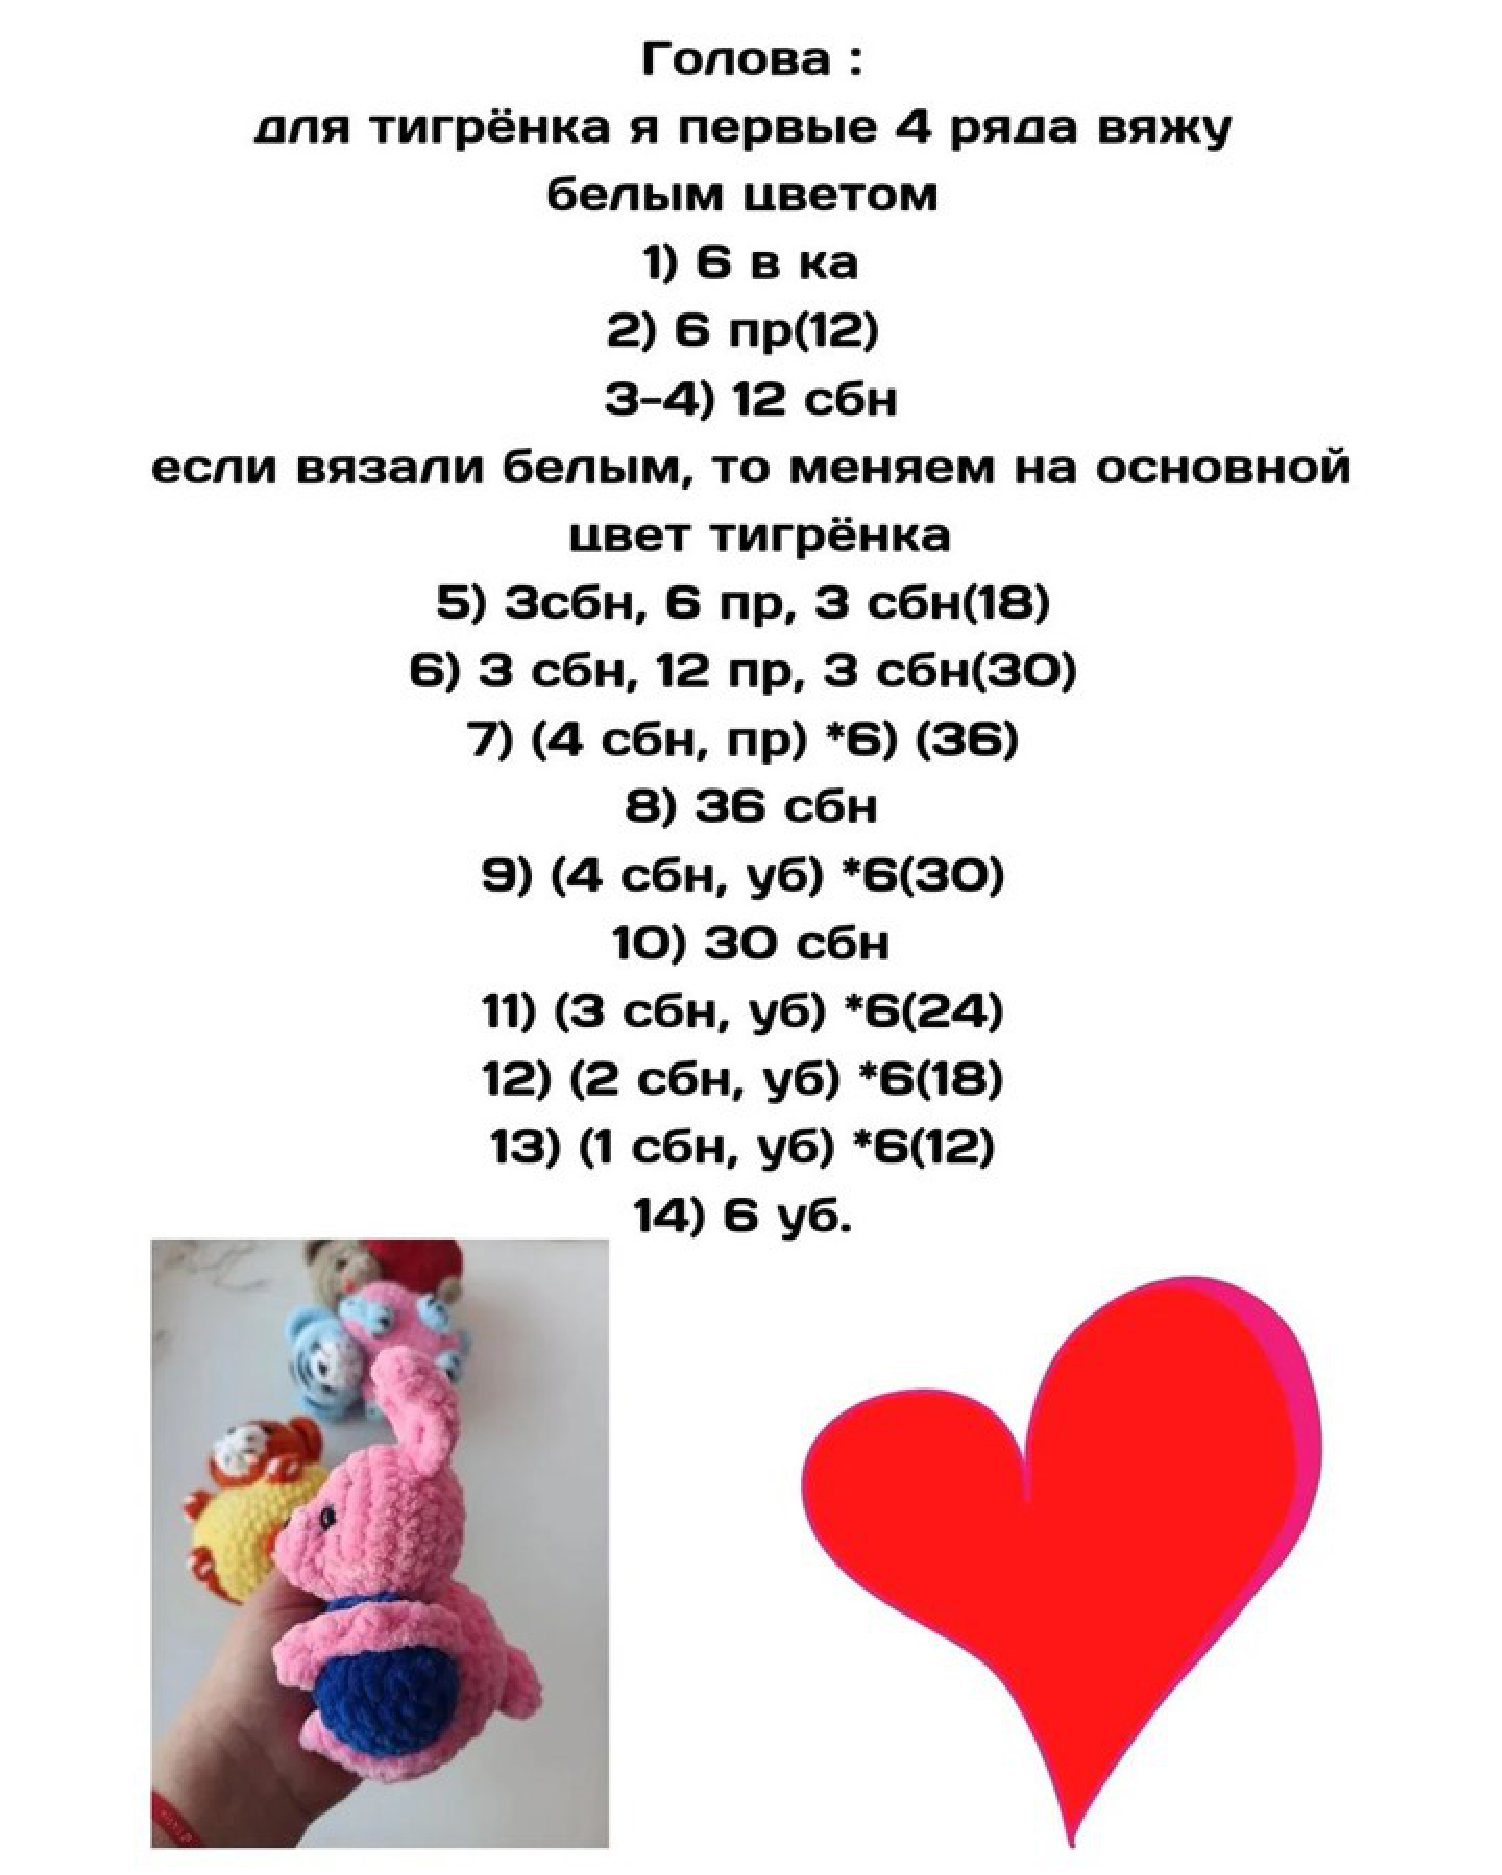
Part 2: The Head
For the tiger, use white yarn for the first 4 rounds, then switch to the main color. For other animals, use the main head color from the start.

Round 1: 6 sc into a MR. (6)
Round 2: 6 inc. (12)
Rounds 3-4: 12 sc. (12)
If making the tiger, change to your main color now.
Round 5: 3 sc, 6 inc, 3 sc. (18)
Round 6: 3 sc, 12 inc, 3 sc. (30)
Round 7: (4 sc, inc) *6. (36)
Round 8: 36 sc. (36)
Round 9: (4 sc, dec) *6. (30)
Round 10: 30 sc. (30)
Round 11: (3 sc, dec) *6. (24)
Insert safety eyes between Rounds 5 and 6. Begin stuffing.
Round 12: (2 sc, dec) *6. (18)
Round 13: (1 sc, dec) *6. (12)
Round 14: 6 dec. (6)
Fasten off, leaving a long tail for sewing. Finish stuffing, close the hole, and weave in the end.
Part 3: Animal Features
Ears for Tiger & Bear (Make 2)
The ears are crocheted directly onto the head between Rounds 9 and 10.
- Attach yarn to the head, ch 1.
- In the next stitch, work: (1 sc, 1 hdc). In the next stitch: (2 dc). In the next stitch: (1 hdc, 1 sc).
- Ch 1 and turn. Work along the edge you just created: 1 sc, 4 hdc, 2 sc along the side edge.
- Ch 1 and turn. 4 sc, 2 sc in the next stitch, 3 sc.
Fasten off, leaving a long tail. Use the tail and a needle to pass through the bottom row of the ear and pull it slightly to give it a folded, cupped shape.
Ears for Bunny (Make 2)
Row 1: Ch 7. Starting in the 3rd chain from the hook, work 7 hdc. Ch 2, turn. (7)
Row 2: 7 hdc. (7)
Fasten off, leaving a long tail for sewing. Sew onto the head between Rounds 9 and 10.
Tails
- Bunny & Bear Tail:
Round 1: 6 sc into MR. (6)
Round 2: (1 sc, inc) *3. (9)
Round 3: 9 sc. (9)
For the Bear, fasten off now. For the Bunny, continue:
Round 4 (Bunny only): (1 sc, dec) *3. (6)
Fasten off, leaving a tail for sewing. - Tiger Tail:
Ch 10. Starting in the 3rd chain from the hook, work 10 hdc. Fasten off, leaving a tail for sewing.
Part 4: Arms, Legs, and Back
Arms (Make 2)
The arms are the same for all animals.
- Ch 10. Starting in the 3rd chain from the hook, work 10 hdc across. Ch 2.
- Now, create the paw. Into the very first stitch of the row, work 5 double crochet stitches together (this is a bobble stitch). To do this: [Yarn over, insert hook, pull up a loop, yarn over, pull through 2 loops] repeat 5 times in the same stitch. You will have 6 loops on your hook. Yarn over and pull through all 6 loops.
- Fasten off, leaving a long tail. Use the tail to sew a small stitch under the bobble to secure it and make it pop out like a paw.
Legs (Make 2)
The legs are the same for all animals.
- Ch 6. Starting in the 3rd chain from the hook, work 6 hdc. Ch 2, turn. (6)
- Work 6 hdc across. (6)
- Now, create the foot. Work a 6 double crochet bobble stitch, splitting it across the two center stitches (3 incomplete dc in the first stitch, 3 incomplete dc in the second stitch).
- Fasten off, leaving a long tail. Secure the bobble as you did for the arms.
Back Piece (Optional)
This small piece can be sewn to the back of the heart to give it a more finished look.
Round 1: 6 sc into a MR. (6)
Round 2: 6 inc. (12)
Round 3: (inc, 1 sc) *3, 3 sc, (inc, 1 sc) *3, 3 sc. (18) (Slightly modified for clarity)
Round 4: (inc, 2 sc) *3, 6 sc, (inc, 2 sc) *3, 6 sc. (24) (Slightly modified for clarity)
Round 5: (3 sc, inc) *6. (30)
Round 6: 30 sc. (30)
Fasten off, leaving a long tail for sewing. Lightly stuff it before sewing it to the back of the heart body.
Assembly & Finishing Touches
- Face Sculpting: To create cute cheeks, insert your needle at the bottom of the head and bring it out on the right side of one eye. Go back in on the left side of the same eye. Repeat for the other eye without cutting the thread. Bring the needle back out at the bottom, pull gently to indent the eyes, and tie a knot.
- Nose & Details: Embroider a small nose with black thread about 1-2 rows below the eyes. You can also add eyebrows for more expression.
- Attach Head: Sew the head securely to the top of the heart body, centered over the “V” where the two bumps meet.
- Attach Limbs: Sew the arms to the sides of the body and the legs to the bottom front.
- Attach Tail & Back: Sew the tail to the lower back of the heart. If you made the back piece, sew it on now.
- Weave in all remaining ends.
And there you have it! Your very own crocheted animal heart. We hope you enjoyed this pattern and have fun creating your little zoo of love!
Original pattern design by @nikky_baby_toys. Rewritten and formatted for clarity.