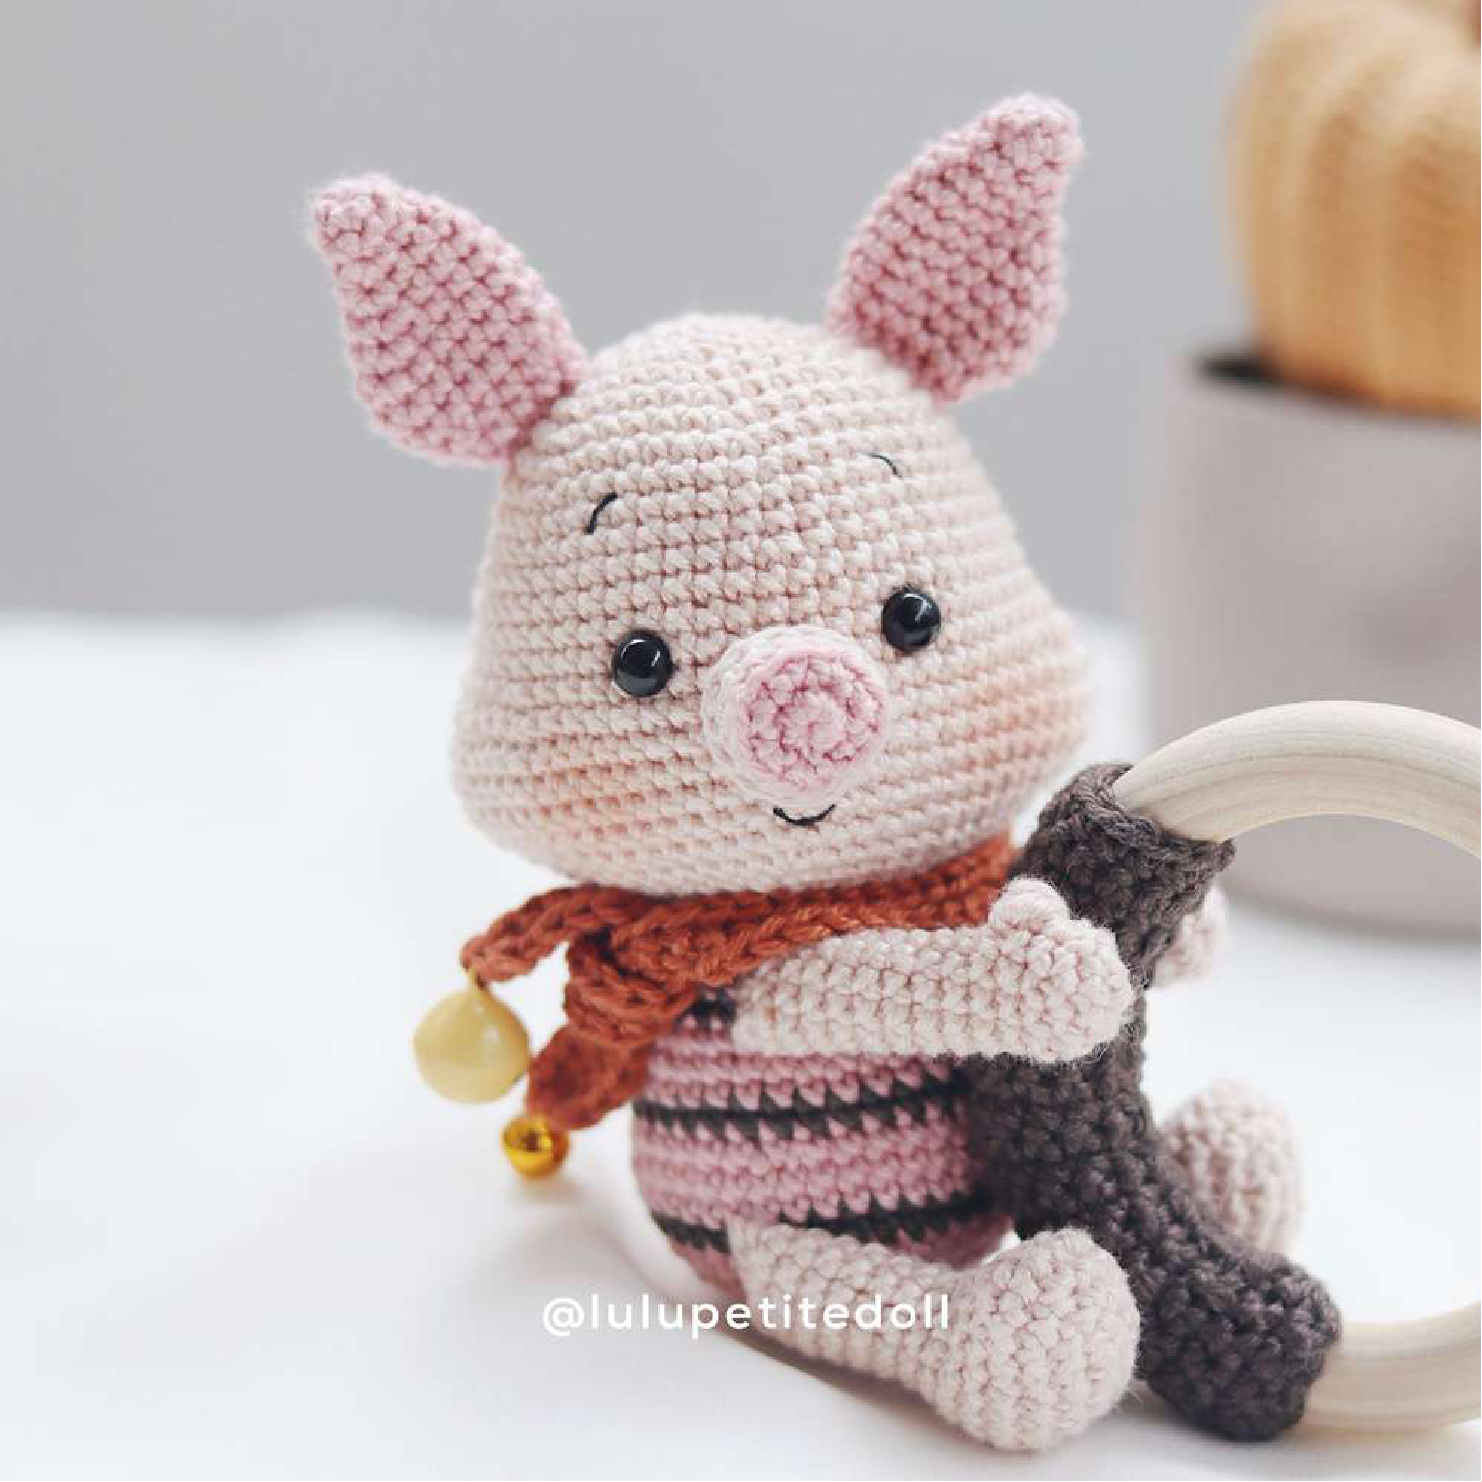
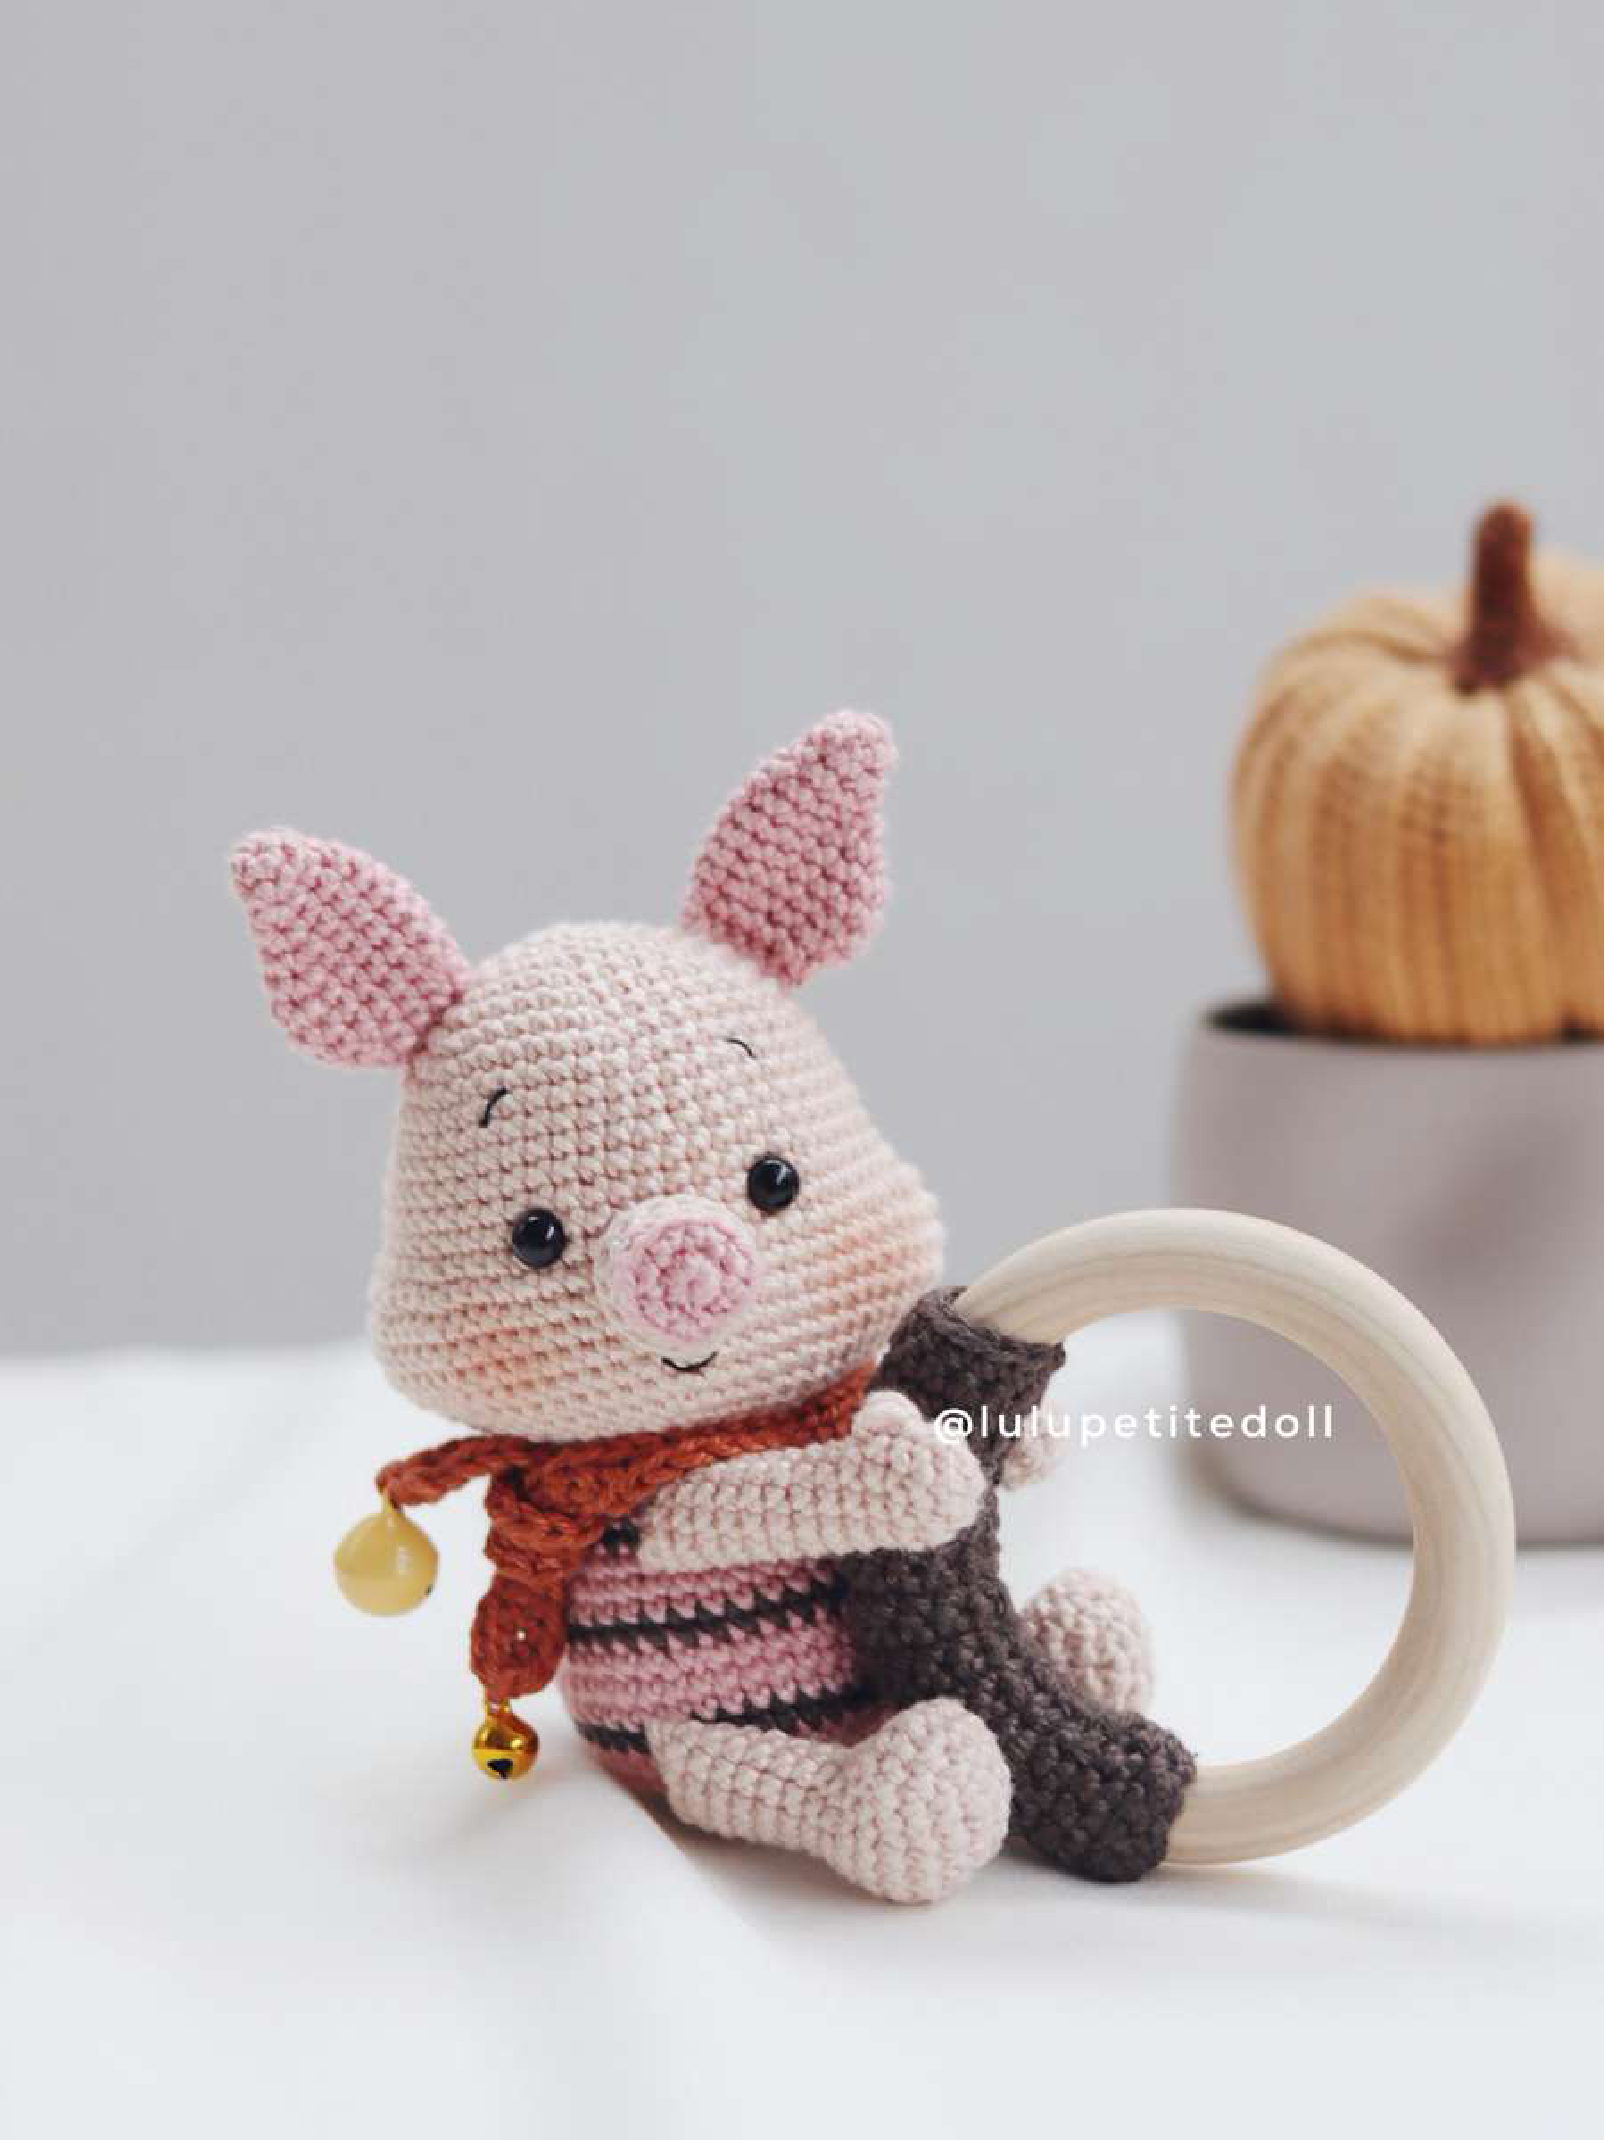
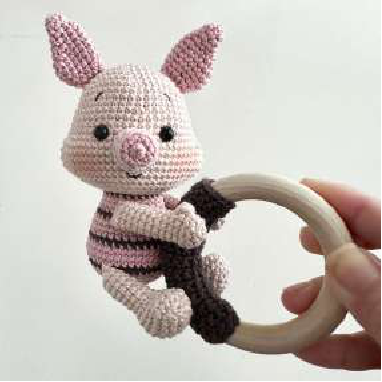
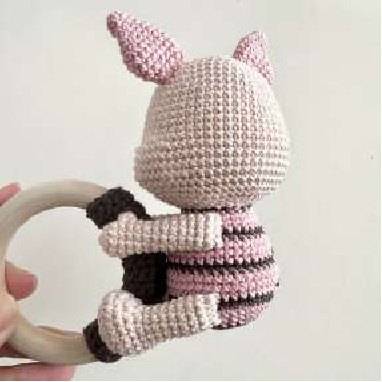
Make the Cutest Piglet Rattle: Easy Pattern!
Cute Piglet Rattle Amigurumi Pattern
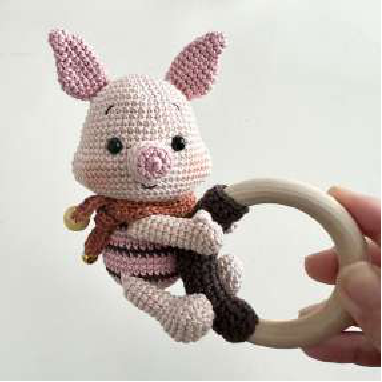
Welcome, fellow crocheters! Get ready to create the most adorable piglet rattle perfect for little hands. This pattern is designed to be clear and easy to follow, taking you step-by-step through making each part of this charming toy. Let’s gather our supplies and begin!
Materials
- Yarn: DK light weight yarn or sport yarn. I used Schachenmayr Catania. Feel free to use any yarn type you prefer.
- Hook: Size 2.00 mm (or suitable for your chosen yarn).
- Safety Eyes: Black, 6 mm.
- Needles: For sewing.
- Stuffing: Fiberfill.
- Wooden Ring: Outer diameter of 7 cm.
- Bells: 2 pieces.
Yarn Colors Used (as shown in example):
- Main Piglet Color (Light Pink): #408
- Nose Color (Dark Pink): #263
- Scarf Color (Orange): #426
- Stripes & Clamp Color (Dark Brown): #415
Abbreviations
- Rnd/Rw: Round/Row
- MR: Magic Ring
- st/sts: Stitch/Stitches
- ch: Chain
- sc: Single Crochet
- inc: Increase (2 sc in one stitch)
- dec: Single Crochet Decrease (use the invisible decrease for a neater look)
- BLO: Back Loop Only
- FLO: Front Loop Only
- hdc: Half Double Crochet
- dc: Double Crochet
- slst: Slip Stitch
- (…) * x: Repeat instructions x times
Pattern Instructions
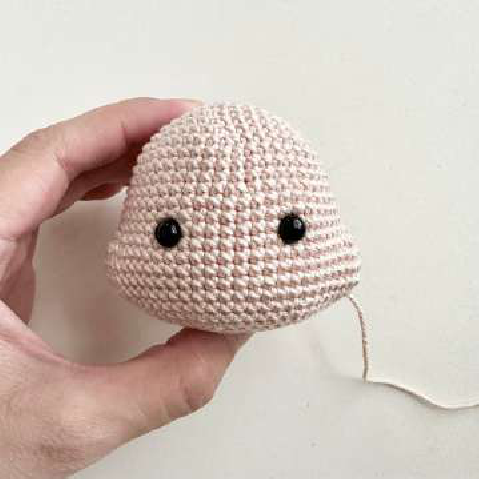
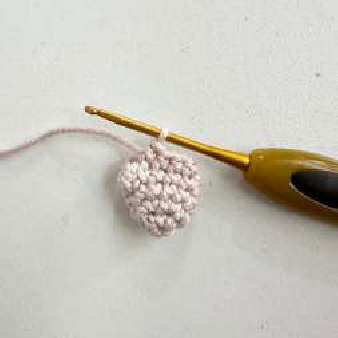
Head (Start with Light Pink Yarn #408)
Work in continuous rounds.
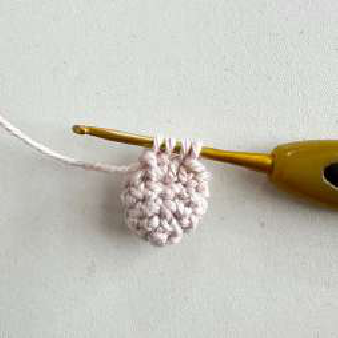
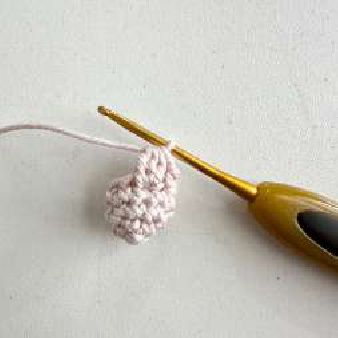
- Rnd 1: MR 6 sc (6 sts)
- Rnd 2: 6 inc (12 sts)
- Rnd 3: (sc, inc)*6 (18 sts)
- Rnd 4: (2 sc, inc)*6 (24 sts)
- Rnd 5: (3 sc, inc)*6 (30 sts)
- Rnd 6: (4 sc, inc)*6 (36 sts)
- Rnd 7: (5 sc, inc)*6 (42 sts)
- Rnd 8: (6 sc, inc)*6 (48 sts)
- Rnd 9 – 11: 48 sc (3 rounds)
- Rnd 12: (11 sc, inc)*4 (52 sts)
- Rnd 13 – 15: 52 sc (3 rounds)
- Rnd 16: 10 sc, (sc, inc)*3, 20 sc, (inc, sc)*3, 10 sc (58 sts)
- Rnd 17: 10 sc, (2 sc, inc)*3, 20 sc, (inc, 2 sc)*3, 10 sc (64 sts)
- Rnd 18 – 20: 64 sc (3 rounds)
- Rnd 21: 10 sc, (2 sc, dec)*3, 20 sc, (dec, 2 sc)*3, 10 sc (58 sts)
- Rnd 22: 10 sc, (sc, dec)*3, 20 sc, (dec, sc)*3, 10 sc (52 sts)
- Rnd 23: (11 sc, dec)*4 (48 sts)
- Rnd 24: (4 sc, dec)*8 (40 sts)
- Rnd 25: (3 sc, dec)*8 (32 sts)
- Rnd 26: (2 sc, dec)*8 (24 sts)
Fasten off, stuff firmly with fiberfill and leave a long tail for sewing. Insert the 6.00 mm safety eyes between round 15 and round 16 with 9 stitches apart.
Ears (Make 2 – Light Pink Yarn #408)
Work in continuous rounds.
- Rnd 1: MR 6 sc (6 sts)
- Rnd 2: 6 sc (6 sts)
- Rnd 3: (sc, inc)*3 (9 sts)
- Rnd 4: 4 sc, inc, 4 sc (10 sts)
- Rnd 5: 4 sc, 2 inc, 4 sc (12 sts)
- Rnd 6: 5 sc, 2 inc, 5 sc (14 sts)
- Rnd 7: 6 sc, 2 inc, 6 sc (16 sts)
- Rnd 8 – 9: 16 sc (2 rounds)
- Rnd 10: (2 sc, dec)*4 (14 sts)
- Rnd 11: 5 sc, dec, 5 sc (11 sts)
Fasten off, leave a long tail for sewing. Fold the ear in half and sew the two sides together to close the opening. Sew the ears to the head between Rnd 4 and Rnd 8 of the ear.
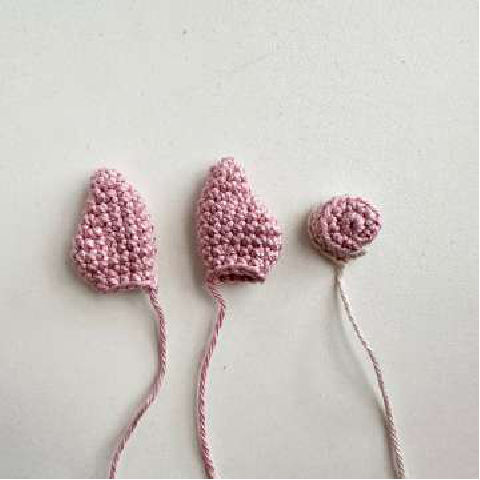
Nose (Start with Light Pink Yarn #408)
Work in continuous rounds.
- Rnd 1: MR 7 sc (7 sts)
- Rnd 2: 7 inc (14 sts)
- Change to Dark Pink Yarn #263.
- Rnd 3: BLO 14 sc (14 sts)
- Rnd 4: 14 sc (14 sts)
Fasten off, leave a long tail for sewing, and lightly stuff with fiberfill. Sew the nose onto the head between round 14 and round 20 of the head, centering it below the eyes.
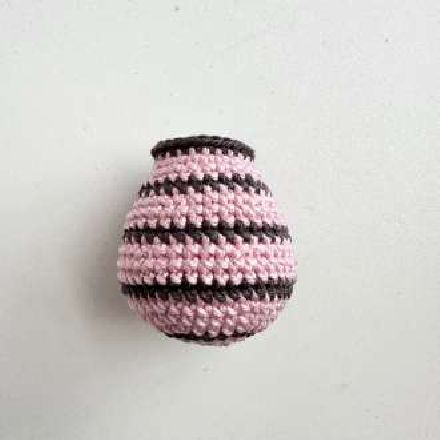
Body (Stripe Pattern)
Work in a stripe pattern: alternate 3 rounds in Light Pink Yarn #408 and 1 round in Dark Brown Yarn #415.
Work in continuous rounds.
- Rnd 1: MR 6 sc (6 sts) – Light Pink
- Rnd 2: 6 inc (12 sts) – Light Pink
- Rnd 3: (sc, inc)*6 (18 sts) – Light Pink
- Rnd 4: (2 sc, inc)*6 (24 sts) – Dark Brown
- Rnd 5: (3 sc, inc)*6 (30 sts) – Light Pink
- Rnd 6: (4 sc, inc)*6 (36 sts) – Light Pink
- Rnd 7: (5 sc, inc)*6 (42 sts) – Light Pink
- Rnd 8 – 10: 42 sc (3 rounds) – Dark Brown (Rnd 8), Light Pink (Rnd 9-10)
- Rnd 11: (5 sc, dec)*6 (36 sts) – Light Pink
- Rnd 12 – 14: 36 sc (3 rounds) – Dark Brown (Rnd 12), Light Pink (Rnd 13-14)
- Rnd 15: (4 sc, dec)*6 (30 sts) – Light Pink
- Rnd 16 – 17: 30 sc (2 rounds) – Dark Brown (Rnd 16), Light Pink (Rnd 17)
- Rnd 18: (3 sc, dec)*6 (24 sts) – Light Pink
- Rnd 19 – 20: 24 sc (2 rounds) – Dark Brown (Rnd 19), Light Pink (Rnd 20)
Fasten off and stuff firmly with fiberfill.
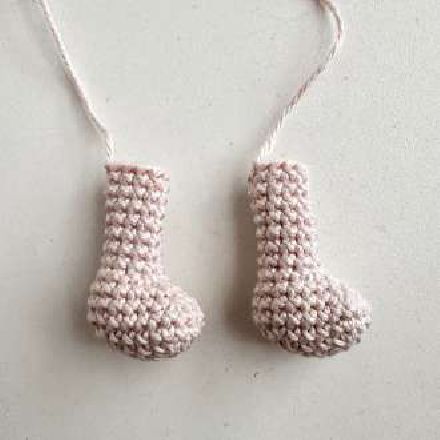
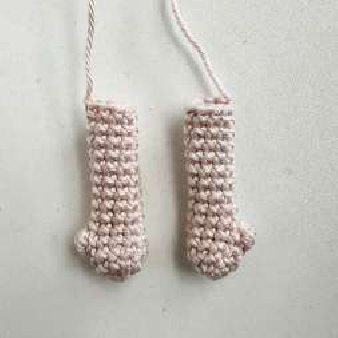
Legs (Make 2 – Light Pink Yarn #408)
Chain 5. Start in the second chain from the hook.
- Rnd 1: 3 sc, 3 sc into the last stitch, then working along the other side of the chain: 2 sc, inc (10 sts)
- Rnd 2: inc, 2 sc, 3 inc, 2 sc, 2 inc (16 sts)
- Rnd 3: sc, inc, 2 sc, (sc, inc)*3, 2 sc, (sc, inc)*2 (22 sts)
- Rnd 4: 22 sc (22 sts)
- Rnd 5: 5 sc, (sc, dec)*3, 6 sc, dec (18 sts)
- Rnd 6: 5 sc, 3 dec, 7 sc (15 sts)
- Rnd 7: 3 sc, 4 dec, 2 sc, dec (10 sts)
- Rnd 8 – 14: 10 sc (7 rounds)
Fasten off, stuff with fiberfill and leave a long tail for sewing.
Arms (Make 2 – Light Pink Yarn #408)
Work in continuous rounds.
-
- Rnd 1: MR 5 sc (5 sts)
- Rnd 2: 5 inc (10 sts)
- Rnd 3 – 4: 10 sc (2 rounds)
- Rnd 5: Bobble 3 dc, 9 sc (10 sts)
To make a Bobble 3 dc: Yarn over, insert hook into stitch, yarn over, pull up a loop, yarn over, pull through 2 loops (2 loops on hook). [Yarn over, insert hook into same stitch, yarn over, pull up a loop, yarn over, pull through 2 loops] two more times (4 loops on hook). Yarn over, pull through all 4 loops.

- Rnd 6: dec, 8 sc (9 sts)
- Rnd 7 – 14: 9 sc (8 rounds)
Crochet 1-2 more single crochet stitches until the last stitch is in the middle of the arm. Stuff slightly with fiberfill. Fasten off, leave a long tail for sewing. Fold the arm flat and sew the opening closed.
Scarf (Orange Yarn #426)
Leave a long tail at the beginning. Chain 56. Start in the second chain from the hook.
- Work 54 sc along the chain.
- Make 3 sc into the last stitch to turn.
- Work 53 sc along the other side of the chain.
- Make 1 inc in the last stitch.
- Slst to join (113 sts total).
Fasten off, leave a long tail for sewing. Sew one bell to each end of the scarf.
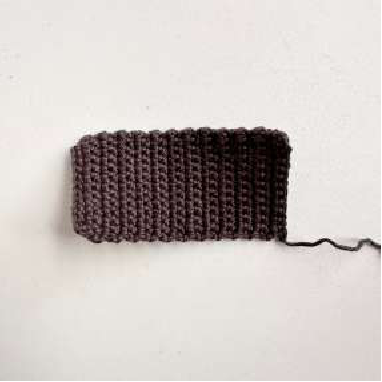
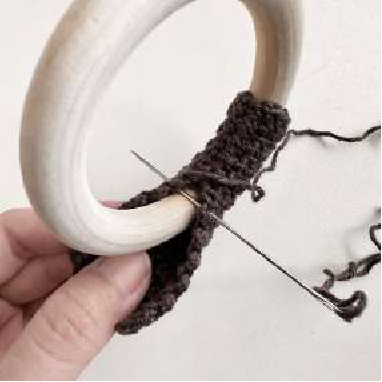
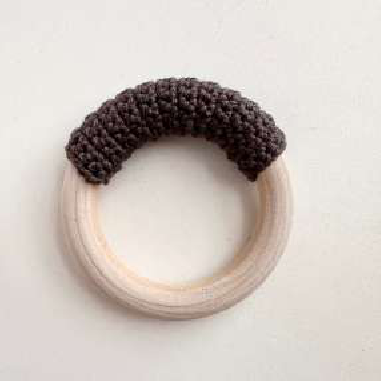
Clamp for Ring (Dark Brown Yarn #415)
Chain 13. Start in the second chain from the hook.
- Rw 1 – 23: 12 sc, ch 1, turn (12 sts)
- Rw 24: 12 sc (12 sts)
Fasten off, leave a long tail for sewing.
Wrap the clamp around the wooden ring and sew the edges together securely.
Assembly
- Sew the head to the body.
- Sew the legs to the bottom of the body.
- Sew the arms to the sides of the body.
- Sew the bottom of the hands and feet to the clamp for the ring, ensuring the piglet sits securely on the ring.
- Tie the scarf around the piglet’s neck.
And there you have it! Your adorable piglet rattle is complete!
Thank You & Sharing!
Thank you for purchasing and using my pattern! I had so much fun designing this little piglet, and I hope you enjoyed making it too.
I can’t wait to see your finished creations! Please share your photos on Instagram by tagging @lulupetitedoll and using the hashtag #lulupetitedoll. Your shares truly make my day!
With love,
Lulupetitedoll
Pattern designed by @lulupetitedoll | Copyright © 2024, Lulupetitedoll – Lulubabytoy.
This pattern is for PERSONAL USE ONLY. The pattern (in whole or in part) may not be published, translated, shared, distributed or resold.
You may sell items made from this pattern, provided a credit to @lulupetitedoll as the designer.