
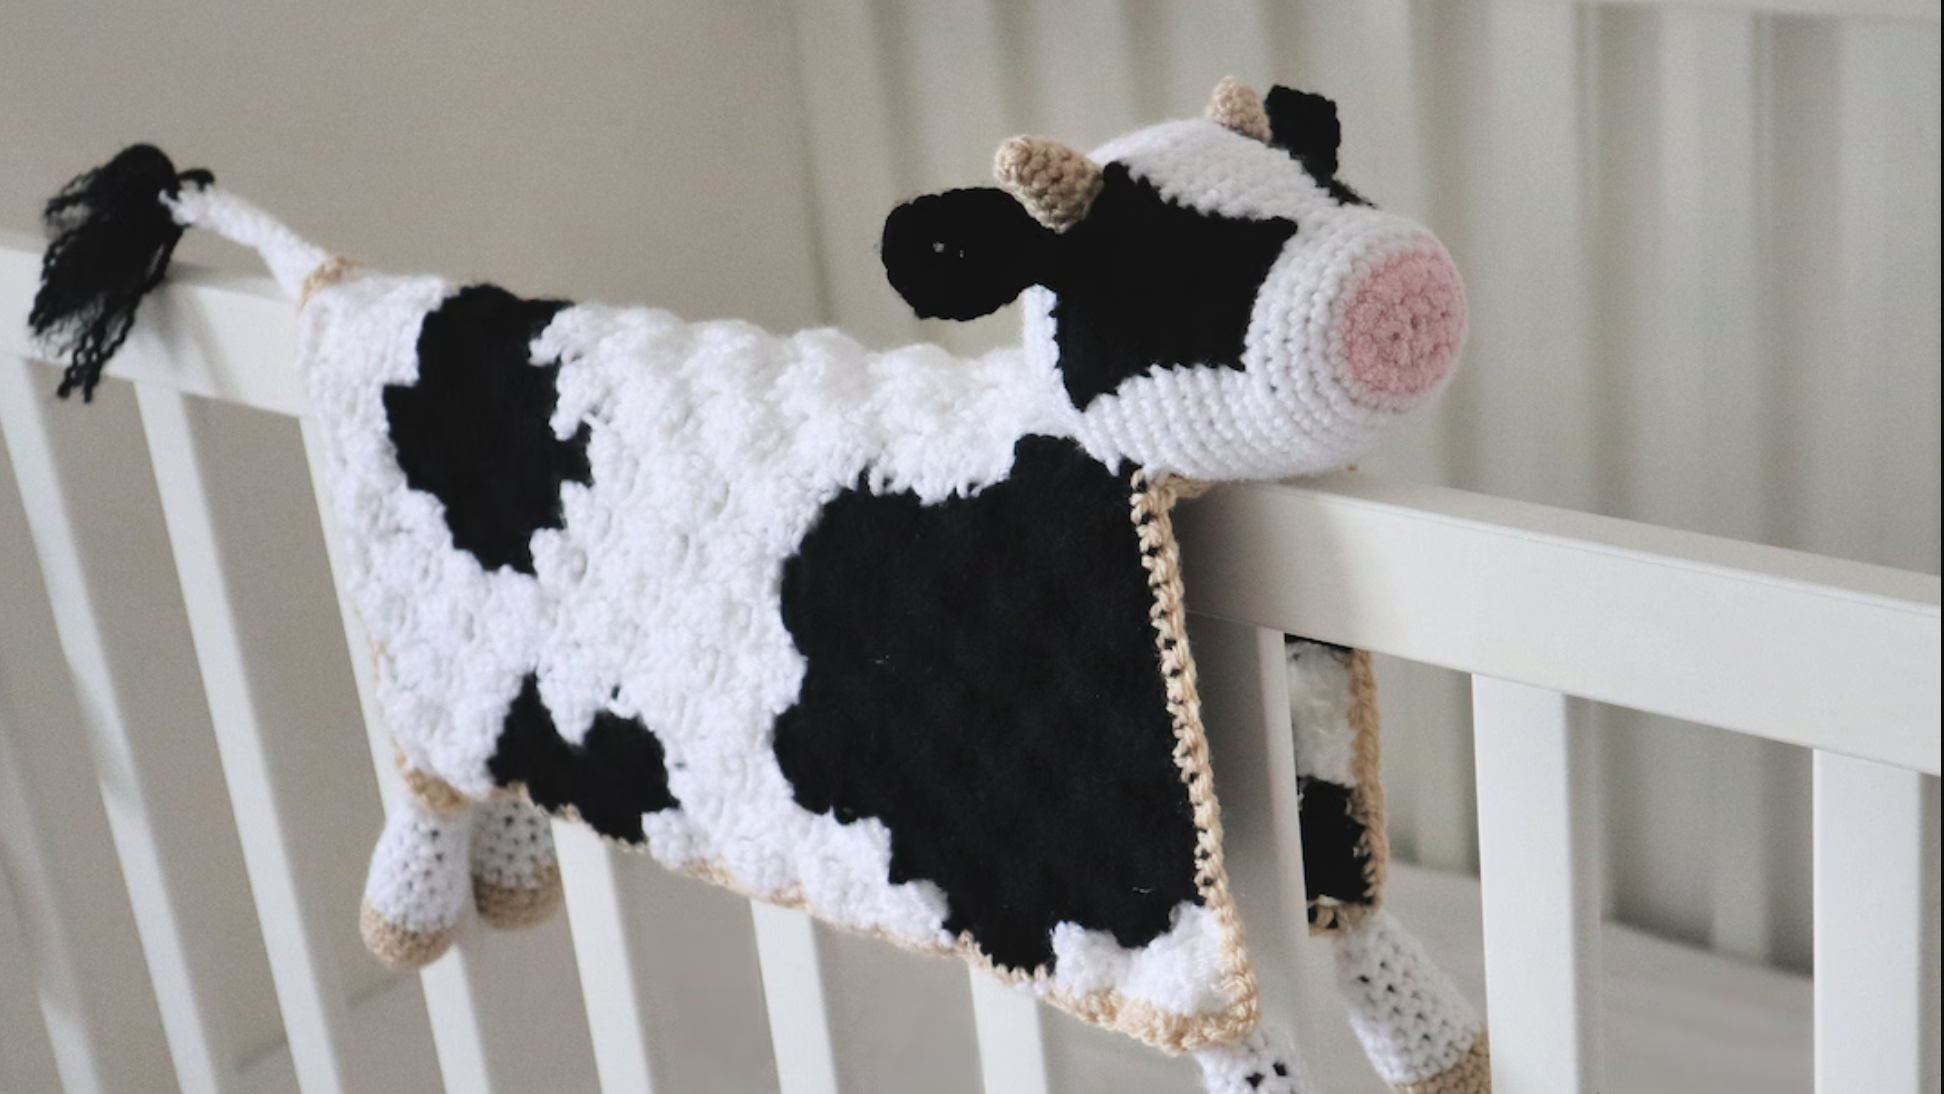
Beautiful Cow Blanket Crochet Pattern 2024

Step 2: Continuing the Pattern
- Rows 2 to 32:
- Follow the same color pattern as the first row.
- Carry the yarn color you’re not using across the top of the previous row. Simply crochet over it as you go. This prevents having loose strands on the back of your work, and it keeps everything tidy.
By the end of Row 32, you’ll have a lovely square that’s approximately 9.5 inches (24 cm) on each side, with a charming cow pattern emerging from the alternating black and white stitches.
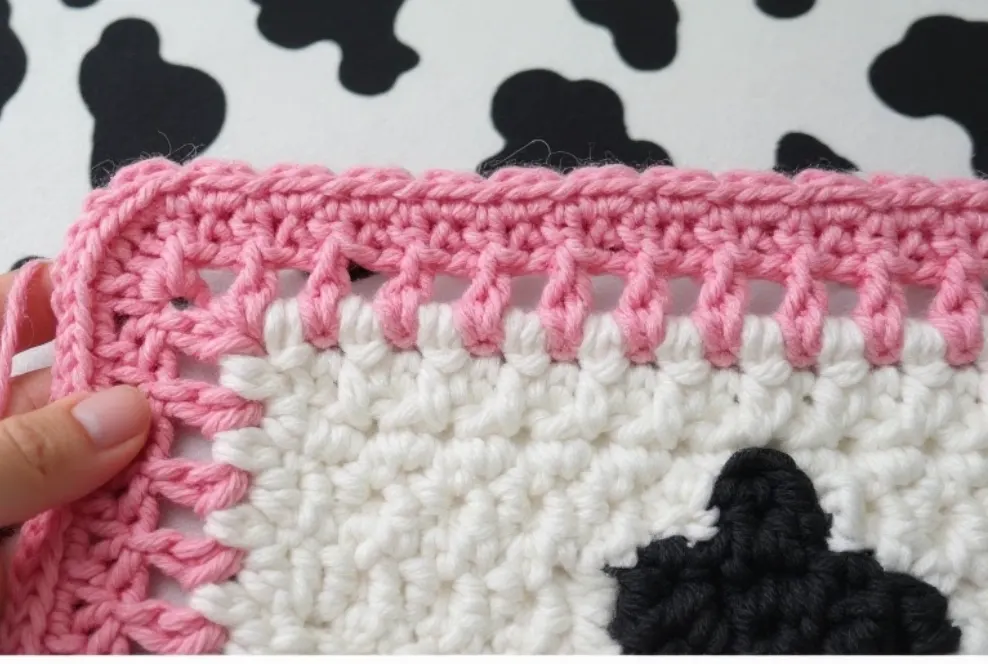
Adding a Pretty Border
Now, let’s give your blanket a nice finishing touch with a pink border.
Step 3: Crocheting the Border
- First Round:
- Join the pink yarn (Color C) in any corner of your blanket with a slip stitch.
- Chain 1, and make 2 single crochets in the same corner stitch.
- Single crochet evenly along each side of the blanket. You’ll want about 33 single crochets along each side, but it’s okay if it’s not exact. The main thing is to keep it even so your blanket lays flat.
- When you reach a corner, make 3 single crochets in the corner stitch. This helps the blanket turn nicely without curling.
- Join with a slip stitch to the first single crochet.
- Second Round:
- Chain 1.
- In the next stitch, work the following all in one stitch:
- Single crochet, chain 5, single crochet, chain 7, single crochet, chain 5, single crochet.
- Chain 4, skip the next 5 stitches.
- Repeat this pattern around the entire blanket.
- Join with a slip stitch and fasten off.
Now your blanket has a lovely pink border with a decorative edge!
Part 2: Making the Cow Features
Now for the fun part—adding the cow’s head and arms to make your blanket extra adorable.
Step 4: Crocheting the Cow’s Head
We’ll start with the cow’s head using beige yarn.
- Begin with a Magic Ring:
- Make a magic ring, chain 1, and work 10 single crochets into the ring.
- Pull the ring tight and join with a slip stitch to the first single crochet.
- Chain 1.
- Building Up the Head:
- Round 2: Make 2 single crochets in each stitch around (you’ll have 20 stitches). Join and chain 1.
- Round 3: Single crochet in each stitch around. Join and chain 1.
- Round 4: Increase Round – Make 2 single crochets in the first stitch, then 1 single crochet in the next stitch. Repeat this pattern around. Join and chain 1.
- Rounds 5 and 6: Continue increasing as per the pattern, with more single crochets between increases, until you have a total of 30 stitches.
- Creating the Face:
- Rounds 7 to 10: Single crochet in each stitch around. This builds up the face.
- Switch to White Yarn:
- On the last stitch of Round 10, switch to white yarn.
- Rounds 11 to 15: Single crochet in each stitch around with the white yarn.
- Adding the Eyes and Nostrils:
- Insert Safety Eyes: Between Rounds 13 and 14, place your safety eyes about 10 stitches apart.
- Embroider Nostrils: With a bit of black yarn, stitch two little nostrils onto the front of the cow’s nose.
- Shaping the Head:
- Rounds 16 to 22: Begin decreasing to shape the head.
- Round 16: Decrease by single crocheting two stitches together (sc decrease), then single crochet in the next two stitches. Repeat around.
- Continue with single crochet rounds and decrease rounds as per the pattern.
- Stuff the Head: Before the opening gets too small, fill the head with stuffing. Make it firm but still soft and cuddly.
- Closing the Head:
- Continue decreasing until the head is closed.
- Rounds 16 to 22: Begin decreasing to shape the head.