Crochet the “Kinder” Snowman: A Tiny Plush Make with Big Holiday Charm
Why You’ll Love This Little Snowman
The Kinder snowman combines a simple construction with charming details. The head and body are crocheted continuously, so there is no separate body to attach. The scarf is also formed during the pattern rather than made as a separate accessory.
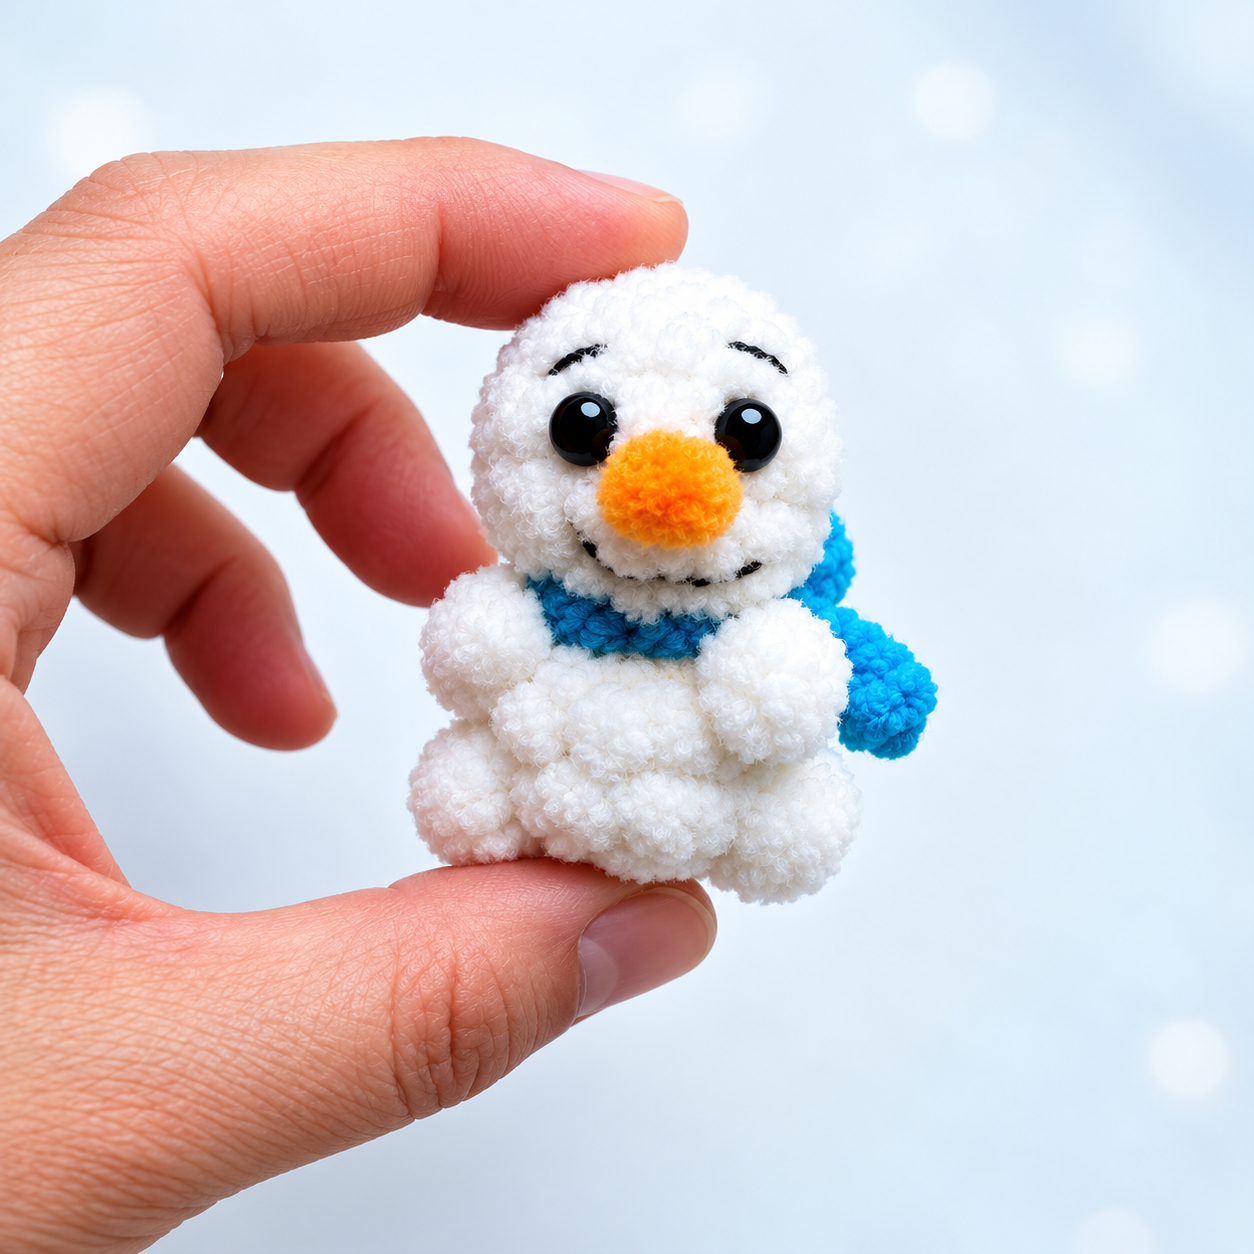
It is also a lovely project for experimenting with color. Keep the classic look with a white body, orange nose, and blue scarf, or choose a scarf shade that matches your holiday décor. Because the main materials are plush yarn and stuffing, the finished snowman has a soft, squeezable texture that makes his small rounded shape even more appealing.
Materials You’ll Need
- Plush yarn with a yardage of approximately 120 m per 100 g (about 131 yards per 3.5 oz), in white and your chosen scarf color
- A small amount of yarn for the carrot nose
- 3.5 mm crochet hook
- Toy stuffing
- 6 mm half-bead eyes
- A yarn needle for weaving in the ends
A stitch marker is also helpful for keeping track of the beginning of each round, especially when working with fluffy yarn.
Crochet Abbreviations
This version uses standard US terms:
- sc – single crochet
- inc – increase; work two stitches into the same stitch unless otherwise instructed
- dec – decrease
- ch – chain
- sl st – slip stitch
- hdc – half double crochet
- puff – puff stitch made with three half double crochets
- MR – magic ring, also called an amigurumi ring
The number in parentheses at the end of a round is the total stitch count for that round.
A Quick Note Before You Begin
For a neat amigurumi finish, work in continuous rounds and mark the first stitch of each round. Keep your tension firm enough to prevent the stuffing from showing through, but avoid pulling the plush yarn so tightly that the stitches become difficult to see.
The puff stitches in this pattern are made from three half double crochets. Work all three into the indicated stitch, then draw the yarn through the loops together to close the puff. Each completed puff counts as one stitch in the round total.
Step 1: Crochet the Carrot Nose
The tiny carrot is made with just a short chain and a few slip stitches.
Join the nose-colored yarn where you want to begin the carrot. Chain 3. Starting in the second chain from the hook, work 2 slip stitches back along the chain. Finish with a slip stitch into the stitch at the base.
Fasten off and cut the yarn. Set the carrot aside if you prefer to attach it during the finishing stage.
Step 2: Start at the Head
Using white yarn, begin the snowman’s head.
Round 1: Work 6 sc into a magic ring. (6 stitches)
Round 2: Increase in every stitch around. (12 stitches)
Rounds 3–4: Work 1 sc in each stitch around. (12 stitches per round)
These first rounds create the top of the head. The small stitch count makes it easier to handle the plush yarn and establish an even shape before adding the scarf and textured details.
Step 3: Change Color and Form the Scarf
Round 5: Change to your scarf color. Work 6 decreases around to reduce the stitch count from 12 to 6.
Without cutting the yarn, make the first scarf end: chain 4, then work 3 slip stitches starting in the second chain from the hook. Slip stitch into the stitch at the base to secure the end.
Repeat once more to create the second scarf end: chain 4, work 3 slip stitches starting in the second chain from the hook, and slip stitch into the base.
You should now have 6 stitches in the main round, plus two narrow scarf ends. Position them toward the back so they look like the loose ends of a scarf wrapped around the snowman’s neck.
Step 4: Build the Body and Add Texture
Round 6: Change back to white yarn. Work 2 regular increases. In the next stitch, make an increase consisting of 1 puff stitch and 1 sc. Work 1 regular increase in the following stitch, then another increase consisting of 1 puff stitch and 1 sc, and finish with 1 regular increase. (12 stitches)
In other words, every original stitch is worked into twice; two of those increases use a puff stitch paired with a single crochet instead of two single crochets.
Round 7: Work 1 sc in each stitch around. (12 stitches)
Round 8: Work 4 sc, 1 puff stitch, 4 sc, 1 puff stitch, then 2 sc. (12 stitches)
The puff stitches give the snowman’s white surface a soft, dimensional look. Gently push them outward with your fingertips so their texture remains visible after stuffing.
Step 5: Stuff and Close
Fill the piece with toy stuffing. Add enough to support the rounded head and body, distributing it gradually rather than packing all of it into one spot.
Round 9: Work 6 decreases around. (6 stitches)
Close the remaining opening by drawing the yarn tail through the front loops of the final stitches and pulling gently. Fasten off, cut the yarn, and use a yarn needle to hide the tail inside the snowman.
Bring Your Snowman to Life
Attach the 6 mm half-bead eyes securely and position the carrot nose at the center of the face, using the original cover photograph as a visual guide. The source pattern does not specify exact eye-placement rounds, so you can adjust their position slightly to create the expression you like best.
For the look shown on the cover, you can also add simple embroidered eyebrows and a small smile with dark yarn or thread. Take a moment to shape the body, straighten the scarf ends, and fluff the puff stitches with your fingers.
Safety tip: Half-bead eyes and other small attached parts may present a choking hazard. If the snowman will be used as a toy by a young child, replace them with securely embroidered features.
Tips for Crocheting with Plush Yarn
Plush yarn creates a wonderfully soft finish, but its fluff can make individual stitches harder to see. Use your fingertips to feel for the top of each stitch, and place a marker at the start of every round. Good lighting and a slightly slower pace can make the small rounds much easier to manage.
When decreasing, try an invisible decrease for a smoother surface. During stuffing, aim for a shape that feels supported but still soft; overfilling can stretch the stitches and distort the compact silhouette.
Most importantly, pause after each round to check your stitch count. Because the snowman is small, an extra or missed increase can noticeably change its proportions.
A Small Make with Plenty of Personality
The Kinder snowman proves that a festive crochet project does not need elaborate construction to feel special. A few rounds of plush stitches, two puff-textured details, a colorful scarf, and an expressive little face come together to create a character that is unmistakably full of winter cheer.
Choose a bright scarf, settle in with your hook, and enjoy watching this tiny snowman take shape—one cozy stitch at a time.