Crochet Your Own Pocket-Sized Beaver: Free Step-by-Step Amigurumi Pattern
DIY Crochet Beaver Amigurumi: Free Step-by-Step Pattern
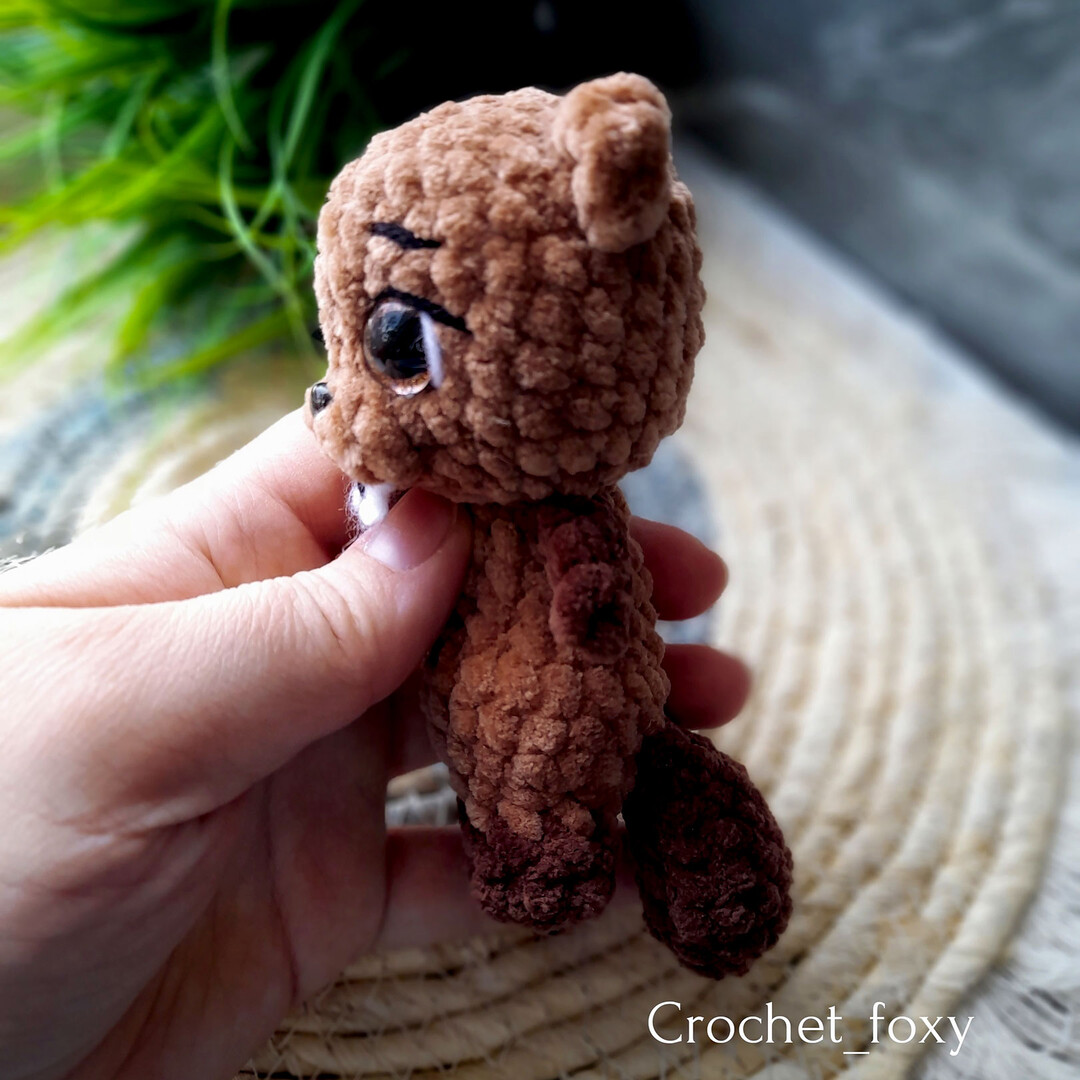
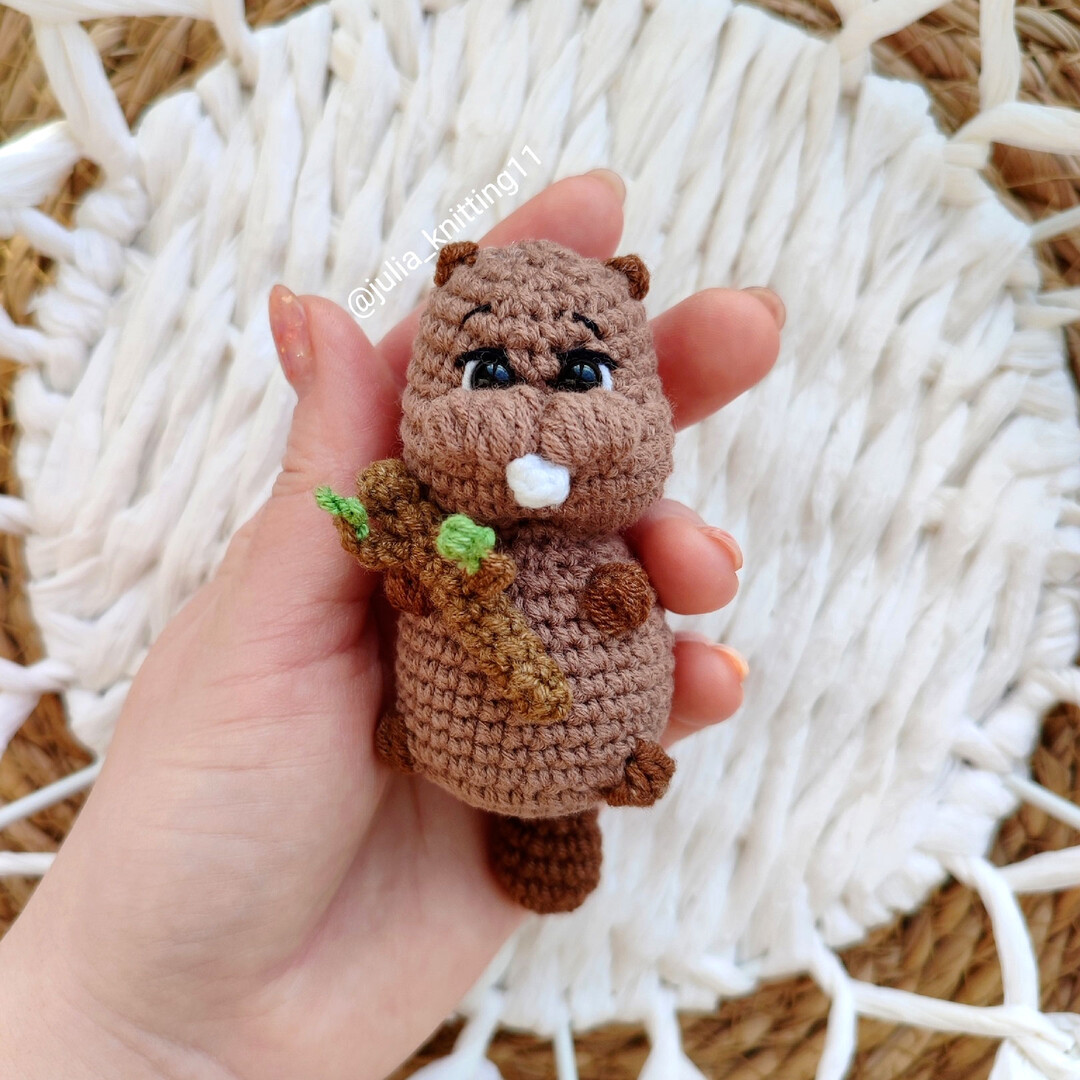
Looking for your next adorable crochet project? This free crochet beaver amigurumi pattern is perfect for crafters of all levels! With its cute little teeth, tiny flat tail, and a sweet little wooden branch to hold, this pocket-sized woodland creature is guaranteed to melt hearts. It makes a wonderful handmade gift, keychain, or desk companion.
Follow along with our detailed, step-by-step tutorial below to create your very own crochet beaver!
—
Materials & Tools Needed
- Yarn: Sport weight yarn (such as YarnArt Jeans or similar semi-cotton yarn) in the following colors:
- Medium Brown (Body color)
- Dark Brown (For arms, legs, tail, and ears)
- Light Brown (For the branch)
- A scrap of White (For the teeth)
- A scrap of Green (For the leaves)
- Crochet Hook: 2.0 mm (US size B-1)
- Safety Eyes: 6 mm
- Stuffing: Polyester fiberfill
- Other Tools: Yarn needle, scissors, and a stitch marker
—
Crochet Abbreviations (US Terms)
- MR: Magic Ring
- ch: Chain
- sc: Single crochet
- dc: Double crochet
- inc: Increase (2 single crochets in one stitch)
- dec: Decrease (invisible single crochet decrease recommended)
- sl st: Slip stitch
- bo: Bobble Stitch (4-dc bobble: crochet 4 partial double crochets into the same stitch, then yarn over and pull through all loops on your hook to close with a single top)
- sts: Stitches
—
Step-by-Step Crochet Beaver Pattern
1. The Tail
Use dark brown yarn.
- Round 1: 6 sc in MR (6)
- Round 2: 6 inc (12)
- Rounds 3–5: 12 sc (12) – 3 rounds total
- Round 6: (2 sc, dec) * 3 (9)
- Rounds 7–9: 9 sc (9) – 3 rounds total
- Stuff the tail lightly halfway. Fold the opening flat and crochet both sides together with 4 sc. Fasten off, leaving a short tail to hide.
2. The Body & Head
Start with medium brown yarn.
- Round 1: 6 sc in MR (6)
- Round 2: 6 inc (12)
- Round 3: (1 sc, inc) * 6 (18)
- Round 4: (2 sc, inc) * 6 (24)
- Round 5: (3 sc, inc) * 6 (30)
- Round 6: Crochet 4 sc working through both the tail and the body stitches to join them, 7 sc, 1 dark brown bobble stitch (foot), 10 sc, 1 dark brown bobble stitch (foot), 7 sc (30)
- Rounds 7–11: 30 sc (30) – 5 rounds total
- Round 12: (8 sc, dec) * 3 (27)
- Round 13: 12 sc, 1 dark brown bobble stitch (arm), 7 sc, 1 dark brown bobble stitch (arm), 7 sc (27)
- Round 14: (7 sc, dec) * 3 (24)
- Round 15: (2 sc, dec) * 6 (18)
- Round 16: (1 sc, dec) * 6 (12)
- Round 17: 12 inc (24) – This begins the head.
- Round 18: (3 sc, inc) * 6 (30)
- Note: Crochet an extra 5 sc, then place your stitch marker here. This marker must be located exactly in the center of the back. Adjust/shift stitches if necessary to align it perfectly.
- Rounds 19–21: 30 sc (30) – 3 rounds total
- Round 22: 13 sc, 2 bobble stitches (in medium brown for cheeks), 1 sc, 2 bobble stitches, 12 sc (30)
- Round 23: 9 sc, dec * 3, 1 sc, dec * 3, 8 sc (24)
- Rounds 24–26: 24 sc (24) – 3 rounds total
- Insert 6mm safety eyes between rounds 24 and 25, leaving a distance of 2 sc between them. Begin stuffing the body and head firmly with fiberfill.
- Round 27: (2 sc, dec) * 6 (18)
- Round 28: (1 sc, dec) * 6 (12)
- Round 29: 6 dec (6)
- Fasten off, weave the tail through the remaining stitches, pull tight to close the opening, and hide the end.
3. The Teeth
Use white yarn.
- Chain 2.
- Starting in the second chain from hook: 2 sc, sl st.
- Fasten off, leaving a yarn tail. Sew the teeth right below the nose/between the cheeks.
4. The Ears
Use dark brown yarn.
- Attach the yarn directly to the head at Round 27.
- Chain 3, then slip stitch to attach it to Round 28.
- Fasten off, tie secure knots, and weave the ends inside the head. Repeat on the other side.
—
How to Crochet the Miniature Branch
Your cute amigurumi beaver needs a little wooden twig to hold! Here is how to make it:
Main Branch
Use light brown yarn.
- Round 1: 5 sc in MR (5)
- Rounds 2–11: 5 sc (5) – 10 rounds total
- Fasten off, pull the opening closed, and weave in the ends.
Small Twigs (Make 2)
- Long Twig: Attach light brown yarn anywhere on the main branch. Chain 4. Starting from the second chain from the hook, work 3 sl st back down. Fasten off and secure.
- Short Twig: Attach light brown yarn anywhere else on the main branch. Chain 3. Starting from the second chain from the hook, work 2 sl st back down. Fasten off and secure.
Leaves (Make 2)
Use green yarn.
- Chain 2. Starting in the second chain from the hook, make 1 sl st.
- Fasten off and tie these tiny leaves onto the twigs. Sew or position the branch securely in the beaver’s arms!
—
Assembly & Finishing Touches
Now that all the parts are crocheted, it’s time to bring your beaver to life:
- Use a bit of dark embroidery thread to stitch a tiny nose just above the white teeth.
- Add small eyebrow expressions for extra personality.
- Position the branch diagonally across the front of the body and sew it securely to the beaver’s hands.
Congratulations! Your cute little crochet beaver is complete!