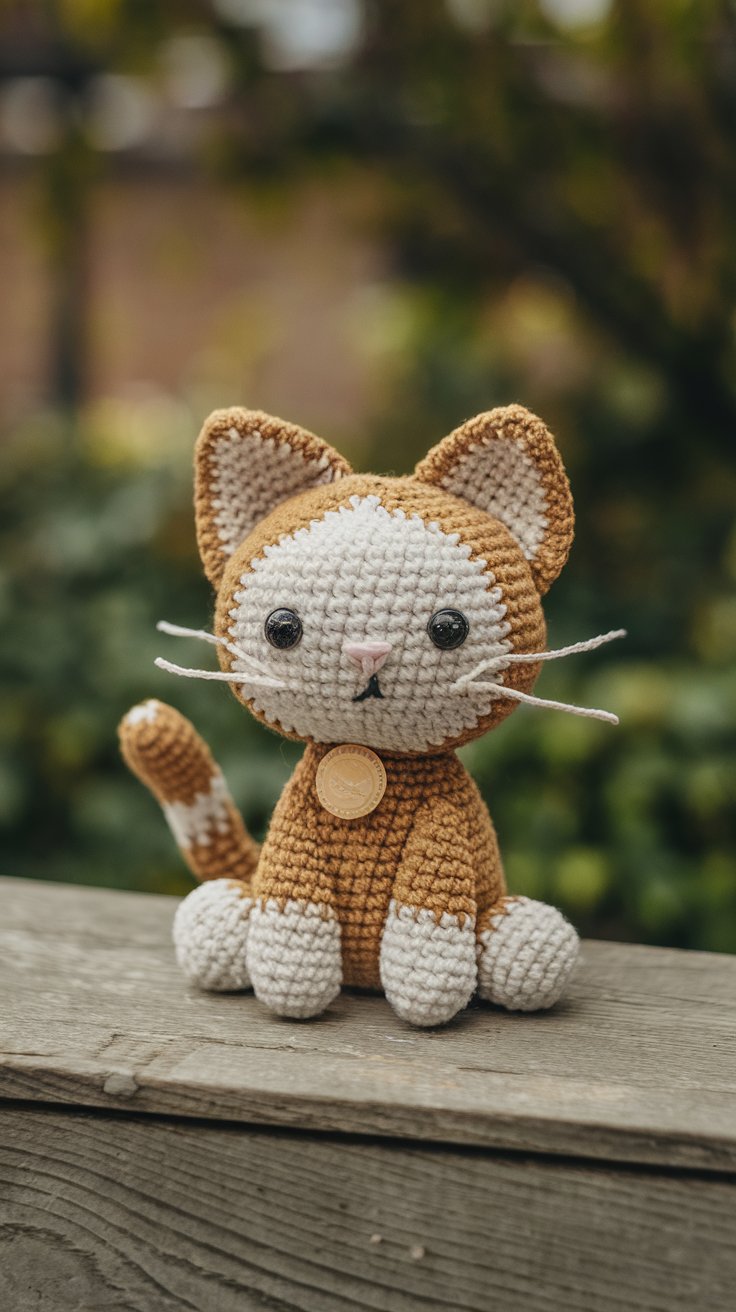
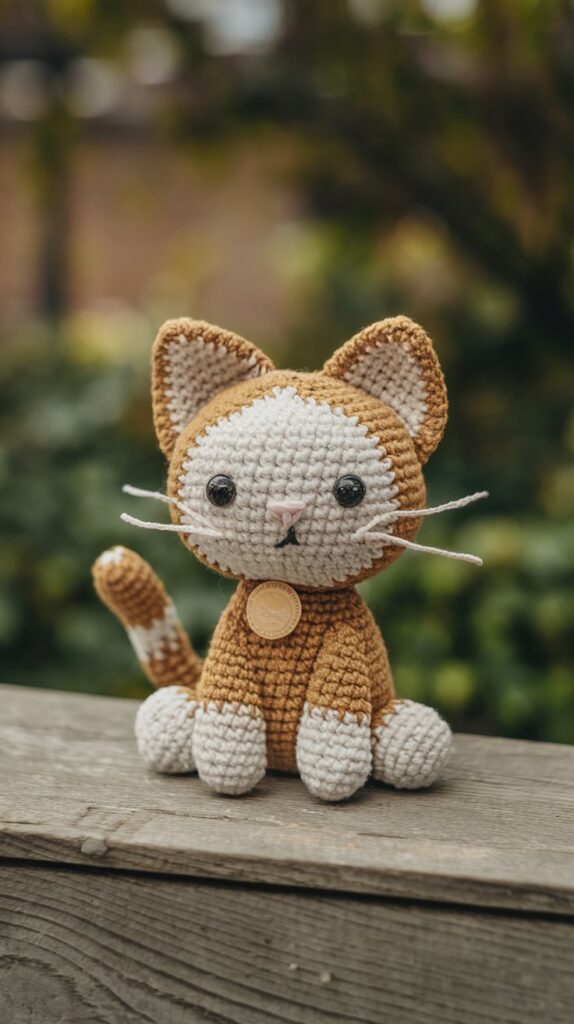
Cute Little Cat Amigurumi Free Crochet Pattern
Materials Needed
- 3.5mm crochet hook
- Worsted weight yarn in brown and white
- Black safety eyes (9mm)
- Thin white or cream yarn/thread for whiskers
- Small decorative button or coin charm
- Fiberfill stuffing
- Yarn needle
- Scissors
- Stitch markers
Abbreviations
- ch = chain
- sc = single crochet
- inc = increase (2 sc in same stitch)
- dec = decrease (sc 2 together)
- ( ) = repeat instructions inside parentheses
- [ ] = number of stitches after completing round
- mr = magic ring
Head/Body (worked as one piece in brown and white)
Starting with white yarn for the face:
- mr 6 [6]
- inc around [12]
- (sc 1, inc) around [18]
- (sc 2, inc) around [24]
- (sc 3, inc) around [30]
- (sc 4, inc) around [36]
7-12. sc around [36]
Switch to brown yarn:
13-18. sc around [36] - (sc 4, dec) around [30]
- (sc 3, dec) around [24]
21-22. sc around [24]
Stuff firmly as you go - (sc 2, dec) around [18]
- (sc 1, dec) around [12]
- dec around [6]
Fasten off and weave in end.
Ears (make 2 in brown, white inner detail added later)
- mr 6 [6]
- inc around [12]
3-4. sc around [12] - dec around [6]
Flatten and sc both sides together.
Add white inner ear detail using surface crochet.
Arms/Legs (make 4 in white)
- mr 6 [6]
- inc around [12]
3-5. sc around [12] - (sc 2, dec) around [9]
7-8. sc around [9]
Stuff lightly - dec around until closed [3]
Fasten off and weave in end.
Tail
With brown yarn:
- mr 6 [6]
2-8. sc around [6]
Add white tip in last round
Fasten off and weave in end.
Assembly Instructions
- Attach safety eyes between rounds 7-8 of head, approximately 6-7 stitches apart
- Embroider small nose with pink yarn between eyes
- Add whiskers using thin white yarn/thread (3 on each side)
- Sew ears to top of head, slightly angled outward
- Attach arms and legs to body, ensuring white paws are positioned correctly
- Sew tail to back
- Attach decorative button/coin to chest
- Use black yarn to add small mouth detail below nose
Tips
- Use stitch markers to keep track of rounds
- Stuff firmly but evenly for best shape
- When changing colors, work the last loop of the previous color with the new color
- For best results, use invisible decrease method
- Make sure to attach limbs symmetrically
- Create slight indentation for neck by tightening round 19
- Sew parts together while stuffing is still somewhat loose for easier needle insertion
Final Measurements
- Height: Approximately 5-6 inches (13-15 cm)
- Width: Approximately 3-4 inches (7.5-10 cm)
Remember to always use smaller parts (eyes, buttons) that are securely fastened if making this for children.

