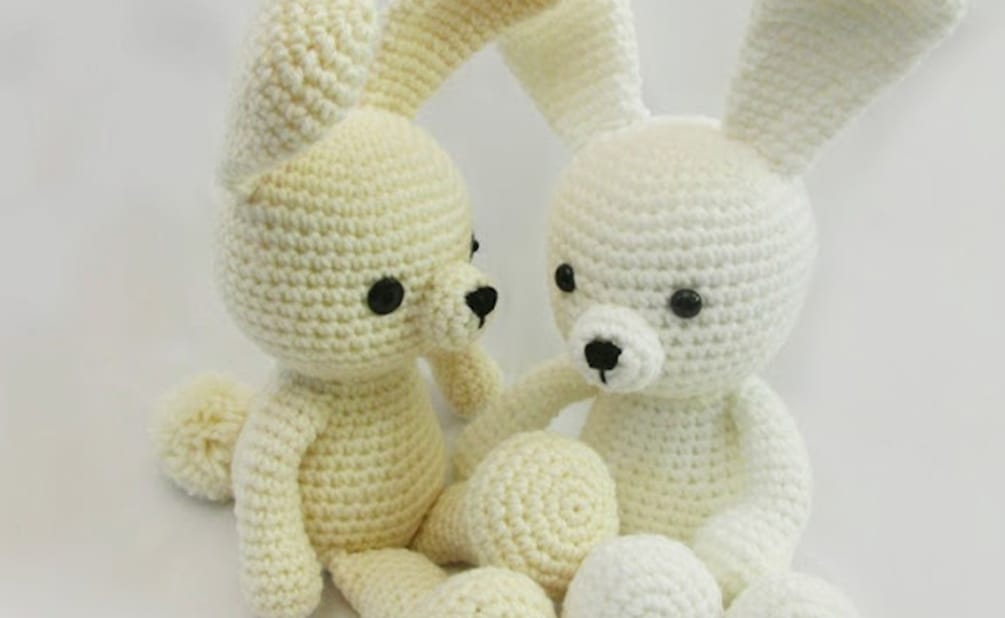
Dress Me Bunny Pattern

Creating your own adorable Dress Me Bunny has never been easier! This delightful crochet pattern is a modified version of the classic Valentine Bear design, perfect for adding charm to your handmade collection. Whether you’re crafting for Easter, spring decor, or a thoughtful gift, this bunny pattern comes with versatile outfit options to suit every occasion.
In this post, you’ll find clear step-by-step instructions, a complete materials list, and helpful tips to guide you through the process. Let’s get started on your new crochet project!
Supplies:
- Worsted weight yarn (e.g., Red Heart Comfort yarn)
- 3.75mm to 4.5mm hook (use smaller hook if you see gaps in stitches)
- Blunt-end yarn needle for sewing
- Scissors
- 100% polyester stuffing
- Safety eyes (10mm) or use buttons, French knots, or paint for eyes
- Optional: Pipe cleaners for ears and arms
Abbreviations:
- st = stitch
- sc = single crochet
- ch = chain
- sl st = slip stitch
- 2tog = crochet 2 stitches together
- f/o = finish off
Head and Body:
- Magic ring with 6 sc (6)
- 2 sc in each st (12)
- 1 sc then 2 sc in next st (18)
- 1 sc in next 2 st then 2 sc in next st (24)
- 1 sc in next 3 st then 2 sc in next st (30)
- 1 sc in next 4 st then 2 sc in next st (36)
- 1 sc in next 5 st then 2 sc in next st (42)
- 1 sc in next 13 st then 2 sc in next st (45) 9-16) 1 sc in each st for 8 rows
- 1 sc in next 13 st then 2tog (42)
- 1 sc in next 5 st then 2tog (36)
- 1 sc in next 4 st then 2tog (30)
- 1 sc in next 3 st then 2tog (24)
- 1 sc in next 2 st then 2tog (18)
- 1 sc in next 4 st then 2tog (15)
- 2 sc in each st (30) Stuff and shape head 24-28) 1 sc in each st for 5 rows
- 1 sc in next 4 st then 2 sc in next st (36)
- 1 sc in next 5 st then 2 sc in next st (42) 31-35) 1 sc in each st for 5 rows
- 1 sc in next 5 st then 2tog (36)
- 1 sc in next 4 st then 2tog (30)
- 1 sc in next 3 st then 2tog (24)
- 1 sc in next 2 st then 2tog (18) Stuff and shape body. Fill stuffing gaps in the neck.
- 1 sc then 2tog (12)
- 1 sc then 2tog (8) F/o leaving a tail. Weave in and out of remaining stitches, pull tight to close.
Ears:
- Magic ring with 6 sc (6)
- 2 sc in each st (12)
- 1 sc then 2 sc in next st (18)
- 1 sc in next 5 st then 2 sc in next st (21)
- 1 sc in next 6 st then 2 sc in next st (24) 6-7) 1 sc in each st for 2 rows
- 1 sc in next 6 st then 2tog (21) 9-10) 1 sc in each st for 2 rows
- 1 sc in next 5 st then 2tog (18) 12-13) 1 sc in each st for 2 rows
- 1 sc in next 4 st then 2tog (15) 15-16) 1 sc in each st for 2 rows
- 1 sc in next 3 st then 2tog (12) 18-19) 1 sc in each st for 2 rows F/o leaving a tail for sewing.
Muzzle:
- Magic ring with 6 sc (6)
- 2 sc in each st (12)
- 1 sc in next 3 st then 2 sc in next st (15)
- 1 sc in each st for 1 row F/o leaving a long tail. Whip stitch a nose onto the muzzle before sewing it to the head.
Arms:
- Magic ring with 6 sc (6)
- 2 sc in each st (12)
- 1 sc in next 3 st then 2 sc in next st (15)
- 1 sc in each st for 1 row
- 1 sc in next 3 st then 2tog (12)
- 1 sc in each st for 1 row
- 1 sc in next 4 st then 2tog (10) 8-16) 1 sc in each st for 9 rows F/o leaving a long tail for sewing. Stuff hand and arm.
Legs:
- Magic ring with 6 sc (6)
- 2 sc in each st (12)
- 1 sc then 2 sc in next st (18)
- 1 sc in next 2 st then 2 sc in next st (24)
- 1 sc in next 3 st then 2 sc in next st (30) 6-7) 1 sc in each st for 2 rows
- 1 sc in next 3 st then 2tog (24)
- (1 sc then 2tog x 6) 1 sc in next 6 st (18)
- 1 sc in each st for 1 row
- (1 sc then 2tog x 4) 1 sc in next 6 st (14) 12-22) 1 sc in each st for 11 rows F/o leaving a tail for sewing. Stuff and shape foot after 2-3 rows, stuff leg at the end of row 22.
Solid Tail:
- Magic ring with 6 sc (6)
- 2 sc in each st (12)
- 1 sc in next 3 st then 2 sc in next st (15)
- 1 sc in each st for 1 row
- 1 sc in next 3 st then 2tog (12) F/o leaving a long tail for sewing.
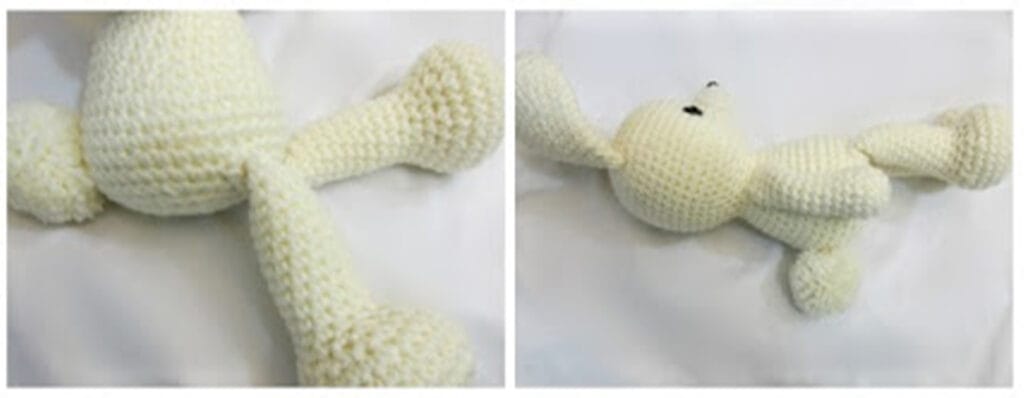
Assembly:
- Sew legs flat to the underside of the body.
- Sew arms under the head, one ring down from the top of the neck.
- Whip stitch a nose in place before sewing the muzzle to the head. Stuff the muzzle before sewing.
- Sew the tail in place. Use lots of pins for positioning before sewing.
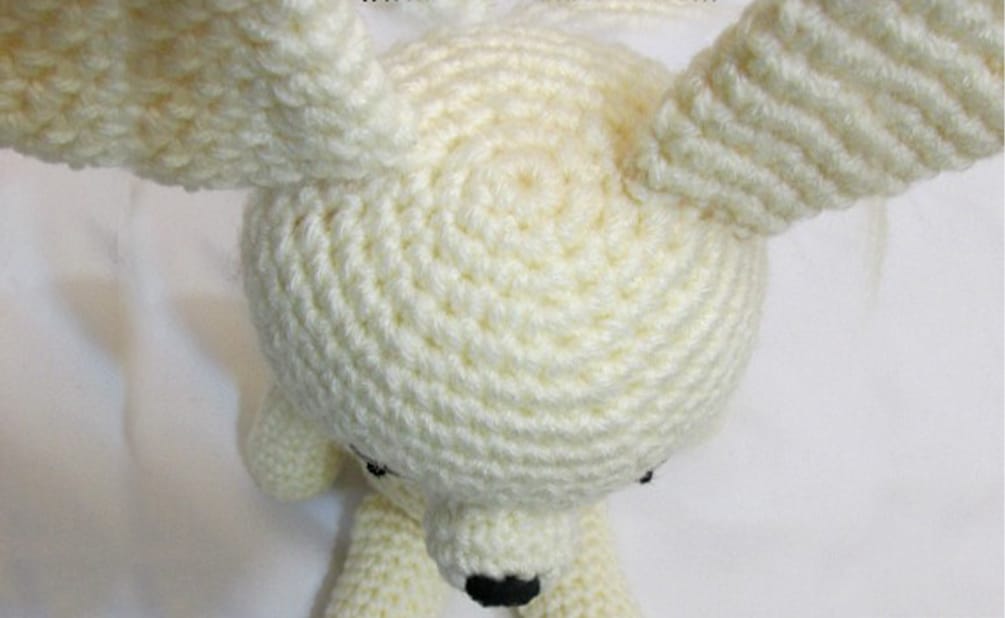
- Pin ears on top of the head, adjust placement, then sew in place.