How to Crochet a Granny Square: The Ultimate Guide for 2025
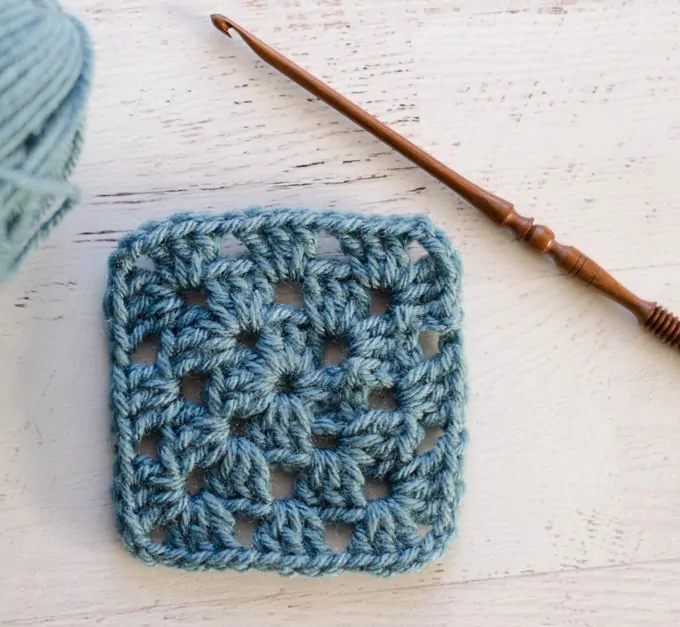
The iconic granny square is a staple in crochet crafting, loved by both beginners and experienced artisans. This delightful square pattern, consisting of clustered stitches worked in rounds, has won over crafters for generations.
What makes granny squares so special? Their amazing versatility! From cozy blankets that tell stories through color to trendy bags that turn heads, these squares can be transformed into countless creations. Here are just a few examples of what creative crafters have made:
- Warm winter scarves
- Stylish crop tops
- Decorative cushion covers
- Eye-catching wall hangings
- Unique phone cases
If you’re new to crochet and looking for a way to expand your skills, mastering the granny square is a fantastic starting point. This pattern incorporates essential techniques such as chain stitches, double crochet, and slip stitches. Once you become comfortable with these basics, you’ll unlock a world of possibilities where you can combine repetitive stitching with your own artistic flair.
Are you excited to make your very first granny square? Let’s gather all the necessary materials and embark on this vibrant journey together!

Materials You Need to Get Started
Let’s dive into the essential supplies you’ll need to create beautiful granny squares. The right materials make a significant difference in your crochet journey.
Yarn Selection
- DK (Double Knit): Perfect for beginners – lightweight, easy to handle, creates delicate squares
- Aran: Medium-weight yarn offering excellent stitch definition and durability
- Chunky: Creates bold, textured squares – works up quickly but may be challenging for first-timers
Choosing Your Hook
The ideal hook size depends on your chosen yarn weight:
- 3.5mm hook – DK yarn
- 4.0mm hook – Aran weight
- 5.0mm hook – Chunky yarn
Pro tip: Check your yarn label for the recommended hook size to achieve the best results
Essential Tools
- Tapestry Needle: A blunt-tipped needle with a large eye for weaving in loose ends
- Sharp Scissors: Essential for clean cuts and precise finishing
- Stitch Markers: Helpful for marking corners and keeping track of rounds
Recommended Yarn Quantities
- Single square: 15-20 yards
- Small project (12 squares): 200-250 yards
- Large blanket (48 squares): 800-1000 yards
Storage tip: Keep your materials in a dedicated project bag to prevent tangling and make your work portable
Mastering Basic Crochet Stitches for Granny Squares
Let’s dive into the three essential stitches you’ll need to create beautiful granny squares. These fundamental techniques form the building blocks of your crochet journey.
Chain Stitch (ch)
The chain stitch creates your foundation row. Here’s how to master it:
- Make a slip knot
- Insert your hook into the loop
- Wrap the yarn over your hook (yarn over)
- Pull the yarn through the loop on your hook
- Repeat steps 3-4 for each chain needed
Pro Tip: Keep your tension consistent – not too tight, not too loose. Your chains should look like tiny “V” shapes when viewed from the front.
Double Crochet (dc)
Double crochet stitches create the signature clusters in granny squares:
- Yarn over
- Insert hook into designated stitch
- Yarn over and pull through (3 loops on hook)
- Yarn over and pull through first 2 loops
- Yarn over and pull through remaining 2 loops
Key Point: Each double crochet should stand tall and straight, measuring approximately 1/2 inch in height.
Slip Stitch (sl st)
The slip stitch connects your rounds and maintains square shape:
- Insert hook into designated stitch
- Yarn over
- Pull yarn through both loops on hook
Practice Tips:
- Count your stitches regularly
- Maintain even tension throughout
- Practice each stitch separately before combining them
- Use stitch markers to identify round beginnings
These three stitches work together to create the classic granny square pattern. The chain stitch forms spaces between clusters, double crochet creates the decorative clusters, and slip stitch joins each round seamlessly.
Starting Your First Granny Square: Two Easy Methods
Ready to create your first granny square? Let’s explore two beginner-friendly methods to start your project.
The Magic Ring Method
The magic ring creates a tight, adjustable center—perfect for granny squares. Here’s how to master this technique:
- Create the Ring
- Hold the yarn tail in your palm
- Wrap the working yarn around your fingers once
- Insert your hook under the wrapped yarn
- Catch the working yarn and pull through
- Secure the Ring
- Chain 3 (counts as your first double crochet)
- Work 2 double crochets into the ring
- Chain 2 for your first corner
- Continue with 3 double crochets in the ring
- Repeat until you have 4 sets of 3 double crochets
- Pull the tail end to close the ring completely
Pro Tip: Keep your magic ring tight by pulling the tail end firmly before working your stitches.
The Chain Method
Some crocheters prefer starting with chains—here’s the alternative approach:
- Form the Foundation
- Chain 4 stitches
- Insert hook into first chain
- Slip stitch to form a ring
- Build Your Base
- Chain 3 (counts as first double crochet)
- Work 2 double crochets into the center of the ring
- Chain 2 for your corner
- Continue pattern around the ring
Quick Tip: The chain method creates a slightly larger center hole than the magic ring, making it ideal for decorative squares where a visible center is desired.
Both methods set you up for success in creating beautiful granny squares. The magic ring offers more control over the center hole size, while the chain method provides stability for beginners.
Crocheting Rounds for Granny Squares: Step-by-Step Instructions
Now that you’ve created your starting ring, let’s dive into the essential rounds that form your granny square pattern.
Round 1: Creating Your First Clusters
- Chain 3 – This counts as your first double crochet
- Work 2 double crochets into the center of your ring
- Chain 3 for your first corner space
- Create 3 double crochet cluster in the ring
- Chain 3 again
- Repeat steps 4-5 two more times
- Join to the top of your initial chain-3 with a slip stitch
Pro Tip: Keep your tension consistent throughout the clusters to maintain square shape
Round 2: Building Your Square
- Slip stitch into the first corner space
- Chain 3 (counts as first double crochet)
- Make 2 double crochets in the same corner space
- Chain 3
- Work 3 double crochets in the same corner space
- Chain 1
- In next corner space: Work (3 dc, ch 3, 3 dc)
- Chain 1
- Repeat steps 7-8 for remaining corners
- Join to top of beginning chain-3
Key Points for Perfect Rounds:
- Each corner should have: 3 dc, ch 3, 3 dc
- Chain-1 spaces between corners create the characteristic granny square look
- Always work your clusters into the chain spaces, not into the stitches
- Pull your slip stitches snug to create clean joins
Your granny square should now display:
- 4 distinct corners
- Chain spaces between clusters
- A symmetrical shape
- Clear definition between rounds
Remember: Your square might look slightly ruffled at this stage – this is normal and will settle as you add more rounds.
Adding Colors and Finishing Touches to Your Granny Squares
The magic of granny squares comes alive with multiple colors. Here’s how to create stunning color combinations while maintaining a professional finish.
Changing Colors Seamlessly
The Perfect Color Change Technique:
- Work your last double crochet stitch until you have two loops on your hook
- Drop your current working yarn
- Pull your new color through these two loops
- Pull your old color tail gently to tighten the stitch
Pro Tips for Clean Color Changes:
- Change colors at the beginning of a round for crisp transitions
- Keep your yarn tails at least 6 inches long for secure weaving
- Maintain consistent tension when switching colors
- Work over your old color for 2-3 stitches to secure it
Creating Professional Finishes
- Back-and-Forth Method
- Thread your tail through your tapestry needle
- Weave under 3-4 stitches in one direction
- Turn and weave back in the opposite direction
- Repeat once more for extra security
- Duplicate Stitch Method
- Follow the path of your stitches with your yarn tail
- Mimic the existing stitch pattern
- Work in small sections for better control
Securing Your Work:
- Weave ends through the same color sections when possible
- Split your yarn plies for extra security
- Work your ends in different directions
- Trim ends only after blocking your square
Color Planning Tips
Strategic Color Placement:
- Use darker colors for your final round to create defined edges
- Place contrasting colors next to each other for visual impact
- Consider using a consistent color for your final round to unify multiple squares
- Keep your color changes consistent across multiple squares for cohesive projects
Your granny squares will look polished and professional with these color-changing and finishing techniques. These methods ensure your work remains secure and beautiful through regular use and washing.
Exploring Different Variations and Practical Applications of Granny Squares
The classic granny square pattern serves as a foundation for countless creative variations. Let’s dive into some popular alternatives you can explore:
1. Solid Granny Squares
- Work continuous double crochet stitches without spaces
- Creates a dense, warm fabric perfect for winter garments
- Ideal for picture-based designs and pixel art blankets
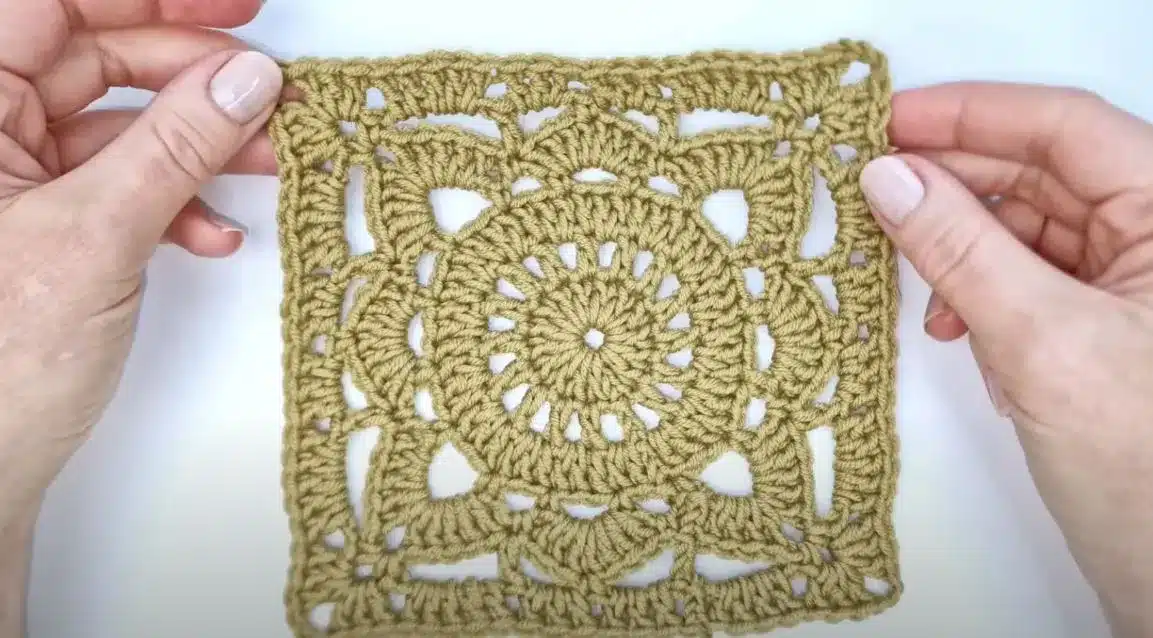
2. Sunburst Granny Squares
- Features a striking circular center that radiates outward
- Uses popcorn stitches to create texture and dimension
- Perfect for decorative pillows and wall hangings
3. Flower Granny Squares
- Incorporates petal-like stitches in the center
- Uses color changes to mimic natural flower patterns
- Beautiful additions to garden-themed blankets
4. Other Variations
- Ripple Granny Squares: Incorporate wave-like patterns using increases and decreases.
- Hexagon Granny Squares: Create hexagonal shapes instead of traditional squares for unique motifs.
- Triangle Granny Squares: Use triangular shapes to add interest and versatility to your projects.
Your granny squares can transform into various functional items:
1. Home Decor
- Cushion covers
- Table runners
- Decorative wall art
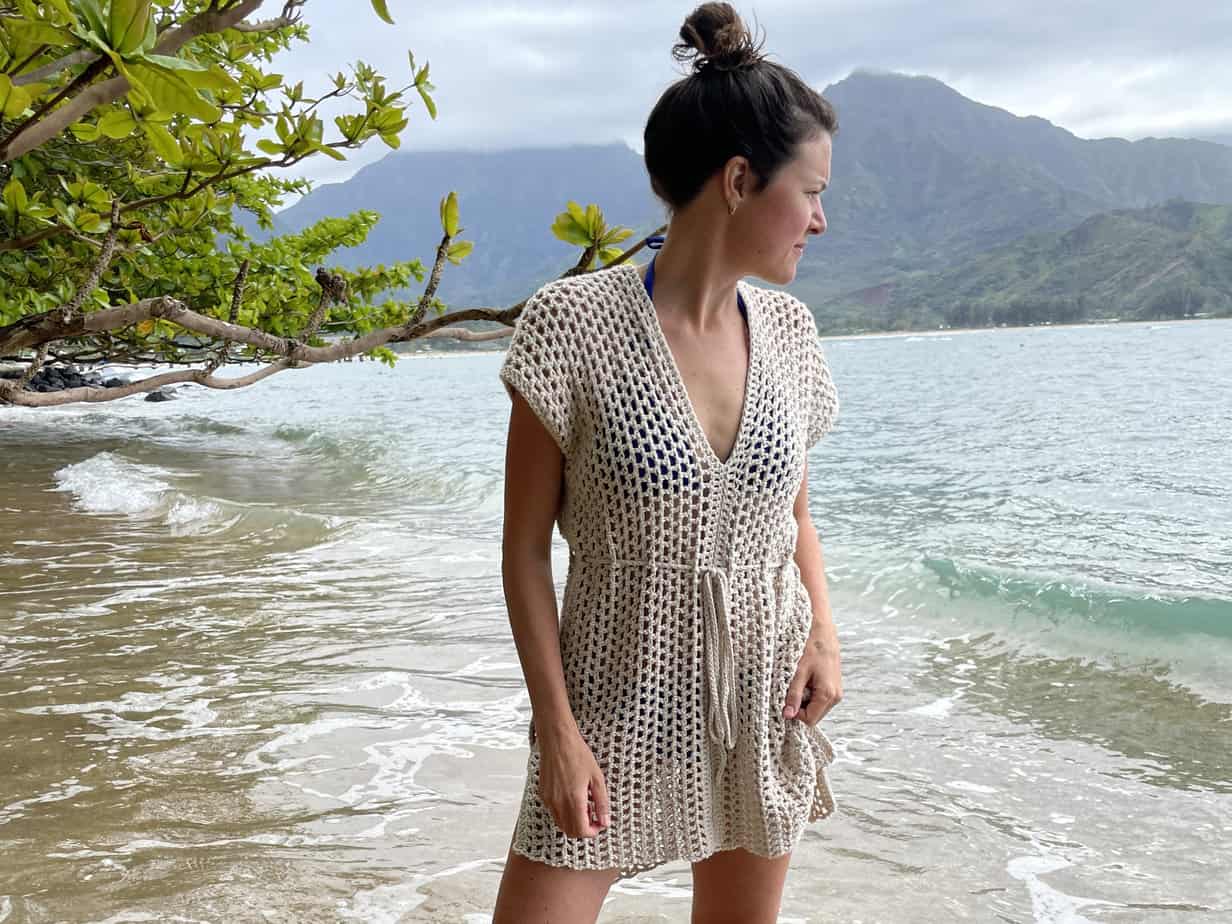
2. Wearables
- Cardigans
- Scarves
- Handbags
3. Seasonal Items
- Summer beach bags
- Winter blankets
- Holiday decorations
These variations open up endless possibilities for customization. Each style brings its unique charm while maintaining the fundamental granny square construction methods you’ve learned.
Conclusion: Embrace Your Creativity with Granny Squares!
Granny squares are a gateway to endless creative possibilities. Each square is like a blank canvas, waiting for you to turn it into something uniquely yours.
Ready to dive deeper into your crocheting journey? Here’s what you can explore:
- Mix unexpected color combinations to create eye-catching designs
- Challenge yourself with intricate pattern variations
- Combine different square styles in a single project
- Create personalized gifts that showcase your growing skills
Remember: Your first squares might not look perfect – that’s part of the learning process! Each stitch brings you closer to mastering this timeless craft.
“The beauty of granny squares lies in their simplicity and versatility. Start small, experiment often, and watch your creativity flourish.”
Whether you’re crafting a cozy blanket, a stylish bag, or a unique wall hanging, your granny squares tell a story – your story. Pick up your hook, choose your favorite yarn, and let your imagination guide you through this rewarding creative adventure.
FAQs (Frequently Asked Questions)
What is a granny square and why is it popular in crochet?
A granny square is a classic crochet motif typically made in the form of a square, consisting of clusters of double crochet stitches. Its popularity stems from its versatility, as granny squares can be used in various projects such as blankets, bags, and garments. They are beginner-friendly and allow for creativity in color combinations.
What materials do I need to start crocheting granny squares?
To start crocheting granny squares, you will need yarn (recommended types include DK, Aran, or chunky), a crochet hook sized between 3.5mm to 4mm depending on your yarn weight, a tapestry needle for weaving in ends, and scissors for cutting your yarn.
How do I make the basic stitches required for granny squares?
You will need to master three basic stitches: the chain stitch (ch), which forms the foundation; the double crochet stitch (dc), which creates the main body of the square; and the slip stitch (sl st), used to join rounds together and maintain the shape. Detailed instructions for each stitch are essential for beginners.
What are two easy methods to start my first granny square?
You can start your first granny square using either the magic ring method or the chain method. The magic ring technique allows you to create a tight center for your square, while the chain method involves chaining 4 and joining with a slip stitch to form a loop. Both methods are effective for beginners.
How do I crochet rounds for my granny squares?
Crocheting rounds involves following specific instructions for each round. For Round 1, you will create a series of chain counts and cluster formations. In Round 2, you will work into chain spaces created in the previous round. Step-by-step guidance can help ensure you maintain the correct shape and size.
Can I customize my granny squares with different colors and designs?
Absolutely! You can change colors seamlessly during rounds without leaving loose ends behind. Additionally, experimenting with different patterns like solid squares or sunburst squares can enhance your projects once you have mastered the basics of crocheting granny squares.