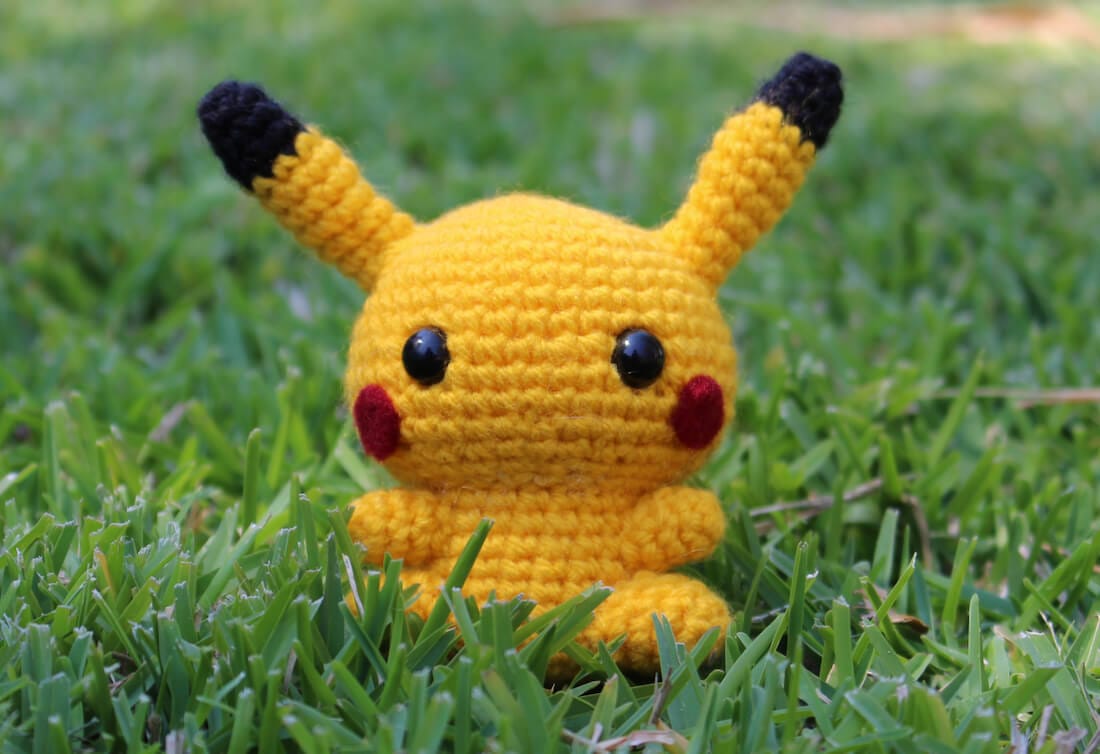
Crochet Your Own Adorable Pikachu Crochet Pattern
Get ready to catch the most famous Pokémon of all with your crochet hook! This comprehensive guide provides the ultimate free Pikachu crochet pattern, designed to help you create an adorable and cuddly amigurumi companion. Perfect for Pokémon fans and crafters, this pattern is detailed, easy to follow, and results in a Pikachu you’ll be proud to display or gift. Let’s get our yarn and get started!
Your Ultimate Pikachu Amigurumi Guide
This pattern is written in standard US crochet terminology. The final Pikachu will stand approximately 6-7 inches tall, depending on your yarn and tension.

Skill Level:
Intermediate. Requires knowledge of basic amigurumi techniques, color changes, and sewing parts together.
Materials & Tools:
- Yarn: Worsted weight (Aran, 10-ply) in Yellow, Black, Red, and a small amount of Brown.
- Crochet Hook: 3.5mm (E-4) or a size that works for your yarn.
- Safety Eyes: 9mm or 10mm pair.
- Stuffing: Polyester fiberfill.
- Yarn Needle: For sewing pieces together.
- Scissors.
- Stitch Marker.
- Optional: A pipe cleaner or thin craft wire for a posable tail.
Abbreviations (US Terms):
- MR: Magic Ring
- sc: Single Crochet
- inc: Increase (2 sc in the same stitch)
- dec: Invisible Decrease (crochet 2 stitches together through the front loops only)
- sl st: Slip Stitch
- ch: Chain
- st(s): Stitch(es)
- Rnd(s): Round(s)
- […] x…: Repeat the instructions in brackets the given number of times.
- (…): The number in parentheses at the end of a round indicates the total stitch count.
- FO: Fasten Off
Pikachu Crochet Pattern Instructions
Head and Body (Worked as one piece from the top down)
Start with yellow yarn. Work in continuous rounds. Use a stitch marker to mark the beginning of each round.
Rnd 1: 6 sc in MR. (6)
Rnd 2: [inc] x 6. (12)
Rnd 3: x 6. (18)
Rnd 4: [2 sc, inc] x 6. (24)
Rnd 5: [3 sc, inc] x 6. (30)
Rnd 6: [4 sc, inc] x 6. (36)
Rnd 7: [5 sc, inc] x 6. (42)
Rnds 8-15 (8 rounds): sc in each st around. (42)
Insert safety eyes between Rnds 12 and 13, about 8 stitches apart. Before securing the backs, lightly stuff the head to ensure you like the placement.
Rnd 16: [5 sc, dec] x 6. (36)
Rnd 17: [4 sc, dec] x 6. (30)
Rnd 18: [3 sc, dec] x 6. (24)
Start stuffing the head firmly. Continue to stuff as you go.
Rnd 19: [2 sc, dec] x 6. (18) (This is the neck)
Rnd 20: [2 sc, inc] x 6. (24) (Start of the body)
Rnd 21: [3 sc, inc] x 6. (30)
Rnd 22: [4 sc, inc] x 6. (36)
Rnds 23-32 (10 rounds): sc in each st around. (36)
Rnd 33: [4 sc, dec] x 6. (30)
Rnd 34: [3 sc, dec] x 6. (24)
Rnd 35: [2 sc, dec] x 6. (18)
Finish stuffing the body firmly.
Rnd 36: x 6. (12)
Rnd 37: [dec] x 6. (6)
FO, leaving a long tail. Thread the tail through the front loops of the final 6 stitches and pull tight to close the hole. Weave in the end.
Ears (Make 2)
Start with black yarn.
Rnd 1: 4 sc in MR. (4)
Rnd 2: x 2. (6)
Rnd 3: sc in each st around. (6)
Rnd 4: [2 sc, inc] x 2. (8)
Change to yellow yarn.
Rnd 5: sc in each st around. (8)
Rnd 6: [3 sc, inc] x 2. (10)
Rnds 7-11 (5 rounds): sc in each st around. (10)
FO, leaving a long tail for sewing. Do not stuff the ears.
Arms (Make 2)
Use yellow yarn.
Rnd 1: 6 sc in MR. (6)
Rnds 2-6 (5 rounds): sc in each st around. (6)
FO, leaving a long tail for sewing. Do not stuff the arms.
Feet (Make 2)
Use yellow yarn.
Rnd 1: 6 sc in MR. (6)
Rnd 2: [inc] x 6. (12)
Rnds 3-4 (2 rounds): sc in each st around. (12)
Rnd 5: [dec] x 6. (6)
FO, leaving a long tail for sewing. Lightly stuff just the bottom of the feet.
Cheeks (Make 2)
Use red yarn.
Rnd 1: 6 sc in MR. (6)
Rnd 2: [inc] x 6. (12)
sl st to the first sc to join. FO, leaving a long tail for sewing.
Tail (Make 2 identical flat pieces)
The tail is made in rows to create the lightning bolt shape. Make two of these pieces.
Use yellow yarn.
Part 1 (Base):
ch 7.
Row 1: Starting in 2nd ch from hook, sc in next 6 ch. ch 1, turn. (6)
Rows 2-4: sc in each st across. ch 1, turn. (6)
Part 2 (First Zag):
Row 5: sc in next 3 st. ch 5, turn. (3 sc + 5 ch)
Row 6: Starting in 2nd ch from hook, sc in next 4 ch, sc in next 3 st from previous row. ch 1, turn. (7)
Row 7: sc in each st across. ch 1, turn. (7)
Part 3 (Second Zag/Tip):
Row 8: sl st in first 3 st, sc in next 4 st. ch 1, turn. (4)
Rows 9-10: sc in each st across. ch 1, turn. (4)
FO on the first piece. Do not fasten off the second piece.
Joining the Tail: Place the two flat tail pieces together, lining up the edges. If using a pipe cleaner or wire, trim it to size and sandwich it between the two layers. Using the live loop on the second piece, ch 1 and begin to single crochet around the entire perimeter of the tail, working through both layers to join them. Add 3 sc in the sharp corners to keep them pointed. Once you have crocheted all the way around, sl st to the first sc to join. FO, leaving a very long tail for sewing.
Bringing Your Pikachu to Life: Assembly Guide
Patience is key! Pin all your pieces in place before sewing to ensure proper placement and symmetry.
- Ears: Flatten the opening of the ears. Pin them to the top of the head, starting around Rnd 3 from the center ring, and sew them on securely.
- Cheeks: Sew the red cheeks onto the face, just below and slightly to the outside of the eyes.
- Arms: Pin the arms to the sides of the body, right at the neck line (around Rnd 19). Sew them on so they point slightly forward.
- Feet: Pin the feet to the bottom front of the body, pointing forward. Sew them firmly in place.
- Tail: Sew the base of the sturdy tail to the lower back of Pikachu’s body. Use the long tail to stitch it on very securely, going around the base multiple times.
- Facial Features: Using black yarn or embroidery floss, embroider a small nose between the eyes (a small “v” or triangle works well). Add a small, simple “w” shape or a curved line for the mouth below the nose.
- Back Stripes: Use brown yarn to embroider two stripes on Pikachu’s back. The top stripe should be just below the shoulder level, and the second a little lower, near the base of the tail. Each stripe should be about 2-3 stitches thick.
Congratulations, you’ve crocheted your very own Pikachu!
We hope you loved this pattern. Share your finished Pokémon on social media and tag us—we’d be thrilled to see your creation! Happy crocheting!