Stitch a Tiny Treasure: Free African Flower Crochet Turtle Pattern
Adorable African Flower Crochet Turtle: Free Amigurumi Pattern
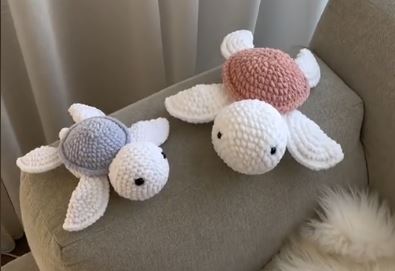
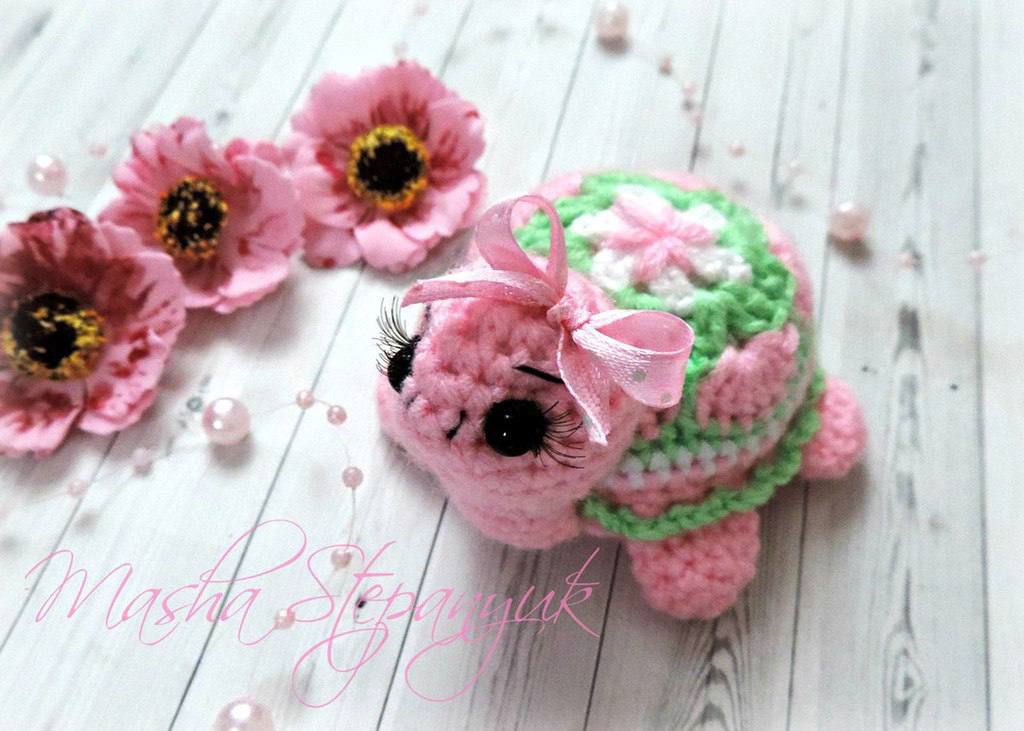
Looking for a charming and quick crochet project? This mini amigurumi turtle features a decorative African flower shell and cute seamless details, making it a perfect stash-buster or gift! Follow this step-by-step crochet pattern to craft your very own tiny turtle companion.
Materials and Tools Needed
- Yarn: Any weight or fiber composition (Cotton or Acrylic working best in Sport, DK, or Worsted weight). The final size of your turtle will depend on yarn weight.
- Crochet Hook: Size matching your selected yarn weight (e.g., 2.25 mm to 3.0 mm for sport/DK yarn).
- Stuffing: Polyester fiberfill.
- Eyes: 6 mm safety eyes, black beads, or small buttons.
- Needle & Thread: Long tapestry needle for sewing parts, plus black embroidery floss or sewing thread for facial details.
- Extras: Stitch markers, straight pins, and a small ribbon for decoration.
Crochet Abbreviations (US Terms)
- MR: Magic Ring
- ch: chain
- sc: single crochet
- dc: double crochet
- inc: increase (2 single crochet in the same stitch)
- dec: decrease (single crochet 2 together)
- sl st: slip stitch
- st(s): stitch(es)
Pattern Instructions
1. Decorative Shell (African Flower Motif)
You can make the shell using a single color or combine multiple colors for a floral look.
- Round 1: Into a MR, ch 3 (counts as 1 dc), 1 dc, ch 1, [2 dc, ch 1] 5 times. Join with sl st to top of starting ch-3. (12 dc, 6 ch-1 spaces)
- Round 2: Sl st into the first ch-1 space. Ch 3, [1 dc, ch 1, 2 dc] into same space. Work [2 dc, ch 1, 2 dc] into each of the remaining 5 ch-1 spaces. Join with sl st to top of starting ch-3.
- Round 3: Sl st into the ch-1 space. Ch 3, work 6 dc into the same ch-1 space. Work 7 dc into each of the next 5 ch-1 spaces. Join with sl st to top of starting ch-3. (42 dc total across 6 petals)
- Round 4: Ch 1, sc in each dc around, placing a spike sc (extended sc worked down between the clusters of Round 2) between each 7-dc petal group. Fasten off.
- Optional Edging: You can edge the shell with a round of decorative picot or small shell stitches if desired. Cut yarn and weave in ends.
2. Bottom Belly Piece
Work in continuous spiral rounds using a single solid color.
- Round 1: 6 sc in MR (6)
- Round 2: [inc] x 6 (12)
- Round 3: [1 sc, inc] x 6 (18)
- Round 4: [2 sc, inc] x 6 (24)
- Round 5: [3 sc, inc] x 6 (30)
- Round 6: [4 sc, inc] x 6 (36)
- Round 7: [5 sc, inc] x 6 (42)
Fasten off and leave a long tail if you prefer to use it for assembly.
3. Head and Neck
- Round 1: 6 sc in MR (6)
- Round 2: [inc] x 6 (12)
- Round 3: [1 sc, inc] x 6 (18)
- Round 4: [2 sc, inc] x 6 (24)
- Rounds 5–8: 24 sc (4 rounds)
- Round 9: [dec] x 12 (12)
- Rounds 10–16: 12 sc (7 rounds)
Stuff the head firmly with fiberfill, but stuff the neck very lightly. Press the flat sides of the neck opening together and sc across the edges to close the opening.
4. Legs (Make 4)
- Round 1: 6 sc in MR (6)
- Round 2: [inc] x 6 (12)
- Rounds 3–5: 12 sc (3 rounds)
Do not stuff the legs. Press the open edges together and sc across both layers to seal each leg flat.
5. Tail
- Round 1: 6 sc in MR (6)
- Rounds 2–4: 6 sc (3 rounds)
Do not stuff. Flatten the open end and sc through both sides to close.
Assembly and Finishing
Step 1: Positioning the Limbs
Using sewing pins, attach the 4 legs, the head, and the tail symmetrically onto the flat side of the bottom belly piece.
Step 2: Attaching the Shell
Place the decorated shell over the top of the body assembly, sandwiching the base of the head, legs, and tail between the belly and top shell. Sew around the perimeter, securing all pieces into place.
Step 3: Stuffing the Body
Before closing the seam entirely, stuff the central body section firmly with fiberfill. Complete the seam and secure your ends invisibly inside the body.
Step 4: Securing the Head Position
Lift the neck slightly so the back of the head rests against the front curve of the top shell. Stitch the head to the front rim of the shell to keep it upright and looking forward.
Step 5: Facial Details
- Use a needle and strong thread to sink the eye sockets slightly, pulling thread back and forth between eye placements for a sculpted look.
- Attach 6 mm safety eyes, beads, or embroider french knots in place.
- Using black thread, embroider light eyebrows and a tiny mouth line.
- Tie a small decorative ribbon into a bow and attach it near the neck or base of one ear for an extra cute touch!
Your tiny crochet turtle is now complete and ready to bring a smile to anyone’s face!