Tiny Trees, Big Charm: How to Crochet Adorable Mini Holiday Ornaments
How to Crochet a Mini Christmas Tree Ornament: Easy Step-by-Step Pattern
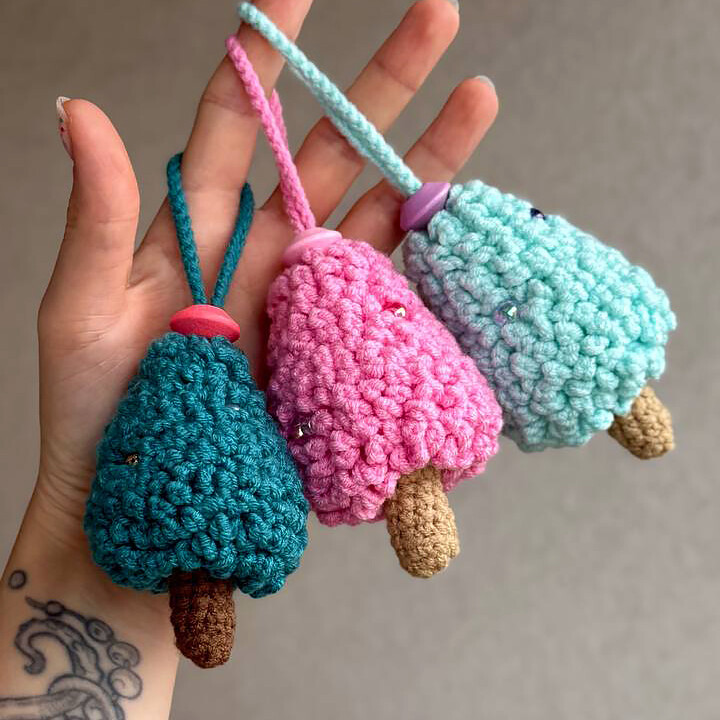
Add a touch of handmade charm to your holiday decorations with these adorable mini Christmas tree ornaments. These small, textured trees are perfect for gifting, selling at craft fairs, or decorating your own home. This guide provides everything you need to create these festive miniatures.
Materials You Will Need
- Yarn: Semi-cotton yarn (such as YarnArt Jeans or a similar blend) in green, brown, and your choice of accent colors.
- Crochet Hook: 2.5 mm
- Stuffing: Fiberfill or polyester stuffing
- Tools: Scissors and a sewing needle
- Optional: Small beads for decorating the tree
Crochet Abbreviations (US Terms)
- MR: Magic Ring
- ch: Chain
- sc: Single crochet
- inc: Increase (two single crochets in one stitch)
- sl st: Slip stitch
- BLO: Back Loop Only
- (…) x n: Repeat the sequence inside the parentheses “n” times
Step-by-Step Instructions
Part 1: The Trunk
Leave a tail of about 2 inches (4-5 cm) at the beginning of the Magic Ring for sewing later.
- Round 1: 6 sc in MR (6)
- Round 2: (1 sc, inc) x3 (9)
- Round 3: 9 sc in BLO (9)
- Rounds 4-6: 9 sc (9) — 3 rounds total
- Round 7: (2 sc, inc) x3 (12)
- Round 8: (1 sc, inc) x6 (18)
- Round 9: (2 sc, inc) x6 (24)
- Round 10: (3 sc, inc) x6 (30)
Finish with a chain and a slip stitch, then fasten off. Important: Stuff the trunk firmly before joining it to the main body of the tree.
Part 2: The Main Tree Body
Note: To create the textured effect, all rounds in this section are worked in the Back Loop Only (BLO) unless otherwise specified.
- Round 1: 6 sc in MR (6)
- Round 2: 6 inc (12)
- Rounds 3-4: 12 sc (12) — 2 rounds total
- Round 5: (1 sc, inc) x6 (18)
- Rounds 6-7: 18 sc (18) — 2 rounds total
- Round 8: (2 sc, inc) x6 (24)
- Rounds 9-10: 24 sc (24) — 2 rounds total
- Round 11: (3 sc, inc) x6 (30)
- Round 12: 30 sc (30)
Secure the yarn tails inside the Magic Ring with a few knots.
Part 3: Assembly and Joining
Now, we will join the main body to the trunk.
- Round 13: Work 30 sc around the piece, joining the tree body to the trunk. When crocheting, take only the back loop of the main tree body and both loops of the trunk stitches. (30)
- Round 14: 30 sc in BLO (30)
Finish with a chain and a slip stitch, then fasten off and weave in your ends.
Part 4: The Hanging Loop
To make the ornament hangable, simply crochet a chain of 40 stitches. Leave a tail of 2 inches (4-5 cm) at both ends to allow for easy tying or sewing to the top of the tree.
Part 5: Adding the Needle Texture
To give the tree its “pine needle” look, follow these steps:
- Attach your yarn to the first stitch of the second round of the tree body, working into the front loop.
- Chain 5, then work 1 sc into the next stitch.
- Repeat the sequence (ch 5, 1 sc in next stitch) all the way around the tree.
- Finish with a slip stitch, chain 1, and fasten off.
Hide your yarn ends and add optional beads to your tree for a final festive touch! Your mini Christmas tree ornament is now complete.