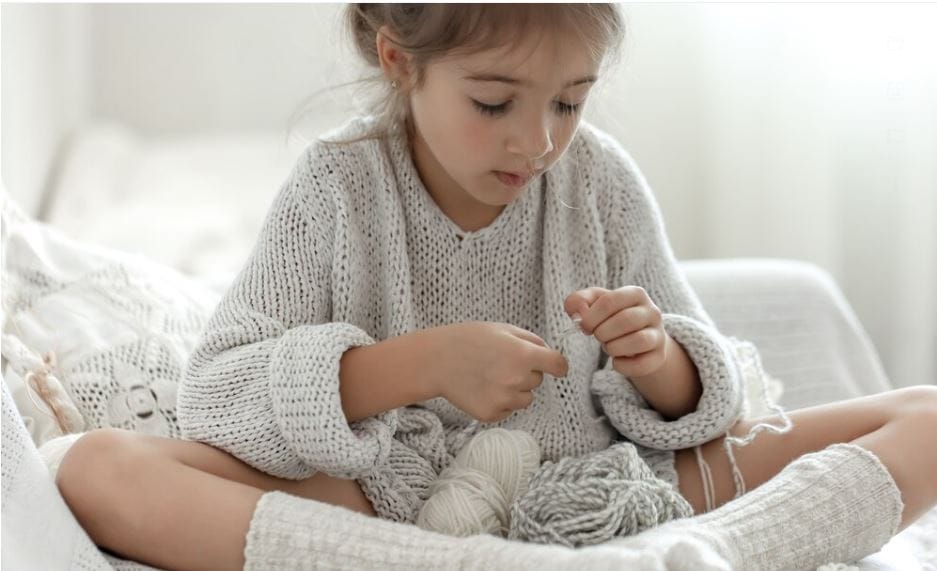
6 Easy Fun Fall Crochet Patterns 2024
Fall has always been my favorite season to dive into new crochet projects. As the leaves change color and the air turns crisp, there’s nothing more comforting than settling down with a warm beverage and some yarn.

Whether you’re a busy parent fitting in crafting time between errands, or you’re gearing up to create unique gifts or products for your next craft fair, this post is tailored just for you. I understand the struggle of finding patterns that are both quick to make and beautifully reflect the autumn spirit.
That’s why I’ve put together three fun fall crochet patterns to inspire your creativity this season.
I may earn a small commission for purchases made through links in this post at no extra cost to you
Supplies You’ll Need
Before you start these cozy fall crochet projects, let’s make sure you have all the necessary supplies. Here’s a checklist to help you prepare:
Basic Supplies:
- Yarn: Select colors that embody the fall season—think deep reds, burnt oranges, golden yellows, earthy browns, and warm creams. Depending on the project, you may need different yarn weights (e.g., fingering weight for bookmarks, worsted weight for mug cozies, and amigurumi).
- Crochet Hooks: Common sizes for these projects include 3.0mm, 4.0mm, 5.0mm, and 6.5mm hooks.
- Tapestry Needle: For weaving in ends and sewing pieces together.
- Scissors: A sharp pair for precise cuts.
- Stitch Markers: Helpful for keeping track of your place, especially when working in the round.
- Polyester Fiberfill: For stuffing items like the amigurumi acorns.
- Embroidery Thread: For adding details like facial expressions or embellishments.
- Buttons or Beads (optional): For decorative touches on mug cozies or bookmarks.
1. Cozy Autumn Leaf Bookmark
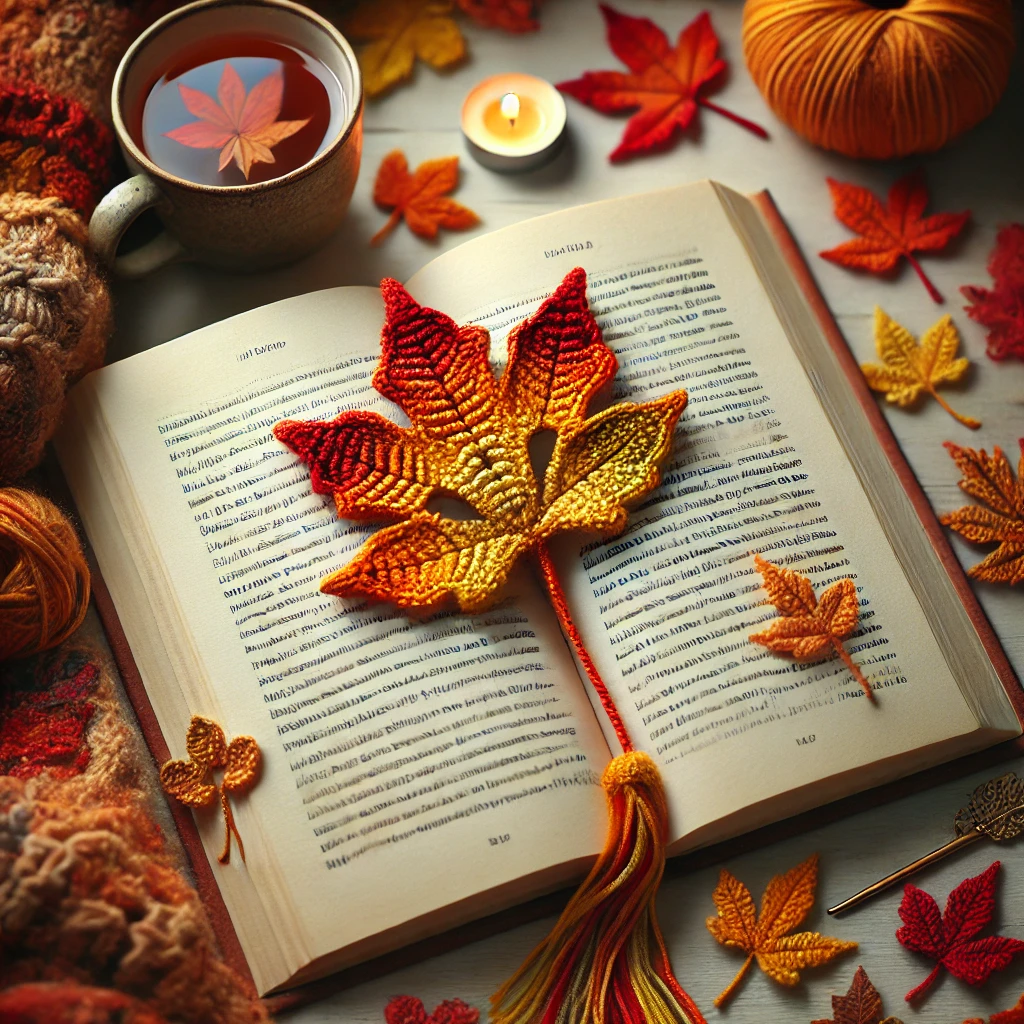
Bring the essence of falling leaves to your reading time with this delicate autumn leaf bookmark. It’s a quick and satisfying project, perfect for using up leftover yarn. Plus, it makes a thoughtful gift for the book lovers in your life.
Materials:
- Fingering or sport weight yarn in your choice of fall colors.
- Crochet hook size 3.0mm.
- Scissors and tapestry needle.
Instructions:
Abbreviations:
- ch: chain
- sl st: slip stitch
- sc: single crochet
- hdc: half double crochet
- dc: double crochet
- tr: treble crochet
Pattern:
- Start with a Slip Knot:
- Make a slip knot and chain 10.
- First Side of the Leaf:
- In the 2nd chain from the hook, work 1 sc.
- In the next chain, work 1 hdc.
- In the following chain, work 1 dc.
- In the next chain, work 1 tr.
- Continue with 1 tr in each of the next 2 chains.
- In the next chain, work 1 dc.
- In the following chain, work 1 hdc.
- In the last chain, work 1 sc.
- Chain and Turn:
- Chain 1 but do not turn your work.
- Second Side of the Leaf:
- Working along the opposite side of the foundation chain:
- In the same chain as the last sc, work 1 sc.
- In the next chain, work 1 hdc.
- In the following chain, work 1 dc.
- In the next chain, work 1 tr.
- Continue with 1 tr in each of the next 2 chains.
- In the next chain, work 1 dc.
- In the following chain, work 1 hdc.
- In the last chain, work 1 sc.
- Create the Stem:
- Chain 10 for the stem.
- Fasten off and weave in any loose ends.
Tips:
- Starching (Optional): For a stiffer bookmark, lightly spray it with fabric starch and press gently with an iron on a low setting.
- Color Variations: Experiment with different shades of yarn to create a collection of colorful leaves.
2. Pumpkin Spice Mug Cozy
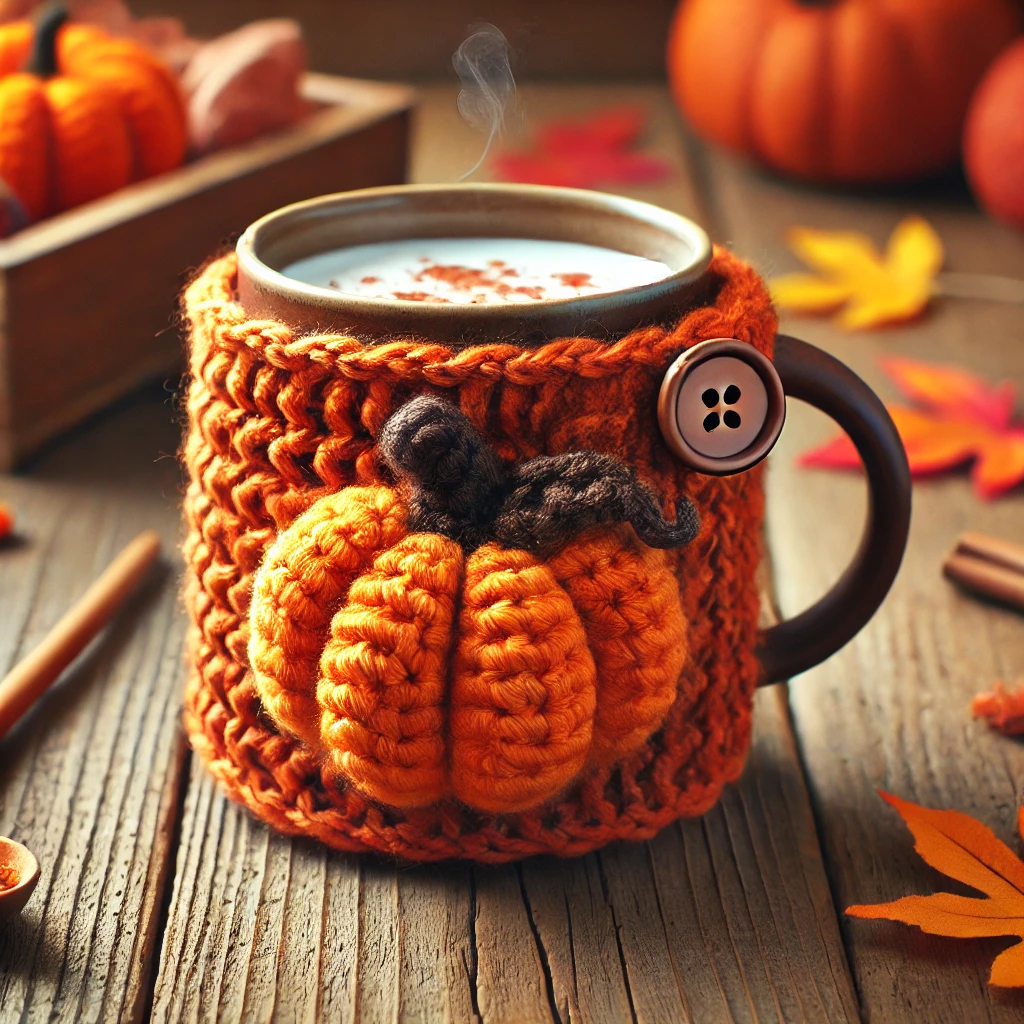
Keep your beverages warm and your hands cool with this charming pumpkin spice mug cozy. It’s an easy and practical project that adds a festive touch to your favorite mug.
Materials:
- Worsted weight yarn in orange (main color) and brown (accent color).
- Crochet hook size 5.0mm.
- A button for closure.
- Tapestry needle and scissors.
Instructions:
Abbreviations:
- ch: chain
- sc: single crochet
- hdc: half double crochet
- sl st: slip stitch
Pattern:
- Measure Your Mug:
- Wrap a measuring tape around your mug to determine the length needed for the cozy.
- Foundation Chain:
- Chain enough stitches to match the height of your mug (usually around 10 chains).
- Row 1:
- Starting in the second chain from the hook, work 1 hdc in each chain across.
- Chain 1, turn.
- Rows 2 – X:
- Repeat Row 1 until the piece is long enough to wrap around your mug snugly. This is typically between 25-30 rows, depending on your mug’s size.
- Create the Button Loop:
- After reaching the desired length, chain 6 to form a loop.
- Attach the chain with a sl st to the end of the last row.
- Fasten off and weave in ends.
- Attach the Button:
- Sew the button onto the opposite end of the cozy, making sure it aligns with the button loop.
- Add Embellishments:
- Using brown yarn, you can embroider a simple pumpkin or leaf design onto the cozy.
- Alternatively, crochet a small pumpkin appliqué and sew it onto the cozy.
Tips:
- Adjusting Size: Ensure the cozy fits snugly but can still slide on and off the mug easily.
- Button Selection: Choose a button that complements the cozy—wooden buttons add a nice rustic touch.
3. Amigurumi Acorns
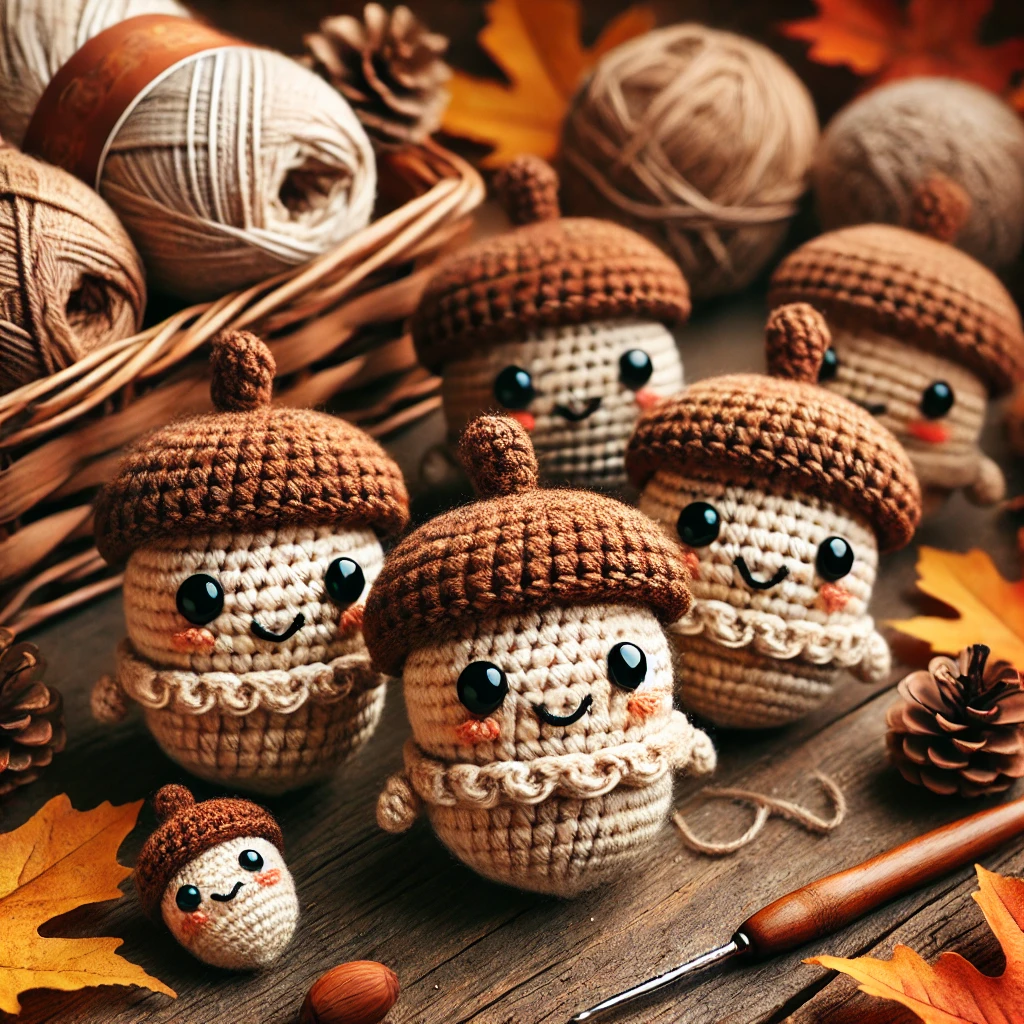
These adorable amigurumi acorns are perfect for decorating your home or giving as gifts. They’re small, quick to make, and bring a touch of whimsy to any space.
Materials:
- Worsted weight yarn in brown (cap) and beige or tan (body).
- Crochet hook size 4.0mm.
- Fiberfill stuffing.
- Safety eyes (optional) or black embroidery thread.
- Tapestry needle and scissors.
Instructions:
Abbreviations:
- ch: chain
- sc: single crochet
- inc: increase (2 sc in the same stitch)
- dec: decrease (sc two stitches together)
- sl st: slip stitch
- st: stitch
- FO: fasten off
Acorn Body:
- Round 1:
- With beige yarn, make a magic ring and work 6 sc into it. (6 sts)
- Round 2:
- Inc in each stitch around. (12 sts)
- Round 3:
- (Sc in next st, inc) repeat around. (18 sts)
- Rounds 4 – 6:
- Sc in each stitch around. (18 sts)
- Round 7:
- (Sc in next st, dec) repeat around. (12 sts)
- Stuff the Body:
- Fill with fiberfill stuffing.
- Round 8:
- Dec around. (6 sts)
- Fasten off and weave in the end.
Acorn Cap:
- Round 1:
- With brown yarn, make a magic ring and work 6 sc into it. (6 sts)
- Round 2:
- Inc in each stitch around. (12 sts)
- Round 3:
- (Sc in next st, inc) repeat around. (18 sts)
- Round 4:
- Sc in each stitch around. (18 sts)
- Round 5:
- (Sc in next 2 sts, inc) repeat around. (24 sts)
- Round 6:
- Sc in each stitch around. (24 sts)
- Round 7 (Cap Edge):
- Working in back loops only, sc in each stitch around. (24 sts)
- Create the Stem:
- Chain 4, sl st back into the same stitch.
- Fasten off, leaving a long tail for sewing.
Assembly:
- Attach the Cap to the Body:
- Place the cap over the body, aligning the edges.
- Sew the cap to the body using the long tail.
- Add Facial Features (Optional):
- Attach safety eyes between Rounds 4 and 5 of the body.
- Use black embroidery thread to stitch a small smile.
Tips:
- Size Variation: Adjust the hook size and yarn weight to create larger or smaller acorns.
- Decorative Use: Add a loop to the stem to hang the acorns as ornaments or attach them to keychains.
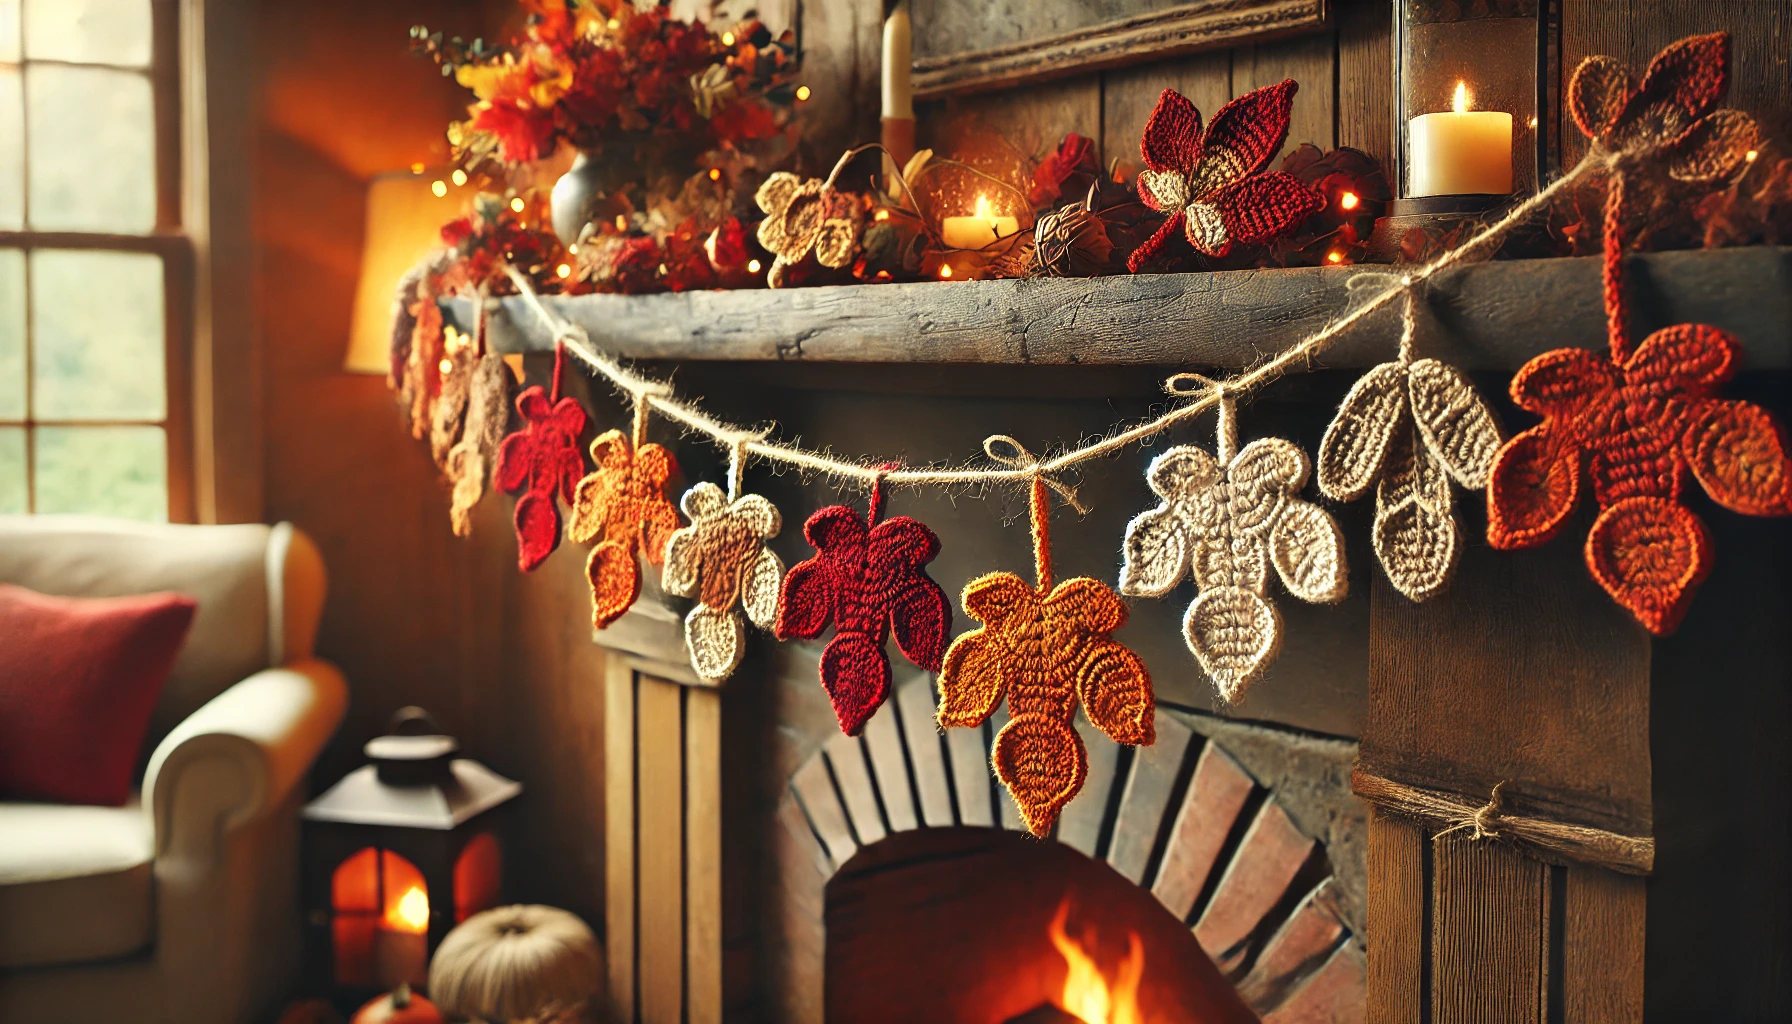
4. Autumn Leaves Garland
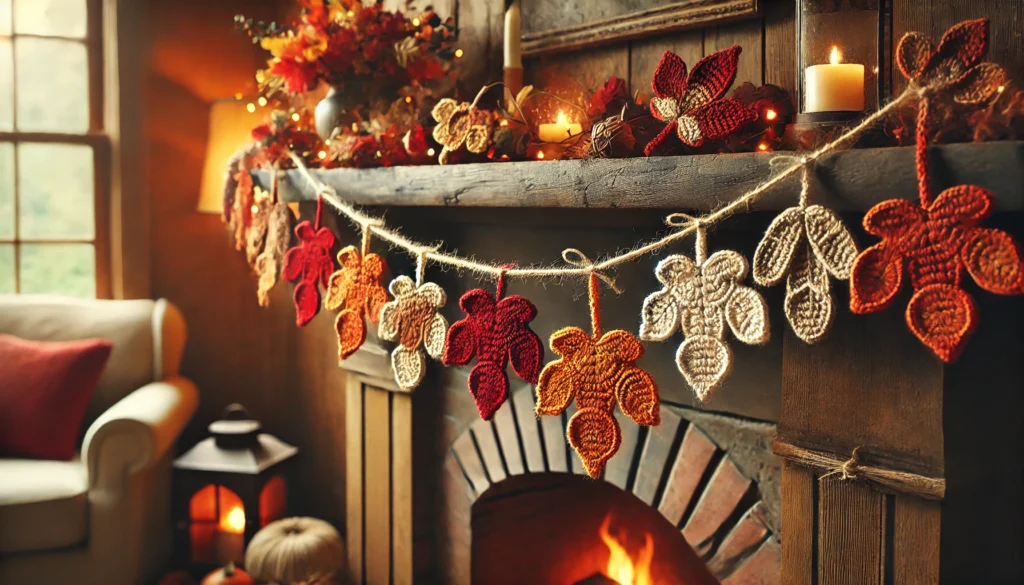
Bring the beauty of falling leaves indoors with this charming autumn leaves garland. It’s a versatile decoration that can adorn your fireplace mantle, window, or doorway. Plus, it’s an excellent way to practice crocheting different leaf shapes.
Materials:
- Worsted weight yarn in assorted fall colors.
- Crochet hook size 4.0mm.
- Tapestry needle and scissors.
- Jute twine or yarn for the garland string.
Instructions:
Abbreviations:
- ch: chain
- sl st: slip stitch
- sc: single crochet
- hdc: half double crochet
- dc: double crochet
- tr: treble crochet
- dtr: double treble crochet
Leaf Pattern:
We’ll create different types of leaves—maple, oak, and simple leaves—to add variety to the garland.
Maple Leaf:
- Start with a Magic Ring:
- Make a magic ring with your chosen color.
- Round 1:
- Ch 3 (counts as dc), work 11 dc into the ring. (12 dc total)
- Pull the ring tight and join with sl st to the top of the beginning ch-3.
- Round 2:
- Ch 2, sc in the next st, repeat around. (12 ch-2 spaces)
- Join with sl st to the first ch-2 space.
- Round 3 (Forming Points):
- In the first ch-2 space, work (sc, hdc, dc, tr, ch 2, sl st in second ch from hook, tr, dc, hdc, sc).
- Sl st in the next ch-2 space.
- Repeat the above sequence in every other ch-2 space around to form five points.
- Fasten off and weave in ends.
Oak Leaf:
- Chain 10.
- Working back along the chain:
- In 2nd ch from hook, sc.
- Hdc in next ch.
- Dc in next ch.
- Tr in next 2 ch.
- Dc in next ch.
- Hdc in next ch.
- Sc in next ch.
- Sl st in last ch.
- Stem and Second Side:
- Ch 3 (stem), sl st in 2nd ch from hook, sl st in next ch.
- Working along the other side of the foundation chain:
- Sl st in first st.
- Sc in next st.
- Hdc in next st.
- Dc in next st.
- Tr in next 2 sts.
- Dc in next st.
- Hdc in next st.
- Sc in next st.
- Finish:
- Sl st to the starting point.
- Fasten off and weave in ends.
Simple Leaf:
- Chain 8.
- First Side:
- Sc in 2nd ch from hook.
- Hdc in next ch.
- Dc in next 3 ch.
- Hdc in next ch.
- Sc in last ch.
- Tip and Second Side:
- Ch 2, sl st in 2nd ch from hook (creates the tip).
- Working along the other side of the chain:
- Sc in first st.
- Hdc in next st.
- Dc in next 3 sts.
- Hdc in next st.
- Sc in last st.
- Finish:
- Sl st to the starting point.
- Fasten off and weave in ends.
Assembling the Garland:
- Make Multiple Leaves:
- Create as many leaves as desired, varying the colors and types.
- Attach to Garland String:
- Cut a length of jute twine or yarn to your desired garland length.
- Using the tapestry needle, thread the top of each leaf onto the string, spacing them evenly.
- Alternatively, you can tie each leaf onto the string with a small piece of yarn.
- Hang and Enjoy:
- Secure the ends of the garland to your desired location.
Tips:
- Customization: Feel free to create other leaf shapes or use glitter yarn for a sparkling effect.
- Secure Leaves: To prevent the leaves from sliding, you can tie a small knot on either side of the leaf on the garland string.
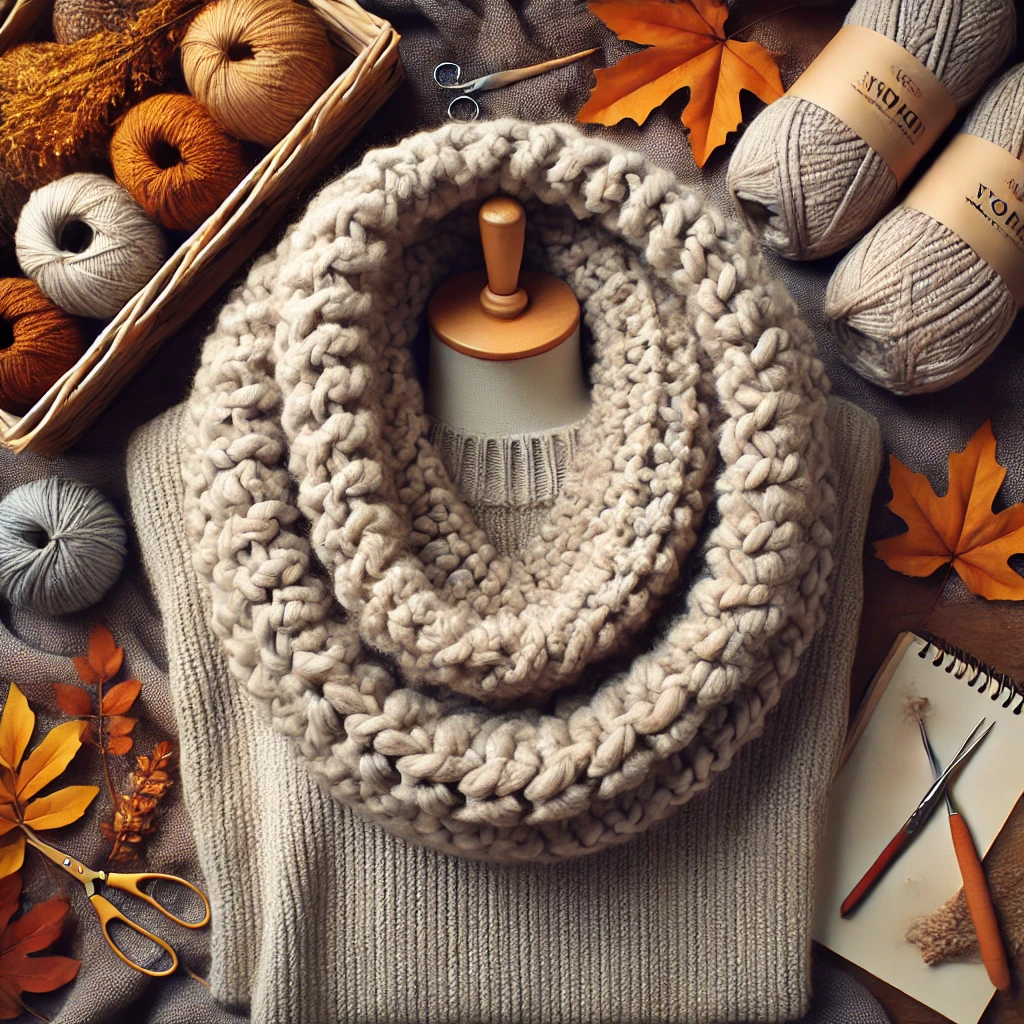
5. Chunky Infinity Scarf
Stay warm and stylish with this cozy chunky infinity scarf. It’s an ideal project for beginners and works up quickly thanks to the bulky yarn. This scarf is perfect for adding a touch of handmade warmth to your fall wardrobe.
Materials:
- Bulky weight yarn (size 6) – approximately 250 yards.
- Crochet hook size 8.0mm.
- Tapestry needle and scissors.
Instructions:
Abbreviations:
- ch: chain
- sl st: slip stitch
- sc: single crochet
- dc: double crochet
- st: stitch
- FO: fasten off
Pattern:
- Foundation Chain:
- Chain 120 loosely (or a multiple of 4 if you want to adjust the length).
- Be careful not to twist the chain, join with a sl st to form a circle.
- Round 1:
- Ch 3 (counts as dc), dc in each ch around.
- Join with sl st to top of ch-3.
- Round 2:
- Ch 3, fpdc around next st, bpdc around next st, repeat from * to * around.
- End with a fpdc.
- Join with sl st to top of ch-3.
- Rounds 3 – 8:
- Repeat Round 2 until the scarf reaches the desired width.
- Finishing:
- Fasten off and weave in all ends.
Tips:
- Adjusting Size: To make the scarf longer or shorter, add or subtract chains in the foundation chain in multiples of 4.
- Styling: Wrap the scarf twice around your neck for extra warmth or leave it long for a stylish drape.
6. Pumpkin Pie Pillow
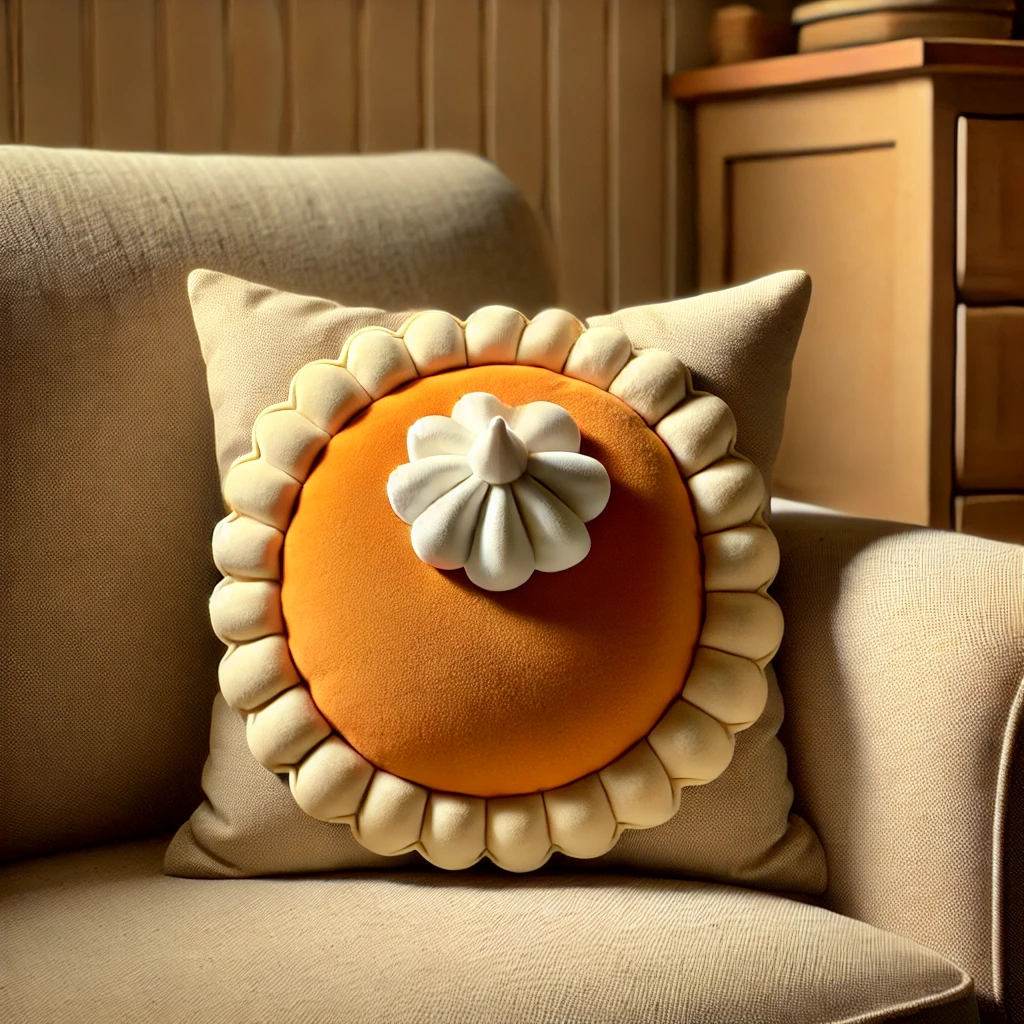
Add a touch of whimsy to your home decor with this adorable pumpkin pie pillow. It’s a delightful accent for your couch or favorite chair and is sure to be a conversation starter.
Materials:
- Worsted weight yarn in orange (pie filling), beige (crust), and white (whipped cream).
- Crochet hook size 5.0mm.
- Fiberfill stuffing.
- Tapestry needle and scissors.
Instructions:
Abbreviations:
- ch: chain
- sl st: slip stitch
- sc: single crochet
- hdc: half double crochet
- dc: double crochet
- tr: treble crochet
- inc: increase (2 sc in same stitch)
- st: stitch
- FO: fasten off
Pie Slice (Make 2):
- Starting at the Tip:
- With orange yarn, ch 2.
- Row 1:
- In the second ch from hook, work 2 sc. Ch 1, turn. (2 sts)
- Row 2:
- Inc in first st, sc in next st. Ch 1, turn. (3 sts)
- Row 3:
- Sc across. Ch 1, turn. (3 sts)
- Row 4:
- Inc in first st, sc in each st across. Ch 1, turn. (4 sts)
- Rows 5 – 20:
- Continue this pattern of increasing at the beginning of every other row until you have 20 sts.
- Rows 21 – 25:
- Sc across without increasing. This forms the wide end of the slice.
- Fasten Off:
- FO and weave in ends.
Pie Crust Edge:
- Attach Beige Yarn:
- Join beige yarn to the wide end of the pie slice.
- Row 1:
- Ch 1, sc across the top edge. Ch 1, turn.
- Row 2 (Crust Ruffle):
- Sc in first st, skip next st, 5 dc in next st, skip next st, repeat across.
- This creates the scalloped edge of the crust.
- Fasten Off:
- FO and weave in ends.
Assembly:
- Join Pie Slices:
- Place the two pie slices together with right sides facing out.
- Starting at one corner of the wide end, use orange yarn to sc around the edges, joining the two pieces.
- Stuffing:
- Before closing completely, stuff the pillow with fiberfill to desired firmness.
- Close Opening:
- Continue to sc around until the opening is closed.
- Fasten off and weave in ends.
Whipped Cream Dollop:
- With White Yarn:
- Make a magic ring.
- Round 1:
- Work 6 sc into the ring. Do not join; work in continuous rounds.
- Round 2:
- Sc in next st, inc in next st, repeat around. (9 sts)
- Rounds 3 – 5:
- Sc in each st around.
- Round 6:
- Sc in next st, dec over next two sts, repeat around. (6 sts)
- Fasten Off:
- Leave a long tail for sewing.
- Attach to Pillow:
- Sew the whipped cream to the top center of the pie slice.
Tips:
- Embellishments: You can embroider “steam” lines with white yarn for a fun effect.
- Size Variation: Increase the number of rows to make a larger pillow or use bulky yarn for an oversized version.
Embrace the Fall Spirit with These Cozy Crochet Creations
Autumn is the perfect season to get creative and cozy up with some yarn. These three fun fall crochet patterns are not only enjoyable to make but also add a touch of handmade charm to your home.
Whether you’re keeping these items for yourself, gifting them to friends and family, or adding them to your craft fair offerings, they’re sure to bring warmth and joy to everyone who sees them.
Happy crocheting!

