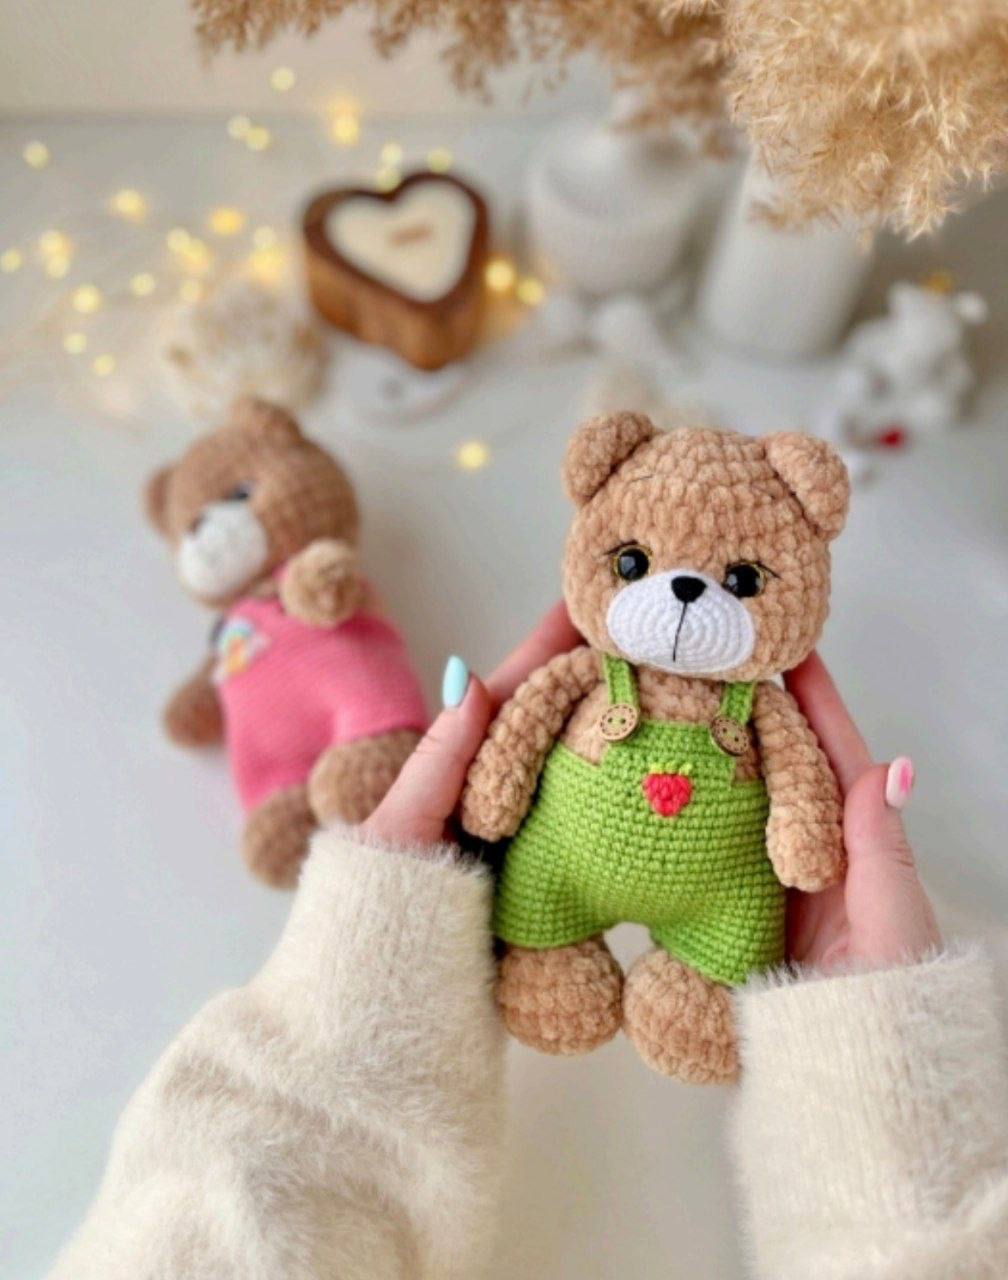
Cuddle-Ready: Easy Plush Teddy Bear & Panda Amigurumi Pattern
Adorable Plush Teddy Bear Amigurumi Crochet Pattern
Creating your own plush teddy bear is one of the most rewarding amigurumi projects you can tackle! This step-by-step tutorial guides you through crafting a super-soft, cuddly plush bear using super bulky chenille yarn. As an added bonus, you will also find instructions at the end to turn this classic teddy into a sweet panda bear!
Skill Level & Pattern Notes
- Skill Level: Easy / Intermediate
- Language & Terminology: US Crochet Terms
- Working Method: Worked in continuous spirals unless stated otherwise. Use a stitch marker to mark the beginning of each round.
Crochet Abbreviations (US Terms)
- MR: Magic Ring
- sc: single crochet
- inc: increase (2 single crochet stitches in the same stitch)
- dec: decrease (single crochet 2 stitches together)
- dec3: 3-stitch decrease (single crochet 3 stitches together)
- sl st: slip stitch
- st(s): stitch(es)
- FO: fasten off
Materials Needed
- Plush Yarn: Super Bulky / Category 6 chenille yarn (such as Himalaya Dolphin Baby, Premier Parfait Chunky, or Bernat Blanket) in Main Color (Brown) and Accent Color (Cream/White for snout).
- Crochet Hook: Size US G/6 or H/8 (4.0 mm).
- Safety Eyes: 14 mm glitter safety eyes.
- Safety Nose: 12 x 10 mm.
- Fiberfill: Polyester stuffing.
- Notions: Yarn needle, scissors, stitch markers, strong sewing thread for facial sculpting and assembly.
- Embroidery Floss/Thread: Dark brown or black thread for eyebrows, eyelashes, and facial details.
- Optional Thin Muzzle Version: Sport weight semi-cotton yarn (e.g., YarnArt Jeans #01) with a 2.0 mm hook and black thread.
Step-by-Step Crochet Bear Pattern
1. Head
Using main color plush yarn and 4.0 mm hook:
- Round 1: 6 sc in MR (6)
- Round 2: [inc] x 6 (12)
- Round 3: [1 sc, inc] x 6 (18)
- Round 4: [2 sc, inc] x 6 (24)
- Round 5: [3 sc, inc] x 6 (30)
- Round 6: 30 sc around (30)
- Round 7: [4 sc, inc] x 6 (36)
- Rounds 8–13 (6 rounds): 36 sc around (36)
Note: Insert safety eyes between Rounds 8 and 9, spaced 6 stitches apart. Stuff the head firmly with fiberfill as you continue working.
- Round 14: [4 sc, dec] x 6 (30)
- Round 15: [1 sc, dec] x 10 (20)
- Round 16: [2 sc, dec] x 5 (15)
Fasten off and cut the yarn.
2. Snout / Muzzle (Choose Option 1 or Option 2)
Option 1: Plush Yarn Muzzle (4.0 mm hook)
- Round 1: 6 sc in MR (6)
- Round 2: [inc] x 6 (12)
- Round 3: [1 sc, inc] x 6, sl st (18)
Fasten off, leaving a long tail for sewing. Place the 12×10 mm safety nose between Rounds 2 and 3 (or glue/embroider it during face assembly).
Option 2: Cotton Yarn Muzzle (2.0 mm hook)
- Round 1: 6 sc in MR (6)
- Round 2: [inc] x 6 (12)
- Round 3: [1 sc, inc] x 6 (18)
- Round 4: [2 sc, inc] x 6 (24)
- Round 5: [3 sc, inc] x 6 (30)
- Round 6: [4 sc, inc] x 5, 1 sc, inc, 3 sc, sl st (36)
Fasten off, leaving a long tail for sewing.
3. Arms (Make 2)
Using main color plush yarn:
- Round 1: 7 sc in MR (7)
- Round 2: [1 sc, inc] x 3, 1 sc (10)
- Round 3: 10 sc around (10)
- Round 4: dec, 2 sc, dec, 4 sc (8)
- Rounds 5–6 (2 rounds): 8 sc around (8)
- Round 7: 1 sc, dec, 5 sc (7)
Stuff the bottom part of the arm lightly. Do not stuff the upper part.
- Round 8: 7 sc around (7)
- Round 9: 1 sc, dec, 4 sc (6)
- Round 10: 6 sc around (6)
Work 1 additional shift sc if needed so the decreases align along the front edge. Fold the top of the arm flat and crochet 3 sc through both layers to close. Fasten off.
4. Legs (Make 2)
Using main color plush yarn:
- Round 1: 7 sc in MR (7)
- Round 2: [inc] x 7 (14)
- Round 3: [1 sc, inc] x 7 (21)
- Round 4: 21 sc around (21)
- Round 5: 4 sc, dec, 8 sc, dec, 5 sc (19)
- Round 6: 4 sc, 5 dec, 5 sc (14)
- Round 7: 5 sc, dec3 (3 stitches together), 6 sc (12)
- Rounds 8–12 (5 rounds): 12 sc around (12)
Stuff only the foot section lightly.
Finishing the Legs:
- For the Left Leg: crochet 1 additional shift sc, fold flat, and sc 6 through both sides.
- For the Right Leg: do not add an extra shift sc. Fold flat and sc 6 through both sides.
Fasten off.
5. Body
Using main color plush yarn:
- Round 1: 6 sc in MR (6)
- Round 2: [inc] x 6 (12)
- Round 3: [1 sc, inc] x 6 (18)
- Round 4: [2 sc, inc] x 6 (24)
- Round 5: [3 sc, inc] x 6 (30)
- Round 6: 7 sc, inc, [2 sc, inc] x 2, 16 sc (33)
In Round 7, you will join the legs into the body as you crochet. Ensure the stitch marker is centered on the back.
- Round 7: 6 sc through both body and Right Leg, 12 sc, 6 sc through both body and Left Leg, 9 sc (33)
- Round 8: 33 sc around (33)
- Round 9: 8 sc, dec, [1 sc, dec] x 2, 17 sc (30)
- Round 10: 30 sc around (30)
- Round 11: [3 sc, dec] x 6 (24)
Stuff the body firmly with fiberfill as you progress.
- Round 12: 24 sc around (24)
- Round 13: [2 sc, dec] x 6 (18)
- Round 14: [4 sc, dec] x 3 (15)
In Round 15, you will attach the arms. Make sure they align evenly above the legs. Adjust shift stitches if necessary.
- Round 15: 2 sc, 3 sc with arm, 4 sc, 3 sc with arm, 3 sc (15)
- Round 16: 15 sc around (15)
Fasten off, leaving a tail for assembly.
6. Ears (Make 2)
Using main color plush yarn:
- Round 1: 6 sc in MR (6)
- Round 2: [inc] x 6 (12)
- Round 3: 12 sc around (12)
Fold flat and crochet 6 sc across both layers to close. Fasten off.
7. Tail
Using main color plush yarn:
- Round 1: 6 sc in MR (6)
- Round 2: [1 sc, dec] x 2 (4)
Stuff very lightly. Fasten off, leaving a tail for sewing.
Assembly & Face Shaping
- Attach Head: Sew the head onto the neck opening of the body securely.
- Attach Tail: Sew the tail to the center back of the body between Rounds 6 and 7.
- Attach Muzzle: Place the muzzle between Rounds 8 and 14 of the head (covering Rounds 9–13). If using the semi-cotton muzzle, gently stretch it horizontally before sewing it down.
- Facial Needle Sculpting (Eye Sinking):
- Thread a yarn needle with strong thread and insert it at the base of the neck.
- Bring it out near the inner corner of the right eye, re-insert near the outer corner, and bring it back out at the neck base. Pull firmly.
- Repeat the process for the left eye. Repeat if necessary until eyes are nicely inset. Tie off securely.
- Embroider Details: Embroider small eyebrows above the eyes and delicate eyelashes using dark embroidery thread. If using a cotton muzzle, embroider a nose line extending downward from the nose tip.
- Attach Ears: Position and sew the ears onto the top of the head between Rounds 3 and 8.
Pattern Variation: Plush Panda Bear
To turn this pattern into a cute panda, adjust the colors as follows:
Panda Color Scheme
- White Yarn: Head main sections, Body main section.
- Black Yarn: Eye patches, Arms, Legs, Ears, Tail, and Upper Body collar.
- Safety Nose: 14 x 12 mm.
Panda Head (Color Changes)
Work Rounds 1–6 in White.
Note: Stitches worked in Black are shown in bold text below.
- Round 7: [4 sc, inc] x 2, 2 sc, 1 sc, 1 sc, inc, 1 sc, 1 sc, 2 sc, inc, [4 sc, inc] x 2 (36)
- Round 8: 13 sc, 2 sc, 4 sc, 2 sc, 15 sc (36)
- Round 9: 12 sc, 3 sc, 4 sc, 3 sc, 14 sc (36)
- Round 10: 11 sc, 4 sc, 4 sc, 4 sc, 13 sc (36)
- Round 11: 11 sc, 3 sc, 6 sc, 3 sc, 13 sc (36)
- Rounds 12–13: 36 sc in White (36)
- Round 14: [4 sc, dec] x 6 in White (30)
- Round 15: [1 sc, dec] x 10 in White (20)
- Round 16: [2 sc, dec] x 5 in White (15)
Panda Body & Limbs
- Make the Arms, Legs, Ears, and Tail entirely in Black yarn.
- Work the Body in White from Rounds 1–13. Change color to Black at Round 14 and complete Rounds 14–16 in Black (attaching Black arms in Round 15).
- Paws detail: Embroider small pink paw pads on the bottom of the black feet using pink plush yarn.