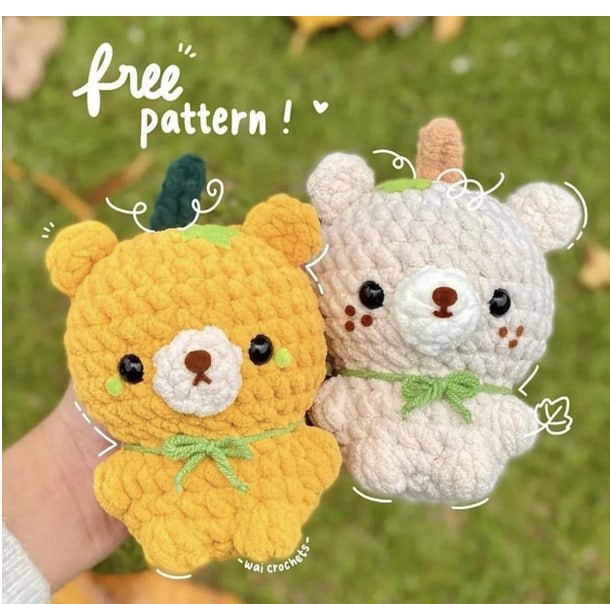
Crochet Pumpkin Bear: Easy Amigurumi Pattern
“`html
How to Crochet a Cute Pumpkin Bear: Step-by-Step Amigurumi Pattern
Create your own adorable pumpkin-themed bear with this easy-to-follow crochet pattern. Perfect for autumn decor or as a cozy gift, this amigurumi project combines a cute bear face with a pumpkin-inspired body.
Materials Needed
- Yarn in 3 preferred colors: Main body color, snout color, and stem color
- Crochet hook matching your yarn size
- Yarn needle
- Stuffing (fiberfill)
- Safety eyes
- Felt (for the nose, mouth, and optional decorations)
Abbreviations (US Terminology)
This pattern is worked in continuous rounds. Do not slip stitch or chain 1 at the end of each round unless specified.
- mr = magic ring
- sc = single crochet
- inc = increase
- dec = (invisible) decrease
- FLO = front loop only
- bbl = bobble stitch
- sl st = slip stitch
- ch = chain
Pattern Instructions
Head and Body (Part 1)
Using the main body color:
- Round 1: 8 sc in mr (8)
- Round 2: 8 inc (16)
- Round 3: (1 sc, 1 inc) x8 (24)
- Round 4: (2 sc, 1 inc) x8 (32)
- Rounds 5-10: 32 sc (32)
- Round 11: (2 sc, 1 dec) x8 (24)
- Round 12: (1 sc, 1 dec) x8 (16)
- Round 13: In FLO, (1 sc, 1 inc) x8 (24)
- Round 14: 7 sc, 1 bbl, 8 sc, 1 bbl, 7 sc (24)
Tip: Insert safety eyes between Round 8 and Round 9, spaced 5 stitches apart. You can begin stuffing the head at this point.
The Stem
Using the stem color:
- Insert your hook at the top of the bear, between Round 1 and Round 2.
- Pull a loop of the stem-colored yarn through.
- Round 1: ch 5
- Round 2: Starting at the 2nd chain from the hook: sl st 2 and sc 2 down the chain (4)
- Sl st back onto the head using the same method you used to first insert the hook to secure the stem.
- Fasten off and weave in the ends.
Head and Body (Part 2)
Continuing with the main body color:
- Round 15: 24 sc (24)
- Round 16: 9 sc, 1 bbl, 4 sc, 1 bbl, 9 sc (24)
- Round 17: (2 sc, 1 dec) x6 (18)
Stop here to stuff your bear fully with stuffing.
- Round 18: 9 dec (9)
Fasten off and sew the hole closed securely.
The Snout
Using the snout color:
- Round 1: 8 sc in mr (8)
- Sl st into the next stitch, then fasten off. Leave a long tail for sewing.
The Ears (Make 2)
Using the main body color:
- Round 1: 6 sc in mr (6)
- Sl st into the next stitch, then fasten off. Leave a long tail for sewing.
Assembly
- Ears: Sew the ears onto the head across Round 4 and Round 5.
- Snout: Sew the snout centrally between the safety eyes.
- Nose and Mouth: Cut an oval shape out of felt for the nose and sew it onto the snout. You can use any felt shape or embroidery for the mouth.
Optional Customizations
- Cheeks: Add cute pink cheek blushes using small pieces of felt or by sewing them on with pink yarn.
- Leaves: Cut out small pumpkin leaves from green felt and attach them near the stem.
- Accessories: Tie a matching ribbon around the bear’s neck for an extra touch of cuteness.
“`