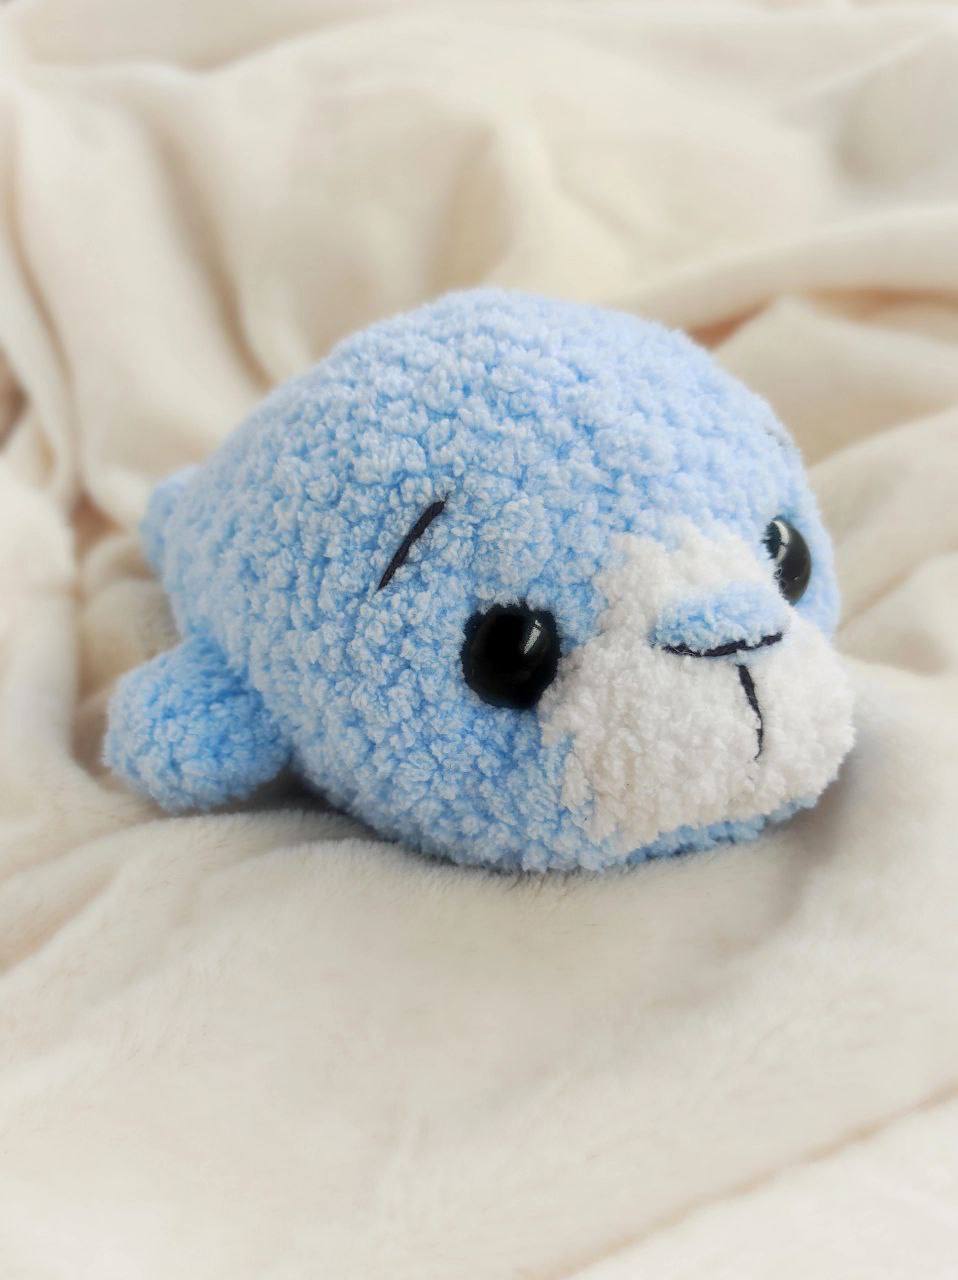
Crochet the Cutest Squishy Seal: Free Plush Amigurumi Pattern!
Free Plush Seal Amigurumi Crochet Pattern
Create your very own soft and squishy plush seal with this easy-to-follow crochet pattern! Perfect for intermediate crocheters or confident beginners looking to work with plush yarn, this adorable sea creature makes a fantastic gift or cozy desk companion. Follow the step-by-step instructions below using standard US crochet terminology.
Materials and Tools
- Plush Yarn: 1 skein of plush/chenille yarn in your primary color choice (e.g., light blue or gray) and a small amount of white plush yarn for the muzzle.
- Embroidery Floss/Yarn: Black cotton yarn or embroidery thread for details.
- Safety Eyes: 16 mm safety eyes (1 pair).
- Crochet Hook: 2.0 mm to 3.5 mm (choose a hook size that gives you tight stitches with your chosen yarn).
- Stuffing: Polyester fiberfill stuffing.
- Notions: Tapestry needle, stitch marker, pins, and scissors.
Finished Size: Approximately 7 inches (18 cm) in length depending on yarn weight and gauge.
Crochet Abbreviations (US Terms)
- MR: Magic Ring
- sc: Single crochet
- inc: Increase (2 sc in the same stitch)
- dec: Decrease (single crochet 2 stitches together)
- st(s): Stitch(es)
- rnd(s): Round(s)
- [ ]: Repeat instructions inside brackets the specified number of times
- ( ): Total stitch count at the end of the round
Step-by-Step Crochet Pattern
Tail Flukes (Make 2)
Work in continuous rounds using the primary yarn color.
- Rnd 1: 6 sc in MR (6)
- Rnd 2: [inc] x 6 (12)
- Rnd 3: [3 sc, inc] x 3 (15)
- Rnds 4–5: sc in all 15 sts (2 rounds)
- Rnd 6: [3 sc, dec] x 3 (12)
- Rnd 7: sc in all 12 sts (12)
Fasten off and cut the yarn for the first fluke only. Do NOT cut the yarn on the second fluke.
Body and Head
We will now join the two tail flukes together and continue crocheting the body towards the head.
Joining Round: Connect the second tail fluke to the first tail fluke. Sc 12 around the first fluke, then sc 12 around the second fluke. Place a stitch marker here to indicate the beginning of the round. (24 sts)
- Rnd 1: [7 sc, inc] x 3 (27)
- Rnd 2: [8 sc, inc] x 3 (30)
- Rnd 3: 9 sc, [inc, 1 sc] x 6, 9 sc (36)
- Rnd 4: 8 sc, inc, 8 sc, inc, 8 sc, inc, 9 sc (39)
- Rnd 5: sc in all 39 sts (39)
- Rnd 6: 9 sc, [inc, 9 sc] x 3 (42)
- Rnds 7–8: sc in all 42 sts (2 rounds)
- Rnd 9: 9 sc, [inc, 10 sc] x 3 (45)
- Rnds 10–11: sc in all 45 sts (2 rounds)
- Rnd 12: 10 sc, [inc, 11 sc] x 2, inc, 10 sc (48)
- Rnds 13–19: sc in all 48 sts (7 rounds)
Begin stuffing the body firmly with fiberfill as you work, continuing to stuff until the head is closed.
- Rnd 20: 9 sc, [3 sc, dec] x 6, 9 sc (42)
- Rnd 21: 9 sc, [2 sc, dec] x 6, 9 sc (36)
- Rnd 22: 6 sc, [dec, 2 sc] x 6, 6 sc (30)
- Rnd 23: 6 sc, [1 sc, dec] x 6, 6 sc (24)
Change to white yarn for the muzzle section.
- Rnd 24: [2 sc, dec] x 6 (18)
- Rnd 25: sc in all 18 sts (18)
Eye Placement: Insert the 16 mm safety eyes between Rnds 23 and 24, spaced approximately 6 to 7 stitches apart on the front face, right above the white muzzle line.
- Rnd 26: [1 sc, dec] x 6 (12)
- Rnd 27: [dec] x 6 (6)
Fasten off, weave the yarn tail through the front loops of the remaining 6 stitches, pull tight to close the hole, and weave in the end.
Side Flippers (Make 2)
Work in continuous rounds using the primary yarn color. Do not stuff the flippers.
- Rnd 1: 6 sc in MR (6)
- Rnd 2: [inc] x 6 (12)
- Rnds 3–4: sc in all 12 sts (2 rounds)
Fasten off, leaving a long yarn tail for sewing.
Assembly and Facial Details
- Eye Sculpting: Using a length of main color yarn or strong thread, insert a needle from the underside of the head/muzzle up to the inner corner of one safety eye. Pass the thread over to the outer corner, then pull the needle back out at the base of the muzzle. Pull gently to indent the eye slightly. Repeat for the second eye and knot securely inside the stitches.
- Embroidering Facial Details:
- Using black embroidery floss or yarn, embroider a small horizontal nose line at the center of the white muzzle section.
- Stitch a short vertical line downward from the center of the nose to create a classic “T” shape mouth line.
- Embroider simple eyebrows slightly above the safety eyes using black thread.
- Attaching the Flippers:
- Pin the side flippers onto the lower sides of the body, positioning them so the seal can rest flat on a surface without rolling sideways.
- Sew both flippers securely in place using the yarn tails and weave in all loose ends.
Your adorable plush crochet seal is complete and ready to snuggle!