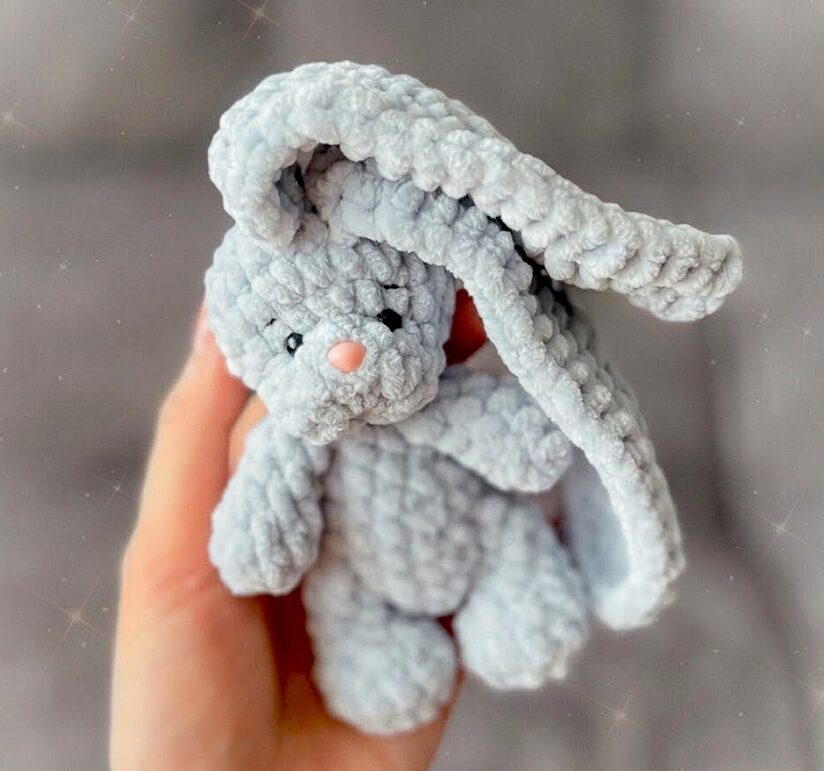
Free Crochet Mini Bunny Pattern
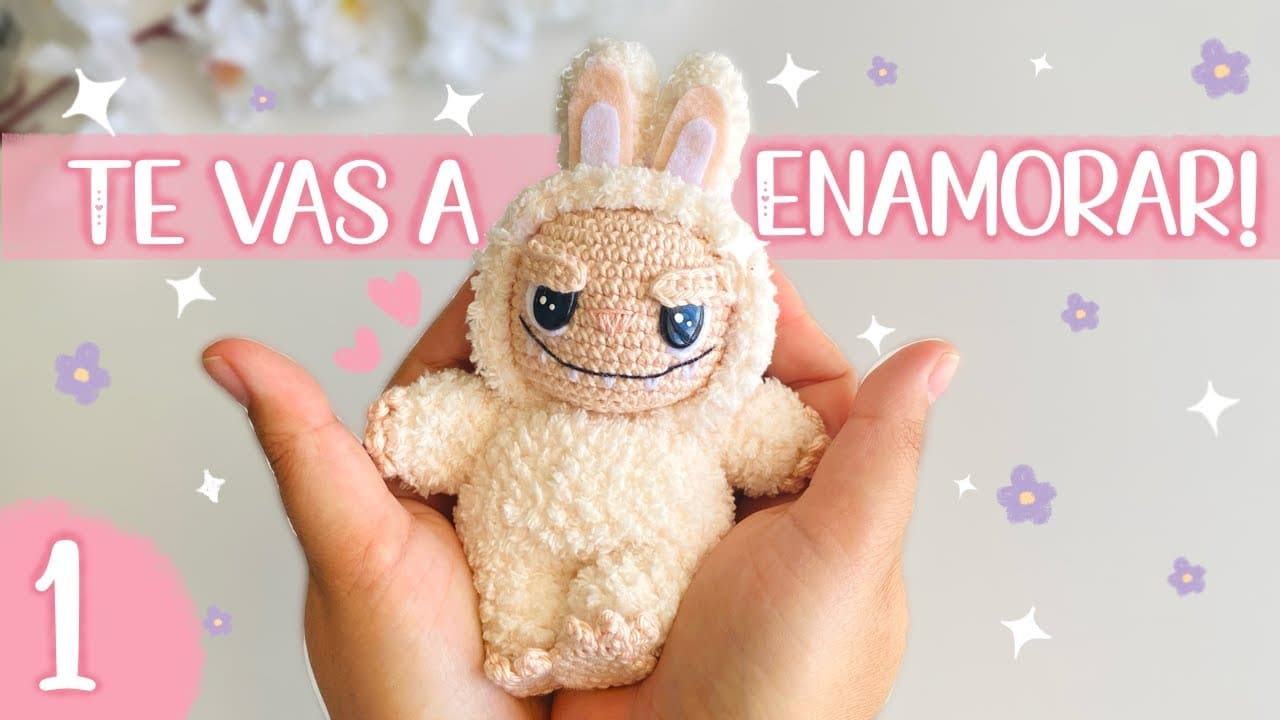
Picture this: you’re sitting in your favorite chair, a cozy mug of tea on the side table, and in your hands — something impossibly soft and small is taking shape, round by round. Two floppy ears. A little pink nose. Tiny paws just begging to be squeezed.
That’s exactly what happens when you make this free crochet mini bunny pattern, and honestly? It’s one of those projects that will have you starting a second one before you’ve even finished weaving in the ends on the first.
This little guy stands just about 5 inches (12–13 cm) tall and uses roughly half a skein of plush yarn, which means you can whip one up in a single afternoon. Whether you’re an amigurumi newbie who just graduated from basic shapes, or a seasoned crocheter looking for a fast and satisfying make, this beginner crochet bunny tutorial is for you.
By the end of this post, you’ll have everything you need to make your own mini crochet bunny — step by step, stitch by stitch — even if you’re still working on perfecting your magic ring.
Why You’ll Love This Crochet Bunny Pattern
This easy crochet bunny step by step pattern checks every single box. Here’s why it deserves a spot at the top of your project queue:
- Quick make: Uses only about half a skein of yarn — you can realistically finish this in one afternoon or evening.
- Beginner-friendly: If you know how to single crochet, increase, and decrease, you have everything you need. No complicated stitches hiding in here!
- Palm-sized perfection: The finished bunny is 5 inches (12–13 cm) tall — small enough to tuck into a pocket, big enough to show off all those sweet details.
- Perfect for gifting: Easter baskets, baby showers, birthday party favors, Christmas stockings — this little bunny fits every occasion and every budget.
- Ultra-cuddly result: Worked in soft plush yarn, the finished toy has that irresistible, cloud-like texture that makes it impossible to put down.
- Highly customizable: Change the yarn color and you’ve got an entirely different bunny — imagine a cream white one, a dusty rose, or a soft lavender!
Materials and Tools You’ll Need
Here’s your simple shopping checklist before you cast on:
Yarn: Plush / chenille-style yarn in your choice of color (brands like Himalaya Dolphin Baby, YarnArt Dolce, or similar chenille baby yarns work perfectly — look for anything labeled “plush,” “velvet,” or “chenille” at your local craft store or on Amazon)
Hook: 4.0 mm (US size G-6)
Stuffing: Polyester fiberfill — just a small amount
Eyes: Two 5 mm safety eyes (black bead-style)
Nose: One 7 mm plastic safety nose (pink looks adorable!)
Scissors
Tapestry needle (for sewing parts together and weaving in ends)
Black yarn or thread for embroidering eyebrows and sewing the eyes in place (the pattern creator uses Vita Coco thread — any sturdy black cotton thread will do)
A quick note on yarn substitutions: Any soft, plush, or chenille yarn in a similar weight will work beautifully. The key is choosing something with that fluffy, velvety texture so your finished bunny looks as snuggly as possible. Avoid anything too thick or stiff — you want those little limbs to have just the right drape and softness.
Abbreviations and Stitch Guide
Here’s every abbreviation you’ll see in this free crochet bunny pattern, spelled out in plain USA crochet terms:
MR — Magic Ring (also called a magic circle): a starting loop that closes tightly with no hole in the center. If you’re new to this technique, it’s worth practicing a couple of times before you begin — it’s the foundation of all amigurumi!
sc — Single crochet: the most basic crochet stitch, your bread and butter for this whole project.
inc — Increase: work 2 single crochets into the same stitch. This is how you make your pieces grow wider.
dec — Decrease (invisible decrease recommended): crochet 2 stitches together into one. This pulls your piece inward to create that round, 3D shape.
ch — Chain: a basic foundation chain stitch.
dc — Double crochet: a taller stitch worked by yarning over once before inserting your hook. Used in the ears.
hdc — Half double crochet: a stitch that sits in height between a single and a double crochet. Also used in the ears for that lovely curved shaping.
A tip on the ears: the ears use a combination of sc, hdc, and dc stitches worked in a specific sequence to give them that beautiful, natural floppy shape. Don’t rush through the ear section — it’s where the magic really happens!
Step-by-Step Crochet Mini Bunny Pattern Instructions
You’ll crochet all parts separately, then assemble at the end. Make the legs and arms first, since they get joined into the body as you go!
LEGS (make 2)
Step 1: Start with a magic ring. Work 6 sc into the MR. Pull tight to close. [6 sts]
Step 2: Work 6 inc around (2 sc in every stitch). [12 sts]
Step 3: Work 12 sc around (one sc in every stitch). [12 sts]
Step 4: Work 3 sc, then work 3 dec (3 decreases back to back), then work 3 sc. [9 sts]
Step 5: Work (2 sc, 1 dec) twice. [7 sts]
Important: Stuff only the foot (the rounded bottom part) at this point! Leave the upper leg unstuffed — this makes it easier to attach to the body later and gives the bunny a natural seated pose.
Steps 6–8: Work 7 sc for 3 rows straight, no increases or decreases. [7 sts each row]
Finish: Flatten the top of the leg and crochet the opening closed by working through both layers. Fasten off and leave a tail for sewing. Set aside!
Pro Tip: Before you fasten off, double-check that your foot is stuffed firmly but not overstuffed — you want a nice round paw, not a lumpy one!
ARMS (make 2 — do NOT stuff)
Step 1: Start with a magic ring. Work 6 sc into the MR. [6 sts]
Step 2: Work (2 sc, 1 inc) twice. [8 sts]
Step 3: Work 8 sc around. [8 sts]
Step 4: Work (2 sc, 1 dec) twice. [6 sts]
Steps 5–6: Work 6 sc for 2 rows. [6 sts each row]
Finish: Flatten the top of the arm and crochet the opening closed. Fasten off and leave a tail for sewing. Set aside!
Pro Tip: The arms stay unstuffed on purpose — this gives them that soft, floppy, huggable quality that makes amigurumi so charming. Trust the process!
BODY
Step 1: Start with a magic ring. Work 6 sc into the MR. [6 sts]
Step 2: Work (1 sc, 1 inc) 3 times. [9 sts]
Step 3: Work (2 sc, 1 inc) 3 times. [12 sts]
Step 4: Work (3 sc, 1 inc) 3 times. [15 sts]
Step 5: Work 5 sc, then join the first leg by working 3 sc across the flattened top of the leg, then work 4 sc on the body, then join the second leg by working 3 sc across its top. [15 sts total]
Pro Tip: This is the most exciting row! You’re attaching the legs right into the body as you crochet. Make sure both legs face forward before you secure them — flip them to check!
Step 6: Work (4 sc, 1 inc) 3 times. [18 sts]
Step 7: Work (4 sc, 1 dec) 3 times. [15 sts]
Step 8: Work (3 sc, 1 dec) 3 times. [12 sts]
Step 9: Work (2 sc, 1 dec) 3 times. [9 sts]
Step 10: Work 4 sc, then join the first arm by working 3 sc across its top, work 1 sc on the body, then join the second arm with 3 sc across its top. [9 sts]
Finish: Fasten off and leave a long tail — you’ll use this to sew the head to the body later!
Pro Tip: Stuff the body now, before you lose the opening! Aim for a firm but squeezable stuffing — not rock hard, not floppy. If you’re making this for a baby, skip the safety eyes and embroider the face instead, and use plenty of stuffing!
HEAD
Step 1: Start with a magic ring. Work 6 sc into the MR. [6 sts]
Step 2: Work 6 inc around. [12 sts]
Step 3: Work 12 sc around. [12 sts]
Step 4: Work 6 sc, then work (1 sc, 1 inc) 3 times. [15 sts]
Step 5: Work 6 sc, then work (2 sc, 1 inc) 3 times. [18 sts]
Step 6: Work (2 sc, 1 inc) 6 times. [24 sts]
Steps 7–8: Work 24 sc for 2 rows straight. [24 sts each row]
Important: Before you continue, insert your safety nose between rounds 2 and 3 (near the front center of the face). Once it’s clicked in, it’s permanent — so take a moment to check placement first! Attach your safety eyes now too, spacing them evenly on either side of the nose.
Step 9: Work (2 sc, 1 dec) 6 times. [18 sts]
Step 10: Work (1 sc, 1 dec) 6 times. [12 sts]
Stuff the head now — firmly and evenly, getting into all the curves. Continue decreasing until the opening closes completely, then fasten off and weave in the end.
EARS (make 2)
Chain 21.
Starting in the 2nd chain from the hook, work along the chain as follows: 5 sc, 5 hdc, 9 dc.
Next, work 3 dc all into the very last chain stitch (this creates the rounded tip of the ear!).
Now continue back along the other side of the foundation chain: 9 dc, 5 hdc, 5 sc.
Chain 1 and turn. Work sc all the way around the entire ear to neaten it up. [42 sts total]
Fasten off and leave a long tail for sewing.
Pro Tip: The ear shaping uses taller stitches at the top and shorter ones at the base — this is what gives the ear its gorgeous, natural curve. Work slowly through this section and you’ll be rewarded with picture-perfect floppy ears!
TAIL
Step 1: Start with a magic ring. Work 3 sc into the MR. [3 sts]
Step 2: Work 3 inc around. [6 sts]
Fasten off and leave a tail for sewing. That teeny pompom is the most adorable thing you’ll make all week.
Finishing and Assembly
Congratulations — you have a pile of bunny parts in front of you, and it’s time to bring this little one to life!
Start by sewing the head to the body. Use that long tail you left on the body piece and your tapestry needle to stitch the head firmly and evenly onto the top of the body. Take your time here — a securely attached head means a bunny that will last for years.
Next, position the ears on top of the head. Place them slightly toward the back and sides of the head for that floppy, freefall ear look. Once you’re happy with the placement, sew them down securely.
Sew the tail onto the back of the body, centered near the bottom.
Now for the face details: using your black thread or yarn, embroider two small brows above the eyes. These tiny arched lines make an enormous difference in giving your bunny a sweet, expressive little face! You can also use the black thread to pull the eyes slightly inward (a technique called “sinking the eyes”) to give the face that extra dimension — simply thread through the head from one eye to the other, pulling gently and securing with a knot.
Weave in all remaining ends, tucking them neatly inside the body so they won’t come loose.
No blocking is needed for plush chenille yarn — just give your bunny a gentle fluff and reshape with your fingers. Stand back. Look at what you made.
You did it! That little pile of yarn is now a tiny, squishy, floppy-eared bunny with a personality all its own. You should be incredibly proud — this is the kind of project that reminds you exactly why you fell in love with crochet in the first place.
Styling and Usage Ideas
Now that your mini crochet bunny is finished, the fun is just beginning! Here are a few ways to use or gift this sweet little make:
Easter basket star: Tuck a few of these bunnies in different pastel colors into Easter baskets for a handmade touch that blows store-bought toys right out of the water. Imagine a cream white one, a soft lavender, and a baby pink all nestled together!
New baby gift: Pair the bunny with a cozy handmade blanket as a newborn gift set. The soft plush yarn makes it safe and snuggly, and no new mom can resist something this adorable.
Bag charm or keychain: Attach a swivel clip to the top of the head and your bunny becomes an irresistible purse charm or diaper bag decoration.
Shelf decor: Line a row of them along a nursery shelf or a craft room windowsill in a rainbow of colors. They look absolutely dreamy displayed together, and every single visitor will ask where you got them.
Happy hooking, friend. That little bunny is going to be so loved.