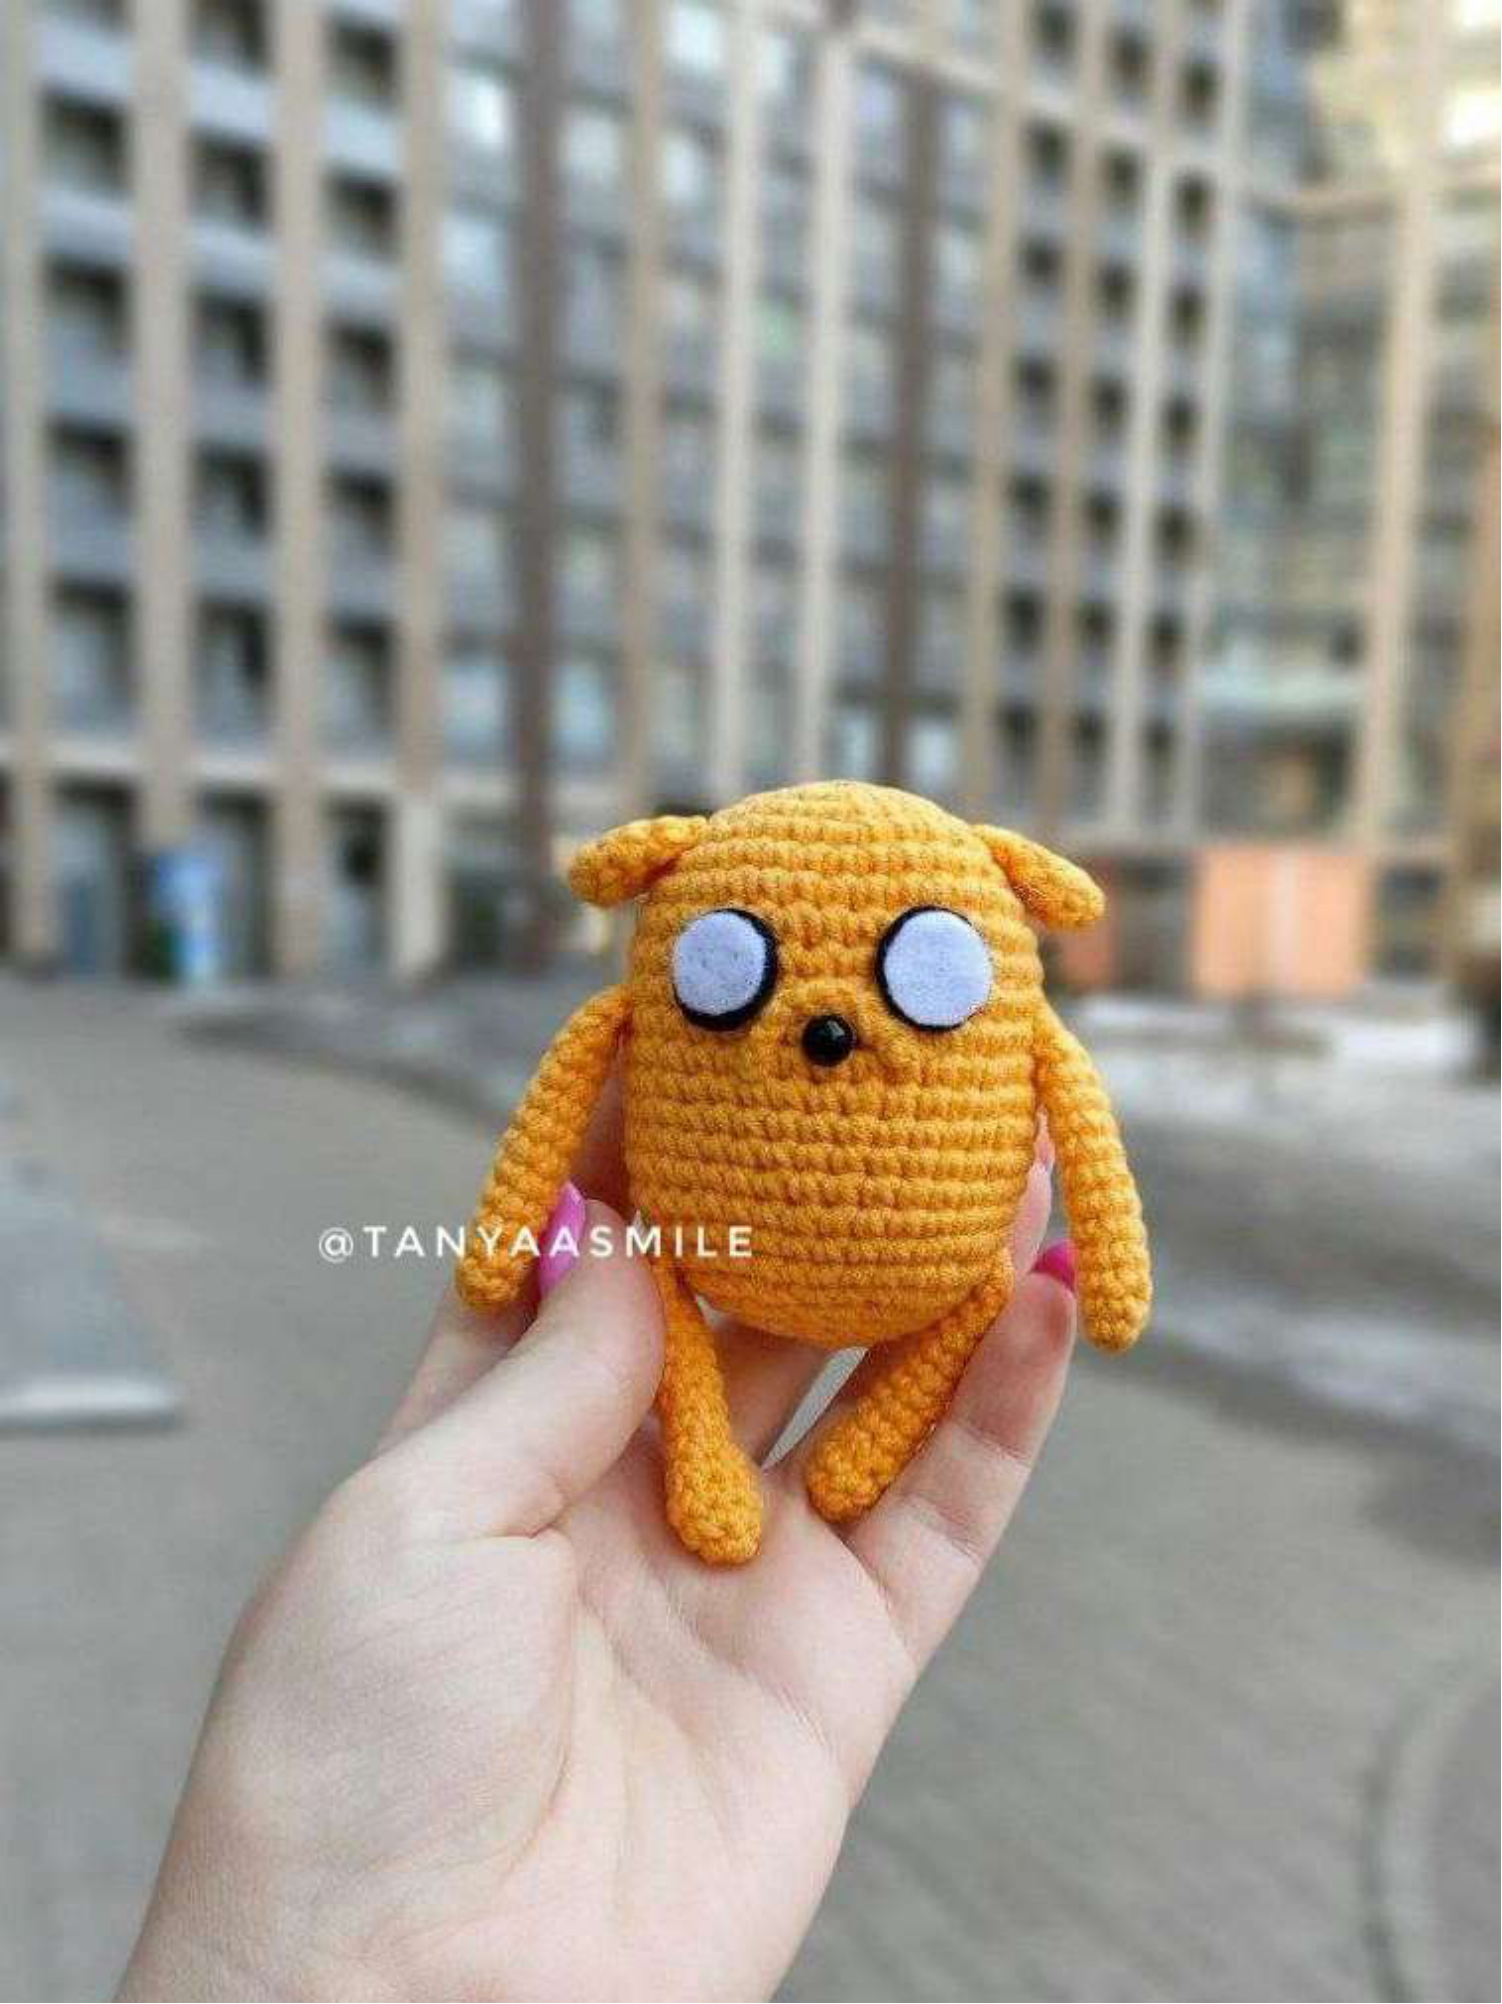
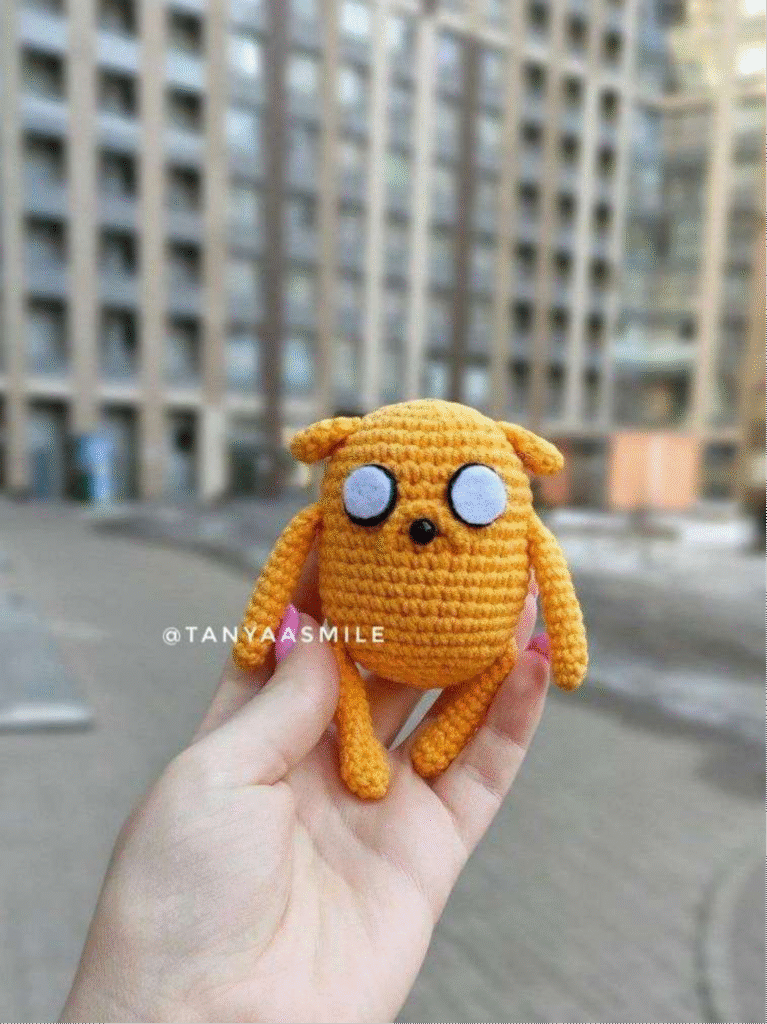
Adventure Time Jake: Free Crochet Dog Pattern
Jake the Dog – Free Crochet Pattern
Hello, fellow crafters! Get ready to bring a beloved animated character to life with your crochet hook. We’re thrilled to share this adorable free pattern for Jake the Dog, inspired by a famous animated series. This charming toy is not only fun to make but also a wonderful gift for fans of all ages. You’ll be delighted by how quickly he comes together—most crafters find it takes approximately 2-2.5 hours to complete!
About the Designer
This wonderful pattern has been generously created and shared by the talented Bocharova Tatyana (@TanyaaSmile). We are so grateful for her creativity and willingness to share her designs with the crochet community!
Connect with Tatyana Bocharova
- VKontakte Group: vk.com/tanya_craft
- Livemaster Shop: https://www.livemaster.ru/ssmile
- Telegram: https://t.me/tanyaasmile
- Social Media Nickname: @tanyaasmile
Thank you for your interest in Tatyana’s amazing master-classes! ♥
General Notes for Crocheters
This pattern assumes basic crochet knowledge. We wish you happy crocheting and many even stitches!
- Each part begins with a Magic Ring (MR).
- Crochet in a spiral, meaning you DO NOT make a Slip Stitch (SL ST) at the end of each round unless otherwise specified.
- To keep track of the beginning of a round, use a stitch marker. Insert the marker into the last stitch of the round.
- The toy should be crocheted tightly enough so that when the fabric stretches, no holes are visible through which the stuffing would show. If your stitches are not tight enough, try using a smaller hook.
- Stuff the parts firmly as you go, unless stated otherwise.
Abbreviations
- MR: Magic Ring (Amigurumi Ring)
- SC: Single Crochet
- CH: Chain Stitch
- SL ST: Slip Stitch
- INC: Increase (2 SC in one stitch)
- DEC: Decrease (2 SC crocheted together)
- (…): Repeat the instructions within the parentheses
- x N: Repeat N times
Materials You’ll Need
- Crochet hook: 2.25 mm
- Yarn: YarnArt Jeans (55% cotton, 45% acrylic, 160m/50g). Color: Yellow #35.
- Safety eye/nose: Black, 6 mm (for the face)
- Felt: White and black (for eyes)
- Glue: For felt parts
- Needle: For sewing parts
- Stuffing: (sintepuh or holofiber)
- Scissors
- Stitch marker (or a contrasting piece of yarn)
Finished Size
When using the specified materials, the toy’s height is approximately 7 cm. Please note that using different materials may result in a change in the final size and appearance of your finished toy.
Pattern Instructions
Head + Body
(Using yellow yarn)
- 6 SC into MR (6)
- 6 INC (12)
- (1 SC, INC) x 6 (18)
- (2 SC, INC) x 6 (24)
- (3 SC, INC) x 6 (30)
- (4 SC, INC) x 6 (36)
- – 20. 36 SC (36)
- Stuff the part.
- (4 SC, DEC) x 6 (30)
- Insert the safety eye/nose between rounds 12 and 13.

- (3 SC, DEC) x 6 (24)
- (2 SC, DEC) x 6 (18)
- Stuff the part firmly.
- (1 SC, DEC) x 6 (12)
- 6 DEC. Fasten off and cut the yarn.


Arms (Make 2)
(Using yellow yarn)
- 6 SC into MR (6)
- – 12. 6 SC (6)
- Do not stuff. This way, the arm will not stick out too much after attaching to the body. Fold the arm in half and crochet through both layers 3 SC. Leave a long tail for sewing.

Legs (Make 2)
(Using yellow yarn)
- 6 SC into MR (6)
- (2 SC, INC) x 2 (8)
- 8 SC (8)
- (2 SC, DEC) x 2 (6)
- – 12. 6 SC (6)
- Do not stuff. Fold the leg in half and crochet through both layers 3 SC. Leave a long tail for sewing.

Ears (Make 2)
(Using yellow yarn)
- 6 SC into MR (6)
- (1 SC, INC) x 3 (9)
- – 4. 9 SC (9)
- Do not stuff. Fold the part in half and crochet through both layers 4 SC. Leave a tail for sewing.

Tail
(Using yellow yarn)
- CH 6. Starting from the 2nd chain from the hook, 5 SC along the chain (5). Leave a tail for sewing.

Nose
(Using yellow yarn)
- CH 8. Leave a tail for sewing.

Felt Eyes
Cut out two black circles and two white circles. The white circles should be smaller than the black ones. During assembly, you will need to glue them above the nose.
Assembly
Now for the exciting part – bringing Jake to life!
- Sew the small yellow strip (nose) over the facial area.
- Sew the arms and legs symmetrically onto the body.
- Sew the ears to the sides of the head.
- Glue the felt eyes above the nose.
You’re awesome! Your dog is ready! 🙂

Share Your Creation!
We hope you had a fantastic time crocheting Jake the Dog! We absolutely love seeing your finished projects. When you publish photos of your amazing toy, please consider including a link to the author’s VKontakte group vk.com/tanya_craft or stating that the toy was made using a pattern by Bocharova Tatyana (@TanyaaSmile). Your support means the world to designers who generously share their work!
For more inspiring patterns and master-classes from Tatyana, be sure to visit her VKontakte page: vk.com/tanya_craft.
Happy crocheting, and don’t forget to share your finished Jake with the Crochetto community on social media! We can’t wait to see your unique creations.